第一部分 视频学习
-
深度学习的数学基础
-
机器学习三要素:模型,策略,算法
- 模型:对要学习问题映射的假设(问题建模,确定假设空间)
- 策略:从假设空间中学习/选择最优模型的准则(确定目标函数)
- 算法:根据目标函数求解最优模型的具体计算方法(求解模型参数)
-
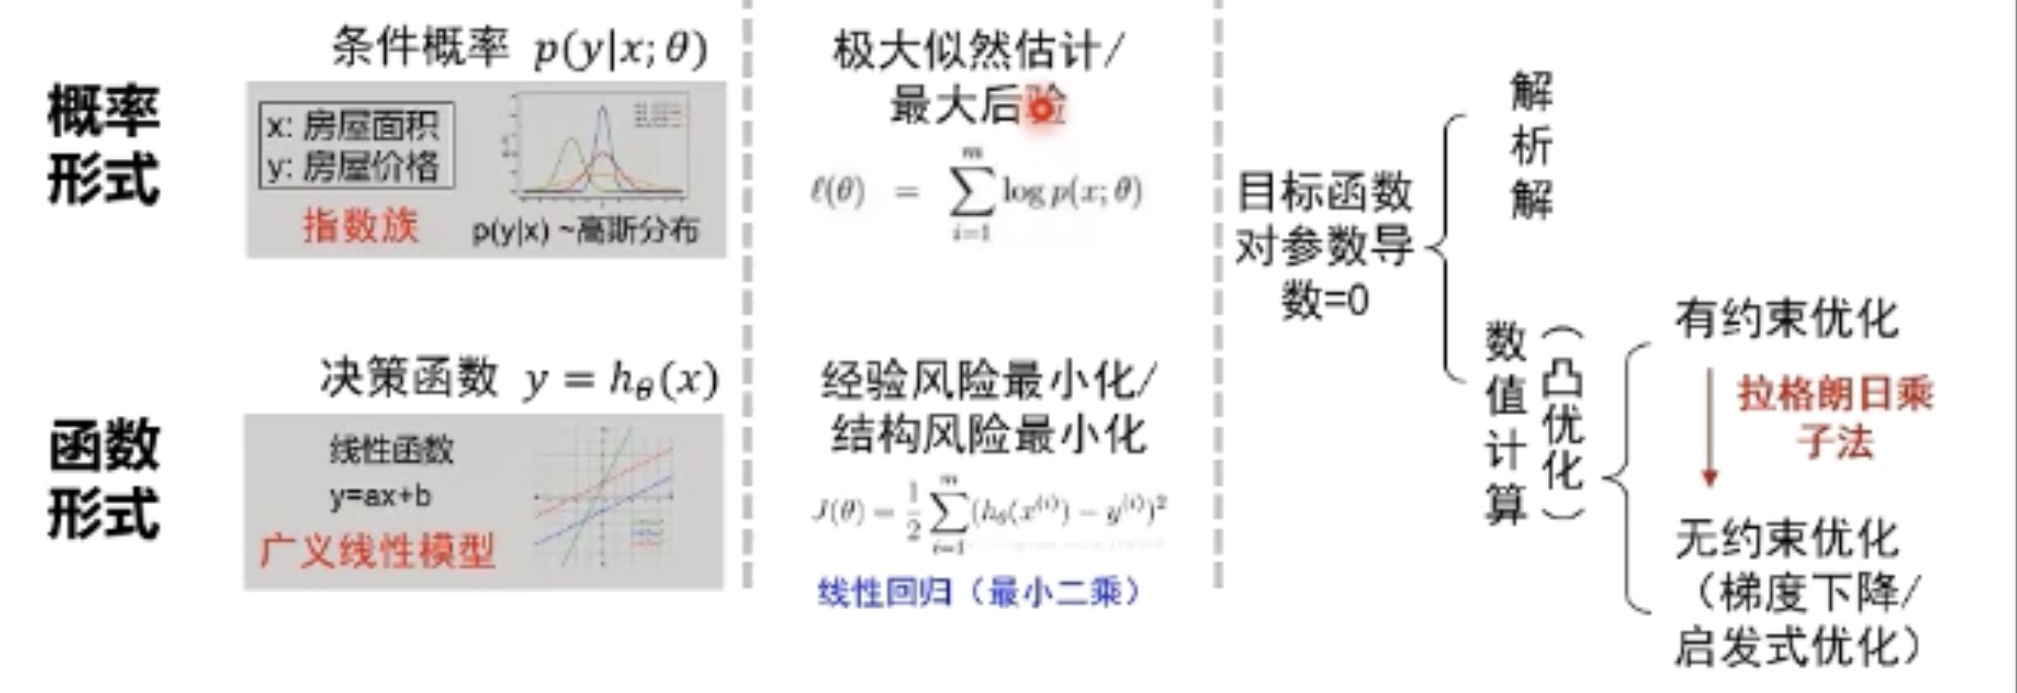
概率/函数形式的统一
-
欠拟合&过拟合
- 欠拟合:训练集的一般性质尚未被学习器学好(训练误差大)
- 过拟合:学习器把训练集特点当作样本的一般特点(训练误差小,测试误差大)
- 解决方案 欠拟合:提高模型复杂度;过拟合:降低模型复杂度
-
卷积神经网络
-
卷积神经网络的基本应用:分类、检索、检测、分割、人脸识别、图像生成、自动驾驶等
-
卷积神经网络通过局部关联和参数共享解决了过拟合问题。
-
卷积层--Convolutional Layer
-
卷积是对两个实变函数的一种数学操作
-
基本概念:input--输入、kernel/filter--卷积核/滤波器、weights--权重、reception field--感受野、feature map--特征图、depth/channel--深度、output--输出、padding
-
输出的特征图大小:(N-F)/stride+1·······未加padding (N+padding*2-F)/stride+1········加padding时
-
-
池化层--Pooling Layer
- 保留了主要特征的同时减少参数和计算量,防止过拟合,提高模型泛化能力
- Pooling类型:最大值池化(Max Pooling)、平均池化(Average Pooling)
-
卷积神经网络典型结构:AlexNet、VGG、GoogleNet、ResNet
-
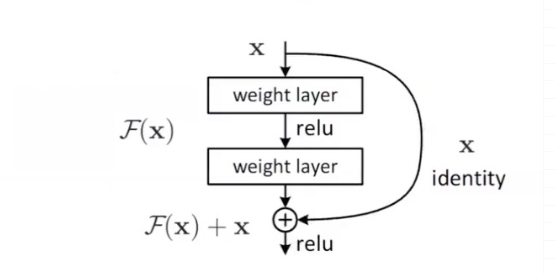
结合pytorch代码讲解ResNet
残差学习
第二部分 代码练习
-
MNIST数据集分类
-
加载数据 MNIST
input_size = 28*28 # MNIST上的图像尺寸是 28x28 output_size = 10 # 类别为 0 到 9 的数字,因此为十类 train_loader = torch.utils.data.DataLoader( datasets.MNIST('./data', train=True, download=True, transform=transforms.Compose( [transforms.ToTensor(), transforms.Normalize((0.1307,), (0.3081,))])), batch_size=64, shuffle=True) test_loader = torch.utils.data.DataLoader( datasets.MNIST('./data', train=False, transform=transforms.Compose([ transforms.ToTensor(), transforms.Normalize((0.1307,), (0.3081,))])), batch_size=1000, shuffle=True) 显示数据集中的部分图像 plt.figure(figsize=(8, 5)) for i in range(20): plt.subplot(4, 5, i + 1) image, _ = train_loader.dataset.__getitem__(i) plt.imshow(image.squeeze().numpy(),'gray') plt.axis('off'); 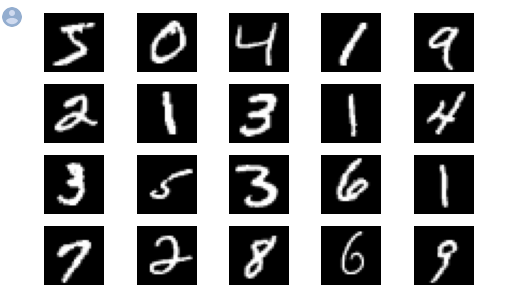 -
创建网络
定义网络时,需要继承nn.Module,并实现它的forward方法,把网络中具有可学习参数的层放在构造函数init中。只要在nn.Module的子类中定义了forward函数,backward函数就会自动被实现(利用autograd)。
-
在小型全连接网络上训练(Fully-connected network)
 n_hidden = 8 # number of hidden units

 model_fnn = FC2Layer(input_size, n_hidden, output_size)
 model_fnn.to(device)
 optimizer = optim.SGD(model_fnn.parameters(), lr=0.01, momentum=0.5)
 print('Number of parameters:
 {}'.format(get_n_params(model_fnn)))

 train(model_fnn)
 test(model_fnn)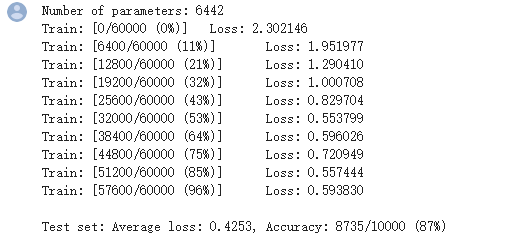
- 在卷积神经网络上训练
需要注意的是,上在定义的CNN和全连接网络,拥有相同数量的模型参数
n_features = 6 # number of feature maps

model_cnn = CNN(input_size, n_features, output_size)
model_cnn.to(device)
optimizer = optim.SGD(model_cnn.parameters(), lr=0.01, momentum=0.5)
print('Number of parameters: {}'.format(get_n_params(model_cnn)))

train(model_cnn)
test(model_cnn)
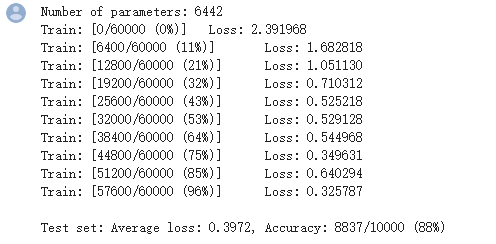
- 打乱像素顺序再次在两个网络上训练与测试
#在全连接网络上训练与测试:
perm = torch.randperm(784)
n_hidden = 8 # number of hidden units

model_fnn = FC2Layer(input_size, n_hidden, output_size)
model_fnn.to(device)
optimizer = optim.SGD(model_fnn.parameters(), lr=0.01, momentum=0.5)
print('Number of parameters: {}'.format(get_n_params(model_fnn)))

train_perm(model_fnn, perm)
test_perm(model_fnn, perm)
!
#在卷积神经网络上训练与测试
perm = torch.randperm(784)
n_features = 6 # number of feature maps

model_cnn = CNN(input_size, n_features, output_size)
model_cnn.to(device)
optimizer = optim.SGD(model_cnn.parameters(), lr=0.01, momentum=0.5)
print('Number of parameters: {}'.format(get_n_params(model_cnn)))

train_perm(model_cnn, perm)
test_perm(model_cnn, perm)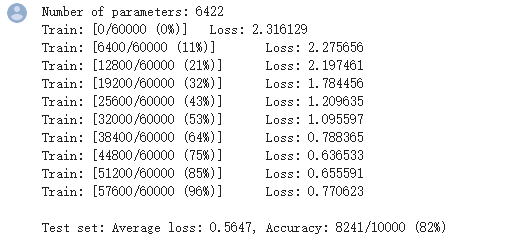
-
-
CIFAR10 数据集分类
images, labels = iter(trainloader).next()
imshow(torchvision.utils.make_grid(images))
# 展示第一行图像的标签
for j in range(8):
    print(classes[labels[j]])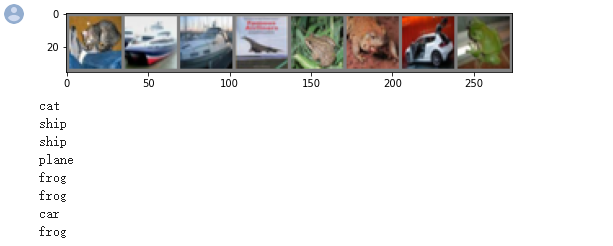
定义网络,损失函数和优化器,训练网络
从测试集中取出8张图片,把图片输入模型,看看CNN把这些图片识别成什么:
outputs = net(images.to(device))
_, predicted = torch.max(outputs, 1)
# 展示预测的结果
for j in range(8):
    print(classes[predicted[j]])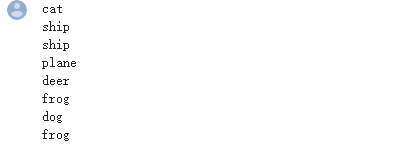
可以看到,有几个都识别错了~ 现在看看网络在整个数据集上的表现:
correct = 0
total = 0

for data in testloader:
    images, labels = data
    images, labels = images.to(device), labels.to(device)
    outputs = net(images)
    _, predicted = torch.max(outputs.data, 1)
    total += labels.size(0)
    correct += (predicted == labels).sum().item()

print('Accuracy of the network on the 10000 test images: %d %%' % (
    100 * correct / total))
-
使用 VGG16 对 CIFAR10 分类
测试验证准确率
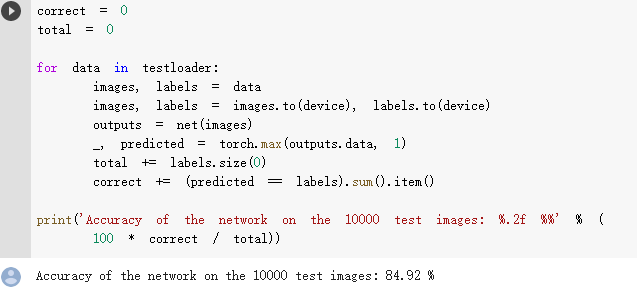
-
使用VGG模型迁移学习进行猫狗大战
1.数据处理
normalize = transforms.Normalize(mean=[0.485, 0.456, 0.406], std=[0.229, 0.224, 0.225])
vgg_format = transforms.Compose([
                transforms.CenterCrop(224),
                transforms.ToTensor(),
                normalize,
            ])

data_dir = './dogscats'
dsets = {x: datasets.ImageFolder(os.path.join(data_dir, x), vgg_format)
         for x in ['train', 'valid']}

dset_sizes = {x: len(dsets[x]) for x in ['train', 'valid']}
dset_classes = dsets['train'].classes
显示图片
def imshow(inp, title=None):
#   Imshow for Tensor.
    inp = inp.numpy().transpose((1, 2, 0))
    mean = np.array([0.485, 0.456, 0.406])
    std = np.array([0.229, 0.224, 0.225])
    inp = np.clip(std * inp + mean, 0,1)
    plt.imshow(inp)
    if title is not None:
        plt.title(title)
    plt.pause(0.001)  # pause a bit so that plots are updated

# 显示 labels_try 的5张图片,即valid里第一个batch的5张图片
out = torchvision.utils.make_grid(inputs_try)
imshow(out, title=[dset_classes[x] for x in labels_try])
创建VGG模型
!wget https://s3.amazonaws.com/deep-learning-models/image-models/imagenet_class_index.json

model_vgg = models.vgg16(pretrained=True)

with open('./imagenet_class_index.json') as f:
    class_dict = json.load(f)
dic_imagenet = [class_dict[str(i)][1] for i in range(len(class_dict))]

inputs_try , labels_try = inputs_try.to(device), labels_try.to(device)
model_vgg = model_vgg.to(device)
outputs_try = model_vgg(inputs_try)
print(outputs_try)
print(outputs_try.shape)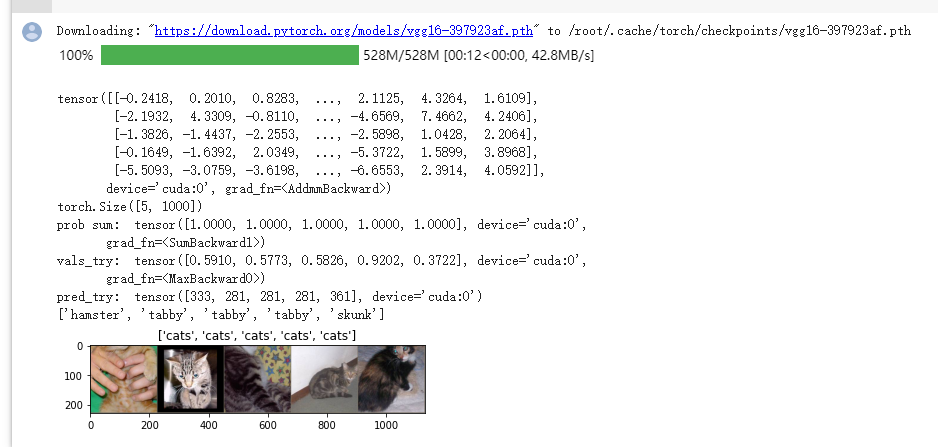
修改最后一层
print(model_vgg)

model_vgg_new = model_vgg;

for param in model_vgg_new.parameters():
    param.requires_grad = False
model_vgg_new.classifier._modules['6'] = nn.Linear(4096, 2)
model_vgg_new.classifier._modules['7'] = torch.nn.LogSoftmax(dim = 1)

model_vgg_new = model_vgg_new.to(device)
print(model_vgg_new.classifier)
训练并测试
train_model(model_vgg_new,loader_train,size=dset_sizes['train'], epochs=1,
            optimizer=optimizer_vgg)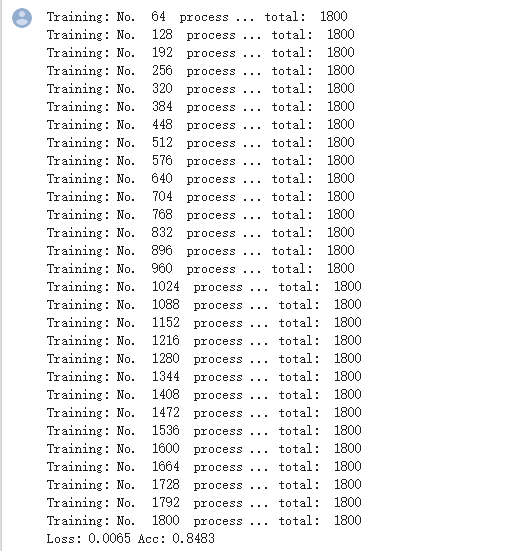
可视化模型预测结果
# 单次可视化显示的图片个数
n_view = 8
correct = np.where(predictions==all_classes)[0]
from numpy.random import random, permutation
idx = permutation(correct)[:n_view]
print('random correct idx: ', idx)
loader_correct = torch.utils.data.DataLoader([dsets['valid'][x] for x in idx],
                  batch_size = n_view,shuffle=True)
for data in loader_correct:
    inputs_cor,labels_cor = data
# Make a grid from batch
out = torchvision.utils.make_grid(inputs_cor)
imshow(out, title=[l.item() for l in labels_cor])
