说起多数据源,一般都来解决那些问题呢,主从模式或者业务比较复杂需要连接不同的分库来支持业务。
多数据源有两个解决方案
第一种是注解(这种非常麻烦,每个方法上都要打上注解等)
第二种是分包管理
第二种在springboot中配置就相对来简单了许多
话不多说上代码
项目结构图

pom.xml文件


<?xml version="1.0" encoding="UTF-8"?>
<project xmlns="http://maven.apache.org/POM/4.0.0"
         xmlns:xsi="http://www.w3.org/2001/XMLSchema-instance"
         xsi:schemaLocation="http://maven.apache.org/POM/4.0.0 http://maven.apache.org/xsd/maven-4.0.0.xsd">
    <modelVersion>4.0.0</modelVersion>

    <artifactId>moreData</artifactId>
    <!--父依赖-->
    <parent>
        <groupId>org.springframework.boot</groupId>
        <artifactId>spring-boot-starter-parent</artifactId>
        <version>1.5.1.RELEASE</version>
    </parent>
    <dependencies>
        <!-- web依赖 -->
        <dependency>
            <groupId>org.springframework.boot</groupId>
            <artifactId>spring-boot-starter-web</artifactId>
        </dependency>
        <!-- freemarker 依赖 -->
        <dependency>
            <groupId>org.springframework.boot</groupId>
            <artifactId>spring-boot-starter-freemarker</artifactId>
        </dependency>
        <!--mybatis的-->
        <dependency>
            <groupId>org.mybatis.spring.boot</groupId>
            <artifactId>mybatis-spring-boot-starter</artifactId>
        </dependency>
        <!--mysql驱动-->
        <dependency>
            <groupId>mysql</groupId>
            <artifactId>mysql-connector-java</artifactId>
        </dependency>
    </dependencies>
    <build>
        <resources>
            <resource>
                <directory>src/main/java</directory>
                <includes>
                    <include>**/*.xml</include>
                </includes>
            </resource>
        </resources>
    </build>
</project>
application.properties配置文件
springboot启动时会默认加载这个文件
#spring.datasource.url=jdbc:mysql:///shiro?characterEncoding=utf8&useSSL=false
#spring.datasource.username=root
#spring.datasource.password=123123
#spring.datasource.driver-class-name=com.mysql.jdbc.Driver


#多数据源data01
spring.datasource.data01.url=jdbc:mysql:///book?characterEncoding=utf8&useSSL=false
spring.datasource.data01.username=root
spring.datasource.data01.password=123123
spring.datasource.data01.driver-class-name=com.mysql.jdbc.Driver


#多数据源data2
spring.datasource.data02.url=jdbc:mysql:///test?characterEncoding=utf8&useSSL=false
spring.datasource.data02.username=root
spring.datasource.data02.password=123123
spring.datasource.data02.driver-class-name=com.mysql.jdbc.Driver
在使用的过程中必须制定主库,不然会报错,其中book为主库。
相关知识点:
1.使用@Bean可以创建一个bean对象交给spring容器管理
2.@Bean创建的bean对象的名称默认为方法名,也可以指定
3.@Bean方法参数表示,接收一个bean对象,默认按照type类型接收注入的对象,若要修改为byName方式,可以使用@Qualifier注解注入准确的对象
4.@Primary表示该bean为此类型的默认bean,在其他地方引用的时候用@Autowired即可按照类型注入,不受同类型多个对象影响
5.EnableJpaRepositories表示启用spring data jpa的支持,也就是jpa的新使用方式,注意basePackages指的是 @Repository接口的所在包位置,可配置多个
package cn.zhiwei.datasource;

import org.apache.ibatis.session.SqlSessionFactory;
import org.mybatis.spring.SqlSessionFactoryBean;
import org.mybatis.spring.SqlSessionTemplate;
import org.mybatis.spring.annotation.MapperScan;
import org.springframework.beans.factory.annotation.Qualifier;
import org.springframework.boot.autoconfigure.jdbc.DataSourceBuilder;
import org.springframework.boot.context.properties.ConfigurationProperties;
import org.springframework.context.annotation.Bean;
import org.springframework.context.annotation.Configuration;
import org.springframework.context.annotation.Primary;
import org.springframework.core.io.support.PathMatchingResourcePatternResolver;
import org.springframework.jdbc.datasource.DataSourceTransactionManager;

import javax.sql.DataSource;

/**
 * Created by Administrator on 2018/4/2.
 */
@Configuration//注入到spring容器中
//扫描dao层,并且给dao层注入指定的sqlSessionFactory
@MapperScan(basePackages = "cn.zhiwei.data01",sqlSessionFactoryRef = "sqlSessionFactory01")
public class DataSource01Config {

    /**
     * 数据源对象
     * @return
     */
    @Bean(name = "dataSource01")//使用@Bean可以创建一个bean对象交给spring容器管理
    @Primary//表示它是主数据库,表示默认的对象
    @ConfigurationProperties(prefix = "spring.datasource.data01")//表示默认读取spring.datasource.data01开头的节点
    public DataSource dataSource01(){
        return DataSourceBuilder.create().build();
    }


    @Primary
    @Bean(name = "sqlSessionFactory01")
    public SqlSessionFactory sqlSessionFactory01(@Qualifier("dataSource01") DataSource dataSource) throws Exception {
        SqlSessionFactoryBean bean=new SqlSessionFactoryBean();
        bean.setDataSource(dataSource);
        //我们采用的是注解的方式,如果写了mapper.xml文件就需要用下面这句话
        //bean.setMapperLocations(new PathMatchingResourcePatternResolver().getResources("classpath:"));
        return bean.getObject();
    }
    @Primary
    @Bean(name = "transactionManager01")
    public DataSourceTransactionManager transactionManager01(@Qualifier("dataSource01")DataSource dataSource){
        return new DataSourceTransactionManager(dataSource);
    }

    @Primary
    @Bean(name = "sessionTemplate01")
    public SqlSessionTemplate sessionTemplate01(@Qualifier("sqlSessionFactory01")SqlSessionFactory sessionFactory){
        return new SqlSessionTemplate(sessionFactory);
    }

}
第二个数据源
package cn.zhiwei.datasource;

import org.apache.ibatis.session.SqlSessionFactory;
import org.mybatis.spring.SqlSessionFactoryBean;
import org.mybatis.spring.SqlSessionTemplate;
import org.mybatis.spring.annotation.MapperScan;
import org.springframework.beans.factory.annotation.Qualifier;
import org.springframework.boot.autoconfigure.jdbc.DataSourceBuilder;
import org.springframework.boot.context.properties.ConfigurationProperties;
import org.springframework.context.annotation.Bean;
import org.springframework.context.annotation.Configuration;
import org.springframework.context.annotation.Primary;
import org.springframework.jdbc.datasource.DataSourceTransactionManager;

import javax.sql.DataSource;

/**
 * Created by Administrator on 2018/4/2.
 */
@Configuration//注入到spring容器中
@MapperScan(basePackages = "cn.zhiwei.data02",sqlSessionFactoryRef = "sqlSessionFactory02")
public class DataSource02Config {

    //数据源对象
    @Bean(name = "dataSource02")
    @ConfigurationProperties(prefix = "spring.datasource.data02")
    public DataSource dataSource02(){
        return DataSourceBuilder.create().build();
    }

    @Bean(name = "sqlSessionFactory02")
    public SqlSessionFactory sqlSessionFactory02(@Qualifier("dataSource02") DataSource dataSource) throws Exception {
        SqlSessionFactoryBean bean=new SqlSessionFactoryBean();
        bean.setDataSource(dataSource);
        //bean.setMapperLocations(new PathMatchingResourcePatternResolver().getResources("classpath:"));
        return bean.getObject();
    }
    @Bean(name = "transactionManager02")
    public DataSourceTransactionManager transactionManager02(@Qualifier("dataSource02")DataSource dataSource){
        return new DataSourceTransactionManager(dataSource);
    }

    @Bean(name = "sessionTemplate02")
    public SqlSessionTemplate sessionTemplate02(@Qualifier("sqlSessionFactory02")SqlSessionFactory sessionFactory){
        return new SqlSessionTemplate(sessionFactory);
    }

}
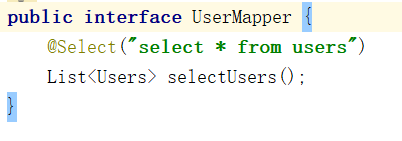
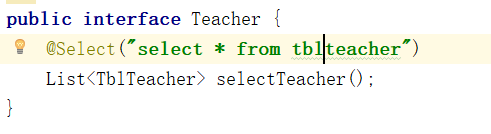
两个dao层
service层我就不写了直接上controller层
package cn.zhiwei.controller;

import cn.zhiwei.data01.mapper.UserMapper;
import cn.zhiwei.data02.mapper.Teacher;
import org.springframework.beans.factory.annotation.Autowired;
import org.springframework.web.bind.annotation.RequestMapping;
import org.springframework.web.bind.annotation.RestController;

/**
 * Created by Administrator on 2018/4/3.
 */
@RestController//这个注解包含了@ResponseBody和@Controller配合,这个类中的方法返回的都是json
public class IndexController {
    @Autowired//表示按名称自动注入
    //主数据源
    private UserMapper userMapper;
    @Autowired
    //第二个数据源
    private Teacher teacher;
    @RequestMapping("/")//对外的访问路径
    public Object getUser(){
        return userMapper.selectUsers();
    }
    @RequestMapping("/baby")
    public Object getTeacher(){
        return teacher.selectTeacher();
    }
}
启动类app
package cn;

import org.springframework.boot.SpringApplication;
import org.springframework.boot.autoconfigure.SpringBootApplication;

/**
 * 启动器
 * Created by Administrator on 2017/12/1.
 */
//@Configuration、@EnableAutoConfiguration、@ComponentScan 注解所修饰,换言之 Springboot 提供了统一的注解来替代以上三个注解
@SpringBootApplication
public class App {
    public static void main(String[] args) {
        //启动springboot的方法
        SpringApplication.run(App.class,args);
    }
}

页面效果

