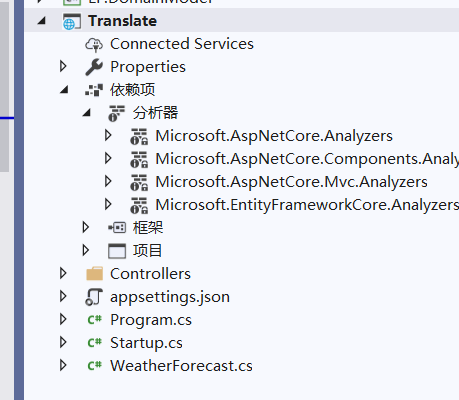
接上面本次创建的实.net api项目联合entityFrameWork项目
所以创建了.net core api项目模板

接着对上次硬编码的数据库信息进行修改,将硬编码的地方消除

同时,建立构造函数参数是DbcontextOption<>,他是Dbcontext的参数,构造函数是继承父类构造函数,options里的值是依赖注入进来的。
这时就需要区strartup.cs的ConfigureServices里去注册一下db连接
        public void ConfigureServices(IServiceCollection services)
        {
            services.AddDbContext<MyContext>(
                options => {
                    options.UseMySql(Configuration.GetConnectionString("DefaultConnection"));
                }
            );
            services.AddControllers();
        }
并且需要对appsettings.json应下配置文件
  "ConnectionStrings" :{
    "DefaultConnection": "Data Source = localhost; Port = 3306; Initial Catalog = mysql; user id = root; password = root;"
  }
同样试一下迁移
多对多关系
这里试用一下多对对关系,假设一本书的作者可以是多个人,一个作者可以写多本书。
多对多还需要中间model让书和它形成一对多关系,让作者和他形成一对多关系
    public class BookAuthor
    {
        //自己的主键
        public int id { get; set; }

        //两个外键
        public int BookId{ get; set; }
        public int AuthorId { get; set; }

        //两个导航属性
        public Book Book{ get; set; }
        public Author Author { get; set; }
    }
修改下之前的书类
这里我将原来作者改成了书和中间类一对多关系
并且将时间datetime这个属性先不使用了,改成string,这里如果不是使用mysql,使用sqlsever可能就不会报错。
mysql这里如何处理我暂时就没去查资料了。
并且在构造函数那里初始化了list
   public class Book
    {
        //初始化BookAuthor
        public Book() {
            BookAuthors = new List<BookAuthor>();
        }
        public Guid Id { get; set; }
        public List<BookAuthor> BookAuthors { get; set; }
        public string BookName { get; set; }
        public String BookOnmarket { get; set; }
        public int SortId { get; set; }
        public Sort Sort { get; set; }
    }
添加作者类
作者类的思路和上面一样
    public class Author
    {
        public Author(){
            BookAuthors = new List<BookAuthor>();
        }
        public int id { get; set; }
        public string name { get; set; }
        public string age { get; set; }
        public List<BookAuthor> BookAuthors { get; set; }
    }
这时关系建立了,但是为了保证EFcore能够实现,在Context中明确写出两个主键
这个方法是指出主键的方法
        protected override void OnModelCreating(ModelBuilder modelBuilder)
        {
            //明确的指出联合主键
            modelBuilder.Entity<BookAuthor>().HasKey(x=>new { x.BookId,x.AuthorId});
        }
并在这个类里写出映射数据库的类BookAuthors,Authors
        public DbSet<BookAuthor> BookAuthors { get; set; }
        public DbSet<Author> Authors { get; set; }
一对一关系
这里再写出售价,写一个一对一关系
book.cs里添加
public Price Price { get; set; }
创建Price.cs
id是主键,Bookid是外键
    public class Price
    {
        public int BookId { get; set; }
        public int Id { get; set; }
        public decimal RMB{ get; set; }
        public decimal Dollar { get; set; }
     public Book Book { get; set; }
    }
这里准备实现的关系是book存在,price不一定存在,price存在book一定存在。
在mycontext里添加他们关系
  protected override void OnModelCreating(ModelBuilder modelBuilder)
        {
            //明确的指出联合主键
            modelBuilder.Entity<BookAuthor>().HasKey(x=>new { x.BookId,x.AuthorId});
            //明确最基础多对一关系书和中间类
            modelBuilder.Entity<BookAuthor>().HasOne(x => x.Book).WithMany(x => x.BookAuthors).HasForeignKey(x => x.BookId);
            //明确指出作者和中间类多对一
            modelBuilder.Entity<BookAuthor>().HasOne(x => x.Author).WithMany(x => x.BookAuthors).HasForeignKey(x => x.AuthorId);
            //一对一一关系
            modelBuilder.Entity<Price>().HasOne(x => x.Book).WithOne(x => x.Price).HasForeignKey<Price>(x=>x.BookId);
        }
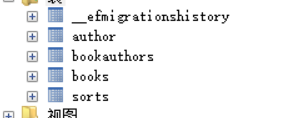
最后生成表
