AndroidO之后,使用hidl来实现Framework和 HAL层之间的解耦。这篇文章就简要的介绍一下HIDL的使用方式。
HIDL,全称HAL interface definition language。关于它的详细介绍可以参考Android官网。
1. 新建HAL文件
一般情况下,都是在
hardware/interfaces中创建hal文件,但是在system/hardware/interfaces/和frameworks/hardware/interfaces/目录下也有定义。
以万能的 Hello World为例,首先在下创建helloworld文件夹,然后在helloworld文件夹下创建一个表示版本的文件夹,这里我们创建的是1.0,最后在该文件夹下创建一个IHelloWorld.hal文件。
目录结构如下:
// hardware/interfaces
helloworld
│   └── 1.0
│       └── IHelloWorld.hal
//IHelloWorld.hal
package android.hardware.helloworld@1.0;
interface IHelloWorld{
    helloworld() generates(string retStr);
};
对于hal文件,不同目录下的文件,对应的package也不同,具体参照下表:
| Package Prefix | Location | Interface Types |
|---|---|---|
android.hardware.* |
hardware/interfaces/* |
HAL |
android.frameworks.* |
frameworks/hardware/interfaces/* |
frameworks/ related |
android.system.* |
system/hardware/interfaces/* |
system/ related |
android.hidl.* |
system/libhidl/transport/* |
core |
此外,目录到版本目录前,/转换成.,版本信息转换为@major.minor。比如我们的helloword,其hal文件目录为hardware/interfaces/helloworld/1.0/,转换为package就是android.hardware.helloword@1.0。
这些文件格式可以参考AOSP中已经存在的模块。
接下来就是编译hal文件了。
在shell中输入如下指令:
PACKAGE=android.hardware.helloworld@1.0	# 对应hal文件中的package
LOC=hardware/interfaces/helloworld/1.0/default/	#指定 编译后的成果物输出路径
./out/host/linux-x86/bin/hidl-gen -o $LOC -Lc++-impl -randroid.hardware:hardware/interfaces
    -randroid.hidl:system/libhidl/transport $PACKAGE		#生成 C++文件。
./out/host/linux-x86/bin/hidl-gen -o $LOC -Landroidbp-impl -randroid.hardware:hardware/interfaces
    -randroid.hidl:system/libhidl/transport $PACKAGE #生成 编译脚本
此时的目录结构如下:
helloworld/
└── 1.0
    ├── IHelloWorld.hal
    └── default
        ├── Android.bp
        ├── HelloWorld.cpp
        └── HelloWorld.h
先看一下生成的Android.bp:
cc_library_shared {
    name: "android.hardware.helloworld@1.0-impl",
    relative_install_path: "hw",
    proprietary: true,
    srcs: [
        "HelloWorld.cpp",
    ],
    shared_libs: [
        "libhidlbase",
        "libhidltransport",
        "libutils",
        "android.hardware.helloworld@1.0",
    ],
}
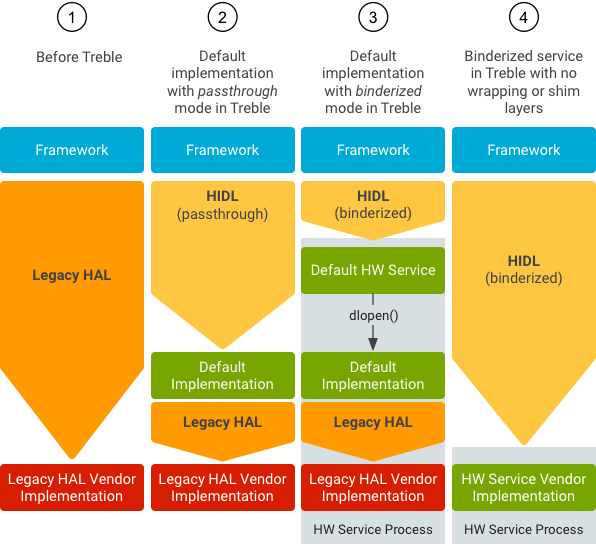
对于Passthrough mode和Binderized Mode,这两个实现都依赖于android.hardware.*@*-impl.so。
- 传统HAL 和 直通模式的HAL相比,相同点是HAL 和Framework的代码在同一个进程执行,不同点是,对于直通模式的hal,我们需要使用 hidl生成的接口来再次包装hal so中已有的接口。
- 直通模式和binderized的区别是,后者,HAL层代码和Framework层的代码在不同的进程执行,此外,直通模式的逻辑运行在HAL层的进程中。
- 最后就是binderized和图中四的区别,后者,没有了包装层,直接按照treble的架构实现hal层驱动。
接下来执行 ./hardware/interfaces/update-makefiles.sh,该命令执行后,回生成几个bp文件,具体编译规则大家自己去看生成的文件。
此时的目录结构如下:
hardware/interfaces/helloworld/
├── 1.0
│   ├── Android.bp
│   ├── Android.mk
│   ├── default
│   │   ├── Android.bp
│   │   ├── HelloWorld.cpp
│   │   ├── HelloWorld.h
│   │   └── main.cpp
│   └── IHelloWorld.hal
└── Android.bp
最后,执行mmm hardware/interfaces/helloworld/1.0/编译Helloworld。
编译后的成果物位于out/soong/.intermediates/hardware/interfaces/helloworld/1.0.
目录结构如下:
.
├── android.hardware.helloworld@1.0
│   ├── android_arm64_armv8-a_cortex-a53_shared_core
│   │   ├── android.hardware.helloworld@1.0.so
│   ├── android_arm64_armv8-a_cortex-a53_static_core
│   │   ├── android.hardware.helloworld@1.0.a
│   ├── android_arm_armv7-a-neon_cortex-a15_shared_core
│   │   ├── android.hardware.helloworld@1.0.so
│   └── android_arm_armv7-a-neon_cortex-a15_static_core
│       ├── android.hardware.helloworld@1.0.a
├── android.hardware.helloworld@1.0_genc++
│   └── gen
│       └── android
│           └── hardware
│               └── helloworld
│                   └── 1.0
│                       └── HelloWorldAll.cpp
├── android.hardware.helloworld@1.0_genc++_headers
│   └── gen
│       └── android
│           └── hardware
│               └── helloworld
│                   └── 1.0
│                       ├── BnHwHelloWorld.h
│                       ├── BpHwHelloWorld.h
│                       ├── BsHelloWorld.h
│                       ├── IHelloWorld.h
│                       └── IHwHelloWorld.h
└── default
    └── android.hardware.helloworld@1.0-impl
        ├── android_arm64_armv8-a_cortex-a53_shared_core
        │   ├── android.hardware.helloworld@1.0-impl.so
        │   └── obj
        │       └── hardware
        │           └── interfaces
        │               └── helloworld
        │                   └── 1.0
        │                       └── default
        │                           ├── HelloWorld.o
        │                           └── HelloWorld.o.d
        └── android_arm_armv7-a-neon_cortex-a15_shared_core
            ├── android.hardware.helloworld@1.0-impl.so
对于这些生成的文件的作用,感兴趣的可以自己去看,这里,我们只要知道我们实现hardware/interfaces/helloworld/1.0/default/HelloWorld.cpp中的接口,然后调用其IHelloWorld::registerAsSevice注册到HwServiceManager即可。
2. 创建HAL Service
按照前面提到的,我们不需要生成android.hardware.helloworld@1.0-impl.so,所以我们清空hardware/interfaces/helloworld/1.0/default/Android.bp中的内容,并写入如下内容:
cc_binary {
    name: "android.hardware.helloworld@1.0-service",
    relative_install_path: "hw",
    proprietary: true,
    srcs: [
        "main.cpp",
        "HelloWorld.cpp",
    ],

    init_rc: ["android.hardware.helloworld@1.0-service.rc"],
    shared_libs: [
        "libhidlbase",
        "libhidltransport",
        "libutils",
        "android.hardware.helloworld@1.0",
    ],
}
-
创建
android.hardware.helloworld@1.0-service.rc文件//hardware/interfaces/helloworld/1.0/default/android.hardware.helloworld@1.0-service.rc service helloworld-1-0 /vendor/bin/hw/android.hardware.helloworld@1.0-service class hal user system -
创建main.cpp
#include <hwbinder/ProcessState.h> #include <hidl/HidlTransportSupport.h> #include "HelloWorld.h" using namespace android::hardware; using namespace android::hardware::helloworld::V1_0; using namespace android::hardware::helloworld::V1_0::implementation; int main() { /* Configures the threadpool used for handling incoming RPC calls in this process. * * This method MUST be called before interacting with any HIDL interfaces, * including the IFoo::getService and IFoo::registerAsService methods. * * @param maxThreads maximum number of threads in this process * @param callerWillJoin whether the caller will join the threadpool later. * * Note that maxThreads must include the caller thread if callerWillJoin is true; * * If you want to create a threadpool of 5 threads, without the caller ever joining: * configureRpcThreadPool(5, false); * If you want to create a threadpool of 1 thread, with the caller joining: * configureRpcThreadPool(1, true); // transport won't launch any threads by itself * */ configureRpcThreadpool(1, true /*callerWillJoin*/); sp<IHelloWorld> service(new HelloWorld()); service->registerAsService(); //blcok joinRpcThreadpool(); return 0; }configureRpcThreadpool(1,true),表示内核不会主动请求创建binder线程,简单的说,整个service中的binder线程只有一个,就是主线程。我们创建一个
HelloWorld实例,然后调用其registerAsService,注册到HwServiceManager中。该函数由hidl-gen自动生成,其实现如下:::android::status_t IHelloWorld::registerAsService(const std::string &serviceName) { ::android::hardware::details::onRegistration("android.hardware.helloworld@1.0", "IHelloWorld", serviceName); const ::android::sp<::android::hidl::manager::V1_0::IServiceManager> sm = ::android::hardware::defaultServiceManager(); if (sm == nullptr) { return ::android::INVALID_OPERATION; } //注册到 HwServiceManager ::android::hardware::Return<bool> ret = sm->add(serviceName.c_str(), this); return ret.isOk() && ret ? ::android::OK : ::android::UNKNOWN_ERROR; }
3. 实现HAL 接口
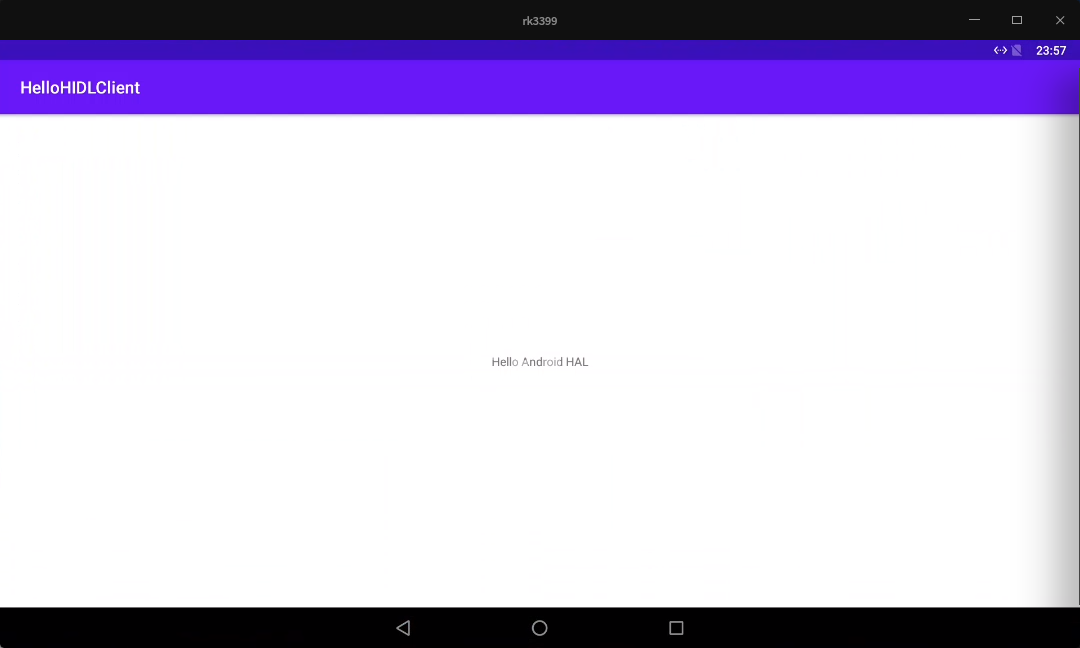
这里,我们简单的返回Hello Android HAL.
//hardware/interfaces/helloworld/1.0/default/HelloWorld.cpp
Return<void> HelloWorld::helloworld(helloworld_cb _hidl_cb) {
    // TODO implement
    _hidl_cb("Hello Android HAL");
    return Void();
}
4. 编译运行
执行mmm hardware/interfaces/helloworld/1.0/编译hellworld模块,编译完成后,会在out/target/product/*/vendor/bin/hw/目录下生成我们的可执行程序。然后我们的android.hardware.helloworld@1.0-service.rc也会拷贝到out/target/product/rk3399/vendor/etc/init目录下。
如果要配置为开机启动,还需要导入selinux规则,这里可以参考Android官网关于SELinux的部分。
还有一点就是要在manifest.xml中加入如下信息:
<hal format="hidl">
	<name>android.hardware.helloworld</name>
	<transport>hwbinder</transport>
	<version>1.0</version>
	<interface>
		<name>IHelloWorld</name>
		<instance>default</instance>
    </interface>
</hal>
该信息在HwServiceManager使用,如果我们没有填写这些信息,当我们获取服务时,就会失败。
该文件的路径通常是:device/*/common/manifest.xml。
我们可以重新编译打包Vendor.img、System.img并将其刷入设备,或者手动将helloworld相关的执行程序和so库push到系统中。
将
android.hardware.helloworld@1.0.so放入system/lib目录,
然后我们手动执行./android.hardware.helloworld@1.0-service.
5. Client获取Service
前面执行 ./hardware/interfaces/update-makefiles.sh时,还会多生成一个Android.mk,其作用就是生成客户端的java库。
默认情况下生成物如下:
out/target/common/obj/JAVA_LIBRARIES/android.hardware.helloworld-V1.0-java-static_intermediates$ ls
anno  classes    classes.jack    jack-rsc  jack-rsc.java-source-list  link_type
这里是没有生成jar文件的,为了我们的Client App能够使用,我们需要更改一下Android.mk文件。
LOCAL_MODULE := android.hardware.helloworld-V1.0-java-static
# 在 static 部分新增这条语句,禁用jack。。。
LOCAL_JACK_ENABLED := disabled
重新编译:
out/target/common/obj/JAVA_LIBRARIES/android.hardware.helloworld-V1.0-java-static_intermediates$ ls
anno  classes  classes-full-debug.jar  classes.jack  classes.jar  jack-rsc  jack-rsc.java-source-list  link_type
我们把生成的classes.jar导入AS中,同时讲frameworks.jar也导入AS中。
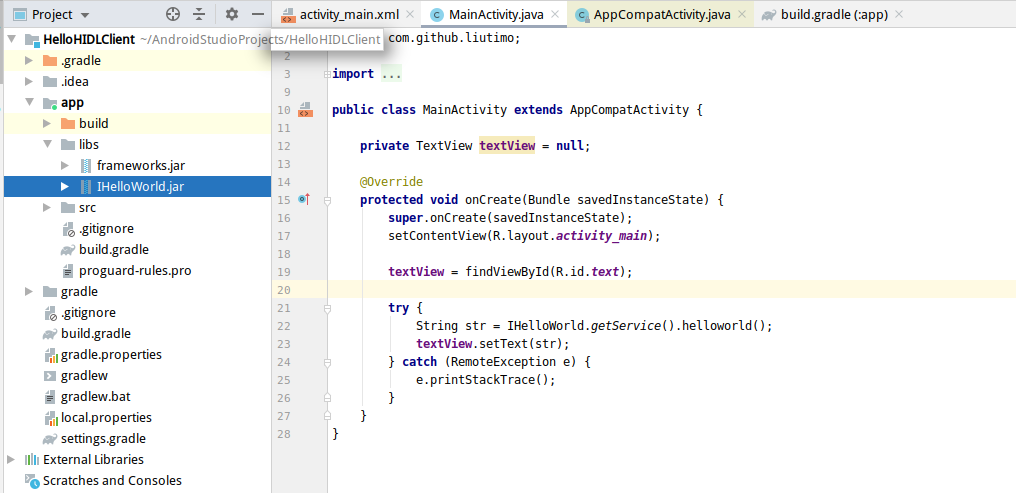
此时,安装运行,会报如下错误:

我的解决方法是删除IHelloWorld.jar(这是我自己重命名的)中重复的部分删除,没有研究能不能通过修改Makefile过滤掉重复部分的classes文件。
最后,运行结果如图: