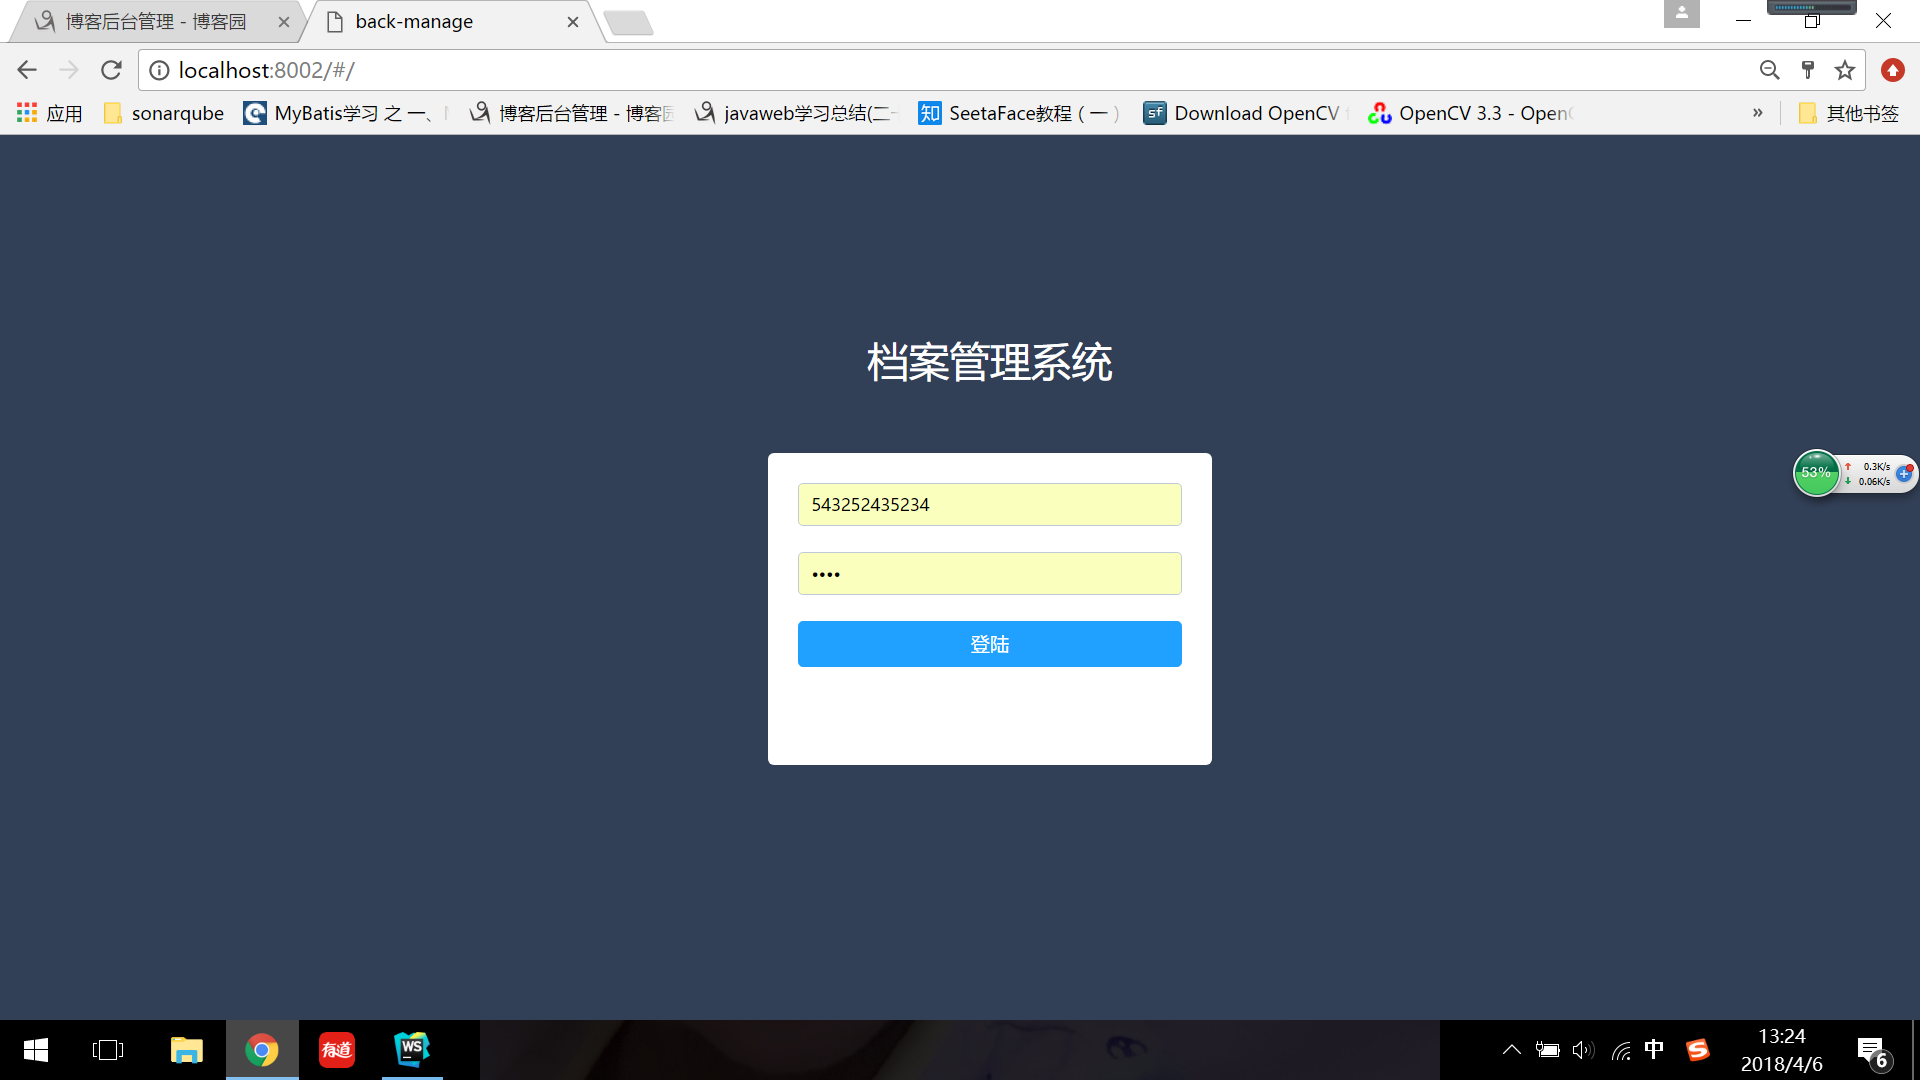
首页: http://localhost:8002/#/, 登录页面如下:

index.js文件中如下的路由配置,转过去看login.vue是如何实现的。
const routes = [
   {
      path: '/',
      component: login
   },

(这里一个问题:  login.vue是如何与index.xml整到一起的呢:
   login作为路由在Router中定义,而在App.vue中Router是参数,这样login就是App.vue的路由了;  App.vue和index.html已经绑定了,并且在App.vue的模板中又又有<Router-View>标签,
所以就可以在index.html中看到login的内容了。)
login.vue代码如下:
  <section>: HTML5中的新标签,定义了文档的某个区域。比如章节、头部、底部或者文档的其他区域。
v-show="true/false: VUE元素的隐藏和显示;
el-form: element的表单
rules: element-UI组件定义的规则,对规则进行校验,如果不满足,会有相应的提示信息等,其规则定义在下面:
                     rules: {
                      username: [
                        { required: true, message: '请输入用户名', trigger: 'blur' },   // 定义了username必填,提示的信息,以及触发条件
              ], password: [ { required: true, message: '请输入密码', trigger: 'blur' } ], },
     ref:  表示是el-form的别名,或者叫引用,供其他地方使用:
           如下的代码,在提交表单的时候,用的就是ref指定的名字。
             <el-form-item>
                        <el-button type="primary" @click="submitForm('loginForm')" class="submit_btn">登陆</el-button>
                      </el-form-item>
    el-form-item:pro:  控件的名字。
      placeholder: input用户名控件中当不输入信息时的提示文本。
      v-if: 指令是条件渲染指令,它根据表达式的真假来删除和插入.
      v-for: v-for指令基于一个数组渲染一个列表;
      v-bind: 和某个值绑定
      v-on : v-on指令用于给监听DOM事件;
@click=: v-on:click的缩写
        <!-- 完整语法 -->
          <a v-on:click="doSomething">...</a>
        <!-- 缩写 -->
          <a @click="doSomething">...</a>
<template>
      <div class="login_page fillcontain">
          <!--<transition name="form-fade" mode="in-out">-->
              <section class="form_contianer" v-show="showLogin">
                  <div class="manage_tip">
                      <p>档案管理系统</p>
                  </div>
                <el-form :model="loginForm" :rules="rules" ref="loginForm">
                    <el-form-item prop="username">
                        <el-input v-model="loginForm.username" placeholder="用户名"><span>dsfsf</span></el-input>
                    </el-form-item>
                    <el-form-item prop="password">
                        <el-input type="password" placeholder="密码" v-model="loginForm.password"></el-input>
                    </el-form-item>
                    <el-form-item>
                        <el-button type="primary" @click="submitForm('loginForm')" class="submit_btn">登陆</el-button>
                      </el-form-item>
                </el-form>
                <!--<p class="tip">温馨提示:</p>-->
                <!--<p class="tip">未登录过的新用户,自动注册</p>-->
                <!--<p class="tip">注册过的用户可凭账号密码登录</p>-->
              </section>
          <!--</transition>-->
      </div>
</template>

<script>
    import {login, getAdminInfo} from '@/api/getData'
    import {mapActions, mapState} from 'vuex'

    export default {
        data(){
            return {
                loginForm: {
                    username: '',
                    password: '',
                },
                rules: {
                    username: [
                        { required: true, message: '请输入用户名', trigger: 'blur' },
                    ],
                    password: [
                        { required: true, message: '请输入密码', trigger: 'blur' }
                    ],
                },
                showLogin: false,
            }
        },
        mounted(){
            this.showLogin = true;
            if (!this.adminInfo.id) {
                this.getAdminData()
            }
        },
        computed: {
            ...mapState(['adminInfo']),
        },
        methods: {
            ...mapActions(['getAdminData']),
            async submitForm(formName) {
                this.$refs[formName].validate(async (valid) => {
                    if (valid) {
                        const res = await login({user_name: this.loginForm.username, password: this.loginForm.password})
                        if (res.status == 1) {
                            this.$message({
                                type: 'success',
                                message: '登录成功'
                            });
                            this.$router.push('manage')
                        }else{
                            this.$message({
                                type: 'error',
                                message: res.message
                            });
                        }
                    } else {
                        this.$notify.error({
                            title: '错误',
                            message: '请输入正确的用户名密码',
                            offset: 100
                        });
                        return false;
                    }
                });
            },
        }
        // watch: {
        //     adminInfo: function (newValue){
        //         if (newValue.id) {
        //             this.$message({
         //                type: 'success',
         //                message: '检测到您之前登录过,将自动登录'
         //            });
        //             this.$router.push('manage')
        //         }
        //     }
        // }
    }
</script>

<style lang="less" scoped>
    @import '../style/mixin';
    .login_page{
        background-color: #324057;
    }
    .manage_tip{
        position: absolute;
         100%;
        top: -100px;
        left: 0;
        p{
            font-size: 34px;
            color: #fff;
        }
    }
    .form_contianer{
        .wh(320px, 210px);
        .ctp(320px, 210px);
        padding: 25px;
        border-radius: 5px;
        text-align: center;
        background-color: #fff;
        .submit_btn{
             100%;
            font-size: 16px;
        }
    }
    .tip{
        font-size: 12px;
        color: red;
    }
    .form-fade-enter-active, .form-fade-leave-active {
          transition: all 1s;
    }
    .form-fade-enter, .form-fade-leave-active {
          transform: translate3d(0, -50px, 0);
          opacity: 0;
    }
</style>
export default {} : ES6的语法,表示导出。es6中,实现了模块功能,你要import 引入东西,导出了才能引用。因为这个login会被其他的组件使用(App.vue),所以一定要导出的。
return data(): 注意, 上面的data()是个函数(有return),而不是对象,每次调用都会返回其中数据的拷贝。这个很重要,因为login模块被很多地方用到,如果返回data对象的
话(不用return),多个地方方公用相同的数据,这是错误的; 而如果data() 是一个函数,return的是全新的对象,这样就不会共享数据了。
data 是数据,主要是这些数据和template中的元素绑定。
mounted VS created:
created:在模板渲染成html前调用,即通常初始化某些属性值,然后再渲染成视图。
mounted:在模板渲染成html后调用,通常是初始化页面完成后,再对html的dom节点进行一些需要的操作。
computed:计算属性,是 Vue 中常用的一个功能
         模板内的表达式是非常便利的,但是它们实际上只用于简单的运算。在模板中放入太多的逻辑会让模板过重且难以维护。
         computed相当于属性的一个实时计算,如果实时计算里关联了对象,那么当对象的某个值改变的时候,同事会出发实时计算