前言
使用uniapp实现移动APP端:拍照->压缩拍下的图片->获取压缩后的图片信息->使用canvas画水印图片->保存本地->读取预览
实现
<template>
<view>
<view class="" v-for="(item,index) in imageList" :key="index">
<image mode="aspectFill" :src="item" @click="prevwImage(item)" class="imageStyle imageWrapper">
</image>
</view>
<!-- 加号 -->
<view class="padding-xl">
<image src="../../static/add.jpg" mode="widthFix" class="imageStyle" @click="imageRecording"></image>
</view>
<!-- 水印 -->
<canvas style="border: 1px solid green;position: absolute;left: -5000px;" :style="{'width':w,'height': h}"
canvas-id="firstCanvas" ref="mycanvas"></canvas>
</view>
</template>
<script>
export default {
data() {
return {
w: 0,
h: 0,
imgPath: "",
imageList: [],
nowTime: Date.now(),
type: "tpurl"
}
},
methods: {
//拍照:压缩
imageRecording() {
let that = this;
uni.chooseImage({
count: 1,
sizeType: ['compressed'], //选择图片的大小
sourceType: ['camera'], //选择图片的来源
success: res => {
//图片数组
let tempFilePath = res.tempFilePaths;
uni.compressImage({
src: tempFilePath[0],
quality: 30,
'40%',
height: '40%',
success: res2 => {
that.getImageInfo(res2.tempFilePath);
},
fail: () => {
}
})
},
fail: () => {
}
})
},
//获取压缩图片信息
getImageInfo(e) {
let that = this;
uni.getImageInfo({
src: e,
success: (res) => {
that.canvasWather(res)
},
fail: () => {
}
})
},
//水印
canvasWather(res) {
let that = this;
let ctx = uni.createCanvasContext('firstCanvas', this);
that.imgPath = res.path
that.w = res.width / 2 + 'px';
that.h = res.height / 2 + 'px';
let userInfo = uni.getStorageSync('userInfo');
let realName = userInfo.realName;
this.nowTime = Date.now();
setTimeout(() => {
// this.ymd = this.$refs.ymdHms.dateShow;
//初始化画布
ctx.fillRect(0, 0, res.width / 2, res.height / 2);
// //将图片src放到cancas内,宽高为图片大小
ctx.drawImage(res.path, 0, 0, res.width / 2, res.height / 2);
ctx.beginPath()
ctx.setFontSize(10)
ctx.setFillStyle('red');
let firstY = res.height / 2 - 60;
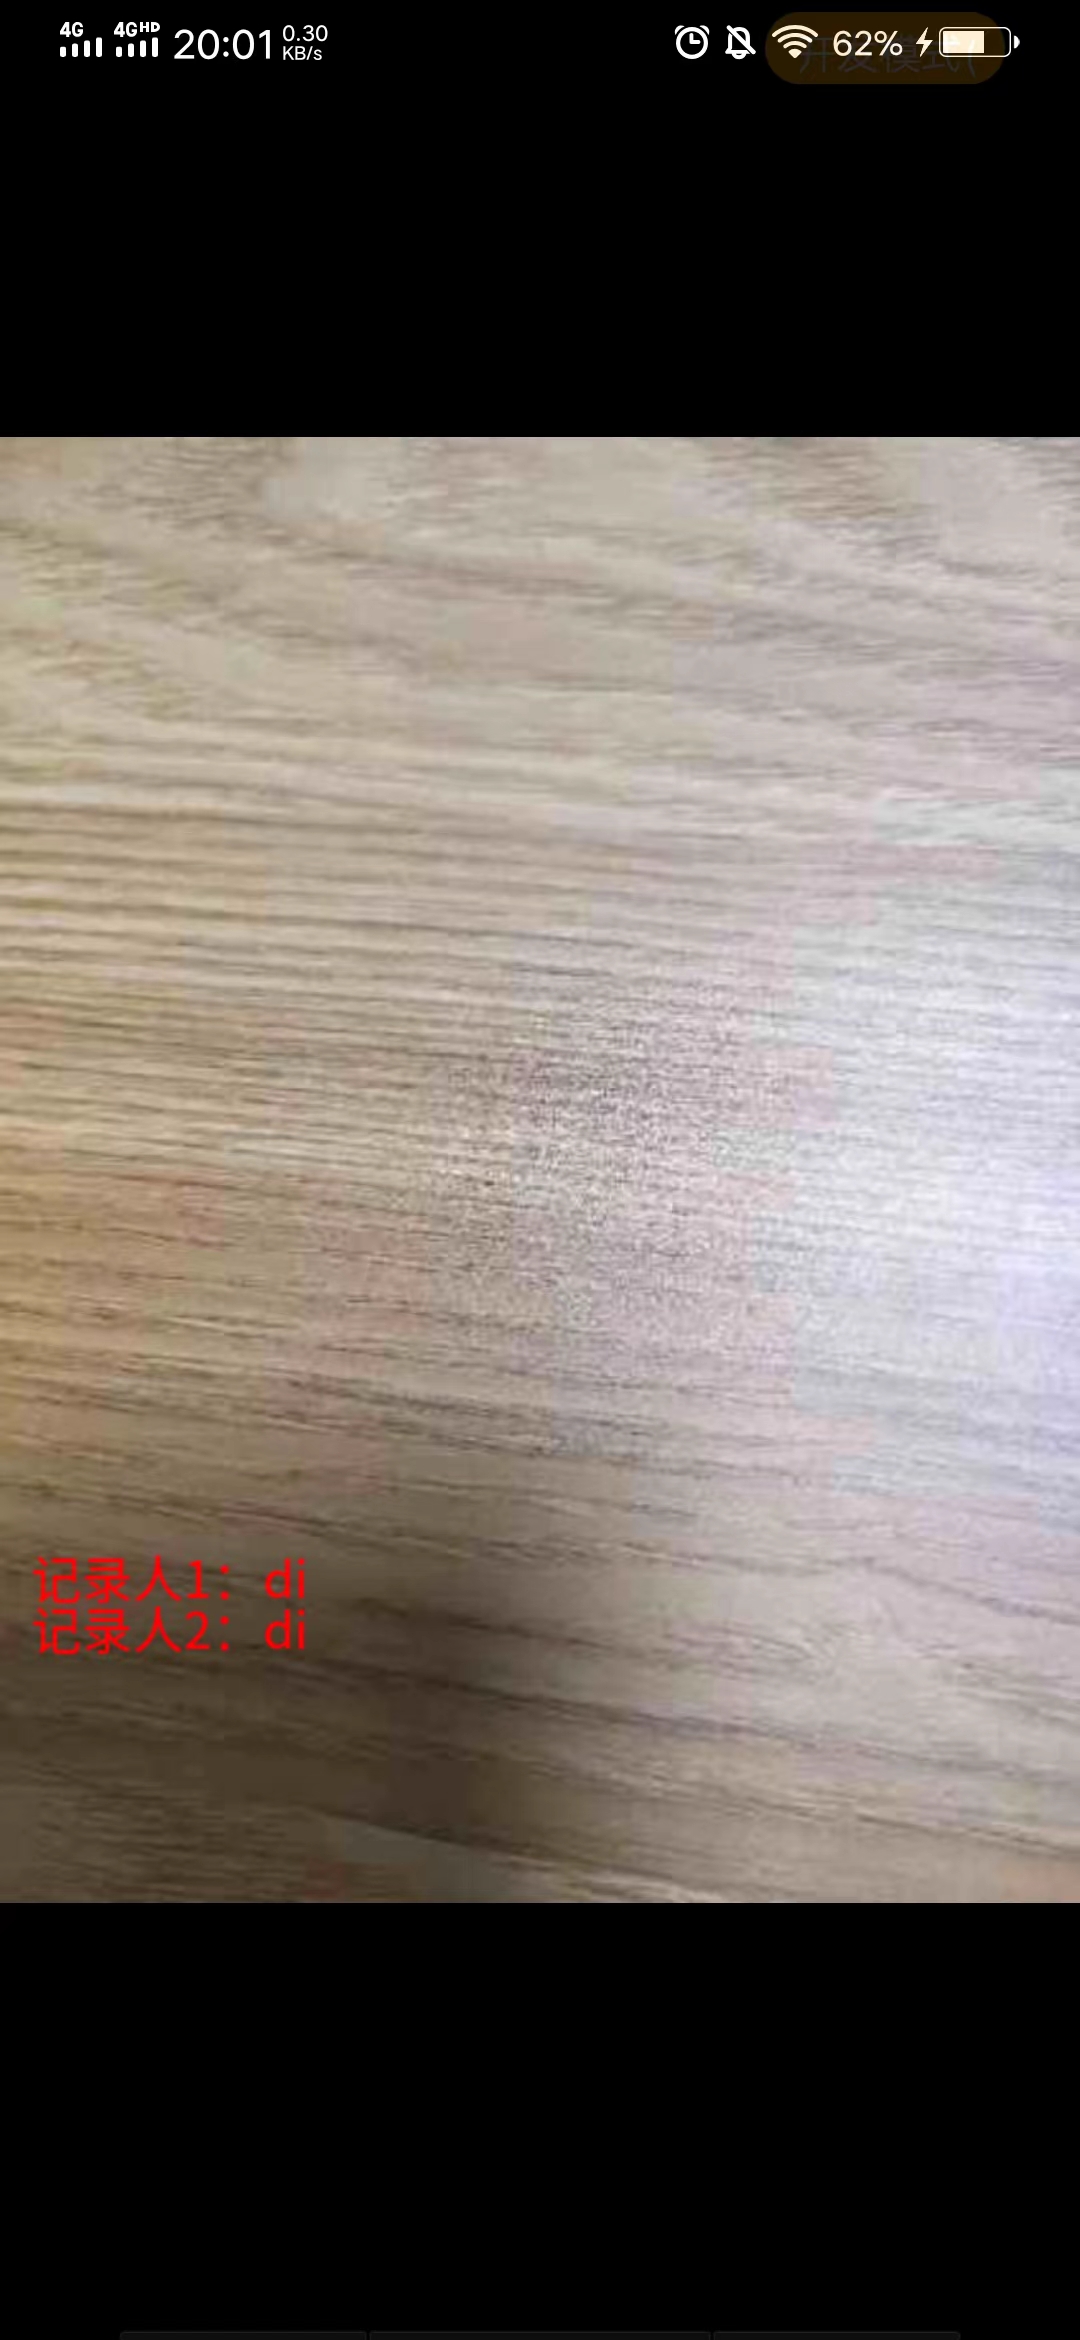
ctx.fillText('记录人1:di', 10, res.height / 2 - 60)
ctx.fillText('记录人2:di', 10, res.height / 2 - 50)
ctx.draw(false, () => {
uni.canvasToTempFilePath({ //将画布中内容转成图片,即水印与图片合成
canvasId: 'firstCanvas',
success: (res) => {
that.saveFile(res);
},
fail: (err) => {
}
})
})
}, 500)
},
//保存本地
saveFile(res) {
let that = this;
uni.saveFile({
tempFilePath: res.tempFilePath,
success: (res2) => {
//图片列表获取
that.imageList.push(res2.savedFilePath)
},
fail: () => {
}
})
},
prevwImage(path) {
let url = [path]
uni.previewImage({
urls: url,
success: (res) => {
},
fail: () => {
}
});
},
}
}
</script>
<style lang="scss" scoped>
.imageWrapper {
position: relative;
z-index: 1;
}
</style>

效果