Windows系统安装svn
1、svn下载
https://sourceforge.net/projects/win32svn/
2、验证是否安装成功
C:Userslibingshen>svn --version
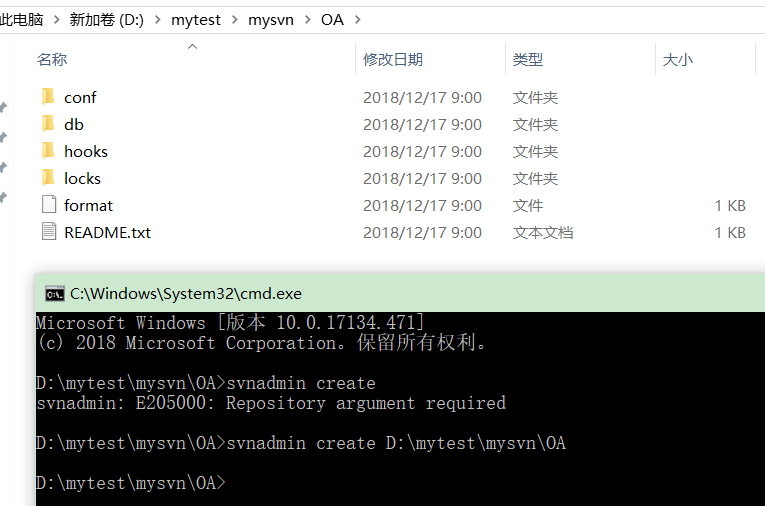
3、创建版本库
D:mytestmysvnOA>svnadmin create D:mytestmysvnOA
4、启动svn服务

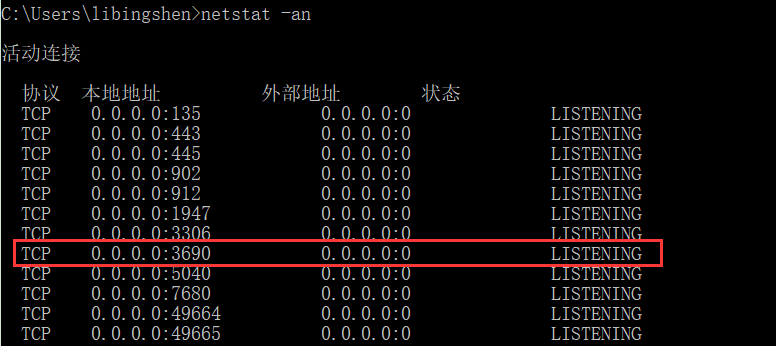
5、验证svn服务是否启动
svn服务监听3690端口
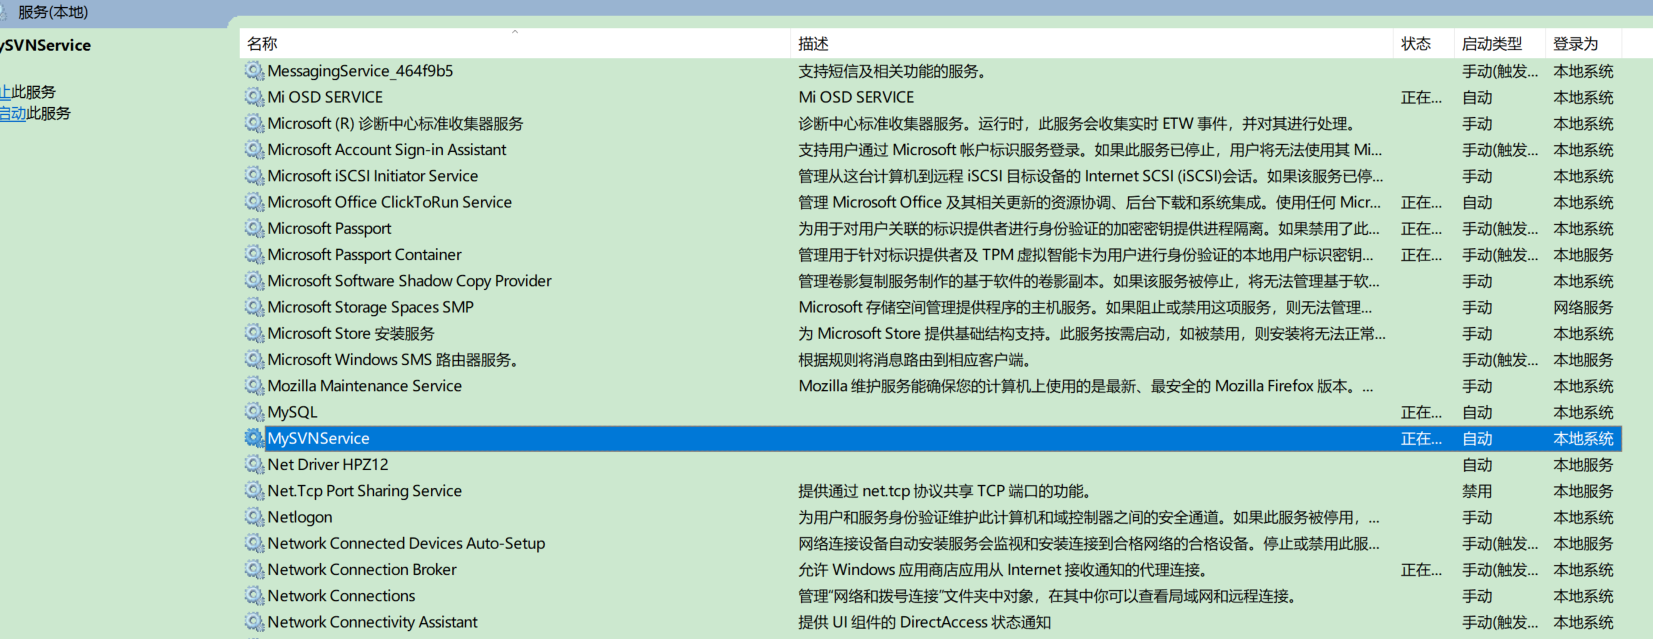
6、svn注册为Windows服务
tip:等号左边没有空格,等号右边有一个空格。
C:WINDOWSsystem32>sc create MySVNService binpath= "C:Pmyprogramsvninsvnserve.exe --service -r D:mytestmysvn" start= auto depend= Tcpip
原因:每次启动svn服务时必须启动一个cmd窗口,cmd窗口一关闭,svn服务就关闭。
非管理员运行时会失败。

管理员运行

启动、停止、删除svn服务(管理员身份运行cmd)
	//启动svn服务
	C:WINDOWSsystem32>sc start MySVNService

	//停止服务
	C:WINDOWSsystem32>sc stop MySVNService

	//删除服务
	C:WINDOWSsystem32>sc delete MySVNService
7、检出项目
D:mytestmycheckout>svn checkout svn://localhost/OA MyOA

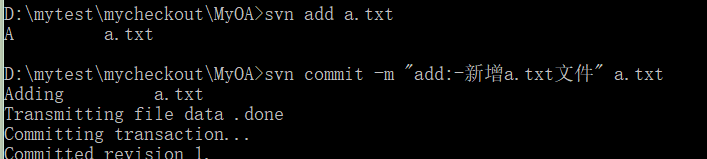
8、提交文件
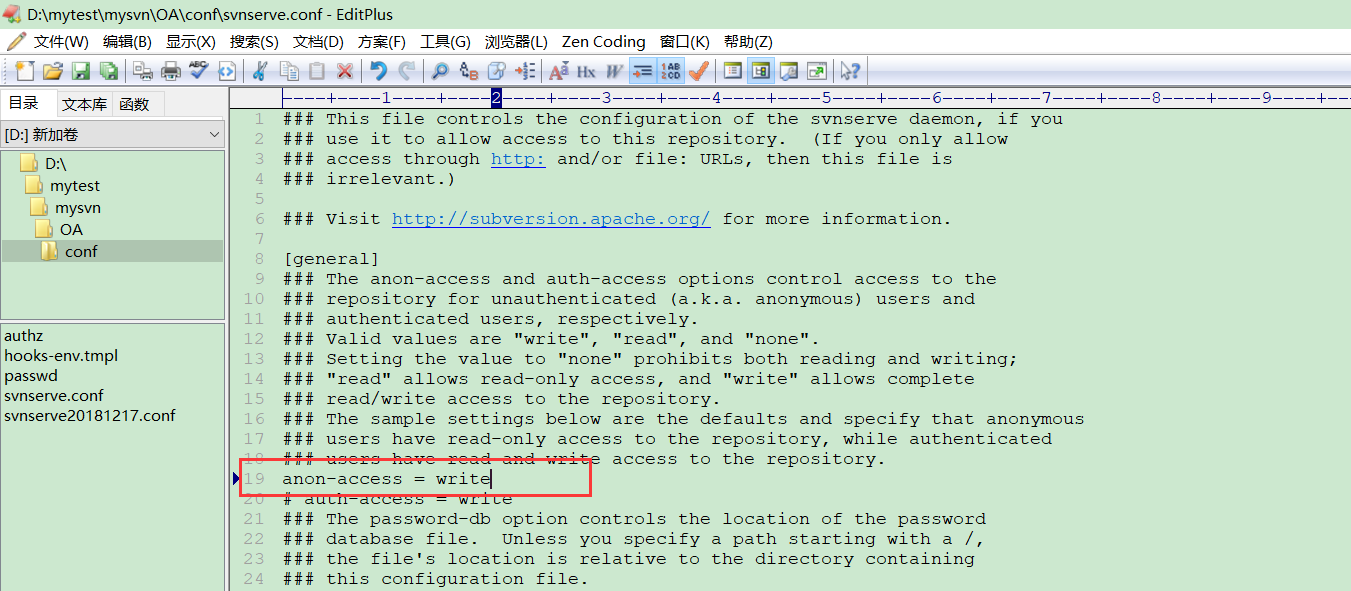
--开启匿名权限访问
--先将文件加入版本库,然后提交(需添加提交日志信息,不然报错)
svn commit 命令最后可以不指定具体文件,此时表示提交当前工作副本中
的所有修改
9、更新
另一个客户端检出项目、更新并提交文件
	//远程版本库具体位置  svn://localhost/OA
	//将OA检出到本地的目录 MyOA2
	D:mytestmycheckout>svn checkout svn://localhost/OA MyOA2


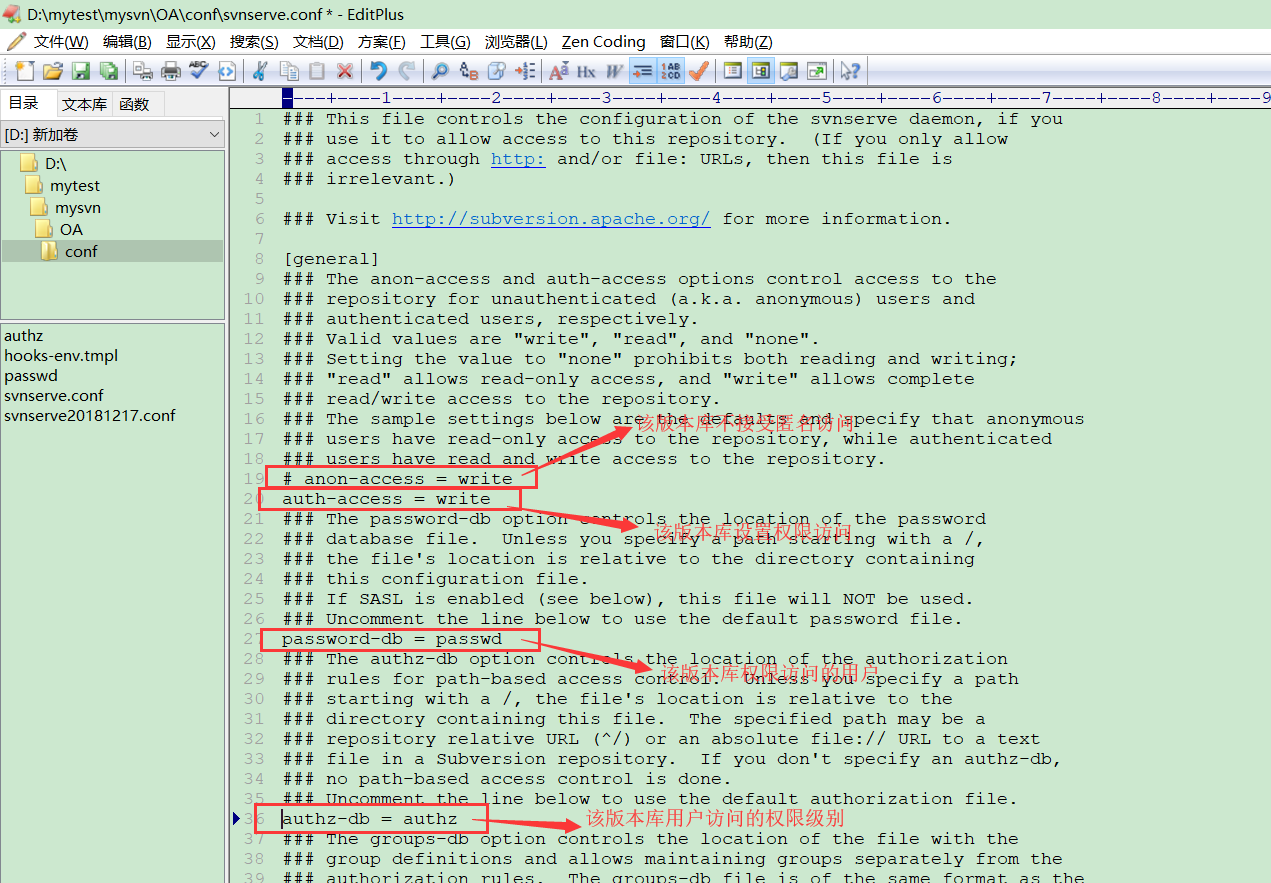
10、授权访问版本库
--单版本库开启授权访问
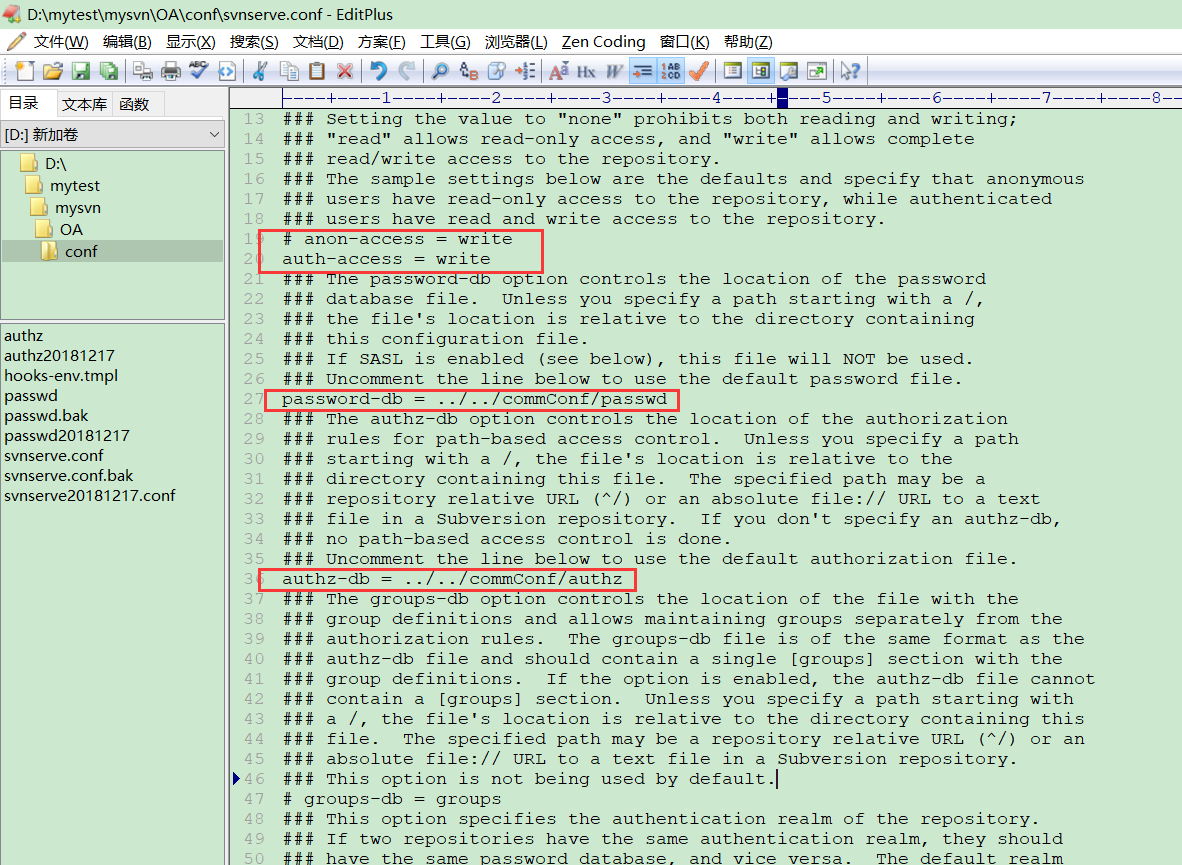
--多版本库开启授权访问
	在版本库根目录 D:mytestmysvn 下创建 commConf 目录
	将未修改的 authz 和 passwd 文件拷贝到 commConf 目录下
	修改需要设置权限的版本库的 svnserve.conf 文件
	①password-db = ../../commConf/passwd
	②authz-db = ../../commConf/authz
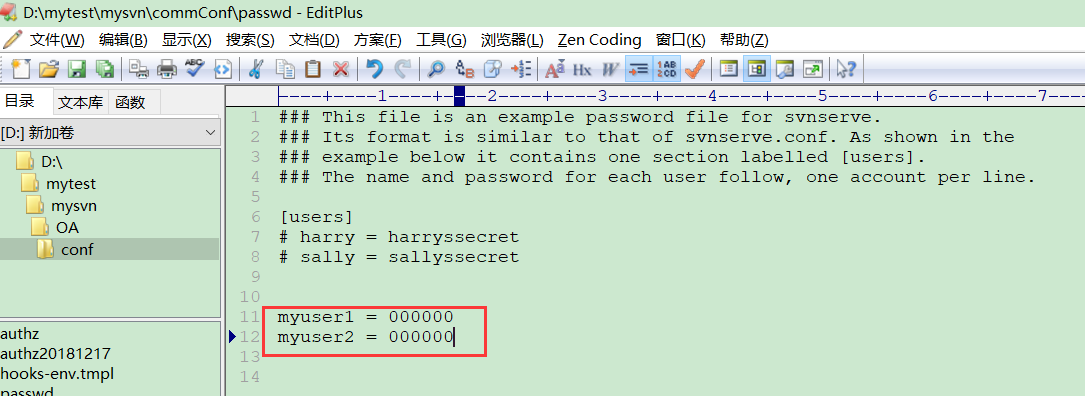
passwd:设置访问版本库的用户信息
authz:设置用户访问版本库的权限

centos7系统安装svn
安装服务端程序
yum install -y subversion
创建并配置版本库
创建版本库目录
用该目录来管理多个项目
mkdir -p /opt/module/svn/repository
在版本库目录下创建具体项目目录
[root@izm5eac6bnsz8uq175jkvez repository]# pwd
/opt/module/svn/repository
[root@izm5eac6bnsz8uq175jkvez repository]# ll
total 4
drwxr-xr-x 6 root root 4096 Oct 20 21:15 pro_oa
[root@izm5eac6bnsz8uq175jkvez repository]# mkdir pro_oa
创建 SVN 版本库
svnadmin create /opt/module/svn/repository/pro_oa
版本库内容
[root@izm5eac6bnsz8uq175jkvez pro_oa]# ll
total 24
drwxr-xr-x 2 root root 4096 Oct 20 22:31 conf
drwxr-sr-x 6 root root 4096 Oct 20 22:47 db
-r--r--r-- 1 root root    2 Oct 20 21:15 format
drwxr-xr-x 2 root root 4096 Oct 20 21:15 hooks
drwxr-xr-x 2 root root 4096 Oct 20 21:15 locks
-rw-r--r-- 1 root root  229 Oct 20 21:15 README.txt
配置svn对应的服务
设置svn服务开机自启
[root@izm5eac6bnsz8uq175jkvez pro_oa]# systemctl enable svnserve.service
修改svn服务开机自启默认的版本库目录
查看svn服务启动的配置文件路径/etc/sysconfig/svnserve
[root@izm5eac6bnsz8uq175jkvez pro_oa]# cat /usr/lib/systemd/system/svnserve.service
[Unit]
Description=Subversion protocol daemon
After=syslog.target network.target

[Service]
Type=forking
EnvironmentFile=/etc/sysconfig/svnserve
ExecStart=/usr/bin/svnserve  --daemon --pid-file=/run/svnserve/svnserve.pid $OPTIONS

[Install]
WantedBy=multi-user.target
[root@izm5eac6bnsz8uq175jkvez pro_oa]#
修改svn服务启动的配置文件,版本库目录OPTIONS="-r /opt/module/svn/repository"
[root@izm5eac6bnsz8uq175jkvez pro_oa]# cat /etc/sysconfig/svnserve
# OPTIONS is used to pass command-line arguments to svnserve.
#
# Specify the repository location in -r parameter:
OPTIONS="-r /opt/module/svn/repository"
[root@izm5eac6bnsz8uq175jkvez pro_oa]#
启动svn服务
[root@izm5eac6bnsz8uq175jkvez pro_oa]# systemctl start svnserve.service
查看服务当前状态
[root@izm5eac6bnsz8uq175jkvez pro_oa]# systemctl status svnserve.service
● svnserve.service - Subversion protocol daemon
   Loaded: loaded (/usr/lib/systemd/system/svnserve.service; enabled; vendor preset: disabled)
   Active: active (running) since Sun 2019-10-20 21:58:58 CST; 11h ago
  Process: 778 ExecStart=/usr/bin/svnserve --daemon --pid-file=/run/svnserve/svnserve.pid $OPTIONS (code=exited, status=0/SUCCESS)
 Main PID: 843 (svnserve)
   CGroup: /system.slice/svnserve.service
           └─843 /usr/bin/svnserve --daemon --pid-file=/run/svnserve/svnserve.pid -r /opt/module/svn/repository

Oct 20 21:58:58 izm5eac6bnsz8uq175jkvez systemd[1]: Starting Subversion protocol daemon...
Oct 20 21:58:58 izm5eac6bnsz8uq175jkvez systemd[1]: Started Subversion protocol daemon.
[root@izm5eac6bnsz8uq175jkvez pro_oa]# netstat -tnlp
Active Internet connections (only servers)
Proto Recv-Q Send-Q Local Address           Foreign Address         State       PID/Program name
tcp        0      0 0.0.0.0:443             0.0.0.0:*               LISTEN      1223/nginx: master
tcp        0      0 0.0.0.0:8000            0.0.0.0:*               LISTEN      1223/nginx: master
tcp        0      0 0.0.0.0:3690            0.0.0.0:*               LISTEN      843/svnserve
tcp        0      0 0.0.0.0:80              0.0.0.0:*               LISTEN      1223/nginx: master
tcp        0      0 0.0.0.0:22              0.0.0.0:*               LISTEN      991/sshd
tcp6       0      0 :::8000                 :::*                    LISTEN      1223/nginx: master
[root@izm5eac6bnsz8uq175jkvez pro_oa]# ps -ef|grep svn
root       843     1  0 Oct20 ?        00:00:00 /usr/bin/svnserve --daemon --pid-file=/run/svnserve/svnserve.pid -r /opt/module/svn/repository
root      2107  2029  0 09:31 pts/0    00:00:00 grep --color=auto svn
检出项目
开发人员1号,检出项目
[root@izm5eac6bnsz8uq175jkvez harry]# mkdir -p /root/workspace/harry
[root@izm5eac6bnsz8uq175jkvez harry]# pwd
/root/workspace/harry
[root@izm5eac6bnsz8uq175jkvez harry]# svn checkout svn://192.168.1.101/pro_oa ./
开发人员2号,检出项目
[root@izm5eac6bnsz8uq175jkvez harry]# mkdir -p /root/workspace/sally
[root@izm5eac6bnsz8uq175jkvez sally]# pwd
/root/workspace/sally
[root@izm5eac6bnsz8uq175jkvez sally]# svn checkout svn://192.168.1.101/pro_oa ./
授权访问
进入到项目svn版本库,查看授权访问的几个相关文件
[root@izm5eac6bnsz8uq175jkvez conf]# pwd
/opt/module/svn/repository/pro_oa/conf
[root@izm5eac6bnsz8uq175jkvez conf]# ll
total 16
-rw-r--r-- 1 root root 1080 Oct 20 21:15 authz
-rw-r--r-- 1 root root  309 Oct 20 21:15 passwd
-rw-r--r-- 1 root root 3089 Oct 20 22:31 svnserve.conf
-rw-r--r-- 1 root root 3090 Oct 20 22:28 svnserve.conf.20191020
[root@izm5eac6bnsz8uq175jkvez conf]#
匿名访问
修改svnserve.conf文件
[root@izm5eac6bnsz8uq175jkvez conf]# ll
total 16
-rw-r--r-- 1 root root 1080 Oct 20 21:15 authz
-rw-r--r-- 1 root root  309 Oct 20 21:15 passwd
-rw-r--r-- 1 root root 3089 Oct 20 22:31 svnserve.conf
-rw-r--r-- 1 root root 3090 Oct 20 22:28 svnserve.conf.20191020
[root@izm5eac6bnsz8uq175jkvez conf]# vim svnserve.conf
anon-access = write
# auth-access = write
# password-db = passwd
# authz-db = authz
授权访问
修改svnserve.conf文件,取消以下注释,左边不留空格
anon-access = none
auth-access = write
password-db = passwd
authz-db = authz
修改passwd文件,配置用户名、密码
[users]
# harry = harryssecret
# sally = sallyssecret
ctp = ctp
zqc = zqc
ywc = ywc
slb=slb
修改authz文件,开启项目授权
[groups]
# harry_and_sally = harry,sally
# harry_sally_and_joe = harry,sally,&joe
admin = ctp,zqc,ywc,slb
# [/foo/bar]
# harry = rw
# &joe = r
# * =
[pro_oa:/]
@admin = rw
# [repository:/baz/fuz]
# @harry_and_sally = rw
# * = r
文件冲突表现
不同开发人员操作同一文件
开发人员1号Harry修改hello.txt,修改后并提交
[root@izm5eac6bnsz8uq175jkvez harry]# svn update
Updating '.':
At revision 3.
[root@izm5eac6bnsz8uq175jkvez harry]# vim hello.txt
[root@izm5eac6bnsz8uq175jkvez harry]# svn commit -m "conflict one commit"
Sending        hello.txt
Transmitting file data .
Committed revision 4.
[root@izm5eac6bnsz8uq175jkvez harry]# cat hello.txt
sally
harray add
sally add two
harry add one conflict commit
[root@izm5eac6bnsz8uq175jkvez harry]#
开发人员2号Sally也修改hello.txt,修改后并提交,提示已过期,执行svn update,提示产生冲突,输入p表示延迟解决该问题
[root@izm5eac6bnsz8uq175jkvez sally]# ll
total 4
-rw-r--r-- 1 root root 32 Oct 20 22:53 hello.txt
[root@izm5eac6bnsz8uq175jkvez sally]# svn update
Updating '.':
At revision 3.
[root@izm5eac6bnsz8uq175jkvez sally]# vim hello.txt
[root@izm5eac6bnsz8uq175jkvez sally]# svn -m "conflict two commit"
Subcommand argument required
Type 'svn help' for usage.
[root@izm5eac6bnsz8uq175jkvez sally]# svn commit -m "conflict two commit"
Sending        hello.txt
Transmitting file data .svn: E160028: Commit failed (details follow):
svn: E160028: File '/hello.txt' is out of date
[root@izm5eac6bnsz8uq175jkvez sally]# ll
total 4
-rw-r--r-- 1 root root 62 Oct 21 10:08 hello.txt
[root@izm5eac6bnsz8uq175jkvez sally]# svn update
Updating '.':
Conflict discovered in '/root/workspace/sally/hello.txt'.
Select: (p) postpone, (df) diff-full, (e) edit,
        (mc) mine-conflict, (tc) theirs-conflict,
        (s) show all options: p
C    hello.txt
Updated to revision 4.
Summary of conflicts:
  Text conflicts: 1
[root@izm5eac6bnsz8uq175jkvez sally]#
此时发现多了几个文件,hello.txt合并后的冲突文件,hello.txt.mine开发人员2号的修改文件,hello.txt.r3 服务器上的版本文件,hello.txt.r4开发人员1号的修改文件
[root@izm5eac6bnsz8uq175jkvez sally]# ll
total 16
-rw-r--r-- 1 root root 126 Oct 21 10:09 hello.txt
-rw-r--r-- 1 root root  62 Oct 21 10:09 hello.txt.mine
-rw-r--r-- 1 root root  32 Oct 21 10:09 hello.txt.r3
-rw-r--r-- 1 root root  62 Oct 21 10:09 hello.txt.r4
[root@izm5eac6bnsz8uq175jkvez sally]# cat hello.txt
sally
harray add
sally add two
<<<<<<< .mine
sally add two conflict commit
=======
harry add one conflict commit
>>>>>>> .r4
[root@izm5eac6bnsz8uq175jkvez sally]# cat hello.txt.mine
sally
harray add
sally add two
sally add two conflict commit
[root@izm5eac6bnsz8uq175jkvez sally]# cat hello.txt.r3
sally
harray add
sally add two
[root@izm5eac6bnsz8uq175jkvez sally]# cat hello.txt.r4
sally
harray add
sally add two
harry add one conflict commit
[root@izm5eac6bnsz8uq175jkvez sally]#
解决
删除多余的文件hello.txt.mine ,hello.txt.r3,hello.txt.r4,修改合并后的冲突文件hello.txt直到满意为止
[root@izm5eac6bnsz8uq175jkvez sally]# ll
total 16
-rw-r--r-- 1 root root 126 Oct 21 10:09 hello.txt
-rw-r--r-- 1 root root  62 Oct 21 10:09 hello.txt.mine
-rw-r--r-- 1 root root  32 Oct 21 10:09 hello.txt.r3
-rw-r--r-- 1 root root  62 Oct 21 10:09 hello.txt.r4
[root@izm5eac6bnsz8uq175jkvez sally]# rm hello.txt.*
rm: remove regular file ‘hello.txt.mine’? y
rm: remove regular file ‘hello.txt.r3’? y
rm: remove regular file ‘hello.txt.r4’? y
[root@izm5eac6bnsz8uq175jkvez sally]# ll
total 4
-rw-r--r-- 1 root root 126 Oct 21 10:09 hello.txt
[root@izm5eac6bnsz8uq175jkvez sally]# cat hello.txt
sally
harray add
sally add two
<<<<<<< .mine
sally add two conflict commit
=======
harry add one conflict commit
>>>>>>> .r4
[root@izm5eac6bnsz8uq175jkvez sally]# vim hello.txt
[root@izm5eac6bnsz8uq175jkvez sally]# cat hello.txt
sally
harray add
sally add two
sally add two conflict commit
harry add one conflict commit
[root@izm5eac6bnsz8uq175jkvez sally]# svn commit -m 'sally have solve conflict' hello.txt
Sending        hello.txt
Transmitting file data .
Committed revision 5.
[root@izm5eac6bnsz8uq175jkvez sally]#
eclipse使用svn
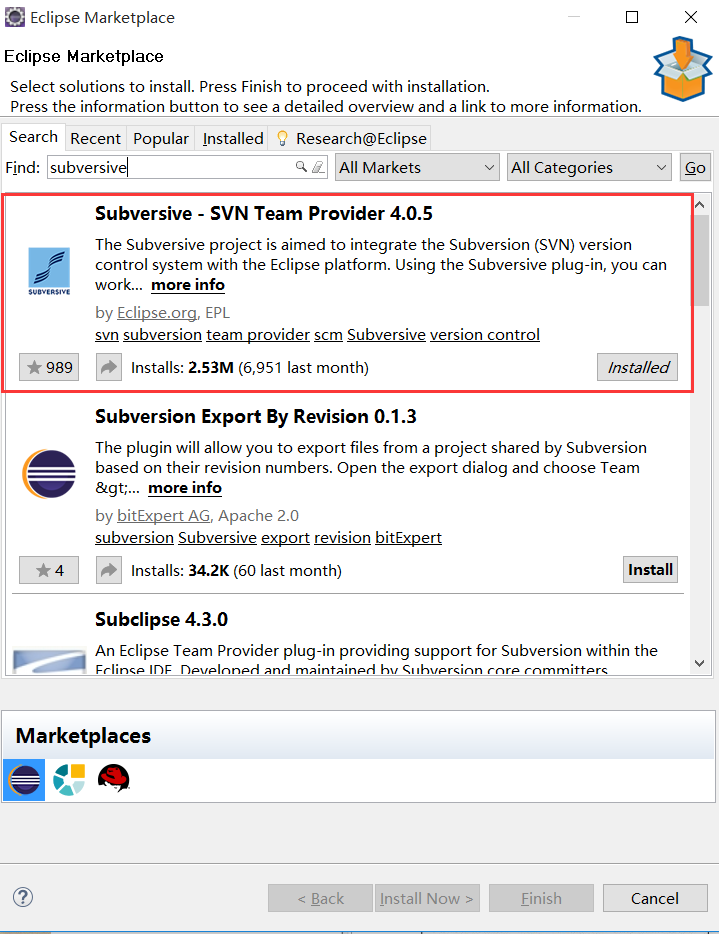
安装svn插件
安装subversive
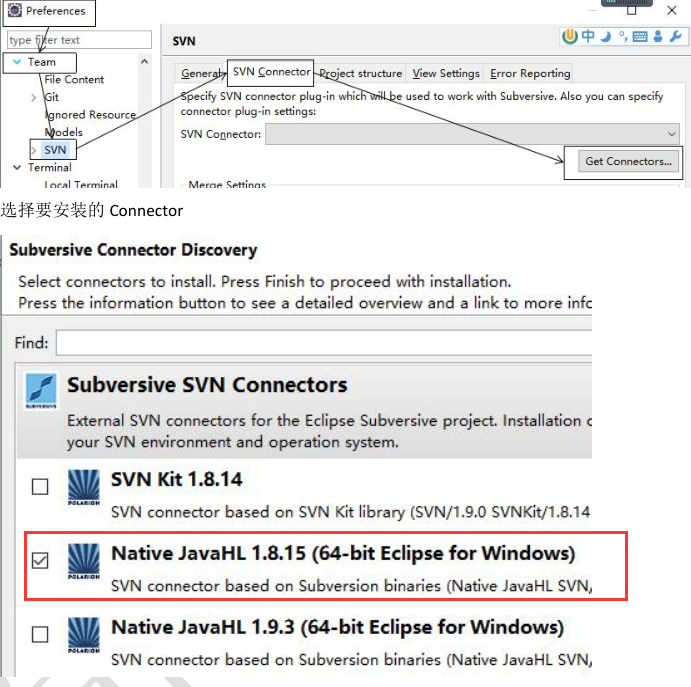
安装SVN Connector
查看svn状态图标

svn默认用户名和密码保存位置
C:UsersshenlibingAppDataRoamingSubversionauthsvn.simple
如果使用eclipse的话,连接资源库的时候选择记住用户名和密码,还会在以下路径存一份用户名和密码的信息
C:Usersshenlibing.eclipseorg.eclipse.equinox.security
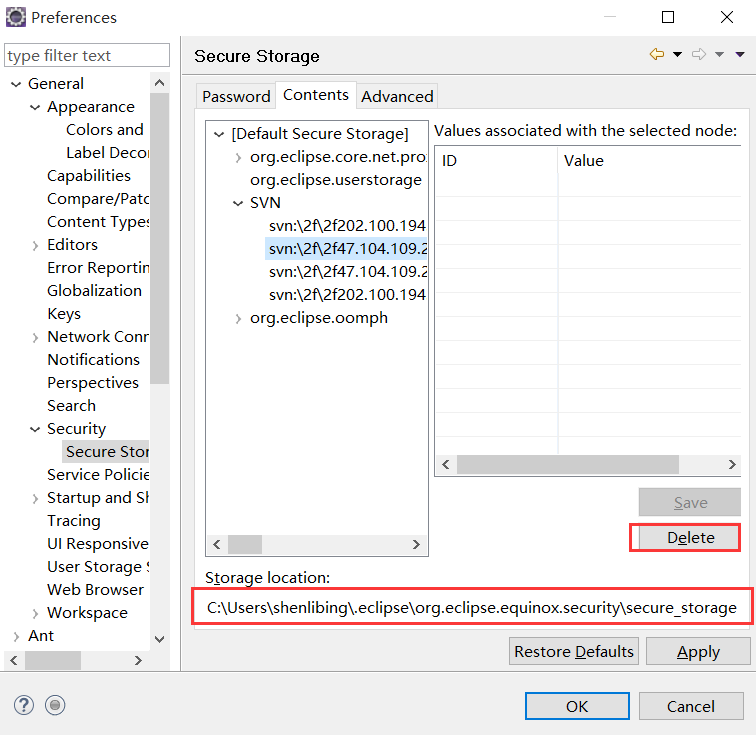
因此需要删除如上两处位置的内容,然后重启eclipse
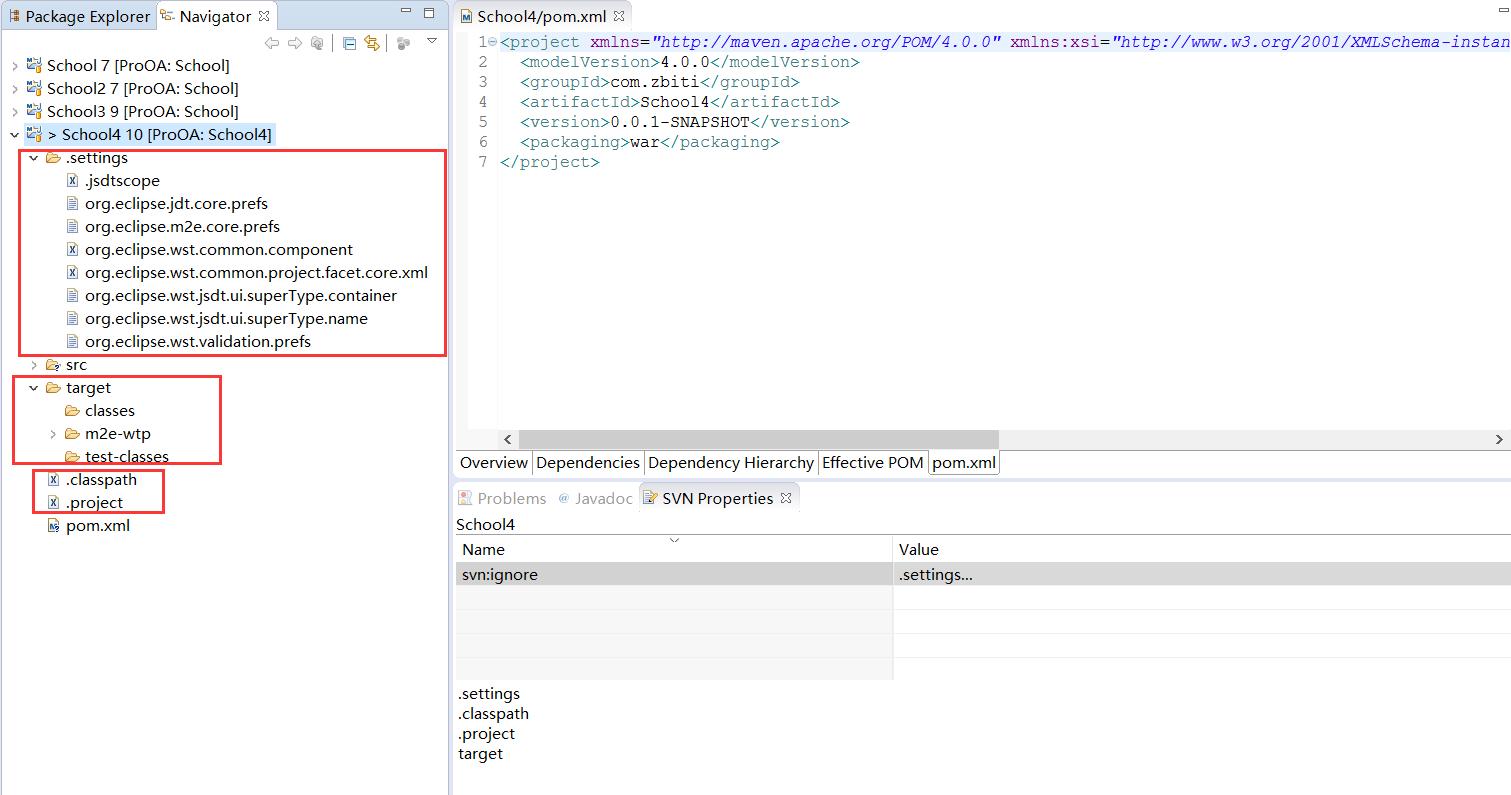
添加忽略文件
项目--->右键--->Team--->Set Properties
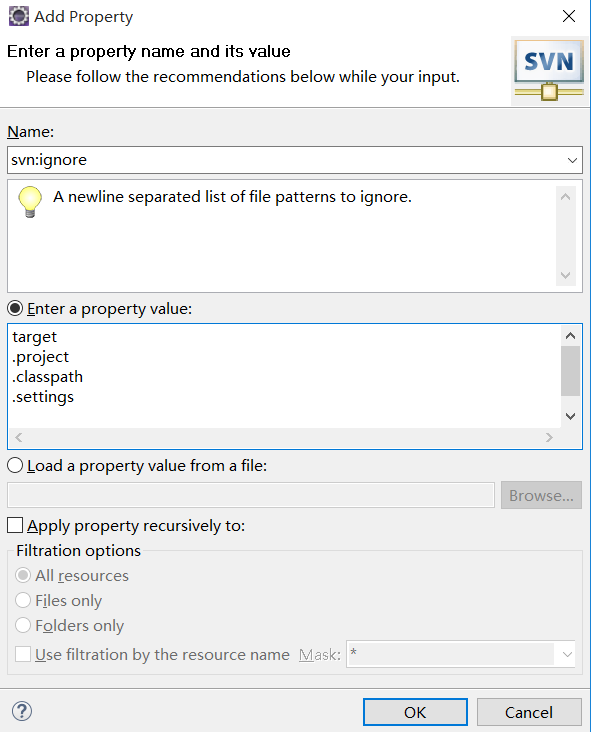
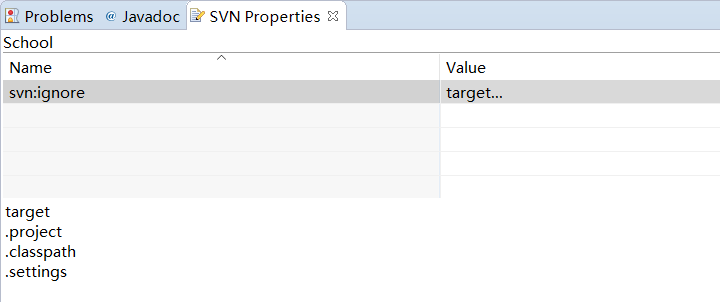
修改添加的忽略文件
项目--->右键--->Team--->Show Properties
全局添加忽略文件
进入到以下目录,修改config文件
C:UsersshenlibingAppDataRoamingSubversion
开启全局忽略文件注释
global-ignores = *.o *.lo *.la *.al .libs *.so *.so.[0-9]* *.a *.pyc *.pyo __pycache__ *.rej *~ #*# .#* .*.swp .DS_Store *.iml .idea */.idea/* .classpath .settings */.settings/* .project target */target/*
开启后eclipse需要重启,如果是eclipse和idea的话,target目录会自动忽略
分享上传项目
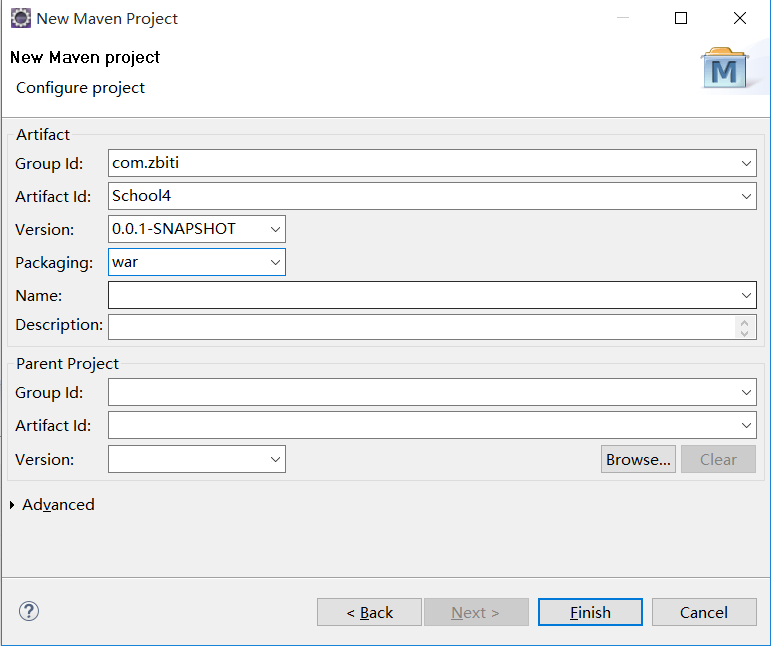
File--->New--->Project,新建maven项目
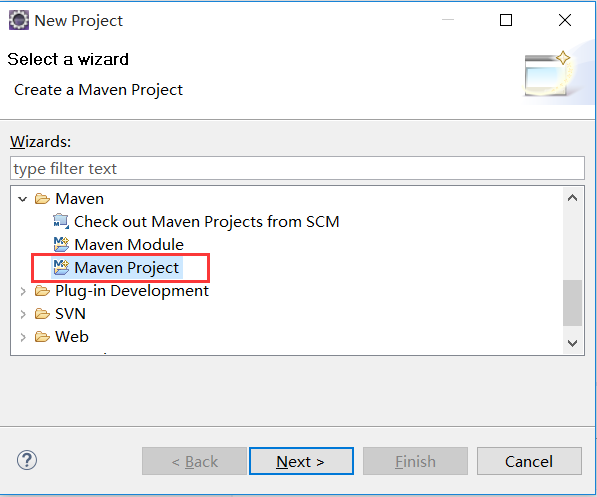
使用骨架

提示缺少web.xml文件
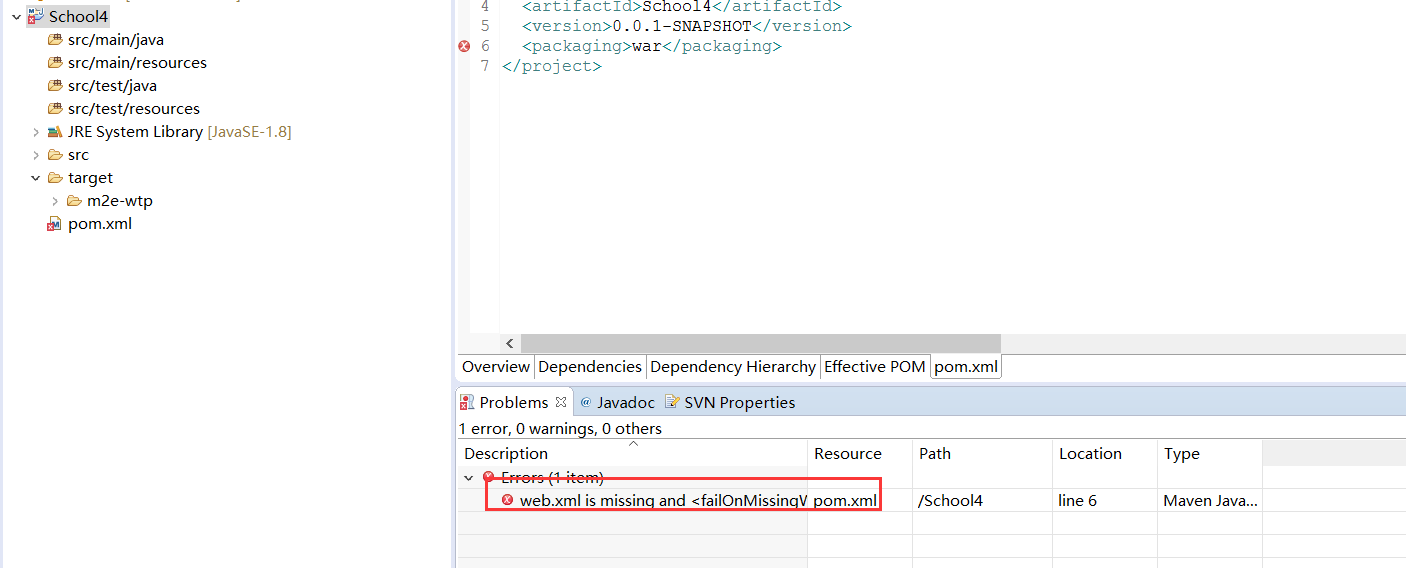
解决
项目--->右键--->Java EE Tools--->Generate Deployment Descriptor Stub
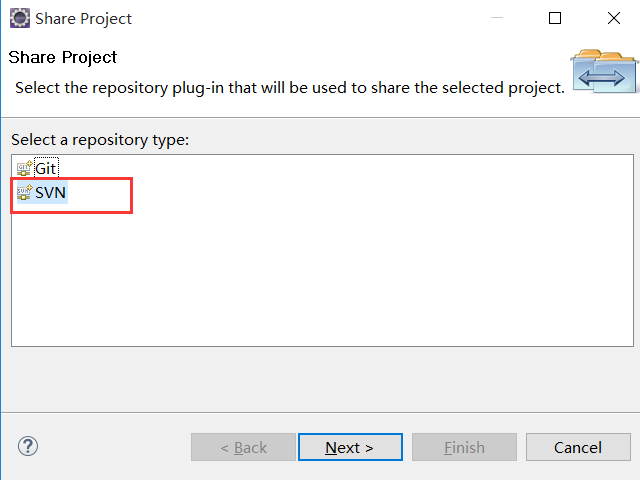
项目--->右键--->Team--->Share Project,上传项目
选择版本工具svn
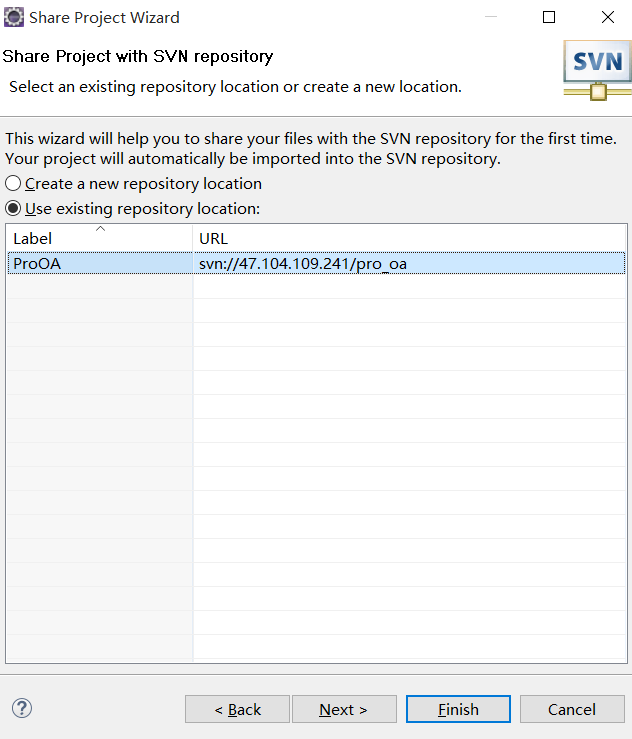
选择一个已经存在的资源库位置
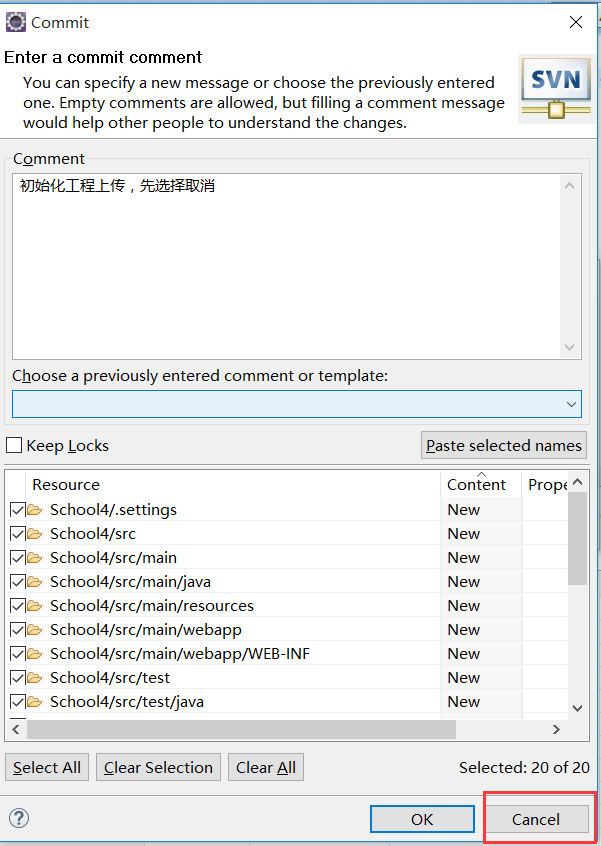
确认工程根目录下子目录和文件是否全部上传,先别上传
添加忽略上传的文件,观察图标前后变化
前
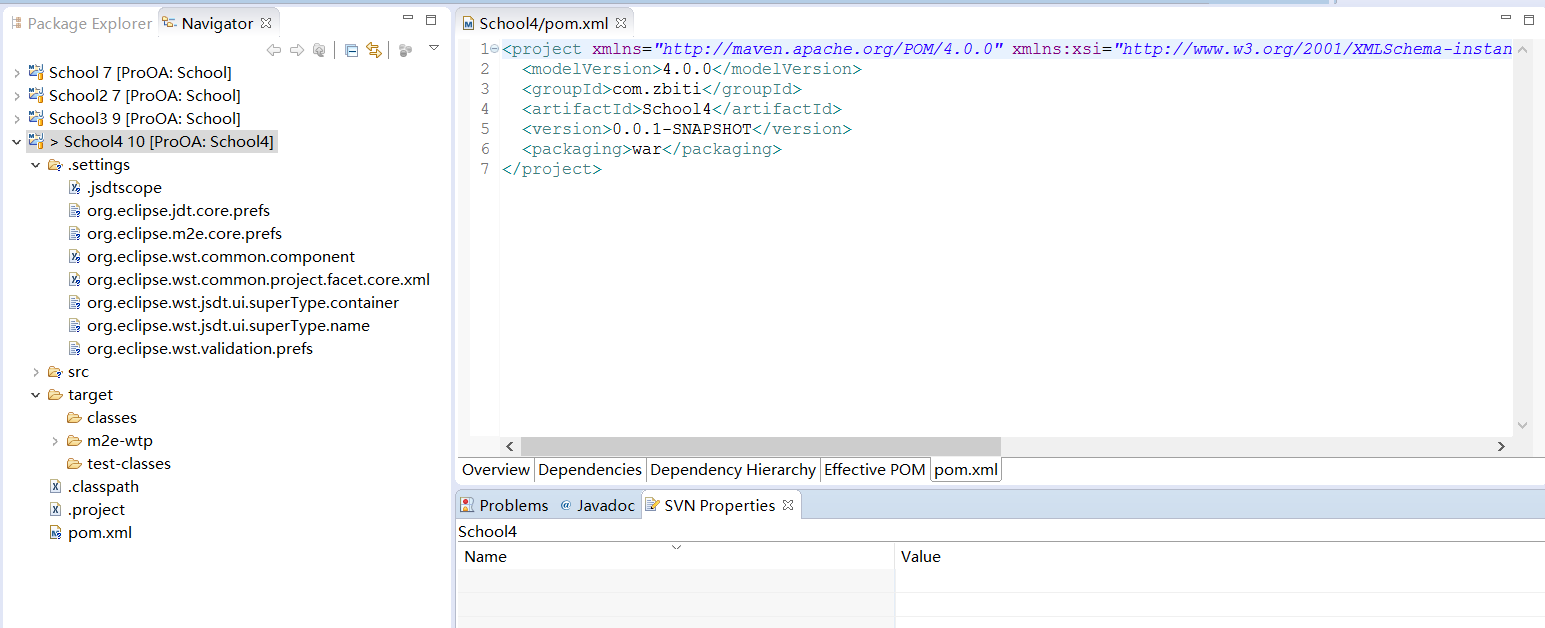
后
上传

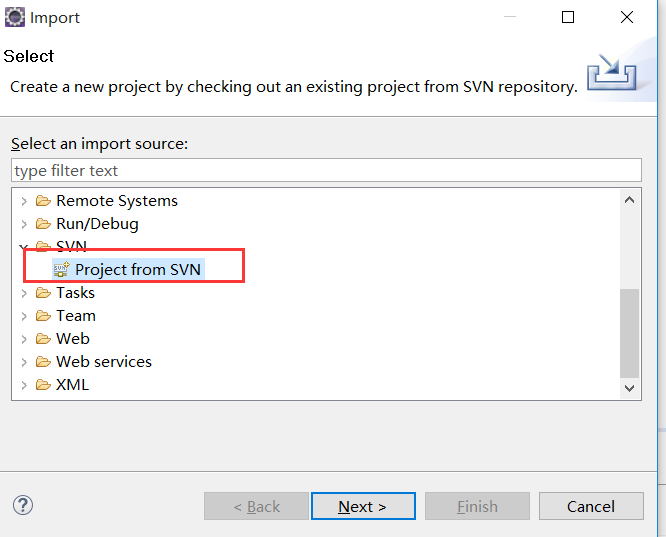
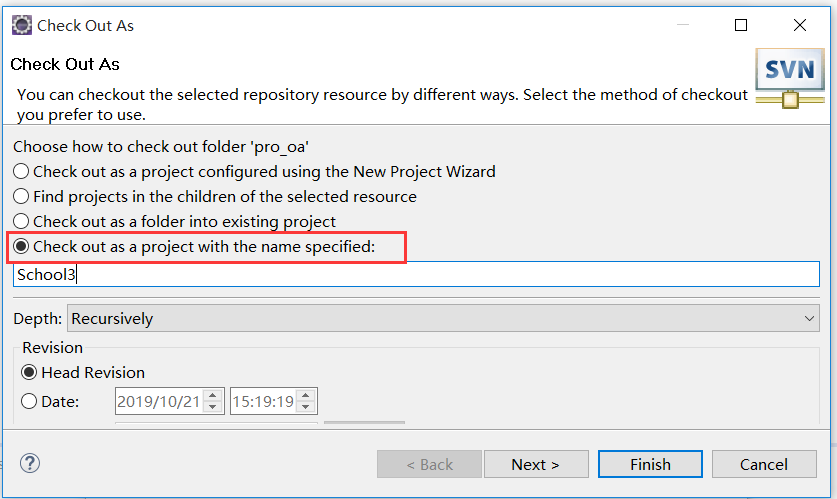
检出项目
File--->import
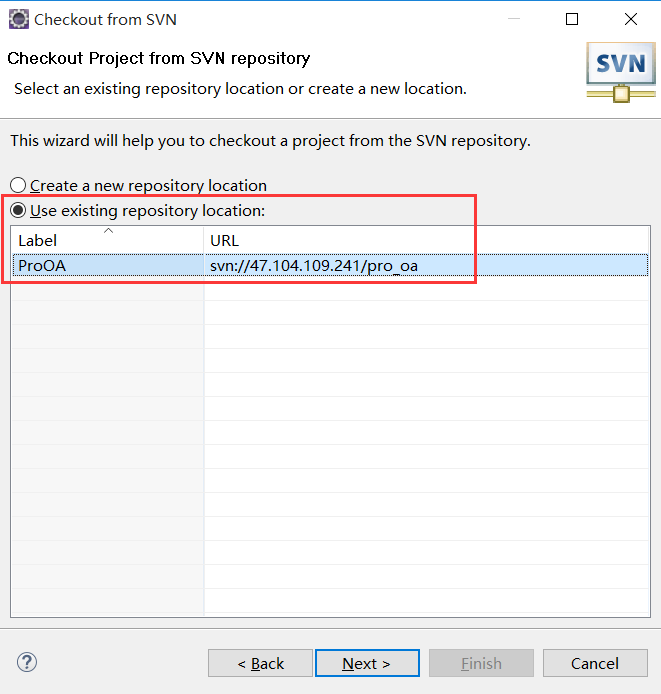
检出项目使用已经存在的仓库地址
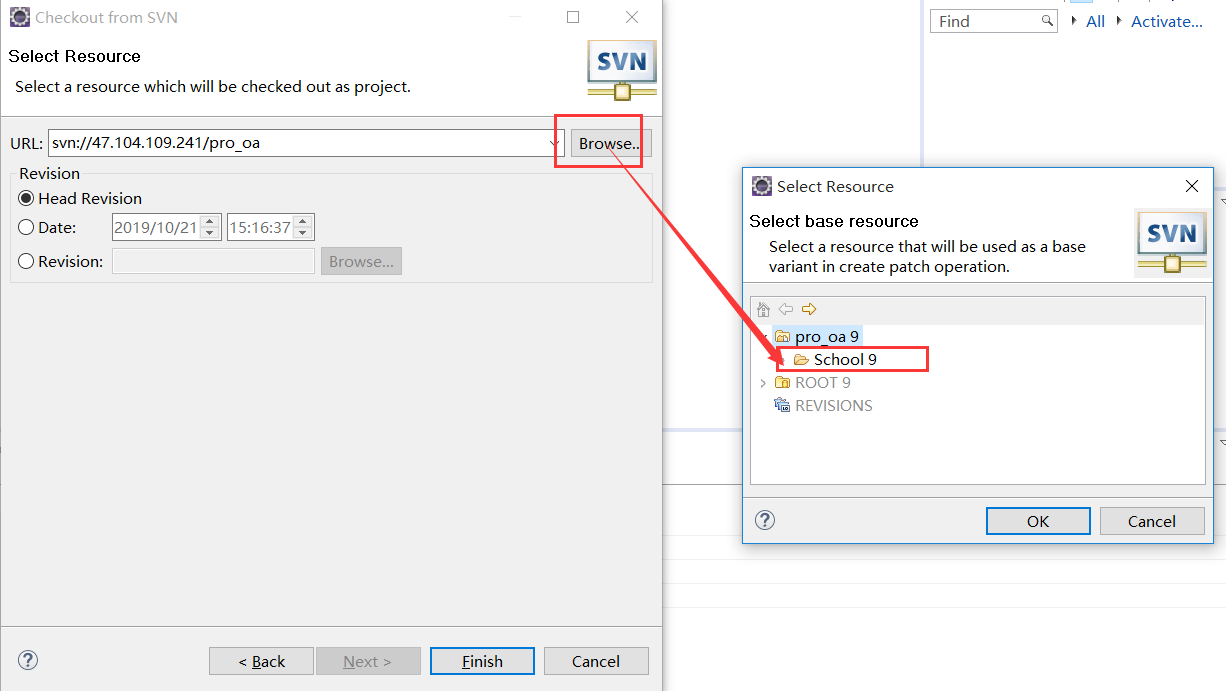
找到我们的项目
使检出的目录本身作为工程
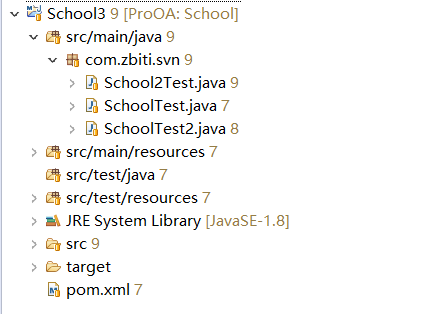
转换工程类型,项目--->右键--->Configure--->Convert to Maven Project
前
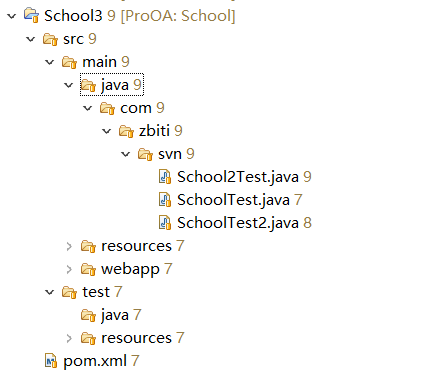
后
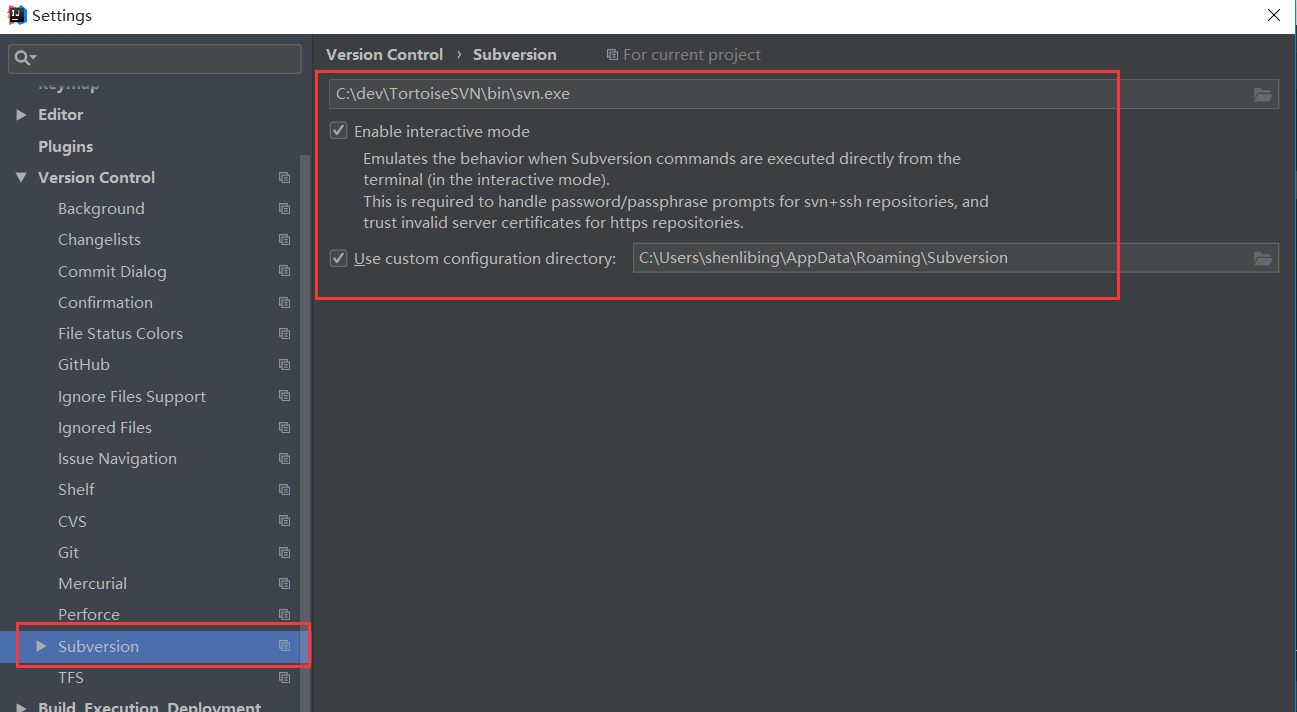
IDEA使用svn
必须安装乌龟TortoiseSVN,因为idea是使用乌龟的svn命令进行分享和检出的
下载安装64位的小乌龟
idea使用乌龟
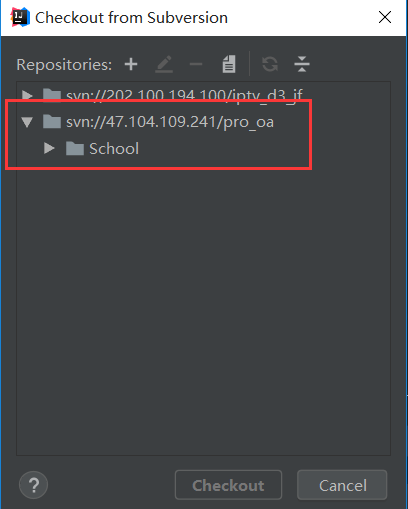
检出项目

输入url地址
添加全局忽略文件,通过小乌龟进行操作,任意目录,右键--->找到小乌龟--->Settings,开启全局注释
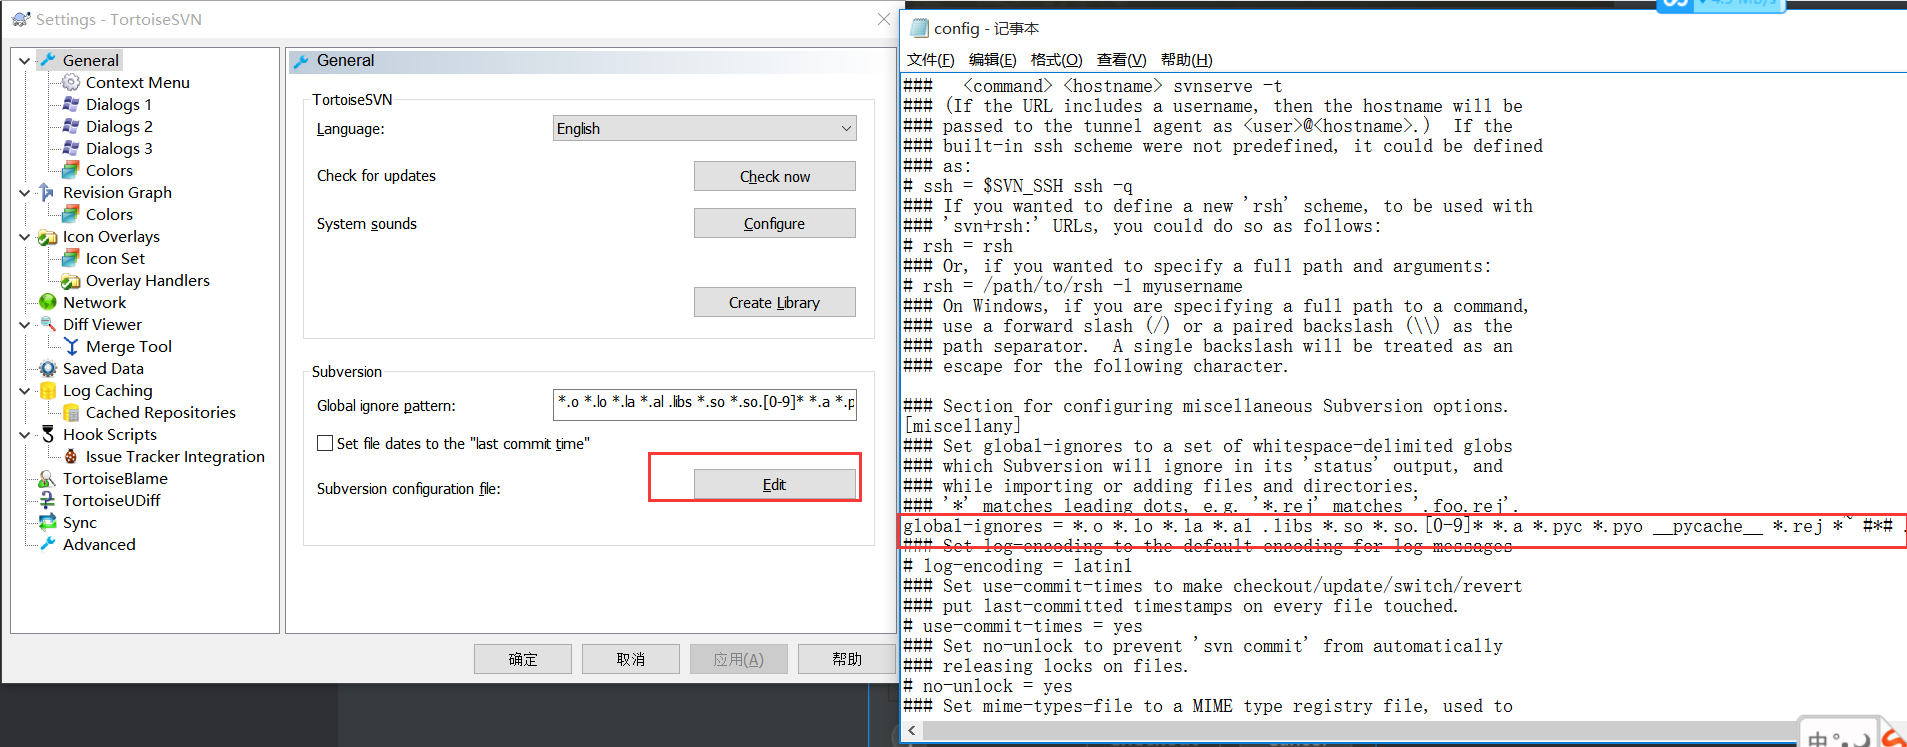
global-ignores = *.o *.lo *.la *.al .libs *.so *.so.[0-9]* *.a *.pyc *.pyo __pycache__ *.rej *~ #*# .#* .*.swp .DS_Store *.iml .idea */.idea/* .classpath .settings */.settings/* .project target */target/*
注意:idea不管是使用svn还是Git都是需要安装客户端工具的,比如小乌龟,通过客户端工具操作远程的svn版本库或者Git的版本库,这一点和eclipse不太一样,eclipse可以直接使用插件
本文由博客一文多发平台 OpenWrite 发布!