前一段看到Yupoo有个日历相册还不错,很精美,具体地址为http://www.yupoo.com/explore/interesting?year=2008&month=12,看到这个日历效果,自己也想用asp.net日历控件尝尝鲜,那么就动手设计看看。
最终的运行效果为:(可以兼容大多数的浏览器)
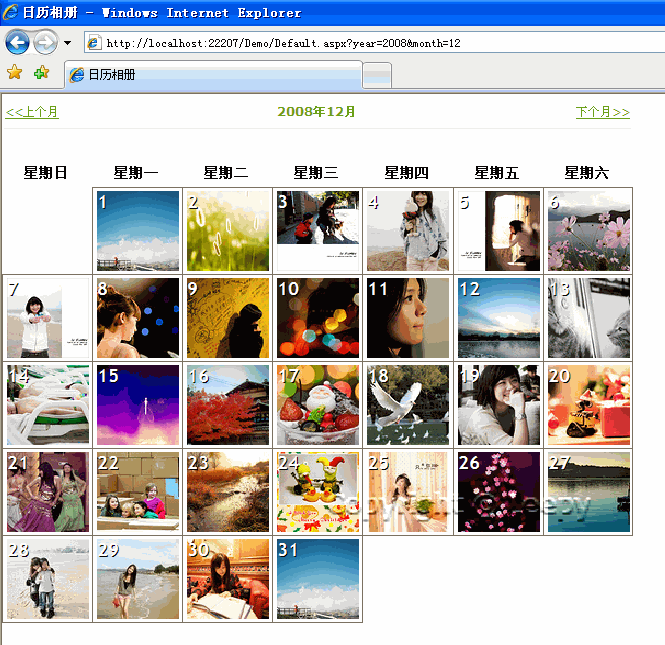
图一
点击其中某一天的图片,可以看到:
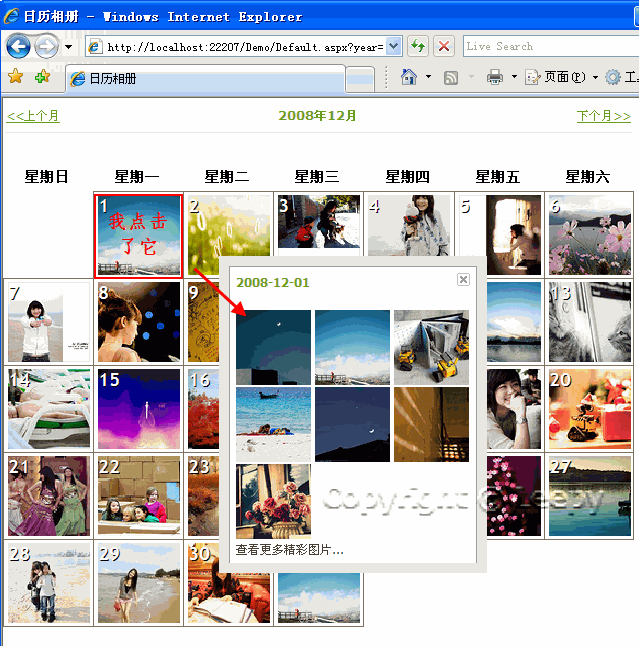
图二
现在讲讲我的思路:
1. 首先先创建一个数据库,我这里简单起见,建立了一个data.mdb的Access数据库,添加表PhotoInfo,具体的设计视图为:
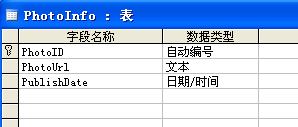
也是简单起见,PhotoUrl字段作为图片存储路径,PublishDate作为上传时间,这里还可以有其他字段,如用户ID等等,我省略掉了。

打开表后,具体的数据为类似这样的数据;
2. 在Default.aspx页面上添加日历控件
<asp:Calendar ID="calendar" runat="server"></asp:Calendar>运行下结果:
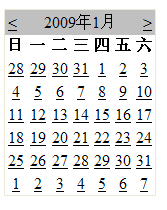
嗯,看起来很简陋的日历控件,现在我加上属性 DayNameFormat="Full",DayNameFormat属性还包括FirstLetter,FirstTwoLetters,Short,Shortest,现在再运行一下:

加上属性 BorderWidth="0":

日历外框消失了。
加上<TitleStyle CssClass="day_title" BorderWidth="0px" BackColor="White" Width="700" />,通过day_title设置样式:
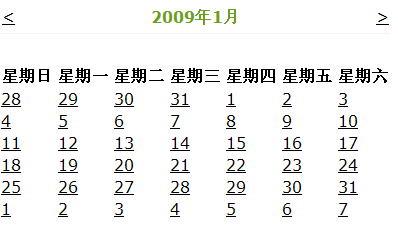
加上<DayStyle Width="86" Height="86" BorderColor="#7E7262" HorizontalAlign="Left" VerticalAlign="Top" />,得到图:

设置了每一日中的宽度和高度。
3. 在Default.aspx.cs后台代码的Page_Load事件中,首先初始化上一月,下一月的赋值:
DateTime nextMonth = calendar.VisibleDate.AddMonths(1);
calendar.PrevMonthText = "<a class=np href=\"Default.aspx?year=" + prevMonth.Year + "&month=" + prevMonth.Month + "\"><<上个月</a>";
calendar.NextMonthText = "<a class=np href=\"Default.aspx?year=" + nextMonth.Year + "&month=" + nextMonth.Month + "\">下个月>></a>";
其中PrevMonthText和NextMonthText属性为上一月,下一月的HTML内容。
![]()
4. 现在首先得到一个DataSet数据,以便于绑定到日历控件中。
{
DateTime firstDate = new DateTime(calendar.VisibleDate.Year, calendar.VisibleDate.Month, 1);
DateTime lastDate = firstDate.AddMonths(1);
FillData(firstDate, lastDate);
}
protected void FillData(DateTime startTime, DateTime endTime)
{
StringBuilder builder = new StringBuilder();
builder.Append("SELECT PhotoID, PhotoUrl, PublishDate FROM PhotoInfo, ");
builder.Append("(SELECT FORMAT(PublishDate, 'yyyy-mm-dd') AS PDate, MAX(PhotoID) AS PID FROM PhotoInfo ");
builder.Append("GROUP BY FORMAT(PublishDate, 'yyyy-mm-dd')) t1 ");
builder.Append("WHERE t1.PID=PhotoInfo.PhotoID ");
builder.Append("AND PublishDate>=#" + startTime + "# AND PublishDate<#" + endTime + "#"); //暂时用连接串来表示
ds = AccessHelper.ExecuteDataSet(builder.ToString());
}
AccessHelper类为了执行SQL语句,返回数据集;这样就可以将某个月份的图片每天的最后一张 查询出来了。
5. 现在这段是实现的重点代码,给日历控件添加一个事件OnDayRender,OnDayRender是在呈现日的时候激发:
{
if (e.Day.IsOtherMonth) //当日期不在当前月份中时不显示
{
e.Cell.Controls.Clear();
}
else
{
e.Cell.BorderWidth = 1;
e.Cell.CssClass = "FullDay";
DateTime nextDate;
Literal ltl = new Literal();
if (ds != null)
{
foreach (DataRow dr in ds.Tables[0].Rows)
{
nextDate = DateTime.Parse(((DateTime)dr["PublishDate"]).ToShortDateString());
if (nextDate == e.Day.Date) //比较每个天是否与当前控件日期相同
{
e.Cell.CssClass = "NotDay";
ltl.Text = "";
string mediaPath = dr["PhotoUrl"].ToString();
mediaPath = ResolveUrl("~/") + "images/" + dr["PhotoUrl"].ToString();
ltl.Text = "<a class=date href=\"javascript:void(0);\"><IMG onclick=\"ShowPhotos(this, '" + nextDate.ToShortDateString() + "');\"class=\"Thumb\" src=" + mediaPath + " width=\"82\" height=\"80\" /></A>";
}
}
}
ltl.Text += "<DIV class=\"BlackDate\">" + e.Day.Date.Day + "</DIV>";
ltl.Text += e.Day.Date == calendar.TodaysDate ? "<DIV class=\"RedDate\">" + e.Day.Date.Day + "</DIV>" : "<DIV class=\"WhiteDate\">" + e.Day.Date.Day + "</DIV>";
e.Cell.Controls.Add(ltl);
}
}
增加相应的CSS代码:
可以得到刚开始时 图一 的效果。
6. 至于图二,我这里添加了showdiv.js
var iWidth = $("#divPhoto").width();
var iHeight = $("#divPhoto").height();
$("#divPhoto").css("top",(document.body.clientHeight - iHeight)/2 + 'px');
$("#divPhoto").css("left",(document.body.clientWidth - iWidth)/2 + 'px');
$("#divPhoto").css("display","inline");
$("#spanDate").html(pDate);
var ret = $.ajax({url:"ShowPic.aspx", data:{"date":pDate}, async: false}).responseText;
$("#divMore").html(ret);
}
function ClosePhotos() {
$("#divPhoto").css("display","none");
$("#spanDate").html("");
$("#divMore").html("");
}
其中ShowPhotos是居中显示,并且利用AJAX得到ShowPic.aspx返回的HTML内容;
最终完成了 图二 的效果。
代码大家自己去查看吧,我这里附上我的源代码:
谢谢大家阅读![]() !
!
转载时请注明出处,谢谢合作!
