一、什么是网卡bond
所谓bond,就是把多个物理网卡绑定成一个逻辑上的网卡,使用同一个IP工作,在增加带宽的同时也可以提高冗余性,一般使用较多的就是来提高冗余,分别和不同交换机相连,提高可靠性,但有时服务器带宽不够了也可以用作增加带宽。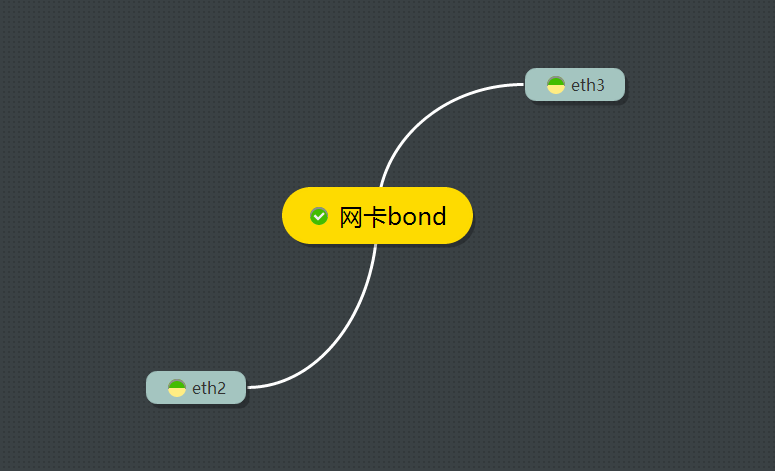
二、网卡bond的模式
网卡绑定mode共有七种(0~6) bond0、bond1、bond2、bond3、bond4、bond5、bond6。 常用的有三种:
mode=0:平衡负载模式,有自动备援,但需要”Switch”支援及设定。
mode=1:自动备援模式,其中一条线若断线,其他线路将会自动备援。
mode=6:平衡负载模式,有自动备援,不必”Switch”支援及设定。
我就我的一次bonding经历,来给大家分享一下,如何做网卡bond,我这次做的是bond6,在centos6.0上完成。
三、网卡bond前期准备
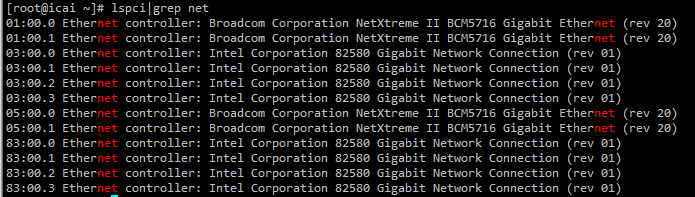
1.由于服务器网卡比较多,逻辑顺序与物理顺序不一定一致。首先要确定哪几块网卡布置了网线,一般是有两块网卡对应两根网线,分别连接不同的交换机。
查看所有网卡
$lspci|grep net
查看网卡2的信息,Link detected:yes表示有网线插入
$ethtool eth2

如果Link detected:no 的话,尝试用命令ifconfig eth2 up,如果用ethtool查看任然为no的话,才能说明此网卡确实没有网线插入。
2.注意如果ifcfg-bond0的配置文件如果是从其他网卡配置文件拷贝过来的,HWADDR地址一定要删除,DEVICE名字要改。
3.NetworkManager要关闭,建议临时和永久都关闭一下。
$chkconfig NetworkManager off
$service NetworkManager stop
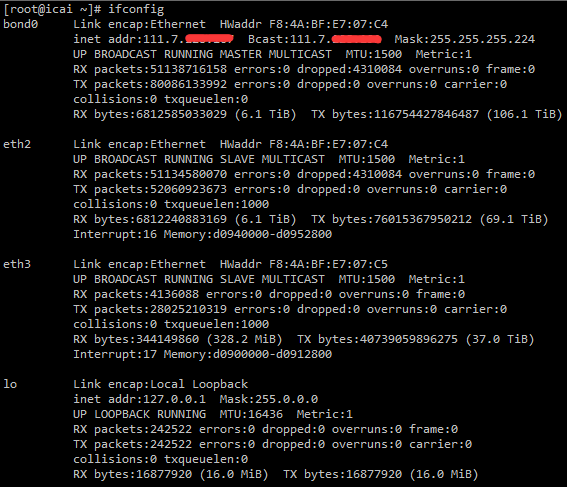
四、更改要bond网卡的配置文件
eth2,eth3为bond前的网卡名称,bond0为bond后的网卡名称,我们需要对这三个配置文件做更改。
eth2:
$vi /etc/sysconfig/network-scripts/ifcfg-eth2
 DEVICE=eth2
 HWADDR=44:A8:42:25:7C:FE
 BOOTPROTO=none
 ONBOOT=yes
 SLAVE=yes
 MASTER=bond0
 TYPE=Ethernet
eth3:
$vi /etc/sysconfig/network-scripts/ifcfg-eth3
 DEVICE=eth3
 HWADDR=44:A8:42:25:7D:01
 BOOTPROTO=none
 ONBOOT=yes
 SLAVE=yes
 MASTER=bond0
 TYPE=Ethernet
bond0:
$vi /etc/sysconfig/network-scripts/ifcfg-bond0
 DEVICE=bond0
 BOOTPROTO=static
 ONBOOT=yes
 IPADDR=100.100.100.100
 NETMASK=255.255.255.0
 GATEWAY=100.100.100.1
 TYPE=Ethernet
五、配置模式为bond6
$vi /etc/modprobe.d/dist.conf
在最后添加下面2行
 alias bond0 bonding
 options bond0 miimon=100 mode=6
也可以用下面的命令添加
$sed -i '$a alias bond0 bonding' /etc/modprobe.d/dist.conf
$sed -i '$a options bond0 miimon=100 mode=6' /etc/modprobe.d/dist.conf
六、重启网络服务
$service network restart
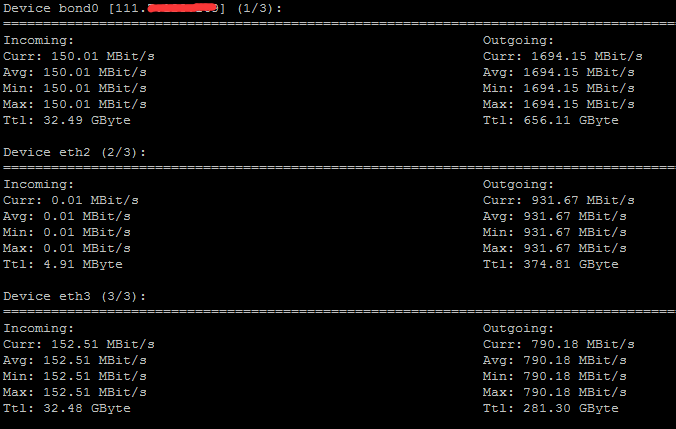
七、用nload查看流量
$vim /root/.bash_profile
export PATH
 alias nload='nload -m -s 5 -u m -t 2000 bond0 eth2 eth3'
$source /root/.bash_profile
$nload
本文转载自:http://www.linuxprobe.com/actual-combat-nic-bond.html