前言
问题
学习selenium的同学估计大多数都遇见过一个问题
明明页面已经精准的定位到了元素,但是执行脚本的时候却经常报错没找到元素。其实原因很简单,就是脚本执行的速度很快,而浏览器加载页面的时候由于网速,css渲染,JS等各种原因导致页面加载缓慢,所以当脚本执行到定位一个元素的代码时,页面还未加载出这个元素,进而导致代码报错。那么有没有办法解决这种问题呢?of course,如果解决不了还叫自动化嘛
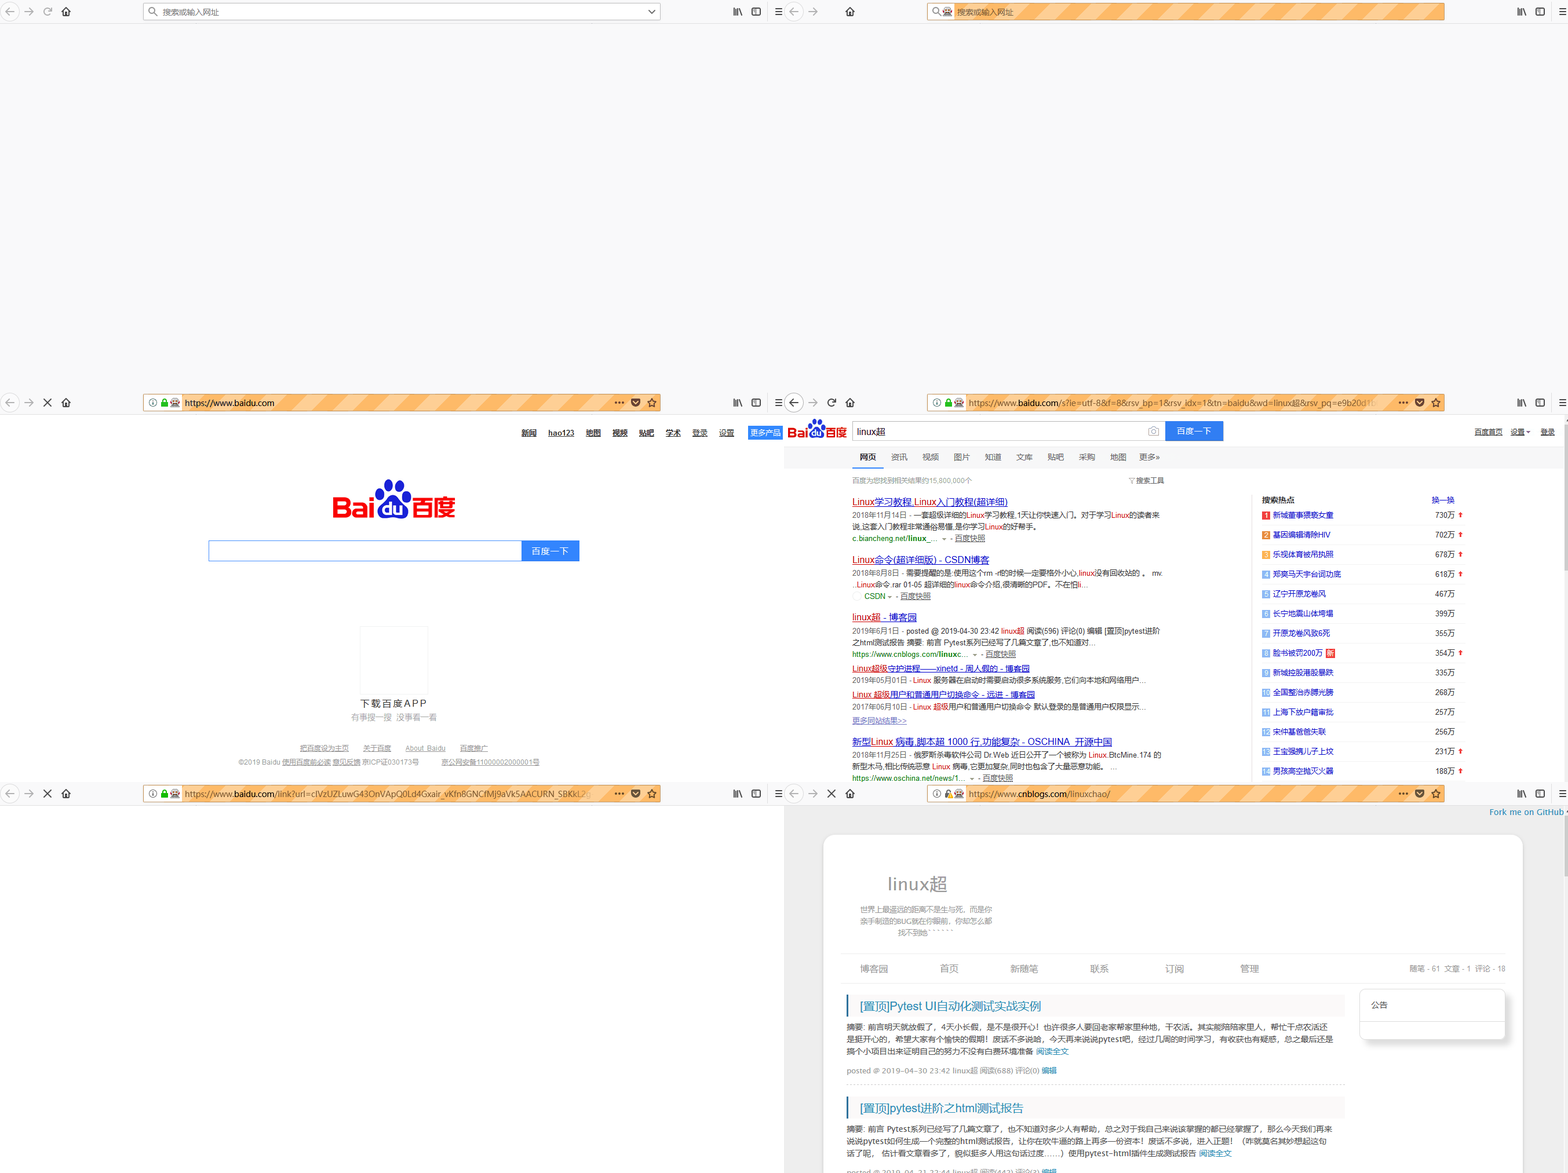
我们先看下面的一个用例(百度首页输入“linux超”关键词,点击“百度一下”, 在搜索结果中找到我的博客地址并点击进入我的博客)我们不使用任何等待方法
"""
------------------------------------
@Time : 2019/7/4 12:34
@Auth : linux超
@File : nowait.py
@IDE  : PyCharm
@Motto: Real warriors,dare to face the bleak warning,dare to face the incisive error!
@QQ   : 28174043@qq.com
@GROUP: 878565760
------------------------------------
"""
import time

from selenium import webdriver
import unittest
from selenium.common.exceptions import NoSuchElementException, TimeoutException


class TestWait(unittest.TestCase):
    def setUp(self):
        self.driver = webdriver.Firefox()
        self.driver.get("https://www.baidu.com")
        self.driver.maximize_window()

    def test_no_wait(self):
        try:
            # 等输入框出现在DOM树中
            input_box = self.driver.find_element_by_id('kw')
            input_box.send_keys('linux超')  # 输入linux超
            # 等元素可点击
            query_btn = self.driver.find_element_by_id('su')
            query_btn.click()  # 点击
            # 等输入框出现在DOM树中
            my_blog = self.driver.find_element_by_xpath('//*[text()="https://www.cnblogs.com/"]')  # 搜索结果找到我的博客
            my_blog.click()  # 进入我的博客
            time.sleep(2)  # 这里我是为了看到效果(跳转到我的博客首页)
        except (NoSuchElementException, TimeoutException) as e:
            raise e

    def tearDown(self):
        self.driver.quit()


if __name__ == '__main__':
    unittest.main()
执行结果
E
======================================================================
ERROR: test_no_wait (__main__.TestWait)
----------------------------------------------------------------------
Traceback (most recent call last):
  File "D:/MyThreading/nowait.py", line 38, in test_no_wait
    raise e
  File "D:/MyThreading/nowait.py", line 34, in test_no_wait
    my_blog = self.driver.find_element_by_xpath('//*[text()="https://www.cnblogs.com/"]')  # 搜索结果找到我的博客
  File "C:Python36libsite-packagesseleniumwebdriver
emotewebdriver.py", line 394, in find_element_by_xpath
    return self.find_element(by=By.XPATH, value=xpath)
  File "C:Python36libsite-packagesseleniumwebdriver
emotewebdriver.py", line 978, in find_element
    'value': value})['value']
  File "C:Python36libsite-packagesseleniumwebdriver
emotewebdriver.py", line 321, in execute
    self.error_handler.check_response(response)
  File "C:Python36libsite-packagesseleniumwebdriver
emoteerrorhandler.py", line 242, in check_response
    raise exception_class(message, screen, stacktrace)
selenium.common.exceptions.NoSuchElementException: Message: Unable to locate element: //*[text()="https://www.cnblogs.com/"]


----------------------------------------------------------------------
Ran 1 test in 14.010s

FAILED (errors=1)

Process finished with exit code 1
不使用任何等待方法的时候,定位搜索结果的时候就报错了,因为百度搜索关键词的时候结果页面会有一定时间的加载过程,还未加载完成时,代码就执行了定位方法,因此报错
强制等待
强制等待其实是python内置模块time的一个方法sleep(n),顾名思义哈,强制等待就是死等固定时间n秒,比如你女票叫你在楼下等10分钟她化妆,那么你就必须等10分钟,10分钟后她还不来,那你就可以该干嘛干嘛去了,定位元素的时候也可以使用这个方法,在定位元素之前,等待固定的时间,再定位。我们使用这个方法修改上面的错误用例
"""
------------------------------------
@Time : 2019/7/4 12:34
@Auth : linux超
@File : nowait.py
@IDE  : PyCharm
@Motto: Real warriors,dare to face the bleak warning,dare to face the incisive error!
@QQ   : 28174043@qq.com
@GROUP: 878565760
------------------------------------
"""
import time

from selenium import webdriver
import unittest
from selenium.common.exceptions import NoSuchElementException, TimeoutException


class TestWait(unittest.TestCase):
    def setUp(self):
        self.driver = webdriver.Firefox()
        self.driver.get("https://www.baidu.com")
        self.driver.maximize_window()

    def test_no_wait(self):
        try:
            # 等输入框出现在DOM树中
            input_box = self.driver.find_element_by_id('kw')
            input_box.send_keys('linux超')  # 输入linux超
            # 等元素可点击
            query_btn = self.driver.find_element_by_id('su')
            query_btn.click()  # 点击
            # 设置强制等待5秒,再定位元素
            time.sleep(5)
            # 等输入框出现在DOM树中
            my_blog = self.driver.find_element_by_xpath('//*[text()="https://www.cnblogs.com/"]')  # 搜索结果找到我的博客
            my_blog.click()  # 进入我的博客
            time.sleep(2)  # 这里我是为了看到效果(跳转到我的博客首页)
        except (NoSuchElementException, TimeoutException) as e:
            raise e

    def tearDown(self):
        self.driver.quit()


if __name__ == '__main__':
    unittest.main()
执行结果
.
----------------------------------------------------------------------
Ran 1 test in 21.043s

OK

Process finished with exit code 0
没错,执行通过了,但是强制等待有很大的弊端,比如加载页面只需要1秒钟就能定位到元素,但是你设置了超过1秒的等待时间,严重浪费了其他时间,而且你无法判定页面加载完成到底需要多少时间
那么你的脚本其实也是不稳定的, 再比如,你为了节省脚本的执行时间, 你只设置了1秒的等待,而且脚本通过了,但是当你的网络很差的时候,1秒的等待就无法成功定位到元素了,导致脚本执行失败
因此只要有一个因素改变就可能导致脚本的失败很不稳定,为了解决这种问题,selenium webdriver 又引入了隐士等待
隐士等待
隐士等待表示在自动化实施过程中,为查找页面元素或执行命令设置一个最长等待时间,如果在规定时间内页面元素被找到或者命令被执行完成,则执行下一步,否则继续等待直到设置的最长等待时间截至
使用webdriver 的implicitly_wait()方法设置隐士等待,我们把前面用例使用隐士等待再做修改
实例
"""
------------------------------------
@Time : 2019/7/4 12:37
@Auth : linux超
@File : implicitly_wait.py
@IDE  : PyCharm
@Motto: Real warriors,dare to face the bleak warning,dare to face the incisive error!
@QQ   : 28174043@qq.com
@GROUP: 878565760
------------------------------------
"""
import time

from selenium import webdriver
import unittest
from selenium.common.exceptions import NoSuchElementException, TimeoutException


class TestWait(unittest.TestCase):
    def setUp(self):
        self.driver = webdriver.Firefox()

    def test_implicitly_wait(self):
        self.driver.get("https://www.baidu.com")
        self.driver.maximize_window()
        self.driver.implicitly_wait(10)
        try:
            input_box = self.driver.find_element_by_id('kw')  # 搜索框
            input_box.send_keys('linux超')  # 输入linux超
            query_btn = self.driver.find_element_by_id('su')  # 百度一下按钮
            query_btn.click()  # 点击
            my_blog = self.driver.find_element_by_xpath('//*[text()="https://www.cnblogs.com/"]')  # 搜索结果找到我的博客
            my_blog.click()  # 进入我的博客
            time.sleep(2)  # 这里我是为了看到效果(跳转到我的博客首页)
        except (NoSuchElementException, TimeoutException) as e:
            raise e

    def tearDown(self):
        self.driver.quit()


if __name__ == '__main__':
    unittest.main()
执行过程

隐士等待的好处是不用像强制等待那样死等固定时间n秒,可以在一定程度上提升测试用例的执行效率和脚本的稳定性,不过这种方法也存在一个弊端,那就是程序会一直等待整个页面加载完成(页面左上角不再转圈圈),才会继续执行下一步操作,比如某些时候我们想要的页面元素早就加载完了,但是由于个别JS等资源加载稍慢,此时程序仍然会等待页面全部加载完成才会继续执行下一步,这无形中加长了测试用例的执行时间
为了避免这个弊端,webdriver 又引入了一种等待方式,叫显示等待。还有一点需要说明,隐士等待只需要设置一次,然后它将在driver的整个生命周期都起作用
显示等待
上面我们介绍了隐士等待,下面再介绍一个更加智能的等待方式--显示等待。通过selenium.webdriver.support.ui模块提供的WebDriverWait类,再结合该类的until()和until_not()方法,并自定义好显示等待的条件,然后根据判断条件而进行灵活的等待,显示等待更比隐士等待节约脚本执行时间,推荐尽量使用显示等待的方式
设置了显示等待,程序会每个一段时间(默认是0.5s)执行一下自定义的判断条件,如果条件成立就执行下一步操作,否则继续等待,直到超过设置的最长等待时间,然后抛出超时异常
WebDriverWait类解析
初始化方法
 1 class WebDriverWait(object):
 2     def __init__(self, driver, timeout, poll_frequency=POLL_FREQUENCY, ignored_exceptions=None):
 3         """Constructor, takes a WebDriver instance and timeout in seconds.
 4
 5            :Args:
 6             - driver - Instance of WebDriver (Ie, Firefox, Chrome or Remote)
 7             - timeout - Number of seconds before timing out
 8             - poll_frequency - sleep interval between calls
 9               By default, it is 0.5 second.
10             - ignored_exceptions - iterable structure of exception classes ignored during calls.
11               By default, it contains NoSuchElementException only.
12
13            Example:
14             from selenium.webdriver.support.ui import WebDriverWait

15             element = WebDriverWait(driver, 10).until(lambda x: x.find_element_by_id("someId"))

16             is_disappeared = WebDriverWait(driver, 30, 1, (ElementNotVisibleException)).

17                         until_not(lambda x: x.find_element_by_id("someId").is_displayed())
18         """
参数解释
driver:webdriver的实例对象
timeout:最长的显示等待时间,单位为s
poll_frequency:调用频率,也就是再timeout设置的时间内,每隔poll_frequency时间执行一次判断条件,默认是0.5
ignored_exception:执行过程中忽略的异常类型,默认忽略NoSuchElelmentException异常
WebDriverWait提供的方法
until(method, message='')
在规定等待时间内,每隔一段时间调用一下method方法,直到其返回值为True,如果超时,抛出带有message异常信息的TimeoutException异常
until_not(method, message='')
与until方法相反,不赘述
实例
现在我们使用显示等待实现之前的用例
"""
------------------------------------
@Time : 2019/7/4 12:50
@Auth : linux超
@File : webdriverWait.py
@IDE  : PyCharm
@Motto: Real warriors,dare to face the bleak warning,dare to face the incisive error!
@QQ   : 28174043@qq.com
@GROUP: 878565760
------------------------------------
"""
import time

from selenium import webdriver
import unittest
from selenium.common.exceptions import NoSuchElementException, TimeoutException
from selenium.webdriver.support.ui import WebDriverWait
from selenium.webdriver.support import expected_conditions as EC
from selenium.webdriver.common.by import By


class TestWait(unittest.TestCase):
    def setUp(self):
        self.driver = webdriver.Firefox()

    def test_webdriver_wait(self):
        self.driver.get("https://www.baidu.com")
        self.driver.maximize_window()
        try:
            # 等输入框出现在DOM树中
            input_box = WebDriverWait(self.driver, 10, 0.3).until(EC.visibility_of_element_located((By.ID, 'kw')))
            input_box.send_keys('linux超')  # 输入linux超
            # 等元素可点击
            query_btn = WebDriverWait(self.driver, 10, 0.3).until(EC.element_to_be_clickable((By.ID, 'su')))
            query_btn.click()  # 点击
            # 等输入框出现在DOM树中
            my_blog = WebDriverWait(self.driver, 10, 0.3).until(EC.visibility_of_element_located((By.XPATH, '//*[text()="https://www.cnblogs.com/"]'))) # 搜索结果找到我的博客
            my_blog.click()  # 进入我的博客
            time.sleep(2)  # 这里我是为了看到效果(跳转到我的博客首页)
        except (NoSuchElementException, TimeoutException) as e:
            raise e

    def tearDown(self):
        self.driver.quit()


if __name__ == '__main__':
    unittest.main()
可以看到显示等待需要配合expected_conditions模块中的各个场景方法使用,具体的场景介绍可以参考我之前的这篇文章
执行效果
表面上和隐士等待执行效果一样,其实还是有一定差异的,当测试脚本操作的页面比较多时,你会发现两中等待方式对于脚本的执行效率是不一样的,显示等待更加节省时间
定位元素方法封装
显示等待和隐士等待我们已经知道是什么东西了,也大概知道他们的区别在哪里了,但是不知道你是否发现一个问题,显示等待案例中定位每个元素都要重新写一个显示等待然后调用判断场景,是不是很麻烦?
下面我们就把显示等待定位元素的方法做个封装,看代码
base.py
"""
------------------------------------
@Time : 2019/7/4 13:18
@Auth : linux超
@File : base.py
@IDE  : PyCharm
@Motto: Real warriors,dare to face the bleak warning,dare to face the incisive error!
@QQ   : 28174043@qq.com
@GROUP: 878565760
------------------------------------
"""
from selenium.common.exceptions import NoSuchElementException, TimeoutException
from selenium.webdriver.support.ui import WebDriverWait


class Base(object):

    def __init__(self, driver):
        self.driver = driver

    def find_element(self, by, locator, timeout=30):
        """
        定位单个元素
        :param by: 定位方式 eg:By.ID
        :param locator: 定位表达式
        :param timeout: 显示等待超时时间
        :return:
        """
        try:
            element = WebDriverWait(self.driver, timeout).
                until(lambda driver: driver.find_element(by, locator))
        except (NoSuchElementException, TimeoutException) as e:
            raise e
        else:
            return element

    def find_elements(self, by, locator, timeout=30):
        """
        定位一组元素
        :param by: 定位方式 eg:By.ID
        :param locator: 定位表达式
        :param timeout: 显示等待超时时间
        :return:
        """
        try:
            elements = WebDriverWait(self.driver, timeout).
                until(lambda driver: driver.find_elements(by, locator))
        except (NoSuchElementException, TimeoutException) as e:
            raise e
        else:
            return elements


if __name__ == '__main__':
    pass
下面我们测试一下封装的方法
"""
------------------------------------
@Time : 2019/7/4 9:17
@Auth : linux超
@File : webwait.py
@IDE  : PyCharm
@Motto: Real warriors,dare to face the bleak warning,dare to face the incisive error!
@QQ   : 28174043@qq.com
@GROUP: 878565760
------------------------------------
"""
from selenium import webdriver
import unittest
from selenium.webdriver.common.by import By

from base import Base


class TestWait(unittest.TestCase):
    def setUp(self):
        self.driver = webdriver.Firefox()
        self.base = Base(self.driver)
        self.driver.get("https://www.baidu.com")
        self.driver.maximize_window()

    def test_webdriver_wait(self):
        # 等输入框出现在DOM树中
        input_box = self.base.find_element(By.ID, 'kw')
        input_box.send_keys('linux超')  # 输入linux超
        # 等元素可点击
        query_btn = self.base.find_element(By.ID, 'su')
        query_btn.click()  # 点击
        # 找搜索结果中的每一个标题
        elements = self.base.find_elements(By.XPATH, '//h3[@class="t"]')
        # 循环打印每一个搜索结果
        for element in elements:
            print(element.text)

    def tearDown(self):
        self.driver.quit()


if __name__ == '__main__':
    unittest.main()
执行过程及结果

Linux学习教程,Linux入门教程(超详细)
Linux命令(超详细版) - CSDN博客
linux超 - 博客园
新型Linux 病毒,脚本超 1000 行,功能复杂 - OSCHINA_开源中国
《Linux就该这么学》 - 必读的Linux系统与红帽RHCE认证免费自学书籍
技术|有所为,有所不为:在 Linux 中使用超级用户权限
Linux下挂载超过2T的磁盘 - qq_40143313的博客 - CSDN博客
现在Linux运行在 99.6%的TOP500超级计算机上_TechWeb
Linux 教程 | 菜鸟教程
linux中超级快 - 云+社区 - 腾讯云
.
----------------------------------------------------------------------
Ran 1 test in 20.094s

OK

Process finished with exit code 0
总结
再来总结一下3中等待方法的优缺点
1.强制等待--固定等待一段时间,即使设置一定的等待时间,也不能确保一定能够定位到元素,因为你无法知道页面加载的时间,而且这种方法通常比较浪费脚本执行时间,效率低
2.隐士等待--设置最长的等待时间,在这个时间内,当元素被加载出现在DOM树中且页面被完全加载完成之后,才执行下一步操作,保证了脚本的稳定性,但是执行效率相对较低,因为往往我们只需要目标元素出现即可,并不需要整个页面都加载完成,而隐士等待要等待整个页面加载完才能执行下一步,浪费一定时间,那么为了解决这种弊端又引入了显示等待
3.显示等待--显示等待实现方式通过判断某一个条件是否成立,如果成立就立即执行下一步操作,不需要等待页面加载完成,执行效率高,脚本的稳定性也相对较高
最后
最后我们使用显示等待的方法封装了定位单一元素和定位一组元素的方法,解决了重复使用显示等待方法定位的代码,使用这个封装方法能够定位到大多数的元素(一些特殊的元素还是需要结合expected_conditions模块中的场景方法比较稳定),以上就是这篇随笔的内容了