目录
安装软件前准备
#更新系统软件包
yum update -y
#安装软件管理包和可能使用到的依赖
yum -y groupinstall "Development tools"
yum install openssl-devel bzip2-devel expat-devel gdbm-devel readline-devel sqlite-devel psmisc libffi-devel
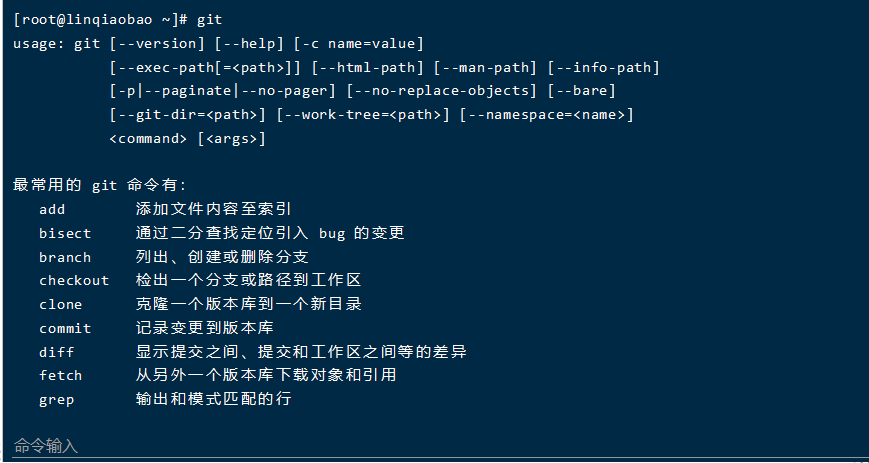
#检测是否安装成功,输入git测试有反应即可,看图1
图1
AliYun Ecs服务器安装Redis
#cd 进入家目录

#安装redis-5.0.5
	wget http://download.redis.io/releases/redis-5.0.5.tar.gz

#解压安装包
	tar -xf redis-5.0.5.tar.gz

#进入解压文件
	cd redis-5.0.5

#编译环境
	make

#复制环境到指定路径完成安装
	cp -r ~/redis-5.0.5 /usr/local/redis

#建立软连接(相当于windows快捷方式)
	ln -s /usr/local/redis/src/redis-server /usr/bin/redis-server
    ln -s /usr/local/redis/src/redis-cli /usr/bin/redis-cli

#后台运行redis
	cd /usr/local/redis
    redis-server &

#测试redis环境
	redis-cli
    crtl + c可以停止

#关闭redis服务
	pkill -f redis -9
AliYun Ecs服务器安装MySql
#cd 进入家目录

#下载mysql 5.7版本
	wget http://dev.mysql.com/get/mysql57-community-release-el7-10.noarch.rpm

#安装
	yum -y install mysql57-community-release-el7-10.noarch.rpm
    yum -y install mysql-community-server

#启动mysql 5.7并查看启动状态
	systemctl start mysqld.service
    systemctl status mysqld.service

#查看默认密码(默认密码不能操作数据库)
	grep "password" /var/log/mysqld.log

#登录并修改密码,新密码需要符合密码策略,查看密码策略SHOW VARIABLES LIKE 'validate_password%';
	mysql -uroot -p默认密码
	ALTER USER 'root'@'localhost' IDENTIFIED BY '新密码';	#我的是ABC123456

#上一步执行不了使用忘记密码把,看这里。。。
AliYun Ecs服务器安装Python
#cd 进入家目录

#下载Python3.6.6
	wget https://www.python.org/ftp/python/3.6.6/Python-3.6.6.tar.xz

#解压安装包
	tar -xf Python-3.6.6.tar.xz

#进入解压包
	cd Python-3.6.6

#配置安装路径到/usr/local/python3
	./configure --prefix=/usr/local/python3

#编译并安装
	make && sudo make install

##建立软连接(相当于windows快捷方式),终端下能用python3,pip3
	ln -s /usr/local/python3/bin/python3.6 /usr/bin/python3
    ln -s /usr/local/python3/bin/pip3.6 /usr/bin/pip3

#可以选择删除安装包与解压包
	rm -rf Python-3.6.7
    rm -rf Python-3.6.7.tar.xz
AliYun Ecs服务器安装Nginx
#cd 进入家目录

#下载niginx 1.13.7
	wget http://nginx.org/download/nginx-1.13.7.tar.gz

#解压安装包
	tar -xf nginx-1.13.7.tar.gz

#进入解压包
	cd nginx-1.13.7

#配置安装路径到/usr/local/nginx
	./configure --prefix=/usr/local/nginx

#编译并安装
	make && sudo make install

#建立软连接(相当于windows快捷方式),终端下能用nginx
	ln -s /usr/local/nginx/sbin/nginx /usr/bin/nginx

#可以选择删除安装包与解压包
	rm -rf nginx-1.13.7
    rm -rf nginx-1.13.7.tar.xz

#终端下输入nginx启动nginx,浏览器访问服务器公网ip(或绑定的域名)端口80
	nginx
    39.97.209.187

#nginx命令
	启动  nginx
    关闭	nginx -s stop
    重启	nginx -s reload
    查看端口,强行关闭
    	ps -aux|grep nginx
        kill <pid:进程编号>

#nginx介绍
    Nginx是一款轻量级的Web 服务器/反向代理服务器及电子邮件(IMAP/POP3)代理服务器,在BSD-like 协议下发行。其特点是占有内存少,并发能力强,事实上nginx的并发能力在同类型的网页服务器中表现较好,中国大陆使用nginx网站用户有:百度、京东、新浪、网易、腾讯、淘宝等。
   作用:
       http请求转发
       反向代理服务器
       负载均衡
       动静分离
Nginx转发前端项目静态文件
#上线前配置,srcassetsjssettings.js
base_url: 'http://39.97.209.187:8000', // 改成自己阿里云服务器官网ip的8000端口
#前端项目打包,pycharm终端下执行
cnpm run build
#利用finalshell上传到服务器家目录下
#服务器操作,移动并重命名上传的dist文件
mv ~/dist /home/html
#到nginx配置目录,备份配置,替换下面内容
cd /usr/local/nginx/conf
mv nginx.conf nginx.conf.bak
vim nginx.conf #按i或insert插入下面的内容,完成后按esc,:wq保存并退出
替换的内容
events {
worker_connections 1024;
}
http {
include mime.types;
default_type application/octet-stream;
sendfile on;
server {
listen 80;
server_name 127.0.0.1; # 改为自己的域名,没域名修改为127.0.0.1:80
charset utf-8;
location / {
root /home/html/dist; # html访问路径
index index.html; # html文件名称
try_files $uri $uri/ /index.html; # 解决单页面应用刷新404问题
}
}
}
#重启nginx
nginx -s reload
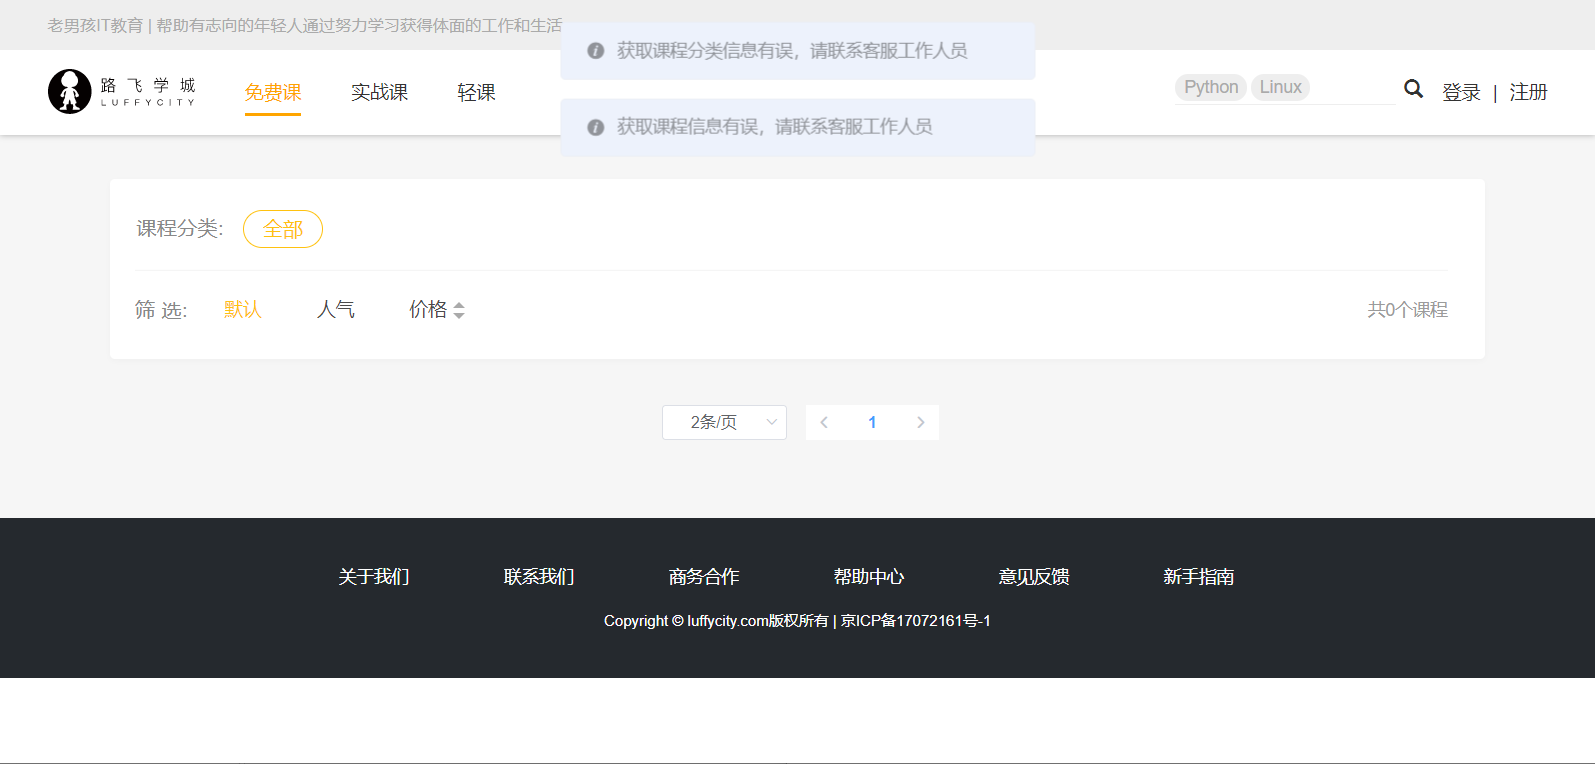
#http://39.97.209.187/就可以访问前端项目了,看图1
图1
AliYun Ecs服务器安装uwsgi
#原生环境下安装
	pip3 install uwsgi

# 建立软连接(相当于windows快捷方式)
	ln -s /usr/local/bin/uwsgi /usr/bin/uwsgi
AliYun Ecs服务器创建虚拟环境
#安装依赖
pip3 install virtualenv
pip3 install virtualenvwrapper
#建立软连接(相当于windows快捷方式)
ln -s /usr/local/python3/bin/virtualenv /usr/bin/virtualenv
#配置虚拟环境,填入下面内容,填入内容后按esc,:wq保存并退出,
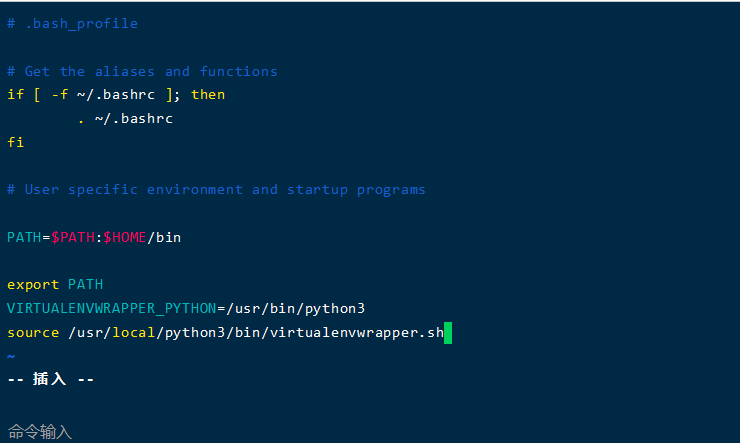
vim ~/.bash_profile
填入内容,看图1
VIRTUALENVWRAPPER_PYTHON=/usr/local/python3/bin/python3
source /usr/local/python3/bin/virtualenvwrapper.sh
#查看下修改好的neir
cat ~/.bash_profile
#更新配置文件内容
source ~/.bash_profile
#虚拟环境默认的根目录
cd ~/.virtualenvs
#创建虚拟环境
1 创建虚拟环境到配置的WORKON_HOME路径下
mkvirtualenv -p python3 自定义的虚拟环境名称(比如:luffy) 使用的是python3
mkvirtualenv -p python2 自定义的虚拟环境名称(比如:luffy) 使用的是python2
2 查看已有的虚拟环境
workon
3 使用虚拟环境
workon 已有的虚拟环境名称(比如:luffy)
4 进入、退出该虚拟环境的Python环境
python、exit()
5 为虚拟环境安装模块
pip install 模块名称(比如:django==2.2)
6 退出当前虚拟环境
deactivate
7 删除虚拟环境(删除当前虚拟环境要先退出)
rmvirtualenv
图1
AliYun Ecs服务器转发动态请求、django项目(使用nginx、uwsgi)
AliYun Ecs 服务器操作
#mkdir /home/project

#cd /home/project

#git clone https://gitee.com/liuqingzheng/luffyapi.git	#换成自己git仓库的地址,clone后端代码

#进入虚拟环境,项目根目录下安装项目需要的依赖包,
	workon luffy
    cd /home/project/luffyapi
	pip install -r requirements.txt

#pip install uwsgi	#workon环境和原生环境都需要安装,退出虚拟环境命令deactivate

#uwsgi服务配置,内容日下
	vim /home/project/luffyapi/luffyapi.xml

    内容
    	<uwsgi>
       <socket>127.0.0.1:8808</socket> <!-- 内部端口,自定义 -->
       <chdir>/home/project/luffyapi/</chdir> <!-- 项目路径 -->
       <module>luffyapi.wsgi</module>  <!-- luffyapi为wsgi.py所在目录名-->
       <processes>4</processes> <!-- 进程数 -->
       <daemonize>uwsgi.log</daemonize> <!-- 日志文件 -->
    	</uwsgi>

#nginx配置目录,备份配置,完全更新配置,改成下面内容
	vim /usr/local/nginx/conf/nginx.conf

    更改内容
events {
    worker_connections  1024;
}
http {
    include       mime.types;
    default_type  application/octet-stream;
    sendfile        on;
    server {
        listen 80;
        server_name  127.0.0.1; # 改为自己的域名,没域名修改为127.0.0.1:80
        charset utf-8;
        location / {
            root /home/html/dist; # html访问路径
            index index.html; # html文件名称
            try_files $uri $uri/ /index.html; # 解决单页面应用刷新404问题
        }
    }
    # 新增的server
    server {
        listen 8000;
        server_name  127.0.0.1; # 改为自己的域名,没域名修改为127.0.0.1:80
        charset utf-8;
        location / {
           include uwsgi_params;
           uwsgi_pass 127.0.0.1:8808;  # 端口要和uwsgi里配置的一样
           uwsgi_param UWSGI_SCRIPT luffyapi.wsgi;  #wsgi.py所在的目录名+.wsgi
           uwsgi_param UWSGI_CHDIR /home/project/luffyapi/; # 项目路径
        }
    }
}


#mysql数据库root用户登录,创建库luffyapi,创建用户,授权该用户
	mysql -uroot -p你的密码

    #创建库
    create database luffyapi default charset=utf8;

    #设置权限账号密码:账号密码要与项目中配置的一致
    grant all privileges on luffyapi.* to 'luffyapi'@'%' identified by 'Luffy123?';
    grant all privileges on luffyapi.* to 'luffyapi'@'localhost' identified by 'Luffy123?';
    flush privileges;	#更新权限

    #退出mysql
    	exit/quit

#到项目下执行数据迁移命令,并创建超级用户
	python manage_pro.py makemigrations
    python manage_pro.py migrate
    python manage_pro.py createsuperuser	#我的joab 1@qq.com lqb666666

#启动uwsgi、nginx,后端项目就起来了
	#启动uwsgi
	uwsgi -x /home/project/luffyapi/luffyapi.xml
    #重启nginx
    nginx -s reload
数据库插入数据
-- 老师表
INSERT INTO luffy_teacher(id, orders, is_show, is_delete, created_time, updated_time, name, role, title, signature, image, brief) VALUES (1, 1, 1, 0, '2019-07-14 13:44:19.661327', '2019-07-14 13:46:54.246271', 'Alex', 1, '老男孩Python教学总监', '金角大王', 'teacher/alex_icon.png', '老男孩教育CTO & CO-FOUNDER 国内知名PYTHON语言推广者 51CTO学院20162017年度最受学员喜爱10大讲师之一 多款开源软件作者 曾任职公安部、飞信、中金公司、NOKIA中国研究院、华尔街英语、ADVENT、汽车之家等公司');

INSERT INTO luffy_teacher(id, orders, is_show, is_delete, created_time, updated_time, name, role, title, signature, image, brief) VALUES (2, 2, 1, 0, '2019-07-14 13:45:25.092902', '2019-07-14 13:45:25.092936', 'Mjj', 0, '前美团前端项目组架构师', NULL, 'teacher/mjj_icon.png', '是马JJ老师, 一个集美貌与才华于一身的男人,搞过几年IOS,又转了前端开发几年,曾就职于美团网任高级前端开发,后来因为不同意王兴(美团老板)的战略布局而出家做老师去了,有丰富的教学经验,开起车来也毫不含糊。一直专注在前端的前沿技术领域。同时,爱好抽烟、喝酒、烫头(锡纸烫)。 我的最爱是前端,因为前端妹子多。');

INSERT INTO luffy_teacher(id, orders, is_show, is_delete, created_time, updated_time, name, role, title, signature, image, brief) VALUES (3, 3, 1, 0, '2019-07-14 13:46:21.997846', '2019-07-14 13:46:21.997880', 'Lyy', 0, '老男孩Linux学科带头人', NULL, 'teacher/lyy_icon.png', 'Linux运维技术专家,老男孩Linux金牌讲师,讲课风趣幽默、深入浅出、声音洪亮到爆炸');

-- 课程分类表
INSERT INTO luffy_course_category(id, orders, is_show, is_delete, created_time, updated_time, name) VALUES (1, 1, 1, 0, '2019-07-14 13:40:58.690413', '2019-07-14 13:40:58.690477', 'Python');

INSERT INTO luffy_course_category(id, orders, is_show, is_delete, created_time, updated_time, name) VALUES (2, 2, 1, 0, '2019-07-14 13:41:08.249735', '2019-07-14 13:41:08.249817', 'Linux');


-- 课程表数据
INSERT INTO luffy_course(id, orders, is_show, is_delete, created_time, updated_time, name, course_img, course_type, brief, level, pub_date, period, attachment_path, status, students, sections, pub_sections, price, course_category_id, teacher_id) VALUES (1, 1, 1, 0, '2019-07-14 13:54:33.095201', '2019-07-14 13:54:33.095238', 'Python开发21天入门', 'courses/alex_python.png', 0, 'Python从入门到入土&&&Python从入门到入土&&&Python从入门到入土&&&Python从入门到入土&&&Python从入门到入土&&&Python从入门到入土&&&Python从入门到入土&&&Python从入门到入土&&&Python从入门到入土&&&Python从入门到入土&&&Python从入门到入土&&&Python从入门到入土', 0, '2019-07-14', 21, '', 0, 231, 120, 120, 0.00, 1, 1);

INSERT INTO luffy_course(id, orders, is_show, is_delete, created_time, updated_time, name, course_img, course_type, brief, level, pub_date, period, attachment_path, status, students, sections, pub_sections, price, course_category_id, teacher_id) VALUES (2, 2, 1, 0, '2019-07-14 13:56:05.051103', '2019-07-14 13:56:05.051142', 'Python项目实战', 'courses/mjj_python.png', 0, '', 1, '2019-07-14', 30, '', 0, 340, 120, 120, 99.00, 1, 2);

INSERT INTO luffy_course(id, orders, is_show, is_delete, created_time, updated_time, name, course_img, course_type, brief, level, pub_date, period, attachment_path, status, students, sections, pub_sections, price, course_category_id, teacher_id) VALUES (3, 3, 1, 0, '2019-07-14 13:57:21.190053', '2019-07-14 13:57:21.190095', 'Linux系统基础5周入门精讲', 'courses/lyy_linux.png', 0, '', 0, '2019-07-14', 25, '', 0, 219, 100, 100, 39.00, 2, 3);


-- 章节表数据
INSERT INTO luffy_course_chapter(id, orders, is_show, is_delete, created_time, updated_time, chapter, name, summary, pub_date, course_id) VALUES (1, 1, 1, 0, '2019-07-14 13:58:34.867005', '2019-07-14 14:00:58.276541', 1, '计算机原理', '', '2019-07-14', 1);

INSERT INTO luffy_course_chapter(id, orders, is_show, is_delete, created_time, updated_time, chapter, name, summary, pub_date, course_id) VALUES (2, 2, 1, 0, '2019-07-14 13:58:48.051543', '2019-07-14 14:01:22.024206', 2, '环境搭建', '', '2019-07-14', 1);

INSERT INTO luffy_course_chapter(id, orders, is_show, is_delete, created_time, updated_time, chapter, name, summary, pub_date, course_id) VALUES (3, 3, 1, 0, '2019-07-14 13:59:09.878183', '2019-07-14 14:01:40.048608', 1, '项目创建', '', '2019-07-14', 2);

INSERT INTO luffy_course_chapter(id, orders, is_show, is_delete, created_time, updated_time, chapter, name, summary, pub_date, course_id) VALUES (4, 4, 1, 0, '2019-07-14 13:59:37.448626', '2019-07-14 14:01:58.709652', 1, 'Linux环境创建', '', '2019-07-14', 3);


-- 课时表数据
INSERT INTO luffy_course_Section(id, is_show, is_delete, created_time, updated_time, name, orders, section_type, section_link, duration, pub_date, free_trail, chapter_id) VALUES (1, 1, 0, '2019-07-14 14:02:33.779098', '2019-07-14 14:02:33.779135', '计算机原理上', 1, 2, NULL, NULL, '2019-07-14 14:02:33.779193', 1, 1);

INSERT INTO luffy_course_Section(id, is_show, is_delete, created_time, updated_time, name, orders, section_type, section_link, duration, pub_date, free_trail, chapter_id) VALUES (2, 1, 0, '2019-07-14 14:02:56.657134', '2019-07-14 14:02:56.657173', '计算机原理下', 2, 2, NULL, NULL, '2019-07-14 14:02:56.657227', 1, 1);

INSERT INTO luffy_course_Section(id, is_show, is_delete, created_time, updated_time, name, orders, section_type, section_link, duration, pub_date, free_trail, chapter_id) VALUES (3, 1, 0, '2019-07-14 14:03:20.493324', '2019-07-14 14:03:52.329394', '环境搭建上', 1, 2, NULL, NULL, '2019-07-14 14:03:20.493420', 0, 2);

INSERT INTO luffy_course_Section(id, is_show, is_delete, created_time, updated_time, name, orders, section_type, section_link, duration, pub_date, free_trail, chapter_id) VALUES (4, 1, 0, '2019-07-14 14:03:36.472742', '2019-07-14 14:03:36.472779', '环境搭建下', 2, 2, NULL, NULL, '2019-07-14 14:03:36.472831', 0, 2);

INSERT INTO luffy_course_Section(id, is_show, is_delete, created_time, updated_time, name, orders, section_type, section_link, duration, pub_date, free_trail, chapter_id) VALUES (5, 1, 0, '2019-07-14 14:04:19.338153', '2019-07-14 14:04:19.338192', 'web项目的创建', 1, 2, NULL, NULL, '2019-07-14 14:04:19.338252', 1, 3);

INSERT INTO luffy_course_Section(id, is_show, is_delete, created_time, updated_time, name, orders, section_type, section_link, duration, pub_date, free_trail, chapter_id) VALUES (6, 1, 0, '2019-07-14 14:04:52.895855', '2019-07-14 14:04:52.895890', 'Linux的环境搭建', 1, 2, NULL, NULL, '2019-07-14 14:04:52.895942', 1, 4);
后台样式
修改线上配置
#编辑线上配置文件
	vim /home/project/luffyapi/luffyapi/settings/pro.py

#修改static配置,新增STATIC_ROOT
    STATIC_URL = '/static/'
    STATIC_ROOT = '/home/project/luffyapi/luffyapi/static'
    STATICFILES_DIRS = (os.path.join(BASE_DIR, "static"),)

#退出保存即可
	esc
    :wq
迁移静态样式
#后端项目目录下创建static
	mkdir /home/project/luffyapi/luffyapi/static

#完成静态文件迁移
	python /home/project/luffyapi/manage_pro.py collectstatic
Nginx配置静态文件路径
#全部修改nginx配置为下面内容
	vim /usr/local/nginx/conf/nginx.conf

    events {
    worker_connections  1024;
}
http {
    include       mime.types;
    default_type  application/octet-stream;
    sendfile        on;
    server {
        listen 80;
        server_name  127.0.0.1; # 改为自己的域名,没域名修改为127.0.0.1:80
        charset utf-8;
        location / {
            root /home/html/dist; # html访问路径
            index index.html; # html文件名称
            try_files $uri $uri/ /index.html; # 解决单页面应用刷新404问题
        }
    }
    server {
        listen 8000;
        server_name  127.0.0.1; # 改为自己的域名,没域名修改为127.0.0.1:80
        charset utf-8;
        location / {
           include uwsgi_params;
           uwsgi_pass 127.0.0.1:8808;  # 端口要和uwsgi里配置的一样
           uwsgi_param UWSGI_SCRIPT luffyapi.wsgi;  #wsgi.py所在的目录名+.wsgi
           uwsgi_param UWSGI_CHDIR /home/project/luffyapi/; # 项目路径
        }
        # 新增的配置静态文件
        location /static {
            alias /home/project/luffyapi/luffyapi/static;
        }
    }
}

#退出保存即可
	esc
    :wq
启动服务
#关闭uwsgi服务,重启uwsgi
	pkill -f uwsgi -9
    uwsgi -x /home/project/luffyapi/luffyapi.xml

#关闭nginx,重启nginx
	nginx -s stop
    nginx
向上项目测试
#本地浏览器访问xadmin后台
http://39.99.192.127:8000/xadmin

#登录,录入测试数据
	账号密码:joab|lqb666666

#或是导出本地数据库为sql,再在线上导入sql
    >: mysql -h 39.99.192.127 -P 3306 -u luffy -p
    >: Luffy123?
    >: use luffy
    >: 复制之前的数据备份