1. 创建maven工程
这个工程的文件结构如下图

2. pom配置
<?xml version="1.0" encoding="UTF-8"?>
<project xmlns="http://maven.apache.org/POM/4.0.0"
         xmlns:xsi="http://www.w3.org/2001/XMLSchema-instance"
         xsi:schemaLocation="http://maven.apache.org/POM/4.0.0 http://maven.apache.org/xsd/maven-4.0.0.xsd">
    <modelVersion>4.0.0</modelVersion>

    <groupId>com.example.jms</groupId>
    <artifactId>jms-spring</artifactId>
    <version>1.0-SNAPSHOT</version>

    <properties>
        <spring.version>4.2.5.RELEASE</spring.version>
    </properties>
    <dependencies>
        <dependency>
            <groupId>junit</groupId>
            <artifactId>junit</artifactId>
            <version>4.11</version>
            <scope>test</scope>
        </dependency>

        <dependency>
            <groupId>org.springframework</groupId>
            <artifactId>spring-context</artifactId>
            <version>${spring.version}</version>
        </dependency>

        <dependency>
            <groupId>org.springframework</groupId>
            <artifactId>spring-jms</artifactId>
            <version>${spring.version}</version>
        </dependency>

        <dependency>
            <groupId>org.springframework</groupId>
            <artifactId>spring-test</artifactId>
            <version>${spring.version}</version>
        </dependency>

        <dependency>
            <groupId>org.apache.activemq</groupId>
            <artifactId>activemq-core</artifactId>
            <version>5.7.0</version>
            <exclusions>
                <exclusion>
                    <artifactId>spring-content</artifactId>
                    <groupId>org.springframework</groupId>
                </exclusion>
            </exclusions>
        </dependency>
    </dependencies>
</project>
3. 创建生产者
3.1 创建ProducerServer接口
public interface ProducerService {
    void sendMessage(String message);

}
3.2 创建ProducerServiceImpl类
public class ProducerServiceImpl implements ProducerService {

    @Autowired
    JmsTemplate jmsTemplate;

    @Resource(name="queueDestination")
    Destination destination;


    public void sendMessage(final String message) {
        // 使用JmsTemplate发送消息
        jmsTemplate.send(destination, new MessageCreator(){
            //创建一个消息
            public Message createMessage(Session session) throws JMSException {
                TextMessage textMessage = session.createTextMessage(message);
                return textMessage;
            }
        });

        System.out.println("发送消息: " + message);
    }
}
3.3 创建配置文件producer.xml
配置如下:
<?xml version="1.0" encoding="UTF-8"?>
<beans xmlns="http://www.springframework.org/schema/beans"
       xmlns:xsi="http://www.w3.org/2001/XMLSchema-instance"
       xmlns:context="http://www.springframework.org/schema/context"
       xsi:schemaLocation="http://www.springframework.org/schema/beans http://www.springframework.org/schema/beans/spring-beans.xsd http://www.springframework.org/schema/context http://www.springframework.org/schema/context/spring-context.xsd">

    <context:annotation-config></context:annotation-config>

    <!--ActiveMQ为我们提供的ConnectinFactory -->
    <bean id="targetConnectionFactory" class="org.apache.activemq.ActiveMQConnectionFactory">
        <property name="brokerURL" value="tcp://192.168.2.121:61616"></property>
    </bean>
    <!--spring jms为我们提供的连接池-->
    <bean id="connectionFactory" class="org.springframework.jms.connection.SingleConnectionFactory">
        <property name="targetConnectionFactory" ref="targetConnectionFactory"></property>
    </bean>

    <!--一个队列目的地,点对点的-->
    <bean id="queueDestination" class="org.apache.activemq.command.ActiveMQQueue">
        <constructor-arg value="queue" />
    </bean>

    <!--配置JmsTemplate, 用于发送消息-->
    <bean id="jmsTemplate" class="org.springframework.jms.core.JmsTemplate">
        <property name="connectionFactory" ref="connectionFactory"></property>
    </bean>

    <bean class="com.example.jms.producer.ProducerServiceImpl">

    </bean>
</beans>
3.4 创建启动类
public class AppProducer {
    public static void main(String[] args) {
        ClassPathXmlApplicationContext context = new ClassPathXmlApplicationContext("producer.xml");
        ProducerService service = context.getBean(ProducerService.class);
        for (int i = 0; i < 100; i++) {
            service.sendMessage("text" + i);
        }
        context.close();

    }

}
4. 创建接收者
4.1 创建监听器
public class ConsumerMessageListener implements MessageListener{
    public void onMessage(Message message) {
        TextMessage textMessage = (TextMessage)message;
        try {
            System.out.println("接收消息" + textMessage.getText());
        } catch (JMSException e) {
            e.printStackTrace();
        }

    }
}
4.2 创建配置文件
<?xml version="1.0" encoding="UTF-8"?>
<beans xmlns="http://www.springframework.org/schema/beans"
       xmlns:xsi="http://www.w3.org/2001/XMLSchema-instance"
       xmlns:context="http://www.springframework.org/schema/context"
       xsi:schemaLocation="http://www.springframework.org/schema/beans http://www.springframework.org/schema/beans/spring-beans.xsd http://www.springframework.org/schema/context http://www.springframework.org/schema/context/spring-context.xsd">

    <context:annotation-config></context:annotation-config>

    <!--ActiveMQ为我们提供的ConnectinFactory -->
    <bean id="targetConnectionFactory" class="org.apache.activemq.ActiveMQConnectionFactory">
        <property name="brokerURL" value="tcp://192.168.2.121:61616"></property>
    </bean>
    <!--spring jms为我们提供的连接池-->
    <bean id="connectionFactory" class="org.springframework.jms.connection.SingleConnectionFactory">
        <property name="targetConnectionFactory" ref="targetConnectionFactory"></property>
    </bean>

    <!--一个队列目的地,点对点的-->
    <bean id="queueDestination" class="org.apache.activemq.command.ActiveMQQueue">
        <constructor-arg value="queue" />
    </bean>

    <!--配置消息监听器-->
    <bean id="consumerMessageListener" class="com.example.jms.consumer.ConsumerMessageListener" />
    <!--配置消息监听容器-->
    <bean id="jmsContainer" class="org.springframework.jms.listener.DefaultMessageListenerContainer">
        <property name="connectionFactory" ref="connectionFactory" />
        <property name="destination" ref="queueDestination" />
        <property name="messageListener" ref="consumerMessageListener" />
    </bean>
</beans>
4.3 创建启动类
public class APPConsumer {
    public static void main(String[] args) {
        ApplicationContext context = new ClassPathXmlApplicationContext("consumer.xml");

    }
}
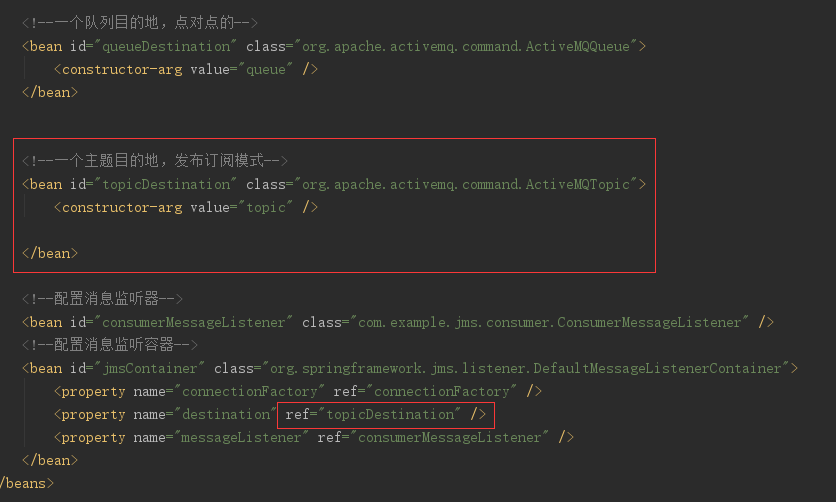
5. 主题模式
5.1 配置消费者
修改consumer.xml文件
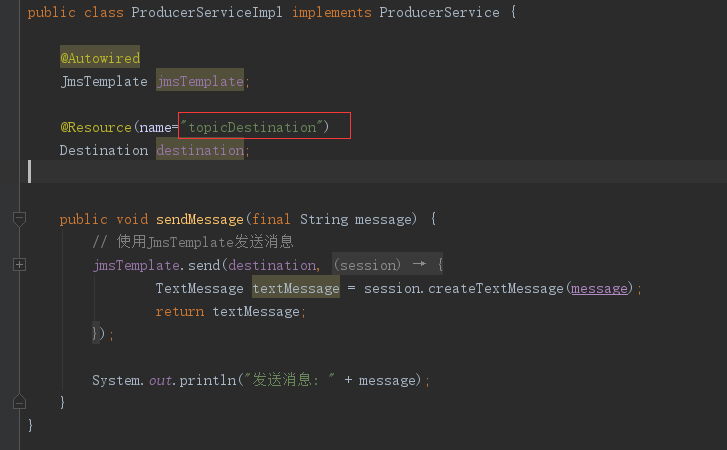
5.2 配置生产者
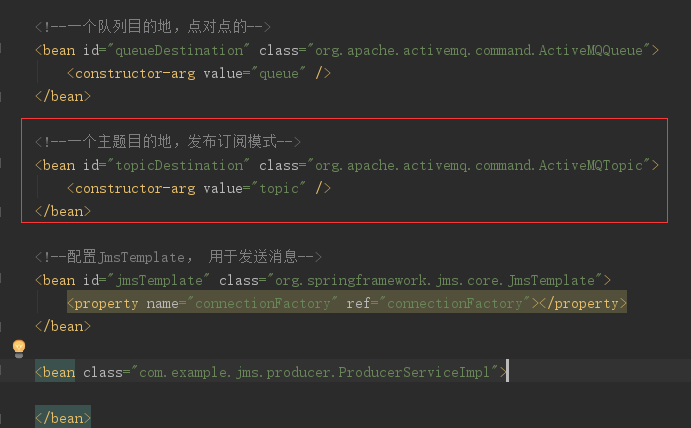
5.3 修改生产者