一、可靠性消息投递
1、rabbit-core-producer工程下创建服务
@Service
public class MessageStoreService {

	@Autowired
	private BrokerMessageMapper brokerMessageMapper;

	public int insert(BrokerMessage brokerMessage) {
		return this.brokerMessageMapper.insert(brokerMessage);
	}

	public BrokerMessage selectByMessageId(String messageId) {
		return this.brokerMessageMapper.selectByPrimaryKey(messageId);
	}

	public void succuess(String messageId) {
		this.brokerMessageMapper.changeBrokerMessageStatus(messageId,
				BrokerMessageStatus.SEND_OK.getCode(),
				new Date());
	}

	public void failure(String messageId) {
		this.brokerMessageMapper.changeBrokerMessageStatus(messageId,
				BrokerMessageStatus.SEND_FAIL.getCode(),
				new Date());
	}

	public List<BrokerMessage> fetchTimeOutMessage4Retry(BrokerMessageStatus brokerMessageStatus){
		return this.brokerMessageMapper.queryBrokerMessageStatus4Timeout(brokerMessageStatus.getCode());
	}

	public int updateTryCount(String brokerMessageId) {
		return this.brokerMessageMapper.update4TryCount(brokerMessageId, new Date());
	}


}
2、定义消息发送状态
public enum BrokerMessageStatus {

	SENDING("0"),
	SEND_OK("1"),
	SEND_FAIL("2"),
	SEND_FAIL_A_MOMENT("3");

	private String code;

	private BrokerMessageStatus(String code) {
		this.code = code;
	}

	public String getCode() {
		return this.code;
	}

}
常量信息
public interface BrokerMessageConst {

	//超时时间为1分钟
	int TIMEOUT = 1;
}
RabbitBrokerImpl增加方式可靠性消息方法
 @Override
    public void reliantSend(Message message) {
        message.setMessageType(MessageType.RELIANT);
        BrokerMessage bm = messageStoreService.selectByMessageId(message.getMessageId());
        if(bm == null) {
            //1. 把数据库的消息发送日志先记录好
            Date now = new Date();
            BrokerMessage brokerMessage = new BrokerMessage();
            brokerMessage.setMessageId(message.getMessageId());
            brokerMessage.setStatus(BrokerMessageStatus.SENDING.getCode());
            //tryCount 在最开始发送的时候不需要进行设置
            brokerMessage.setNextRetry(DateUtils.addMinutes(now, BrokerMessageConst.TIMEOUT));
            brokerMessage.setCreateTime(now);
            brokerMessage.setUpdateTime(now);
            brokerMessage.setMessage(message);
            messageStoreService.insert(brokerMessage);
        }
        //2. 执行真正的发送消息逻辑
        sendKernel(message);
    }
收到确认消息操作
RabbitTemplateContainer类中的confirm方法修改如下:
 @Override
    public void confirm(CorrelationData correlationData, boolean ack, String cause) {
        //消息应答
       List<String> strings =  splitter.splitToList(correlationData.getId());
       String messageId = strings.get(0);
       long sendTime = Long.parseLong(strings.get(1));
        String messageType = strings.get(2);
       if(ack){
           log.info("发送消息成功,confirm messageId={}, sendTime={}" , messageId, sendTime);
       }else {
           log.info("发送消息失败,confirm messageId={}, sendTime={}" , messageId, sendTime);
       }
        if(ack) {
            //	当Broker 返回ACK成功时, 就是更新一下日志表里对应的消息发送状态为 SEND_OK

            // 	如果当前消息类型为reliant 我们就去数据库查找并进行更新
            if(MessageType.RELIANT.endsWith(messageType)) {
                this.messageStoreService.succuess(messageId);
            }
            log.info("发送消息成功,confirm messageId={}, sendTime={}" , messageId, sendTime);
        } else {
            log.info("发送消息失败,confirm messageId={}, sendTime={}" , messageId, sendTime);

        }
    }
二、分布式定时任务组件封装 rabbit-task
1、增加依赖。引入elastic-job
<?xml version="1.0" encoding="UTF-8"?>
<project xmlns="http://maven.apache.org/POM/4.0.0"
         xmlns:xsi="http://www.w3.org/2001/XMLSchema-instance"
         xsi:schemaLocation="http://maven.apache.org/POM/4.0.0 http://maven.apache.org/xsd/maven-4.0.0.xsd">
    <parent>
        <artifactId>rabbit-parent</artifactId>
        <groupId>com.example</groupId>
        <version>1.0-SNAPSHOT</version>
    </parent>
    <modelVersion>4.0.0</modelVersion>

    <groupId>com.example</groupId>
    <artifactId>rabbit-task</artifactId>

    <properties>
        <elastic-job.version>2.1.4</elastic-job.version>
    </properties>
    <dependencies>
        <!-- spring boot dependency -->
        <dependency>
            <groupId>org.springframework.boot</groupId>
            <artifactId>spring-boot-starter</artifactId>
        </dependency>
        <!--  elastic-job dependency -->
        <dependency>
            <groupId>com.dangdang</groupId>
            <artifactId>elastic-job-lite-core</artifactId>
            <version>${elastic-job.version}</version>
        </dependency>
        <dependency>
            <groupId>com.dangdang</groupId>
            <artifactId>elastic-job-lite-spring</artifactId>
            <version>${elastic-job.version}</version>
        </dependency>
        <dependency>
            <groupId>org.springframework.boot</groupId>
            <artifactId>spring-boot-configuration-processor</artifactId>
            <optional>true</optional>
        </dependency>
    </dependencies>

</project>
2、增加自动装配
1) 创建类JobParserAutoConfigurartion ,用于解析Elastic-Job连接zk注册中心的配置,并初始化配置信息到zk注册中心。
将配置属性读取到JobZookeeperProperties 类中
@Slf4j
@Configuration
@ConditionalOnProperty(prefix = "elastic.job.zk", name = {"namespace", "serverLists"}, matchIfMissing = false)
@EnableConfigurationProperties(JobZookeeperProperties.class)
public class JobParserAutoConfigurartion {

	@Bean(initMethod = "init")
	public ZookeeperRegistryCenter zookeeperRegistryCenter(JobZookeeperProperties jobZookeeperProperties) {
		ZookeeperConfiguration zkConfig = new ZookeeperConfiguration(jobZookeeperProperties.getServerLists(),
				jobZookeeperProperties.getNamespace());
		zkConfig.setBaseSleepTimeMilliseconds(zkConfig.getBaseSleepTimeMilliseconds());
		zkConfig.setMaxSleepTimeMilliseconds(zkConfig.getMaxSleepTimeMilliseconds());
		zkConfig.setConnectionTimeoutMilliseconds(zkConfig.getConnectionTimeoutMilliseconds());
		zkConfig.setSessionTimeoutMilliseconds(zkConfig.getSessionTimeoutMilliseconds());
		zkConfig.setMaxRetries(zkConfig.getMaxRetries());
		zkConfig.setDigest(zkConfig.getDigest());
		log.info("初始化job注册中心配置成功, zkaddress : {}, namespace : {}", jobZookeeperProperties.getServerLists(), jobZookeeperProperties.getNamespace());
		return new ZookeeperRegistryCenter(zkConfig);
	}

	@Bean
	public ElasticJobConfParser elasticJobConfParser(JobZookeeperProperties jobZookeeperProperties, ZookeeperRegistryCenter zookeeperRegistryCenter) {
		return new ElasticJobConfParser(jobZookeeperProperties, zookeeperRegistryCenter);
	}

}
2)、在resources文件夹下创建META-INF
在META-INF文件夹下创建spring.factories
# Auto Configure
org.springframework.boot.autoconfigure.EnableAutoConfiguration=
com.example.task.autoconfigure.JobParserAutoConfigurartion
3)、JobZookeeperProperties 类中
@ConfigurationProperties(prefix = "elastic.job.zk")
@Data
public class JobZookeeperProperties {

	private String namespace;

	private String serverLists;

	private int maxRetries = 3;

	private int connectionTimeoutMilliseconds = 15000;

	private int sessionTimeoutMilliseconds = 60000;

	private int baseSleepTimeMilliseconds = 1000;

	private int maxSleepTimeMilliseconds = 3000;

	private String digest = "";

}
3、增加模块装配
1) 增加注解。 导入JobParserAutoConfigurartion配置
@Target(ElementType.TYPE)
@Retention(RetentionPolicy.RUNTIME)
@Documented
@Inherited
@Import(JobParserAutoConfigurartion.class)
public @interface EnableElasticJob {

}
2) 增加Job配置注解ElasticJobConfig
@Target(ElementType.TYPE)
@Retention(RetentionPolicy.RUNTIME)
public @interface ElasticJobConfig {

	String name();	//elasticjob的名称

	String cron() default "";

	int shardingTotalCount() default 1;

	String shardingItemParameters() default "";

	String jobParameter() default "";

	boolean failover() default false;

	boolean misfire() default true;

	String description() default "";

	boolean overwrite() default false;

	boolean streamingProcess() default false;

	String scriptCommandLine() default "";

	boolean monitorExecution() default false;

	public int monitorPort() default -1;	//must

	public int maxTimeDiffSeconds() default -1;	//must

	public String jobShardingStrategyClass() default "";	//must

	public int reconcileIntervalMinutes() default 10;	//must

	public String eventTraceRdbDataSource() default "";	//must

	public String listener() default "";	//must

	public boolean disabled() default false;	//must

	public String distributedListener() default "";

	public long startedTimeoutMilliseconds() default Long.MAX_VALUE;	//must

	public long completedTimeoutMilliseconds() default Long.MAX_VALUE;		//must

	public String jobExceptionHandler() default "com.dangdang.ddframe.job.executor.handler.impl.DefaultJobExceptionHandler";

	public String executorServiceHandler() default "com.dangdang.ddframe.job.executor.handler.impl.DefaultExecutorServiceHandler";

}
3、增加解析注解(ElasticJobConfig )的信息类ElasticJobConfParser
@Slf4j
public class ElasticJobConfParser implements ApplicationListener<ApplicationReadyEvent> {

	private JobZookeeperProperties jobZookeeperProperties;

	private ZookeeperRegistryCenter zookeeperRegistryCenter;

	public ElasticJobConfParser(JobZookeeperProperties jobZookeeperProperties,
			ZookeeperRegistryCenter zookeeperRegistryCenter) {
		this.jobZookeeperProperties = jobZookeeperProperties;
		this.zookeeperRegistryCenter = zookeeperRegistryCenter;
	}

	@Override
	public void onApplicationEvent(ApplicationReadyEvent event) {
		try {
			ApplicationContext applicationContext = event.getApplicationContext();
			Map<String, Object> beanMap = applicationContext.getBeansWithAnnotation(ElasticJobConfig.class);
			for(Iterator<?> it = beanMap.values().iterator(); it.hasNext();) {
				Object confBean = it.next();
				Class<?> clazz = confBean.getClass();
				if(clazz.getName().indexOf("$") > 0) {
					String className = clazz.getName();
					clazz = Class.forName(className.substring(0, className.indexOf("$")));
				}
				// 	获取接口类型 用于判断是什么类型的任务
				String jobTypeName = clazz.getInterfaces()[0].getSimpleName();
				//	获取配置项 ElasticJobConfig
				ElasticJobConfig conf = clazz.getAnnotation(ElasticJobConfig.class);

				String jobClass = clazz.getName();
				String jobName = this.jobZookeeperProperties.getNamespace() + "." + conf.name();
				String cron = conf.cron();
				String shardingItemParameters = conf.shardingItemParameters();
				String description = conf.description();
				String jobParameter = conf.jobParameter();
				String jobExceptionHandler = conf.jobExceptionHandler();
				String executorServiceHandler = conf.executorServiceHandler();

				String jobShardingStrategyClass = conf.jobShardingStrategyClass();
				String eventTraceRdbDataSource = conf.eventTraceRdbDataSource();
				String scriptCommandLine = conf.scriptCommandLine();

				boolean failover = conf.failover();
				boolean misfire = conf.misfire();
				boolean overwrite = conf.overwrite();
				boolean disabled = conf.disabled();
				boolean monitorExecution = conf.monitorExecution();
				boolean streamingProcess = conf.streamingProcess();

				int shardingTotalCount = conf.shardingTotalCount();
				int monitorPort = conf.monitorPort();
				int maxTimeDiffSeconds = conf.maxTimeDiffSeconds();
				int reconcileIntervalMinutes = conf.reconcileIntervalMinutes();

				//	把当当网的esjob的相关configuration
				JobCoreConfiguration coreConfig = JobCoreConfiguration
						.newBuilder(jobName, cron, shardingTotalCount)
						.shardingItemParameters(shardingItemParameters)
						.description(description)
						.failover(failover)
						.jobParameter(jobParameter)
						.misfire(misfire)
						.jobProperties(JobProperties.JobPropertiesEnum.JOB_EXCEPTION_HANDLER.getKey(), jobExceptionHandler)
						.jobProperties(JobProperties.JobPropertiesEnum.EXECUTOR_SERVICE_HANDLER.getKey(), executorServiceHandler)
						.build();

				//	到底要创建什么样的任务.
				JobTypeConfiguration typeConfig = null;
				if(ElasticJobTypeEnum.SIMPLE.getType().equals(jobTypeName)) {
					typeConfig = new SimpleJobConfiguration(coreConfig, jobClass);
				}

				if(ElasticJobTypeEnum.DATAFLOW.getType().equals(jobTypeName)) {
					typeConfig = new DataflowJobConfiguration(coreConfig, jobClass, streamingProcess);
				}

				if(ElasticJobTypeEnum.SCRIPT.getType().equals(jobTypeName)) {
					typeConfig = new ScriptJobConfiguration(coreConfig, scriptCommandLine);
				}

				// LiteJobConfiguration
				LiteJobConfiguration jobConfig = LiteJobConfiguration
						.newBuilder(typeConfig)
						.overwrite(overwrite)
						.disabled(disabled)
						.monitorPort(monitorPort)
						.monitorExecution(monitorExecution)
						.maxTimeDiffSeconds(maxTimeDiffSeconds)
						.jobShardingStrategyClass(jobShardingStrategyClass)
						.reconcileIntervalMinutes(reconcileIntervalMinutes)
						.build();

				// 	创建一个Spring的beanDefinition
				BeanDefinitionBuilder factory = BeanDefinitionBuilder.rootBeanDefinition(SpringJobScheduler.class);
				factory.setInitMethodName("init");
				factory.setScope("prototype");

				//	1.添加bean构造参数,相当于添加自己的真实的任务实现类
				if (!ElasticJobTypeEnum.SCRIPT.getType().equals(jobTypeName)) {
					factory.addConstructorArgValue(confBean);
				}
				//	2.添加注册中心
				factory.addConstructorArgValue(this.zookeeperRegistryCenter);
				//	3.添加LiteJobConfiguration
				factory.addConstructorArgValue(jobConfig);

				//	4.如果有eventTraceRdbDataSource 则也进行添加
				if (StringUtils.hasText(eventTraceRdbDataSource)) {
					BeanDefinitionBuilder rdbFactory = BeanDefinitionBuilder.rootBeanDefinition(JobEventRdbConfiguration.class);
					rdbFactory.addConstructorArgReference(eventTraceRdbDataSource);
					factory.addConstructorArgValue(rdbFactory.getBeanDefinition());
				}

				//  5.添加监听
				List<?> elasticJobListeners = getTargetElasticJobListeners(conf);
				factory.addConstructorArgValue(elasticJobListeners);

				// 	接下来就是把factory 也就是 SpringJobScheduler注入到Spring容器中
				DefaultListableBeanFactory defaultListableBeanFactory = (DefaultListableBeanFactory) applicationContext.getAutowireCapableBeanFactory();

				String registerBeanName = conf.name() + "SpringJobScheduler";
				defaultListableBeanFactory.registerBeanDefinition(registerBeanName, factory.getBeanDefinition());
				SpringJobScheduler scheduler = (SpringJobScheduler)applicationContext.getBean(registerBeanName);
				scheduler.init();
				log.info("启动elastic-job作业: " + jobName);
			}
			log.info("共计启动elastic-job作业数量为: {} 个", beanMap.values().size());

		} catch (Exception e) {
			log.error("elasticjob 启动异常, 系统强制退出", e);
			System.exit(1);
		}
	}

	private List<BeanDefinition> getTargetElasticJobListeners(ElasticJobConfig conf) {
		List<BeanDefinition> result = new ManagedList<BeanDefinition>(2);
		String listeners = conf.listener();
		if (StringUtils.hasText(listeners)) {
			BeanDefinitionBuilder factory = BeanDefinitionBuilder.rootBeanDefinition(listeners);
			factory.setScope("prototype");
			result.add(factory.getBeanDefinition());
		}

		String distributedListeners = conf.distributedListener();
		long startedTimeoutMilliseconds = conf.startedTimeoutMilliseconds();
		long completedTimeoutMilliseconds = conf.completedTimeoutMilliseconds();

		if (StringUtils.hasText(distributedListeners)) {
			BeanDefinitionBuilder factory = BeanDefinitionBuilder.rootBeanDefinition(distributedListeners);
			factory.setScope("prototype");
			factory.addConstructorArgValue(Long.valueOf(startedTimeoutMilliseconds));
			factory.addConstructorArgValue(Long.valueOf(completedTimeoutMilliseconds));
			result.add(factory.getBeanDefinition());
		}
		return result;
	}

}
实现了ApplicationListener<ApplicationReadyEvent>接口,等Bean都初始化完成,应用起来后执行onApplicationEvent方法。
2) 增加枚举ElasticJobTypeEnum
public enum ElasticJobTypeEnum {

	SIMPLE("SimpleJob", "简单类型job"),
	DATAFLOW("DataflowJob", "流式类型job"),
	SCRIPT("ScriptJob", "脚本类型job");

	private String type;

	private String desc;

	private ElasticJobTypeEnum(String type, String desc) {
		this.type = type;
		this.desc = desc;
	}

	public String getType() {
		return type;
	}

	public void setType(String type) {
		this.type = type;
	}

	public String getDesc() {
		return desc;
	}

	public void setDesc(String desc) {
		this.desc = desc;
	}

}
三、分布式定时任务测试
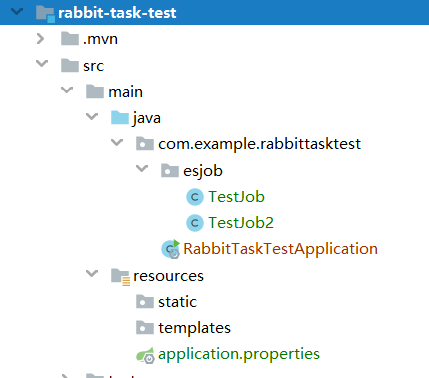
1、创建工程rabbit-task-test工程
工程结构如下:
1、application.properties 配置如下
server.port=8881
elastic.job.zk.namespace=elastic-job
elastic.job.zk.serverLists=47.xx.xx.120:2181
2、启动ElasticJob。
增加注解EnableElasticJob
@EnableElasticJob
@SpringBootApplication
@ServletComponentScan(basePackages = {"com.example.rabbittasktest.esjob"})
public class RabbitTaskTestApplication {

    public static void main(String[] args) {
        SpringApplication.run(RabbitTaskTestApplication.class, args);
    }

}
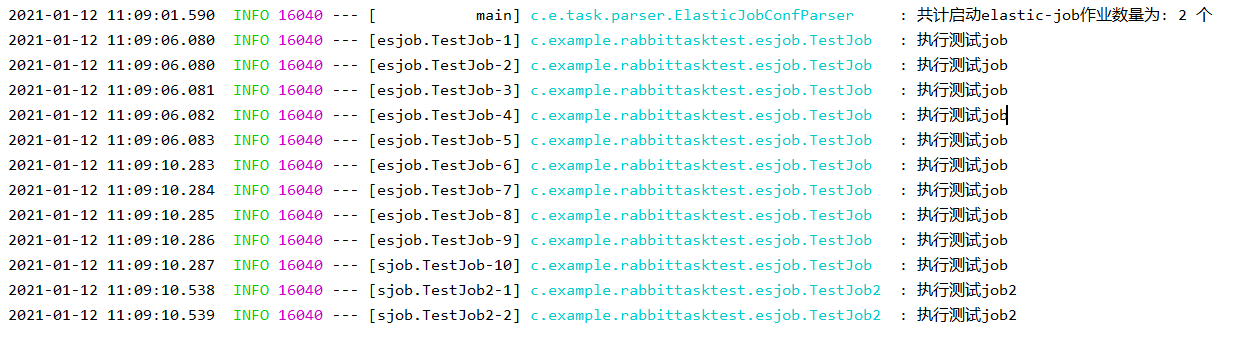
3、创建定时任务
1 ) 创建定时任务1 ,5秒钟执行一次
@Component
@ElasticJobConfig(
        name = "com.example.rabbittasktest.esjob.TestJob",
        cron = "0/5 * * * * ?", //5秒钟一次
        description = "测试定时任务",
        overwrite = true,
        shardingTotalCount = 5
)
@Slf4j
public class TestJob implements SimpleJob {
    @Override
    public void execute(ShardingContext shardingContext) {
        log.info("执行测试job");
    }
}
2) 创建定时任务2
10秒钟一次执行一次
@Component
@ElasticJobConfig(
        name = "com.example.rabbittasktest.esjob.TestJob2",
        cron = "0/10 * * * * ?", //10秒钟一次
        description = "测试定时任务2",
        overwrite = true,
        shardingTotalCount = 2
)
@Slf4j
public class TestJob2 implements SimpleJob {
    @Override
    public void execute(ShardingContext shardingContext) {
        log.info("执行测试job2");
    }
}
启动工程,说明已经成功了。
三、定时任务补偿
在rabbit-core-producer 工程中创建job
@Component
@ElasticJobConfig(
        name = "com.example.producer.task.RetryMessageDataflowJob",
        cron = "0/10 * * * * ?", //10秒钟一次
        description = "可靠性投递消息补偿任务",
        overwrite = true,
        shardingTotalCount = 1  //broker_message表只有一张,加入有100张表,可以采用10个分片,每个分片处理10张表
)
@Slf4j
public class RetryMessageDataflowJob implements DataflowJob<BrokerMessage> {

    @Autowired
    private MessageStoreService messageStoreService;

    @Autowired
    private RabbitBroker rabbitBroker;

    private static final int MAX_RETRY_COUNT = 3;

    @Override
    public List<BrokerMessage> fetchData(ShardingContext shardingContext) {
        List<BrokerMessage>  list = messageStoreService.fetchTimeOutMessage4Retry(BrokerMessageStatus.SENDING);
        log.info("------@@@抓取的数据数量:{}", list.size());
        return list;
    }

    @Override
    public void processData(ShardingContext shardingContext, List<BrokerMessage> list) {
        list.forEach(brokerMessage -> {
            if(brokerMessage.getTryCount() >= MAX_RETRY_COUNT){
                this.messageStoreService.failure(brokerMessage.getMessageId());
                log.warn("消息重试最终失败,消息设置为最终失败,消息Id={}", brokerMessage.getMessageId());
            }else {
                //每次重发的时候更新try_count字段 ,值+1
                this.messageStoreService.updateTryCount(brokerMessage.getMessageId());
                //重发消息
                this.rabbitBroker.reliantSend(brokerMessage.getMessage());
            }
        });
    }
}
四、可靠性消息测试
1、创建工程rabbit-test
1) 增加依赖
        <dependency>
            <groupId>com.example</groupId>
            <artifactId>rabbit-core-producer</artifactId>
            <version>1.0-SNAPSHOT</version>
        </dependency>
2) rabbit 启动 参考Linux 下安装RabbitMQ
目前存在Exchange,名称为exchange1
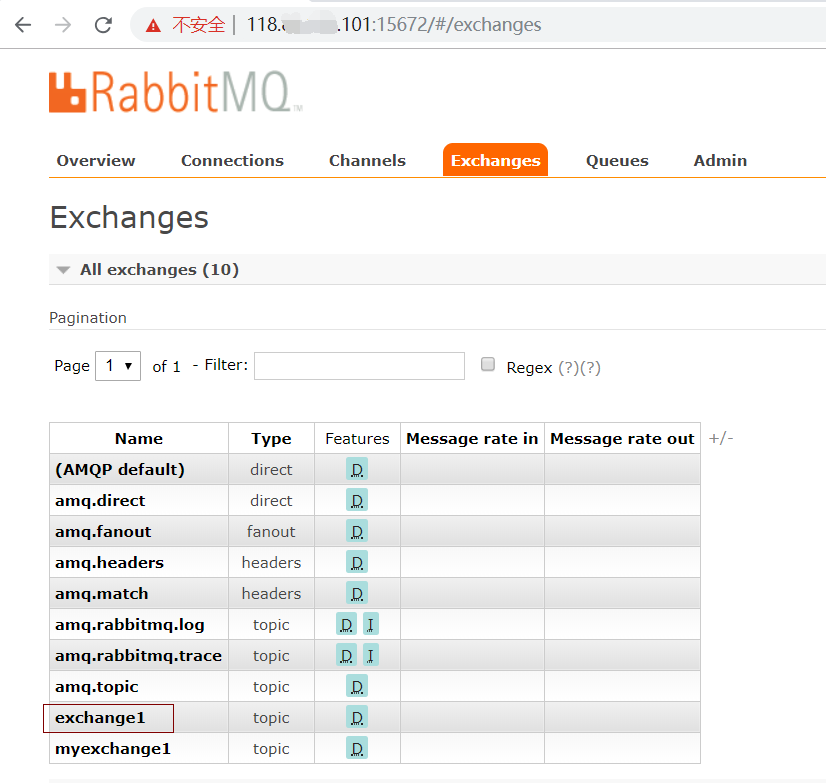
创建绑定了queue1
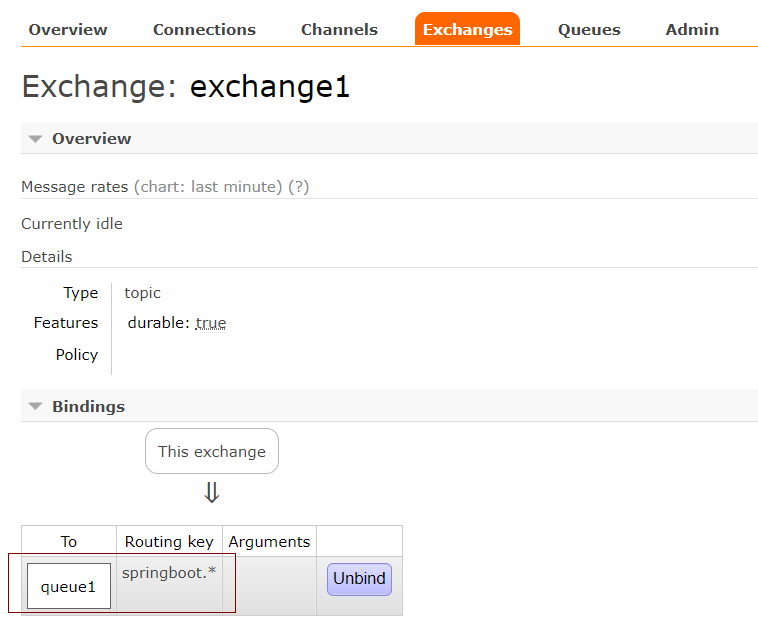
Routing key为springboot.*
3、增加配置属性
application.properties
server.servlet.context-path=/rabbittest
server.port=8001
spring.application.name=/rabbittest

spring.rabbitmq.addresses=118.xx.xx.101:5672
spring.rabbitmq.username=guest
spring.rabbitmq.password=guest
spring.rabbitmq.virtual-host=/
spring.rabbitmq.connection-timeout=15000
#spring.rabbitmq.publisher-confirms=true
spring.rabbitmq.publisher-confirm-type=correlated
spring.rabbitmq.publisher-returns=true
spring.rabbitmq.template.mandatory=true
spring.rabbitmq.listener.simple.auto-startup=false

elastic.job.zk.serverLists=47.xx.xx.120:2181
elastic.job.zk.namespace=elastic-job
4、增加注解
@EnableElasticJob
@SpringBootApplication
@ComponentScan( {"com.example.rabbittest", "com.example"})
@MapperScan({"com.example.producer.mapper"})
public class RabbittestApplication {

    public static void main(String[] args) {
        SpringApplication.run(RabbittestApplication.class, args);
    }

}
5、增加测试方法
@RestController
public class TestController {

    @Autowired
    private ProducerClient producerClient;

    @RequestMapping("/test1")
    public String test1() throws Exception{
        for(int i = 0 ; i < 1; i ++) {
            String uniqueId = UUID.randomUUID().toString();
            Map<String, Object> attributes = new HashMap<>();
            attributes.put("name", "张三");
            attributes.put("age", "18");
            Message message = new Message(
                    uniqueId,
                    "exchange1",
                    "springboot.abc",
                    attributes,
                    0, MessageType.RELIANT);
            producerClient.send(message);
        }

        Thread.sleep(100000);

        return  "success";
    }
}
访问http://localhost:8001/rabbittest/test1
打印日志如下: 说明发送成功。

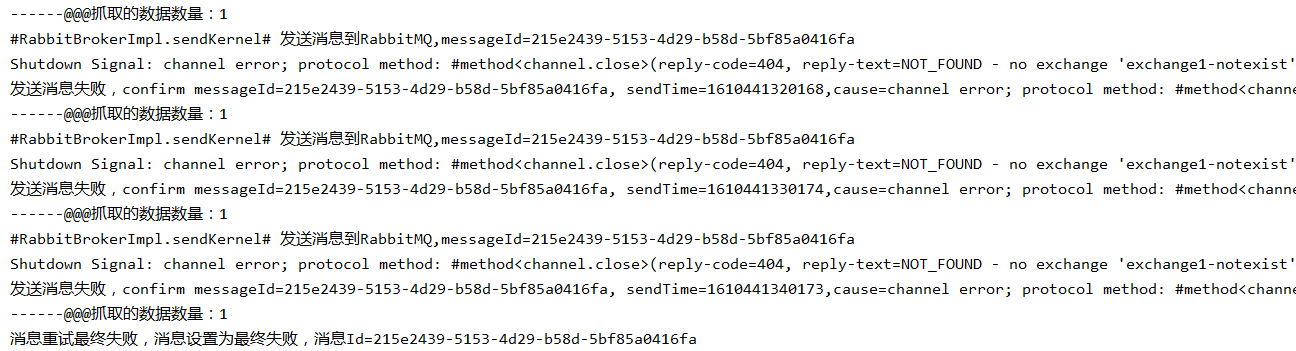
修改exchange1为exchange-noexist, 因为exchange1-noexist不存在, confirm回调方法里返回失败。
Shutdown Signal: channel error; protocol method: #method<channel.close>(reply-code=404, reply-text=NOT_FOUND - no exchange 'exchange1-notexist' in vhost '/', class-id=60, method-id=40)
定时任务补偿3次后还是失败,设置为最终失败。
6、批量发送。
 public void sendMessages() {
        List<Message> messages = MessageHolder.clear();
        messages.forEach(message -> {
            MessageHolderAyncQueue.submit((Runnable) () -> {
                CorrelationData correlationData =
                        new CorrelationData(String.format("%s#%s#%s",
                                message.getMessageId(),
                                System.currentTimeMillis(),
                                message.getMessageType()));
                String topic = message.getTopic();
                String routingKey = message.getRoutingKey();
                RabbitTemplate rabbitTemplate = rabbitTemplateContainer.getTemplate(message);
                rabbitTemplate.convertAndSend(topic, routingKey, message, correlationData);
                log.info("#RabbitBrokerImpl.sendMessages# send to rabbitmq, messageId: {}", message.getMessageId());
            });
        });
    }
本质上还是一条一条发送。
7、延迟发送
延迟发送需要在Rabbit MQ中增加延迟插件
代码修改如下
	@Override
	public Message toMessage(Object object, MessageProperties messageProperties) throws MessageConversionException {
//		messageProperties.setExpiration(delaultExprie);
		com.example.api.Message message = (com.example.api.Message)object;
		messageProperties.setDelay(message.getDelayMills());
		return this.delegate.toMessage(object, messageProperties);
	}