# 软件环境:
* Centos 7.6
* bind-9.14.1.tar.gz
* postgresql 11
* python 3.7
* django 2.2.1
QPS:单节点1590 qps
# 目前测试性能最高的方案
* bind-9.12.4/bind-9.12.1、postgresql 11、Centos 7.6,4核心8G的ESXi虚拟机,开4线程,单节点查询性能可达68842 qps

zone数据使用文件配置加载到内存方式(即不使用数据库)的测试性能可达:80514 qps
## 测试其他说明
bind-9.12.4、mysql开多线程则奇慢无比
bind-9.13.3到bind-9.15.0都只有单线程,即使启动参数配置多线程,实际运行也是单线程,经过测试,这些版本与mysql结果性能会比postgresql高一些,mysql性能2300 qps左右,postgresql性能1600 qps,基本范围1400-2400 qps
从bind-9.13.3及之后的版本不支持 --enable-threads 配置参数,即多线程的支持,bind-9.13.2还支持
# 安装基本包
yum install -y bind-utils traceroute wget man sudo ntp ntpdate screen patch make gcc gcc-c++ flex bison zip unzip ftp net-tools --skip-broken
关联动态库
# vi /etc/ld.so.conf 添加如下内容
include /etc/ld.so.conf.d/*.conf
/usr/local/lib
/usr/local/lib64
/lib
/lib64
/usr/lib
/usr/lib64
编辑完ld.so.conf,执行
ldconfig
使动态库生效
# 安装postgresql
参考地址:https://www.postgresql.org/download/linux/redhat/
yum -y install https://download.postgresql.org/pub/repos/yum/11/redhat/rhel-7-x86_64/pgdg-redhat11-11-2.noarch.rpm
yum -y install postgresql11
yum -y install postgresql11-server
yum -y install postgresql11-libs
yum -y install postgresql11-devel
/usr/pgsql-11/bin/postgresql-11-setup initdb
systemctl enable postgresql-11
## 添加环境变量
把/usr/pgsql-11/bin加入到 /etc/profile系统环境变量里
如:
## PATH
export PATH=/usr/local/sbin:/usr/local/bin:/usr/sbin:/usr/bin:/root/bin:$JAVA_HOME/bin:/usr/pgsql-11/bin
. /etc/profile
## postgresql设置
/var/lib/pgsql/11/data/postgresql.conf
listen_addresses = '*'
port = 5432
max_connections = 5120
tail -n 20 /var/lib/pgsql/11/data/pg_hba.conf
规则从上往下匹配,匹配到一条后就停止往下匹配了
# TYPE  DATABASE        USER            ADDRESS                 METHOD

# "local" is for Unix domain socket connections only
local   all             all                                     peer
# IPv4 local connections:
## host    all             all             127.0.0.1/32            ident
host    all             all             127.0.0.1/32            md5
host    all             all             0.0.0.0/0               md5
# IPv6 local connections:
host    all             all             ::1/128                 ident
# Allow replication connections from localhost, by a user with the
# replication privilege.
#local   replication     all                                     peer
#host    replication     all             127.0.0.1/32            ident
#host    replication     all             ::1/128                 ident
## 启动postgresql
systemctl start postgresql-11
## 创建用户、数据库
su postgres
psql
create user bind_ui_wr with encrypted password 'ww123456'; # encrypted 表示用加密方式保存密码,如果不指定,则是根据配置文件中的password_encryption参数决定
create database bind_ui owner bind_ui_wr ENCODING=utf8;
## 创建只读用户
CREATE USER bind_ui_r WITH ENCRYPTED PASSWORD 'rr123456';
alter user bind_ui_r set default_transaction_read_only=on; # 设置默认事务只读
GRANT CONNECT ON DATABASE bind_ui to bind_ui_r; # 赋予用户连接数据库bind_ui的权限
c bind_ui # 切换到指定库bind_ui
GRANT USAGE ON SCHEMA public to bind_ui_r; # 把当前库现有的所有在public这个schema下的表的使用权限赋给用户
ALTER DEFAULT PRIVILEGES IN SCHEMA public GRANT SELECT ON TABLES TO bind_ui_r; # 默认把当前库之后新建在public这个schema下的表的使用权限赋给bind_ui_r
GRANT SELECT ON ALL SEQUENCES IN SCHEMA public TO bind_ui_r; # 赋予用户bind_ui_r所有public下的序列的查看权
GRANT SELECT ON ALL TABLES IN SCHEMA public TO bind_ui_r; # 赋予用户bind_ui_r所有public下的表的select权
## 删除只读用户方法
revoke USAGE ON SCHEMA public from bind_ui_r; # 回收schema的usage权限
revoke SELECT ON ALL TABLES IN SCHEMA public from bind_ui_r; # 回收public下所有表的查询权限
revoke SELECT ON ALL SEQUENCES IN SCHEMA public from bind_ui_r; # 回收public下所有序列的查询权限
ALTER DEFAULT PRIVILEGES IN SCHEMA public revoke SELECT ON TABLES from bind_ui_r; # 回收默认权限
revoke CONNECT ON DATABASE foo from bind_ui_r; # 关闭数据库连接权限
alter user bind_ui_r set default_transaction_read_only=off; # 关闭默认只读事务设置
ddp # 查看权限是否为空了
drop user bind_ui_r; # 删除用户
## 测试连接
psql -h 127.0.0.1 -p 5432 -U bind_ui_wr -d bind_ui
# 安装bind
cd /usr/local/src
wget http://ftp.isc.org/isc/bind9/9.14.1/bind-9.14.1.tar.gz
wget https://www.openssl.org/source/openssl-1.0.2r.tar.gz
tar -zxvf openssl-1.0.2r.tar.gz; cd openssl-1.0.2r; ./config; make; make install
export LDFLAGS=-L/usr/pgsql-11/lib # 指定pgsql lib,要指定多个路径时,使用:分隔,这对需要扩展多种数据库驱动时很有用,路径查找postgresql lib dir: pg_config --libdir,mysql lib查找方法mysql_config --libs
./configure --prefix=/usr/local/bind_9.14.1 --with-dlz-postgres=yes --enable-threads --enable-epoll --enable-largefile --with-openssl=/usr/local/src/openssl-1.0.2r
make; make install
ln -s /usr/local/bind_9.14.1 /usr/local/bind
ln -s /usr/local/bind/etc /etc/named
groupadd -g 25 named
useradd named -M -u 25 -g 25 -s /sbin/nologin
chown -R named:named /usr/local/bind/var
mkdir -p /var/log/named /usr/local/bind/etc/conf.d; chown -R named.named /var/log/named
systemctl 启动脚本
cat /usr/lib/systemd/system/named.service
[Unit]
Description=Berkeley Internet Name Domain (DNS)
After=network.target

[Service]
Type=forking
PIDFile=/usr/local/bind/var/named.pid
ExecStart=/usr/local/bind/sbin/named -n 1 -u named -c /usr/local/bind/etc/named.conf
ExecReload=/bin/sh -c '/usr/local/bind/sbin/rndc reload > /dev/null 2>&1 || /bin/kill -HUP $MAINPID'
ExecStop=/bin/sh -c '/usr/local/bind/sbin/rndc stop > /dev/null 2>&1 || /bin/kill -TERM $MAINPID'
PrivateTmp=true
Restart=always
RestartSec=10

[Install]
WantedBy=multi-user.target
注意: /usr/local/bind/sbin/named -n 1 线程数
经测试,bind-9.13、bind-9.14已经与线程数量无关,均为单线程了。设置-n 4与-n 1性能都一样
bind-9.12.4、postgresql 11开多线程,性能很高
systemctl enable named;
cd /usr/local/bind/etc/
/usr/local/bind/sbin/rndc-confgen > rndc.conf
tail -10 rndc.conf | head -9 | sed s/# //g > named.conf #内容类似下面这样:
key "rndc-key" {
    algorithm hmac-sha256;
    secret "vCQLvxUeXxvcdKkt8JSNI9p6eB+/ZE9DKg6Wyq1g7Uo=";
};

controls {
    inet 127.0.0.1 port 953
        allow { 127.0.0.1; } keys { "rndc-key"; };
};
cat /etc/name/named.conf
key "rndc-key" {
    algorithm hmac-sha256;
    secret "vCQLvxUeXxvcdKkt8JSNI9p6eB+/ZE9DKg6Wyq1g7Uo=";
};

controls {
    inet 127.0.0.1 port 953
    allow { 127.0.0.1; } keys { "rndc-key"; };
};

options {
    listen-on port 53 { any; };    # 开启侦听53端口,any表示接受任意ip连接
    directory "/usr/local/bind/var";
    dump-file "/usr/local/bind/var/named_dump.db"; # 执行rndc dumpdb [-all|-cache|-zones|-adb|-bad|-fail] [view ...]时保存数据的导出文件
    pid-file "named.pid";  # 文件内容就是named进程的id
    allow-query{ any; };     # 允许任意ip查询
    allow-query-cache { any; }; # 允许任意ip查询缓存
    recursive-clients 60000;
    forwarders{ # 设置转发的公网ip
        202.96.128.86;
        223.5.5.5;
    };
    forward only; # 置只使用forwarders DNS服务器做域名解析,如果查询不到则返回DNS客户端查询失败。
    # forward first; 设置优先使用forwarders DNS服务器做域名解析,如果查询不到再使用本地DNS服务器做域名解析。
    max-cache-size 4g;
    dnssec-enable no; # 9.13、9.14版本的bind做转发时需要设置关闭DNS安全设置,否则转发失败,报broken trust chain/broken trust chain错
    dnssec-validation no; # 9.13、9.14版本的bind做转发时需要设置关闭DNS安全验证设置
};

logging {
    channel query_log {    # 查询日志
        file "/var/log/named/query.log" versions 20 size 300m;
        severity info;
        print-time yes;
        print-category yes;
    };

    channel error_log {    # 报错日志
        file "/var/log/named/error.log" versions 3 size 10m;
        severity notice;
        print-time yes;
        print-severity yes;
        print-category yes;
    };

    category queries { query_log; };
    category default { error_log; };
};


# acl
include "/etc/named/conf.d/cn_dx.acl";
include "/etc/named/conf.d/cn_lt.acl";
include "/etc/named/conf.d/cn_yd.acl";
include "/etc/named/conf.d/cn_jy.acl";
include "/etc/named/conf.d/cn.acl";


# view
include "/etc/named/conf.d/cn_dx.conf";
include "/etc/named/conf.d/cn_lt.conf";
include "/etc/named/conf.d/cn_yd.conf";
include "/etc/named/conf.d/cn_jy.conf";
include "/etc/named/conf.d/cn.conf";
include "/etc/named/conf.d/default.conf";    # default view 放最后
日志级别:
在定义通道的语句中,severity是指定记录消息的级别。在bind中主要有以下几个级别(按照严重性递减的顺序):
critical
error
warning
notice
info
debug [ level ]
dynamic
versions 20:保留20个文件
named-checkconf /etc/named/named.conf # 检测配置文件合法性
acl配置:
存放目录:/etc/named/conf.d
ip列表:https://ip.cn/chnroutes.html
示例:
cat cn_yd.acl
# 中国移动
# 2017101711, 74 routes

acl cn_yd {
36.128.0.0/10;
39.128.0.0/10;
42.83.200.0/23;
43.239.172.0/22;
43.241.112.0/22;
43.251.244.0/22;
45.121.68.0/22;
45.121.72.0/22;
45.121.172.0/22;
45.121.176.0/22;
45.122.96.0/21;
45.123.152.0/22;
45.124.36.0/22;
45.125.24.0/22;
58.83.240.0/21;
59.153.68.0/22;
61.14.244.0/22;
103.20.112.0/22;
103.21.176.0/22;
103.35.104.0/22;
103.37.176.0/23;
103.40.12.0/22;
103.43.124.0/22;
103.45.160.0/22;
103.61.156.0/22;
103.61.160.0/22;
103.62.24.0/22;
103.62.204.0/22;
103.62.208.0/22;
103.83.72.0/22;
103.192.0.0/22;
103.192.144.0/22;
103.193.140.0/22;
103.205.116.0/22;
103.227.48.0/22;
111.0.0.0/10;
111.235.182.0/24;
112.0.0.0/10;
114.66.68.0/22;
117.128.0.0/10;
118.187.40.0/21;
118.191.248.0/21;
118.194.165.0/24;
120.192.0.0/10;
121.255.0.0/16;
131.228.96.0/24;
163.53.56.0/22;
183.192.0.0/10;
202.141.176.0/20;
211.103.0.0/17;
211.136.0.0/13;
211.148.224.0/19;
211.155.236.0/24;
218.200.0.0/13;
221.130.0.0/15;
221.176.0.0/19;
221.176.32.0/20;
221.176.48.0/21;
221.176.56.0/24;
221.176.58.0/23;
221.176.60.0/22;
221.176.64.0/18;
221.176.128.0/17;
221.177.0.0/16;
221.178.0.0/15;
221.180.0.0/14;
223.64.0.0/11;
223.96.0.0/12;
223.112.0.0/14;
223.116.0.0/15;
223.118.2.0/24;
223.118.10.0/24;
223.118.18.0/24;
223.120.0.0/13;
};
其他类似
view配置:
存放目录:/etc/named/conf.d
这里连接数据库的帐号只需要只读权限就可以了
cat cn_yd.conf # match-clients要与定义的acl匹配
view "cn_yd" {
match-clients { cn_yd; };

dlz "Postgres zone" {
    database "postgres 2
        {host=127.0.0.1 dbname=bind_ui port=5432 user=bind_ui_r password=rr123456}
        {select zone_name from "DnsRecord_zonetag" where zone_name = '$zone$'}
        {select ttl, type, mx_priority,
            case when lower(type)='txt' then
                concat('"', data, '"')
            when lower(type) = 'soa' then
                concat_ws(' ', data, resp_person, serial, refresh, retry, expire, minimum)
            else
                data
            end
            from "DnsRecord_zonetag" inner join "DnsRecord_record" on "DnsRecord_record".zone_tag_id = "DnsRecord_zonetag".id
                and "DnsRecord_zonetag".zone_name = '$zone$'
                and "DnsRecord_record".host = '$record$'
                where "DnsRecord_zonetag".status = 'on'
                    and "DnsRecord_record".status = 'on'
                    and ("DnsRecord_record".resolution_line = '103' or "DnsRecord_record".resolution_line = '0')
        }
    ";
};

};
注意:这里
DnsRecord_record.resolution_line 的值要与 bindUI定义值相同,以区别不同的解析线路
其他类似
cat default.conf # 默认view,any acl表示所有,不需要定义,所以默认view需要放在配置中所有view的最后
view "default" {
match-clients { any; };

dlz "Postgres zone" {
    database "postgres 2
        {host=127.0.0.1 dbname=bind_ui port=5432 user=bind_ui_r password=rr123456}
        {select zone_name from "DnsRecord_zonetag" where zone_name = '$zone$'}
        {select ttl, type, mx_priority,
            case when lower(type)='txt' then
                concat('"', data, '"')
            when lower(type) = 'soa' then
                concat_ws(' ', data, resp_person, serial, refresh, retry, expire, minimum)
            else
                data
            end
            from "DnsRecord_zonetag" inner join "DnsRecord_record" on "DnsRecord_record".zone_tag_id = "DnsRecord_zonetag".id
                and "DnsRecord_zonetag".zone_name = '$zone$'
                and "DnsRecord_record".host = '$record$'
                where "DnsRecord_zonetag".status = 'on'
                    and "DnsRecord_record".status = 'on'
                    and "DnsRecord_record".resolution_line = '0'
        }
    ";
};

};
# 安装python 3.7
cd /usr/loca/src; wget https://www.python.org/ftp/python/3.7.3/Python-3.7.3.tar.xz
tar -Jxvf Python-3.7.3.tar.xz; cd Python-3.7.3
./configure --prefix=/usr/local/python_3.7.3; make; make install
可以把 /usr/local/python_3.7.3/bin 添加系统环境变量,这样使用更简单
/usr/local/python_3.7.3/bin/pip install --upgrade pip
/usr/local/python_3.7.3/bin/pip install virtualenv
## 更换国内pipy源,安装python扩展更快
参考:https://www.cnblogs.com/meelo/p/4636340.html
cat ~/.pip/pip.conf
[global]
index-url = https://mirrors.aliyun.com/pypi/simple/

[install]
trusted-host = mirrors.aliyun.com
## 创建用于运行BindUI项目的python虚拟环境
mkdir -p /data/pyvenv/
/usr/local/python_3.7.3/bin/pyvenv /data/pyvenv/BindUI
要进虚拟python环境操作方法
. /data/pyvenv/BindUI/bin/activate
退出虚拟环境
deactivate
# 部署BindUI项目
mkdir -p /data/webroot
cd /data/webroot
yum -y install git
git clone https://github.com/cucker0/BindUI.git
rm -rf /data/webroot/BindUI/.git # 为网站安全
## 设置配置信息,设置连接数据库信息
/data/webroot/BindUI/bindUI/settings.py
注释下面这两行
# import pymysql
# pymysql.install_as_MySQLdb()
这里的帐号需要有写读权限
DATABASES = {
    'default': {
        'ENGINE': 'django.db.backends.postgresql',
        'NAME': 'bind_ui',
        'USER': 'bind_ui_wr',
        'PASSWORD': 'ww123456',
        'HOST': '127.0.0.1',
        'PORT': '5432',
    }
}
## 安装依赖组件
cd /data/webroot/BindUI
. /data/pyvenv/BindUI/bin/activate
pip install --upgrade pip
pip install django Pillow pymysql IPy xlrd xlwt psycopg2
## 初始化数据库
python manage.py migrate
python manage.py makemigrations
python manage.py migrate

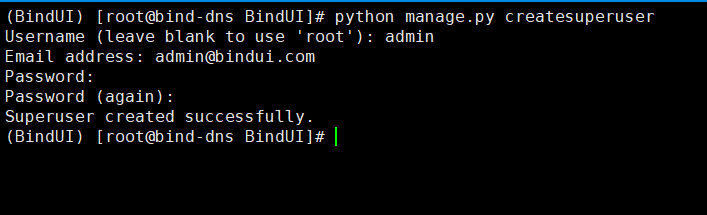
## 创建超级用户
python manage.py createsuperuser
## 运行django
python manage.py runserver 0.0.0.0:8080
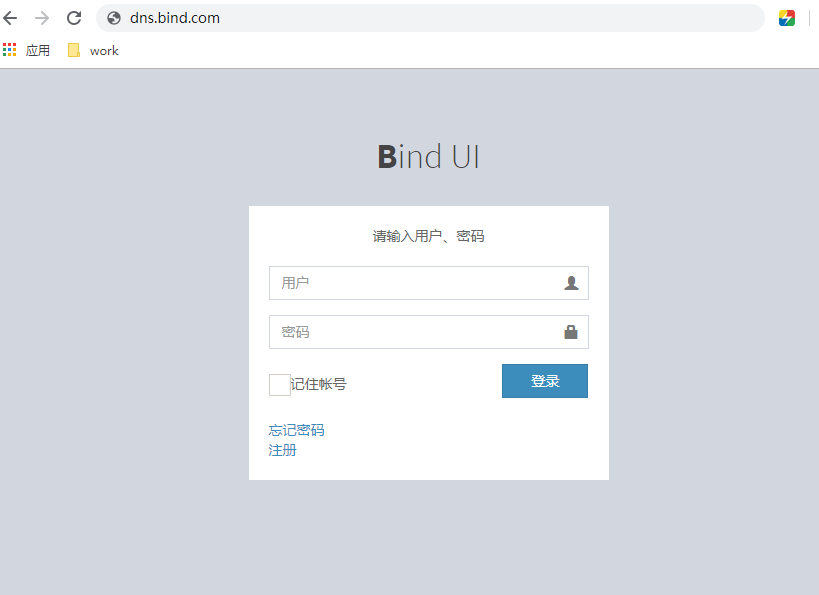
此时可以通过下面的URL访问BindUI控制台
http://服务器IP:8080
使用上面的登记登录
* 登录

* 首页
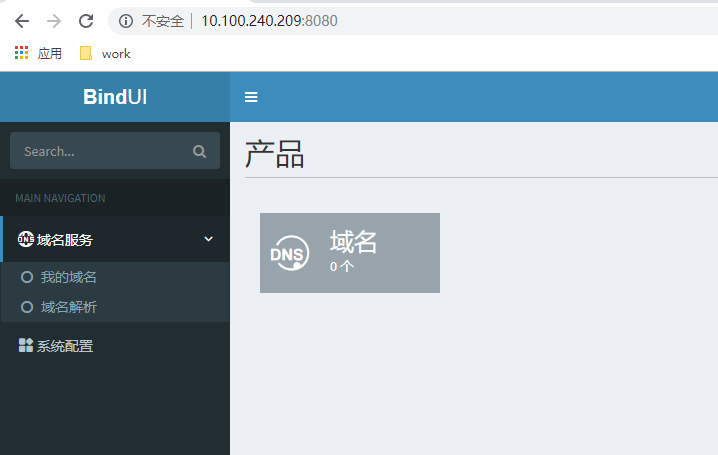
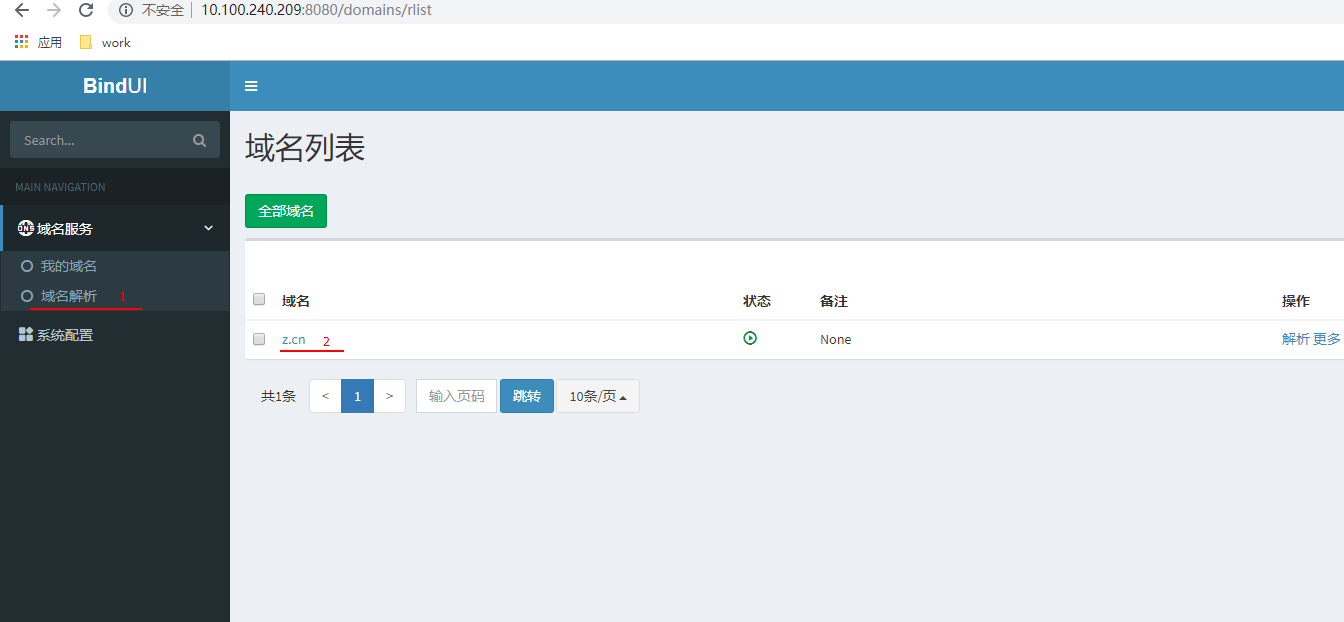
* 添加域名
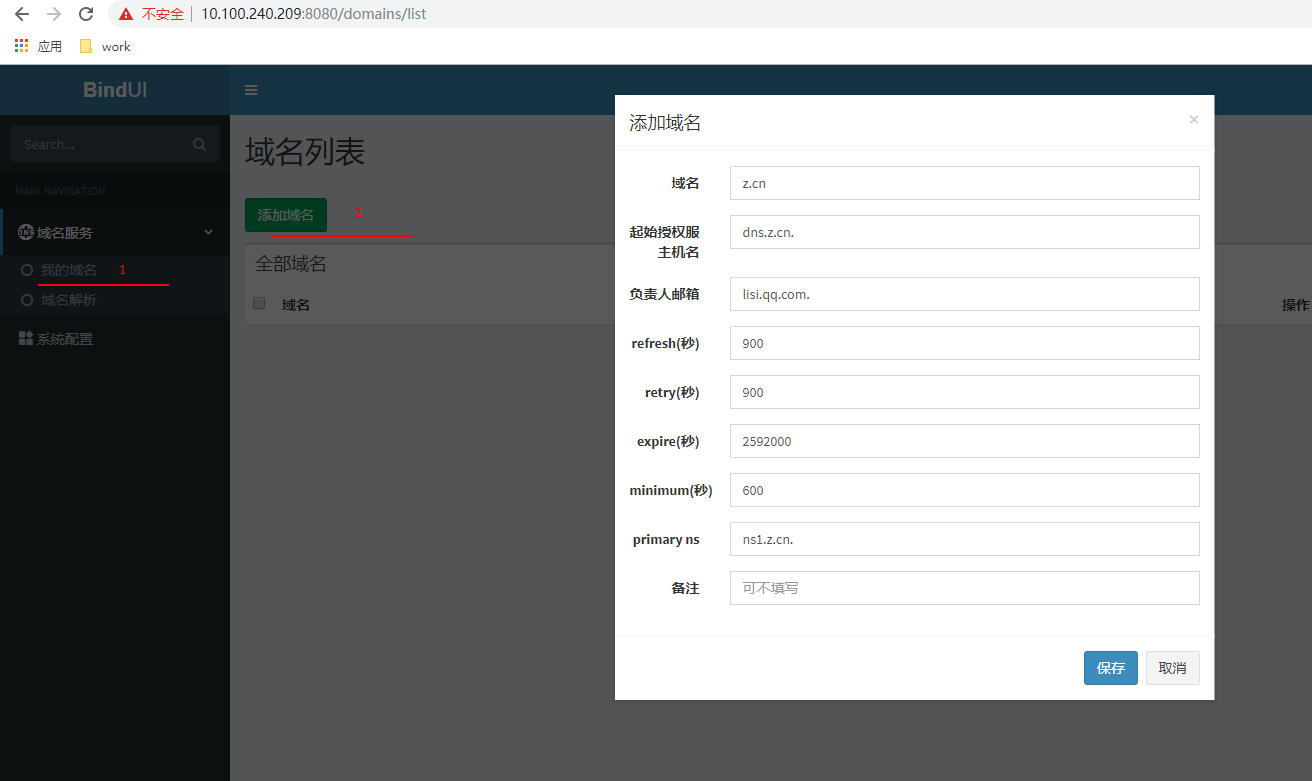
* 设置NS主机,可设置多个
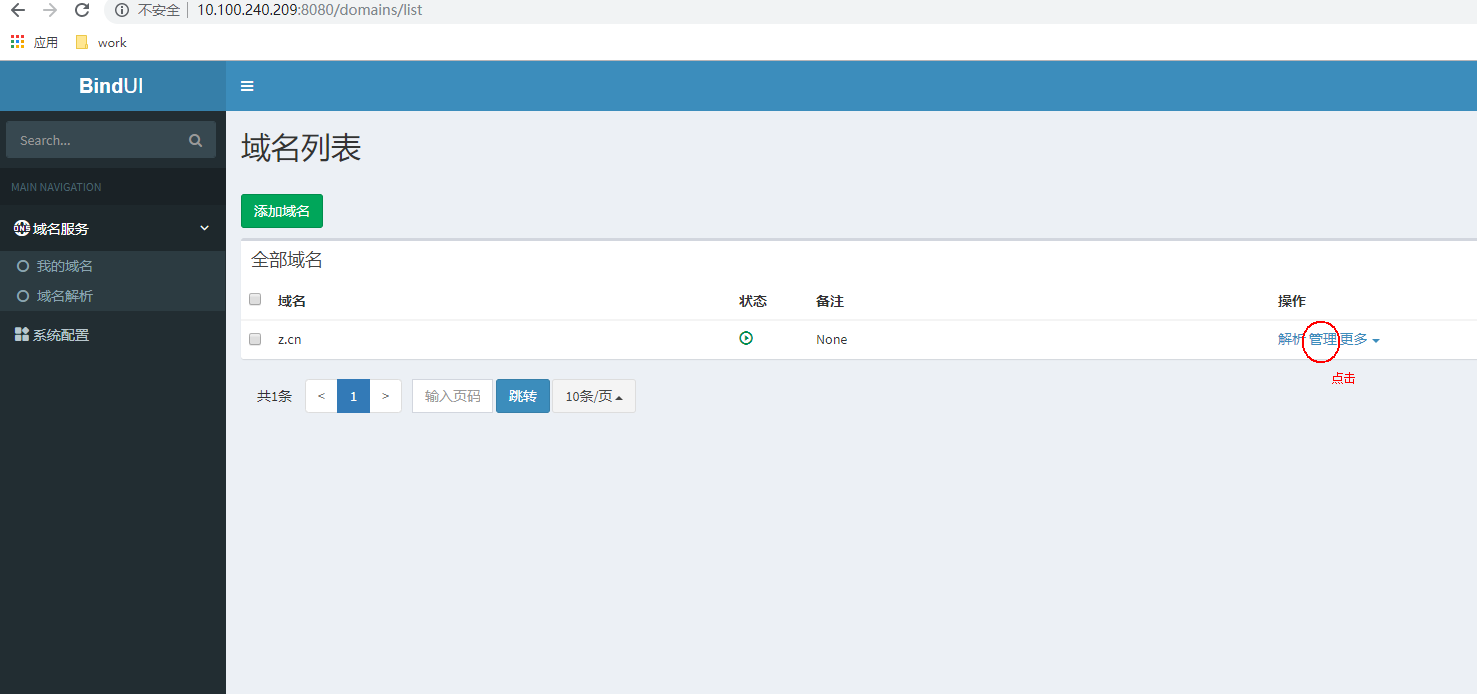
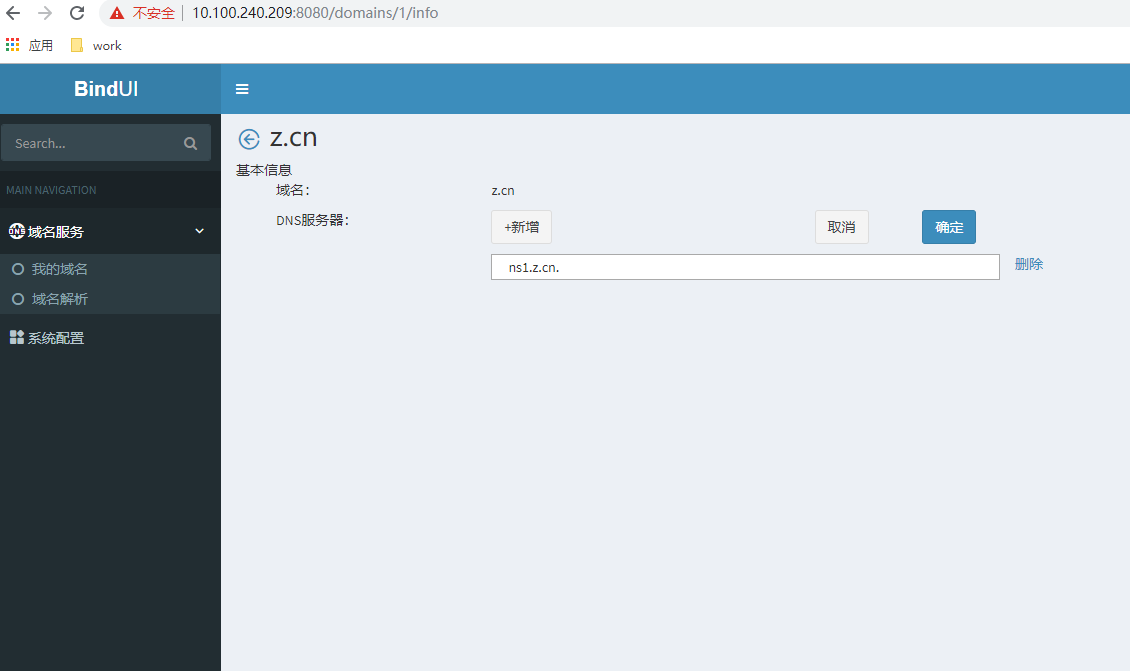
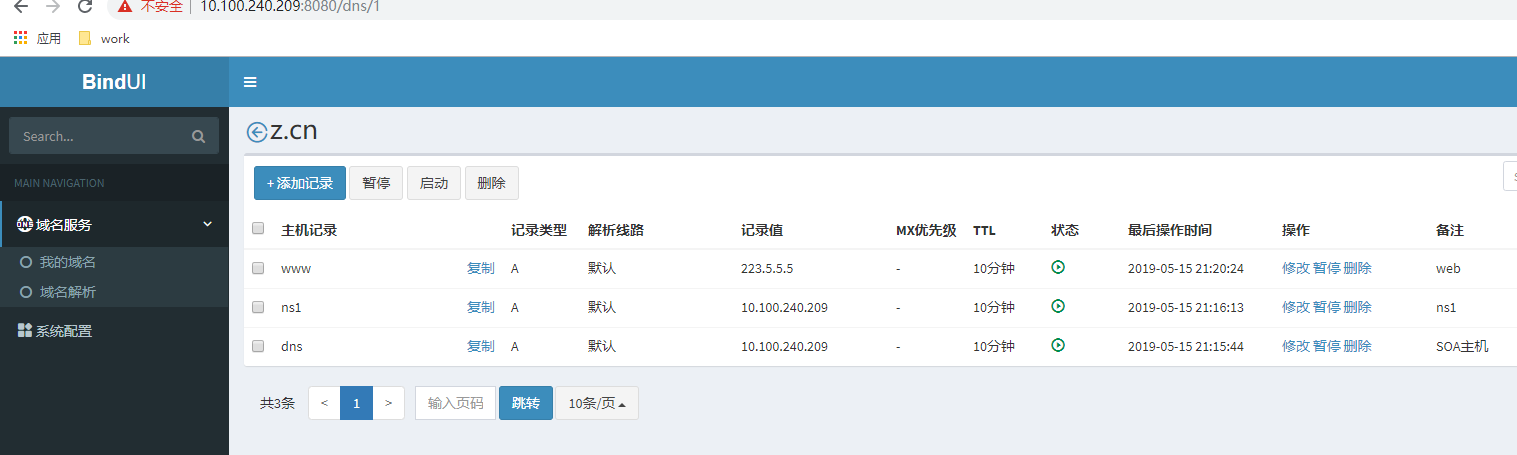
* 添加起始授权主机、NS主机相应的记录
NS主机设置了多个就需要建立多个,起始授权主机只有一个

建一个反向解析域

同样也需要设置NS主机
建立PTR记录,与NS主机记录对应

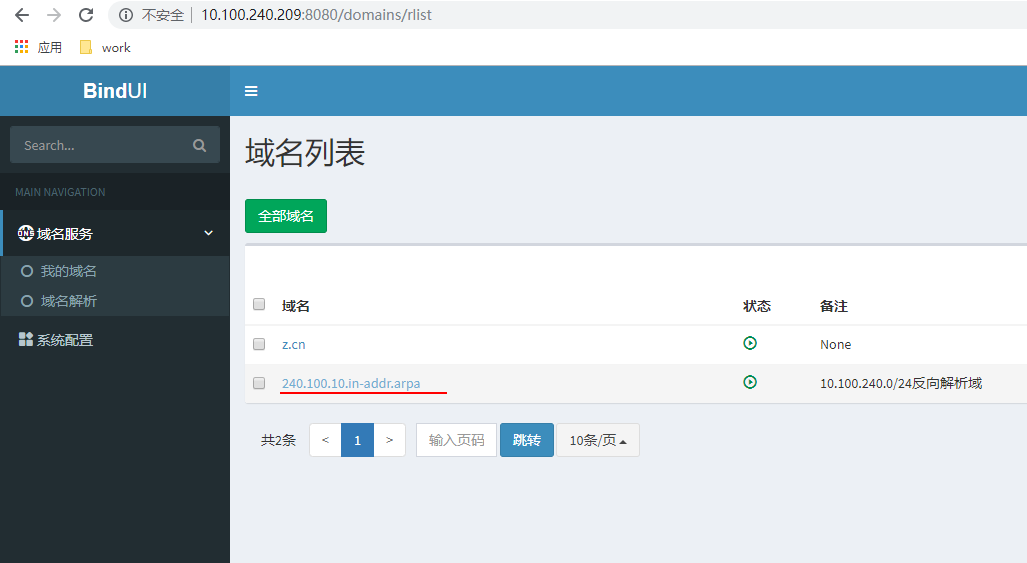

此时就能建其他记录了
## 给bind_ui_r用户添加相应表的只读权限
上面授权时,因为下面这些表还没有创建,所以是没有授到权的,需要重新执行一次。
su postgres
psql
c bind_ui
GRANT SELECT ON "DnsRecord_record" TO bind_ui_r;
GRANT SELECT ON "DnsRecord_zonetag" TO bind_ui_r;
## 启动bind服务
systemctl start named
bind启动调试模式方法
/usr/local/bind/sbin/named -n 1 -u named -c /usr/local/bind/etc/named.conf -d 4 -g
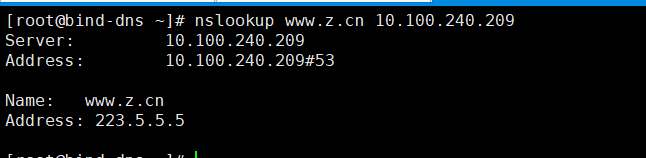
此时就可以解析了
# Django Nginx+ uWSGI 运行django项目
前面运行的django 在bash控制上,现在以守护进程方式运行,参考https://www.cnblogs.com/linkenpark/p/6560787.html
## 安装uwsgi
/usr/local/python_3.7.3/bin/pip install uwsgi
id uwsgi
uid=1000(uwsgi) gid=1000(uwsgi) groups=1000(uwsgi)
/usr/local/python_3.7.3/bin/uwsgi --http 0.0.0.0:8000 -H /data/pyvenv/BindUI --chdir /data/webroot/BindUI/ --wsgi-file bindUI/wsgi.py
这时在浏览器上能看到除了样式外的页面
退出uwsgi
## 配置uwsgi
mkdir /etc/uwsgi
vi /etc/uwsgi/uwsgi9090.ini
[uwsgi]
socket=127.0.0.1:9090
chdir=/data/webroot/BindUI/
wsgi-file=bindUI/wsgi.py
# 开启主进程
master=True
# 设置多进程
processes=8
uid=uwsgi
gid=uwsgi
# 最大并发
max-requests=20480
# 当服务停止的时候自动移除unix Socket和Pid文件
vacuum=True
# 虚拟环境
home=/data/pyvenv/BindUI
# 日志
daemonize=/var/log/uwsgi/uwsgi9090.log
chown -R uwsgi:uwsgi /data/webroot/BindUI//upload/user_image # 上传用户头像的目录可写,其他目录只需要只读权限即可。
## 设置uwsgi自动启动脚本
cat /etc/systemd/system/uwsgi.service
[Unit]
Description=uWSGI Emperor
After=syslog.target

[Service]
ExecStart=/usr/local/python_3.7.3/bin/uwsgi --emperor /etc/uwsgi
Restart=always
KillSignal=SIGQUIT
Type=notify
StandardError=syslog
NotifyAccess=all

[Install]
WantedBy=multi-user.target
systemctl enable uwsgi
systemctl start uwsgi
## 更新项目代码
当python项目代码有更新时,要让其生效,重载或重启 uwsgi服务即可
systemctl reload uwsgi
## 安装nginx
cd /usr/local/src
wget https://ftp.pcre.org/pub/pcre/pcre-8.43.tar.gz
wget http://nginx.org/download/nginx-1.16.0.tar.gz
tar -zxvf pcre-8.43.tar.gz; cd pcre-8.43; ./configure --enable-jit; make; make install
ldconfig
yum -y install zlib zlib-devel gd gd-devel --skip-broken
useradd nginx -M -s /sbin/nologin
cd /usr/local/src
tar -zxvf nginx-1.16.0.tar.gz; cd nginx-1.16.0
./configure --prefix=/usr/local/nginx_1.16.0 --user=nginx --group=nginx --with-http_stub_status_module --with-http_ssl_module --with-pcre=/usr/local/src/pcre-8.43 --with-http_realip_module --with-http_image_filter_module --with-http_gzip_static_module --with-openssl=/usr/local/src/openssl-1.0.2r --with-openssl-opt="enable-tlsext" --with-stream --with-stream_ssl_module --with-http_v2_module
make; make install
mkdir /usr/local/nginx/conf/conf.d
ln -s /usr/local/nginx_1.16.0 /usr/local/nginx
ln -s /usr/local/nginx/conf /etc/nginx
/usr/local/nginx/sbin 添加到系统环境变量中
. /etc/profile # 重新加载环境变量
## nginx自动启动脚本
cat /usr/lib/systemd/system/nginx.service
[Unit]
Description=nginx - high performance web server
Documentation=http://nginx.org/en/docs/
After=network.target remote-fs.target nss-lookup.target


[Service]
Type=forking
PIDFile=/usr/local/nginx/logs/nginx.pid
ExecStartPre=/usr/local/nginx/sbin/nginx -t -c /etc/nginx/nginx.conf
ExecStart=/usr/local/nginx/sbin/nginx -c /etc/nginx/nginx.conf
ExecReload=/bin/kill -s HUP $MAINPID
ExecStop=/bin/kill -s QUIT $MAINPID
PrivateTmp=true

[Install]
WantedBy=multi-user.target
systemctl enable nginx
systemctl start nginx
## nginx配置
cat /etc/nginx/nginx.conf
user nginx nginx;
worker_processes auto;
worker_cpu_affinity auto;

error_log  logs/error.log notice;
pid        logs/nginx.pid;
worker_rlimit_nofile 65535;

events {
    use epoll;
    worker_connections 65535;
}


http {
    include       mime.types;
    default_type  application/octet-stream;
    log_format  main  '$http_x_forwarded_for`$remote_addr`$proxy_add_x_forwarded_for`[$time_local]`"$request"`'
                      '$status`$body_bytes_sent`"$http_referer"`'
                      '"$http_user_agent"`"$request_time"`'
                      '$http_x_request_id`$upstream_response_time`$upstream_addr`$upstream_connect_time`$upstream_status';

    log_format  access  '$remote_addr`[$time_local]`"$request"`'
                      '$status`$body_bytes_sent`"$http_referer"`'
                      '"$http_user_agent"`"$http_x_forwarded_for"`'
                      '$http_x_request_id`$upstream_response_time`$upstream_addr`$upstream_connect_time`$upstream_status';

#    proxy_ignore_client_abort on;
    proxy_headers_hash_max_size 2048;
    proxy_headers_hash_bucket_size 256;
    sendfile    on;
    tcp_nopush  on;
    tcp_nodelay on;
    keepalive_timeout 60;
    server_tokens off;

    gzip    on;
    gzip_min_length 1k;
    gzip_buffers    4 16k;
    gzip_http_version 1.1;
    gzip_comp_level 2;
    gzip_types  text/plain  application/x-javascript text/css application/xml;
    gzip_vary on;

    client_max_body_size 100m;
    client_body_buffer_size 128k;
    client_body_temp_path /dev/shm/client_body_temp;
    proxy_connect_timeout 600;
    proxy_read_timeout 600;
    proxy_send_timeout 600;
    proxy_buffer_size 16k;
    proxy_buffers 32 32k;
    proxy_busy_buffers_size 64k;
    proxy_temp_file_write_size 64k;
    proxy_temp_path /dev/shm/proxy_temp;

    include /etc/nginx/conf.d/*.conf;

}
/etc/nginx/conf.d/bind_ui.conf
upstream dns_bind_com {
    server 127.0.0.1:9090 weight=10 max_fails=0;
}

server {
    listen       80;
    server_name  dns.bind.com;
    charset utf-8;
    access_log  logs/dns.bind.com.log  main;

    location /static/system/ {
        alias /data/webroot/BindUI/upload/system/;
    }


    location /static/user_image/ {
        alias /data/webroot/BindUI/upload/user_image/;
    }

    location /static {
        alias /data/webroot/BindUI/static;
    }

    location / {
        include uwsgi_params;
        uwsgi_pass dns_bind_com;
    }
}
nginx -t
systemctl restart nginx
## django admin静态文件加载不了问题
在/data/webroot/BindUI/bindUI/settings.py 最后添加下面设置
STATIC_ROOT = os.path.join(BASE_DIR, "static")
STATICFILES_FINDERS = (
    "django.contrib.staticfiles.finders.FileSystemFinder",
    "django.contrib.staticfiles.finders.AppDirectoriesFinder"
)
cd /data/webroot/BindUI
. /data/pyvenv/BindUI/bin/activate
python manage.py collectstatic #生产静态问题,询问覆盖时,输入yes,这时生成了这个目录 /data/webroot/BindUI/static/admin
再把上面添加的配置删除或注释
deactivate
最终访问效果: