MSDyn365FO: Print Product label to a ZPL printer from a PowerApp
While ago I have posted a series of blogs that describe how to create a PowerApp that generates product labels. This app was embedded into Microsoft Dynamics 365 for Finance and Operations, it allowed to generate label with a barcode and open it as a pdf file in separate tab. In this solution I used ZPL language for label design and Microsoft Power Automate (MS Flow) to retrieve product specific data from MSDyn365FO. If you like to know more about this solution, then start reading from this post.
Because PowerApps and Microsoft Power Automate do not support printing, we could print our label only via browser print option and could not redirect the label to a ZPL printer. There are some blogs on the web that show you how to solve this issue, for example, you could save a file to One drive folder and have PowerShell script or external app that monitors this folder and prints files from it. However, none of the options I saw was perfect.
Therefore, I have got an idea to use Document routing agent for printing. We already know that it is capable to print ZPL labels, because we use it in Advanced warehouse management. The only gotcha here, is that there is no out of the box entity to add records into a printing queue. Kudos to a colleague of mine, Ievgen Miroshnikov, who helped me out to implement this solution. You can find it on a GitHub here, and in this post, I will create an example that shows you how to use it.
To test my solution, I will setup a dummy printer. To do it, follow Step 2 from this blog.
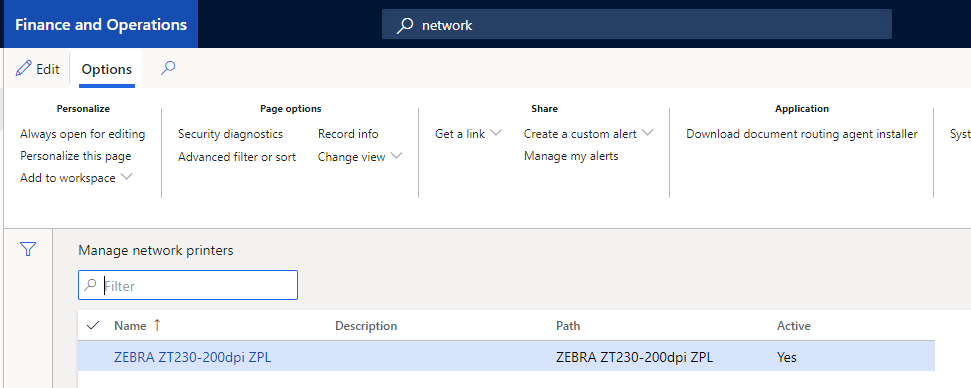
Then I have installed Document routing agent and enabled my printer in MSDyn365FO:
Considering that I created original app while ago, I no longer had that version, and I had to recreate it from the scratch. Therefore, I have used it as an opportunity to change and enhance it a bit. Below you can see what was modified:
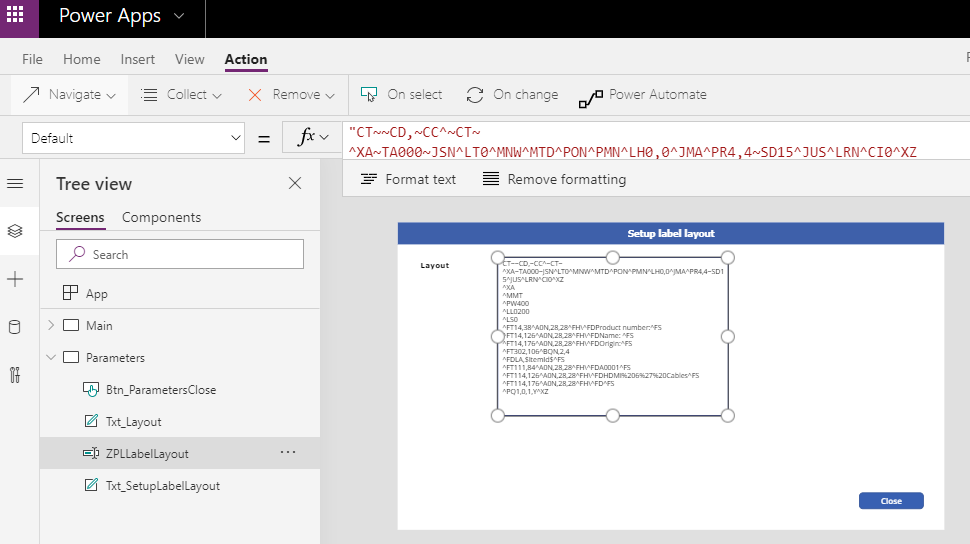
- I have created parameters form that stores ZPL label design, this is to have one place to store the layout (ZPLLabelLayout field below that stores ZPL label text):
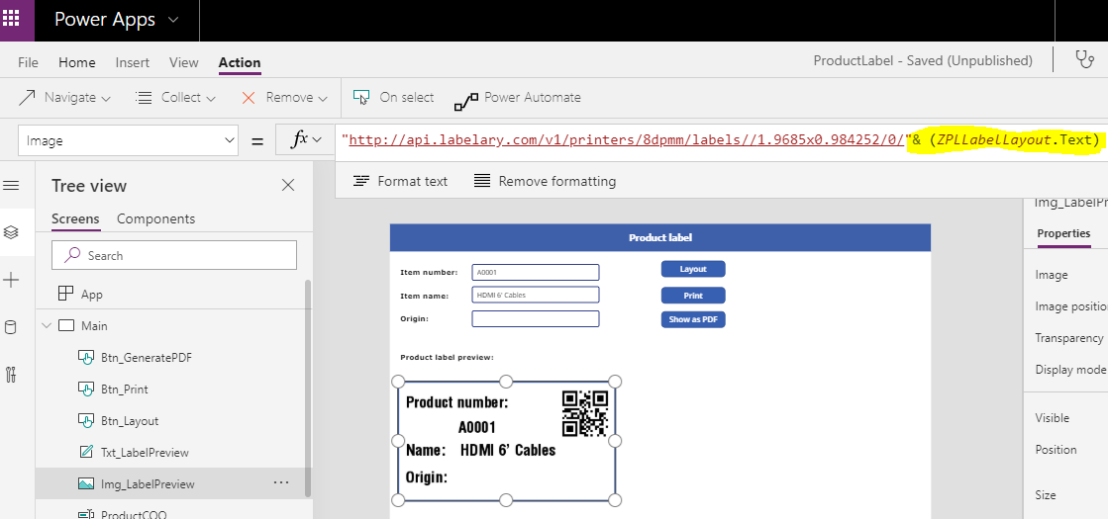
- I have added Layout button to the Main form (it opens Parameters screen where you can setup layout). Also, I have changed preview Image property to refer to ZPLLabelLayout field created above (previously I had here hardcoded ZPL label text):
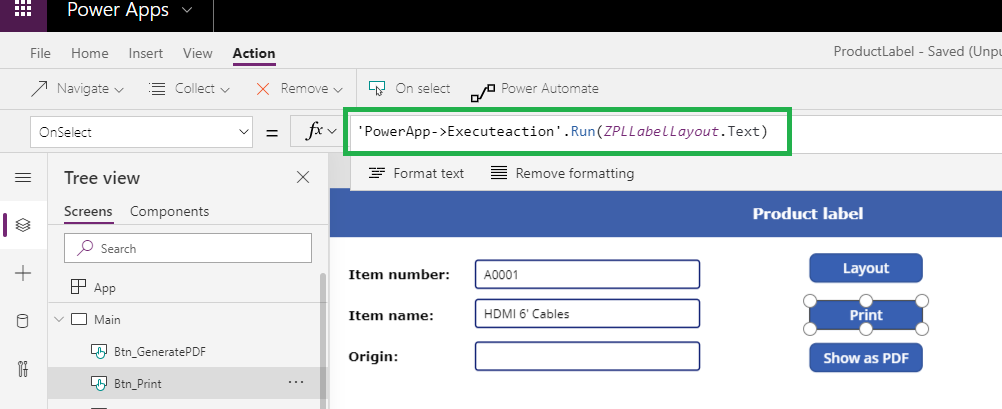
- Finally, I have added print button that uses Microsoft Power Automate to trigger print action. On select I have specified my flow and passed ZPLLabelLayout field value to it:
These are all the changes from PowerApp side. Let’s have a look at the created flow. We have two steps in the flow, one is a trigger another one is an action:
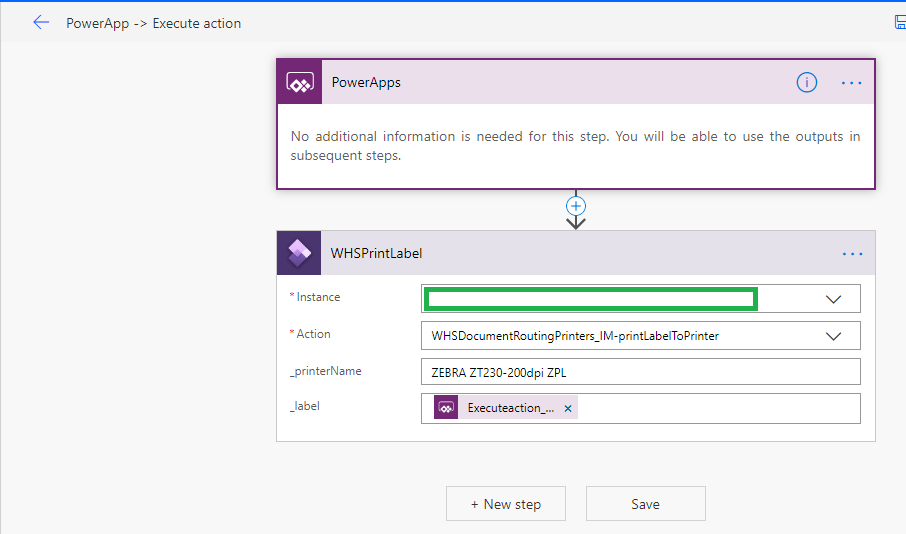
For the action step we need to specify following parameters:
- Instance – link to MSDyn365FO instance
- Action – data entity that was exposed to submit records to document routing agent queue
- _printerName – Printer name from MSDyn365FO (note, I have hardcoded it, but you can retrieve all printers available from MSDyn365FO and add an option to select it in the PowerApp)
- _label – label that we print, that is going to be a value we pass from PowerApp (ZPLLabelLayout.Text)
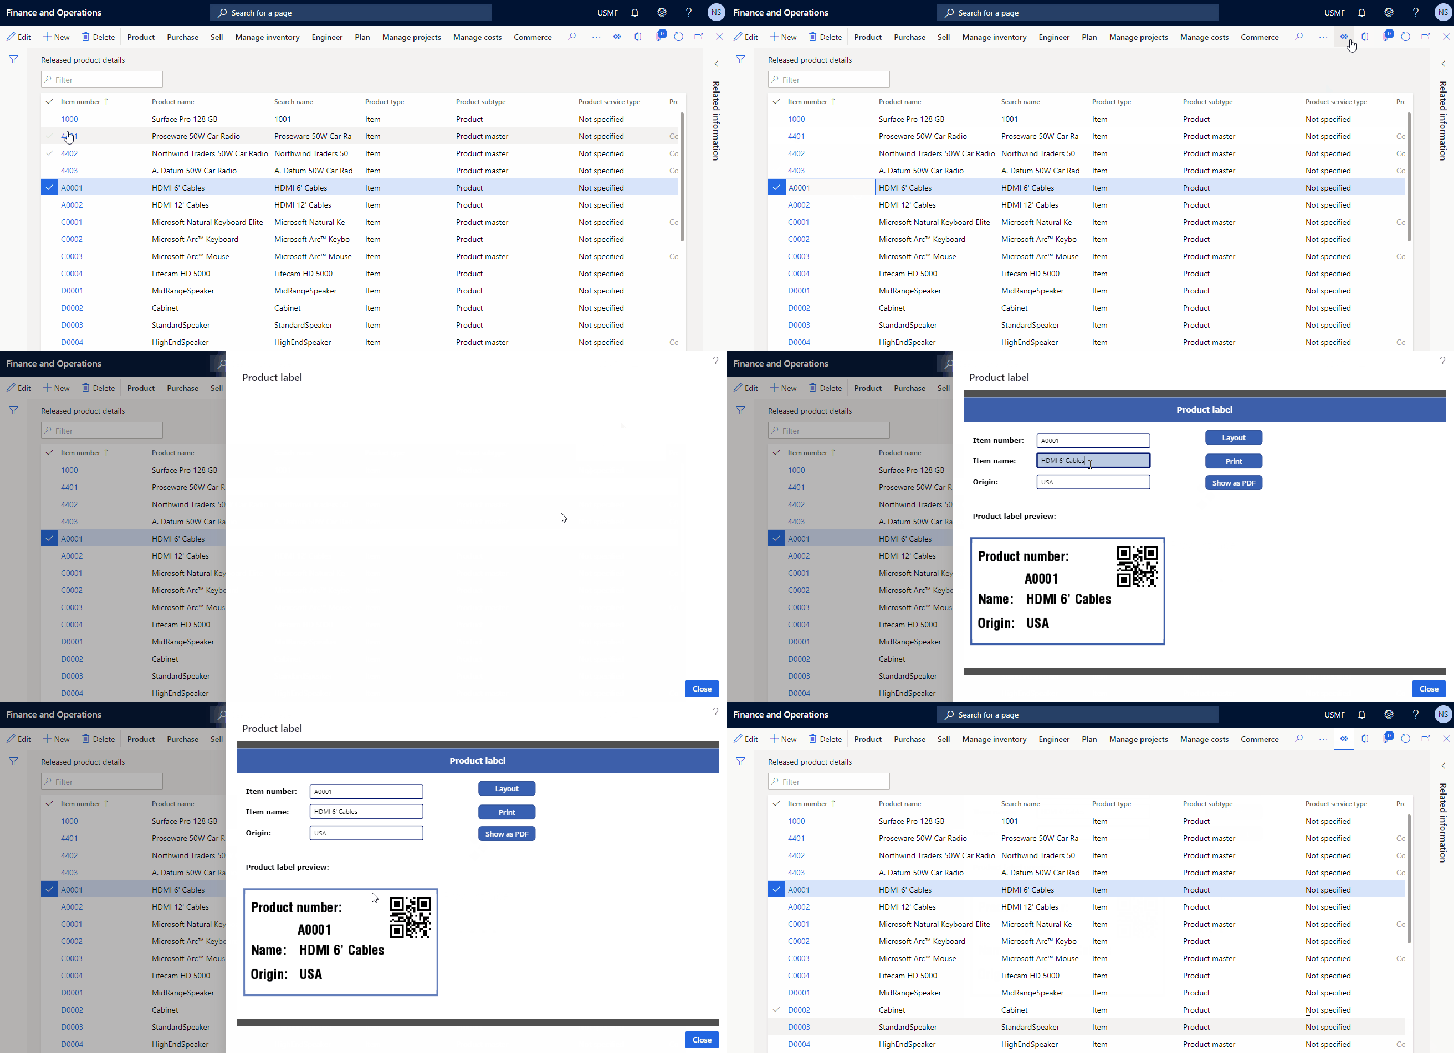
All done and now it is time to test it. Open the App and click on the Print button:
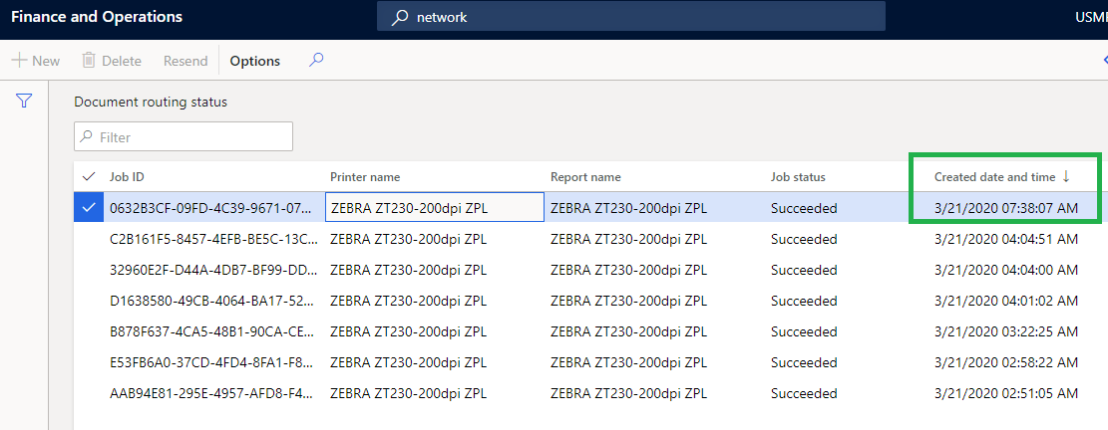
Check Document routing status form:
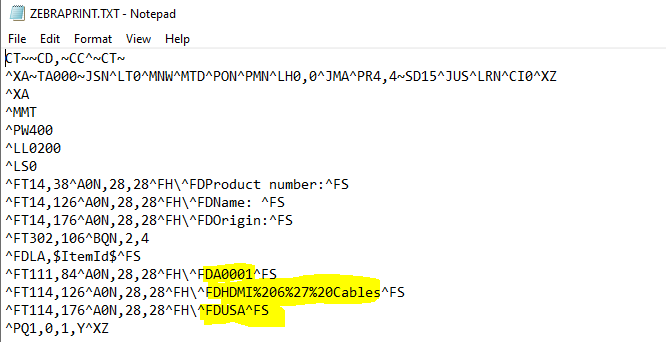
Let’s check what was printed to the dummy printer:

That is all, with minor changes to MSDyn365FO we have managed to create hassle-free and reliable printing solution. Not bad I would say!