前文有提到过 做一个简单的订餐系统,最近花了点时间,了解了一下AngularJS框架的使用。因此本文的目的根据了解的知识重新搭建基于 AngularJS框架. 该框架是基于对于AngularJS的学习而制定的,这其中肯定有很多不足,在以后的学习中在加以改进。
一。系统准备
安装Node.js version>=0.10.0版本
Git Shell 并添加该 Shell脚本到Path环境变量中 Path=:,"$git_home/bin"
二。手动搭建框架
2.1 创建开发目录
cd $PROJECT_HOME$
mkdir client
cd client
mkdir app
mkdir test
mkdir dist
2.2 配置文件package.json
创建一个空的package.json文件,并且修改该package.json文件 内容如下:
package.json文件是NPM package管理的具体配置文件,当npm执行时则会解析该文件中的内容。具体请看https://docs.npmjs.com/files/package.json
{
  "name": "client",
  "version": "1.0.0",
  "private": true,
  "description": "A skeleton based on angularJS",
  "dependencies": {},
  "repository":  { "type" : "git", "url" : "https://github.com/hlxinyan/AngularJSSkeleton.git"},
  "devDependencies": {
    "grunt": "^0.4.5",
    "grunt-autoprefixer": "^2.0.0",
    "grunt-concurrent": "^1.0.0",
    "grunt-contrib-clean": "^0.6.0",
    "grunt-contrib-compass": "^1.0.0",
    "grunt-contrib-concat": "^0.5.0",
    "grunt-contrib-connect": "^0.9.0",
    "grunt-contrib-copy": "^0.7.0",
    "grunt-contrib-cssmin": "^0.12.0",
    "grunt-contrib-htmlmin": "^0.4.0",
    "grunt-contrib-imagemin": "^0.9.2",
    "grunt-contrib-jshint": "^0.11.0",
    "grunt-contrib-uglify": "^0.7.0",
    "grunt-contrib-watch": "^0.6.1",
    "grunt-filerev": "^2.1.2",
    "grunt-google-cdn": "^0.4.3",
    "grunt-karma": "^0.10.1",
    "grunt-newer": "^1.1.0",
    "grunt-ng-annotate": "^0.9.2",
    "grunt-svgmin": "^2.0.0",
    "grunt-usemin": "^3.0.0",
    "grunt-wiredep": "^2.0.0",
    "jshint-stylish": "^1.0.0",
    "karma": "~0.12",
    "karma-jasmine": "^0.3.5",
    "karma-phantomjs-launcher": "^0.1.4",
    "load-grunt-tasks": "^3.1.0",
    "time-grunt": "^1.0.0",
    "protractor": "^1.1.1",
    "http-server": "^0.6.1",
    "bower": "^1.3.1",
    "shelljs": "^0.2.6",
    "karma-junit-reporter": "^0.2.2"
  },
  "dependencies": {
    "angular-resource": "^1.3.15"
  },
  "engines": {
    "node": ">=0.10.0"
  },
  "scripts": {
    "postinstall": "bower install",

    "prestart": "npm install",
    "start": "http-server -a localhost -p 8000 -c-1",

    "pretest": "npm install",
    "test": "karma start karma.conf.js",
    "test-single-run": "karma start karma.conf.js  --single-run",

    "preupdate-webdriver": "npm install",
    "update-webdriver": "webdriver-manager update",

    "preprotractor": "npm run update-webdriver",
    "protractor": "protractor e2e-tests/protractor.conf.js",

    "update-index-async": "node -e "require('shelljs/global'); sed('-i', /\/\/@@NG_LOADER_START@@[\s\S]*\/\/@@NG_LOADER_END@@/, '//@@NG_LOADER_START@@\n' + sed(/sourceMappingURL=angular-loader.min.js.map/,'sourceMappingURL=bower_components/angular-loader/angular-loader.min.js.map','app/bower_components/angular-loader/angular-loader.min.js') + '\n//@@NG_LOADER_END@@', 'app/index-async.html');""
  }
}
2.3 配置bower
2.3.1 创建一个.bowerc文件,并修改该文件内容如下:
http://bower.io/docs/config/#placement--order
{
  "directory": "app/bower_components",
 "analytics": false
  "interactive": false
}
2.3.2 创建一个空的bower.json文件,并且修改该bower.json文件 .
http://bower.io/docs/creating-packages/#maintaining-dependencies
{
  "name": "client",
  "version": "0.0.0",
  "dependencies": {
    "angular": "^1.3.0",
    "bootstrap-sass-official": "^3.2.0",
    "angular-animate": "^1.3.0",
    "angular-cookies": "^1.3.0",
    "angular-resource": "^1.3.0",
    "angular-route": "^1.3.0",
    "angular-sanitize": "^1.3.0",
    "angular-touch": "^1.3.0"
  },
  "devDependencies": {
    "angular-mocks": "^1.3.0"
  },
  "appPath": "app",
  "moduleName": "clientApp"
}
2.4 安装包
npm install
在执行install后,在client目录下将会看到 新增的node_modules 以及在 client/app目录下看到 bower_components。 具体如图所表示:
2.5 配置单元测试
cd $PROJECT_HOME/client/test
mkdir unit
创建karma.conf.js文件,并编辑其内容如下:
module.exports = function (config) {
  config.set({

    basePath: '../',

    files: [
      'app/bower_components/angular/angular.js',
      'app/bower_components/angular-route/angular-route.js',
      'app/bower_components/angular-resource/angular-resource.js',
      'app/bower_components/angular-mocks/angular-mocks.js',
      'app/js/**/*.js',
      'test/unit/**/*.js'
    ],

    autoWatch: true,

    frameworks: ['jasmine'],

    browsers: ['Chrome'],

    plugins: [
      'karma-chrome-launcher',
      'karma-firefox-launcher',
      'karma-jasmine'
    ],

    junitReporter: {
      outputFile: 'test_out/unit.xml',
      suite: 'unit'
    }

  });
};
执行npm test
2.6 配置E2E测试
cd $PROJECT_HOME/client/test
mkdir e2e
创建protractor.conf.js文件,并编辑其内容如下:
exports.config = {
  allScriptsTimeout: 11000,

  specs: [
    'e2e/*.js'
  ],

  capabilities: {
    'browserName': 'chrome'
  },

  baseUrl: 'http://localhost:8000/app/',

  framework: 'jasmine',

  jasmineNodeOpts: {
    defaultTimeoutInterval: 30000
  }
};
执行
现在一个console启动npm start
在另一个console启动npm run protractor
3.制作一个空的页面
cd client/app
cd client/app/js 创建一个app.js
cd client/app/css 创建一个 app.css
创建一个index.html
<!doctype html>
<html lang="en" ng-app="clientApp">
<head>
  <meta charset="utf-8">
  <title>Online Food Ordering</title>
  <!-- build:css css/main.css -->
  <link rel="stylesheet" href="bower_components/bootstrap/dist/css/bootstrap.css">
  <link rel="stylesheet" href="css/app.css">
  <!-- endbuild -->

  <!-- build:js js/main.js -->
  <!-- jQuery is used for JavaScript animations (include this before angular.js) -->
  <script src="bower_components/jquery/dist/jquery.js"></script>
  <!-- required module to enable animation support in AngularJS -->
  <script src="bower_components/angular/angular.js"></script>
  <script src="bower_components/angular-route/angular-route.js"></script>
  <script src="bower_components/angular-animate/angular-animate.js"></script>
  <script src="bower_components/angular-resource/angular-resource.js"></script>
  <script src="js/app.js"></script>
  <!-- endbuild -->
</head>

<body>
<div class="view-container">
  <div ng-view class="view-frame"></div>
</div>
</body>
</html>
其中把 css部分用:
<!-- build:css css/main.css –> <!-- endbuild --> 给包括起来
把JS部分用
<!-- build:js js/main.js –> <!—endbuild --> 给包括起来
4.项目打包
cd $PROJECT_HOME/client 创建一个Gruntfile.js,编辑内容如下:
/*jslint node: true */
"use strict";


module.exports = function(grunt) {

  grunt.initConfig({
    pkg: grunt.file.readJSON('package.json'),

    copy: {
      main: {
        src: 'app/index.html',
        dest: 'dist/index.html'
      }
    },

    useminPrepare: {
      html: 'app/index.html',
      options: {
        dest: 'dist'
      }
    },
    usemin: {
      html: ['dist/index.html']
    },

    jshint: {
      all: [ 'Gruntfile.js', 'app/*.js', 'app/js/*.js' ]
    },
    uglify: {
      options: {
        report: 'min',
        mangle: false
      }
    },
    clean: {
      temp: {
        src: [ 'tmp' ]
      }
    }

  });

  grunt.loadNpmTasks('grunt-contrib-jshint');
  grunt.loadNpmTasks('grunt-contrib-clean');
  grunt.loadNpmTasks('grunt-contrib-connect');
  grunt.loadNpmTasks('grunt-contrib-compress');
  grunt.loadNpmTasks('grunt-contrib-concat');
  grunt.loadNpmTasks('grunt-contrib-uglify');
  grunt.loadNpmTasks('grunt-html2js');
  grunt.loadNpmTasks('grunt-contrib-watch');
  grunt.loadNpmTasks('grunt-bower-task');
  grunt.loadNpmTasks('grunt-karma');
  grunt.loadNpmTasks('grunt-usemin');
  grunt.loadNpmTasks('grunt-contrib-cssmin');
  grunt.loadNpmTasks('grunt-contrib-copy');


  grunt.registerTask('default', [ 'jshint', 'clean','copy', 'useminPrepare', 'concat', 'uglify', 'cssmin', 'usemin' ]);

};
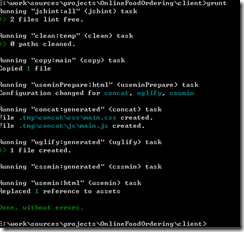
在控制台执行 grunt,运行结果如下:
单击dist/index.html 可以看到js以及css 都被合成一个文件,具体如下:
<!doctype html>
<html lang="en" ng-app="clientApp">
<head>
  <meta charset="utf-8">
  <title>Online Food Ordering</title>
  <link rel="stylesheet" href="css/main.css">

  <script src="js/main.js"></script>
</head>

<body>
<div class="view-container">
  <div ng-view class="view-frame"></div>
</div>
</body>
</html>
到此该项目框架搭建结束了,对于gruntfile目前只是用来文件的合并和压缩,而包管理 则直接使用 bower,单元测试 则直接使用 karma,e2e测试则使用protractor.
5. 提交Git
git add –A
git commit –m ‘myfirst skeleton’
git remote add myskeleton https://github.com/hlxinyan/AngularJSSkeleton.git
git push -u myskeleton master


