one sklearn mnist example
https://scikit-learn.org/stable/auto_examples/linear_model/plot_sparse_logistic_regression_mnist.html
如下例子,使用逻辑回归,基于mnist数据构建手写识别分类器。
Here we fit a multinomial logistic regression with L1 penalty on a subset of the MNIST digits classification task. We use the SAGA algorithm for this purpose: this a solver that is fast when the number of samples is significantly larger than the number of features and is able to finely optimize non-smooth objective functions which is the case with the l1-penalty. Test accuracy reaches > 0.8, while weight vectors remains sparse and therefore more easily interpretable.
Note that this accuracy of this l1-penalized linear model is significantly below what can be reached by an l2-penalized linear model or a non-linear multi-layer perceptron model on this dataset.
Out:
Sparsity with L1 penalty: 79.95%
Test score with L1 penalty: 0.8322
Example run in 36.916 s
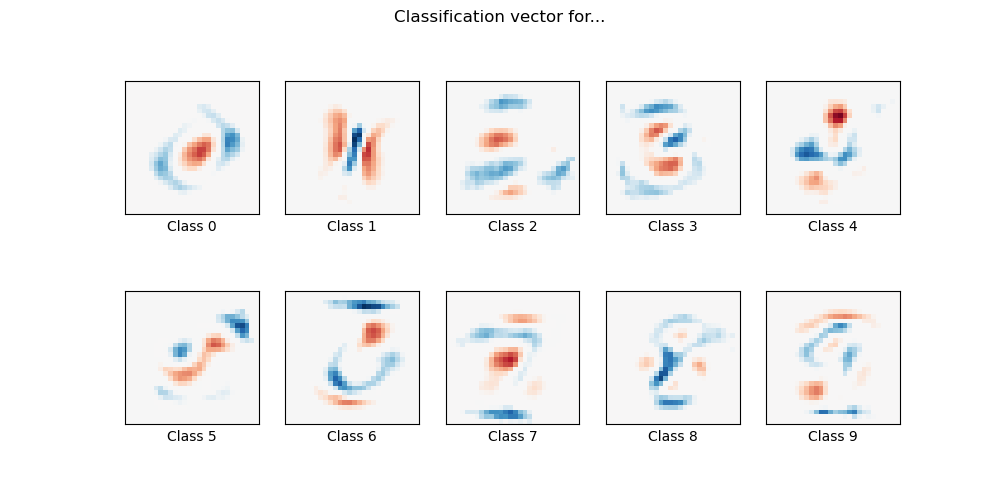
import time
import matplotlib.pyplot as plt
import numpy as np

from sklearn.datasets import fetch_openml
from sklearn.linear_model import LogisticRegression
from sklearn.model_selection import train_test_split
from sklearn.preprocessing import StandardScaler
from sklearn.utils import check_random_state

print(__doc__)

# Author: Arthur Mensch <arthur.mensch@m4x.org>
# License: BSD 3 clause

# Turn down for faster convergence
t0 = time.time()
train_samples = 5000

# Load data from https://www.openml.org/d/554
X, y = fetch_openml('mnist_784', version=1, return_X_y=True, as_frame=False)

random_state = check_random_state(0)
permutation = random_state.permutation(X.shape[0])
X = X[permutation]
y = y[permutation]
X = X.reshape((X.shape[0], -1))

X_train, X_test, y_train, y_test = train_test_split(
    X, y, train_size=train_samples, test_size=10000)

scaler = StandardScaler()
X_train = scaler.fit_transform(X_train)
X_test = scaler.transform(X_test)

# Turn up tolerance for faster convergence
clf = LogisticRegression(
    C=50. / train_samples, penalty='l1', solver='saga', tol=0.1
)
clf.fit(X_train, y_train)
sparsity = np.mean(clf.coef_ == 0) * 100
score = clf.score(X_test, y_test)
# print('Best C % .4f' % clf.C_)
print("Sparsity with L1 penalty: %.2f%%" % sparsity)
print("Test score with L1 penalty: %.4f" % score)

coef = clf.coef_.copy()
plt.figure(figsize=(10, 5))
scale = np.abs(coef).max()
for i in range(10):
    l1_plot = plt.subplot(2, 5, i + 1)
    l1_plot.imshow(coef[i].reshape(28, 28), interpolation='nearest',
                   cmap=plt.cm.RdBu, vmin=-scale, vmax=scale)
    l1_plot.set_xticks(())
    l1_plot.set_yticks(())
    l1_plot.set_xlabel('Class %i' % i)
plt.suptitle('Classification vector for...')

run_time = time.time() - t0
print('Example run in %.3f s' % run_time)
plt.show()
数据源改造点
上面的例子中, 数据源头的获取,是从openml站点上拉去, 如:
# Load data from https://www.openml.org/d/554
X, y = fetch_openml('mnist_784', version=1, return_X_y=True, as_frame=False)
数据源探索
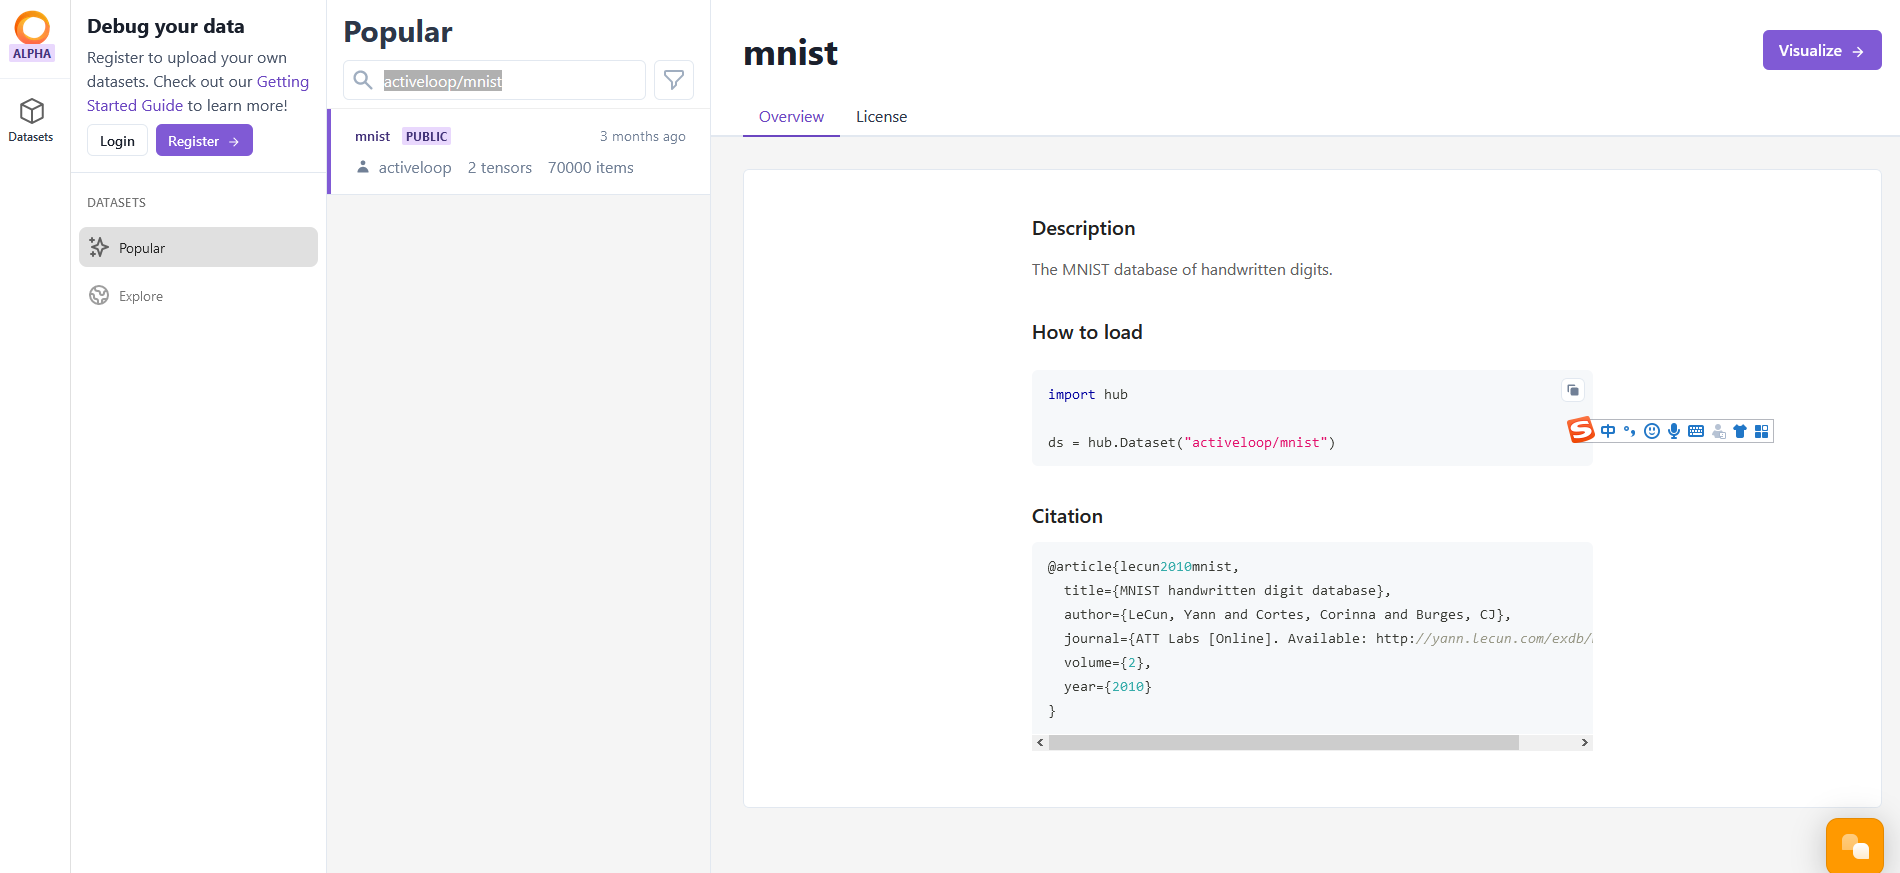
我们需要将这部分替换为hub获取, 数据源名称为 activeloop/mnist。
在如下网站的搜索框中,输入 activeloop/mnist, 找到此数据源
https://app.activeloop.ai/datasets/popular
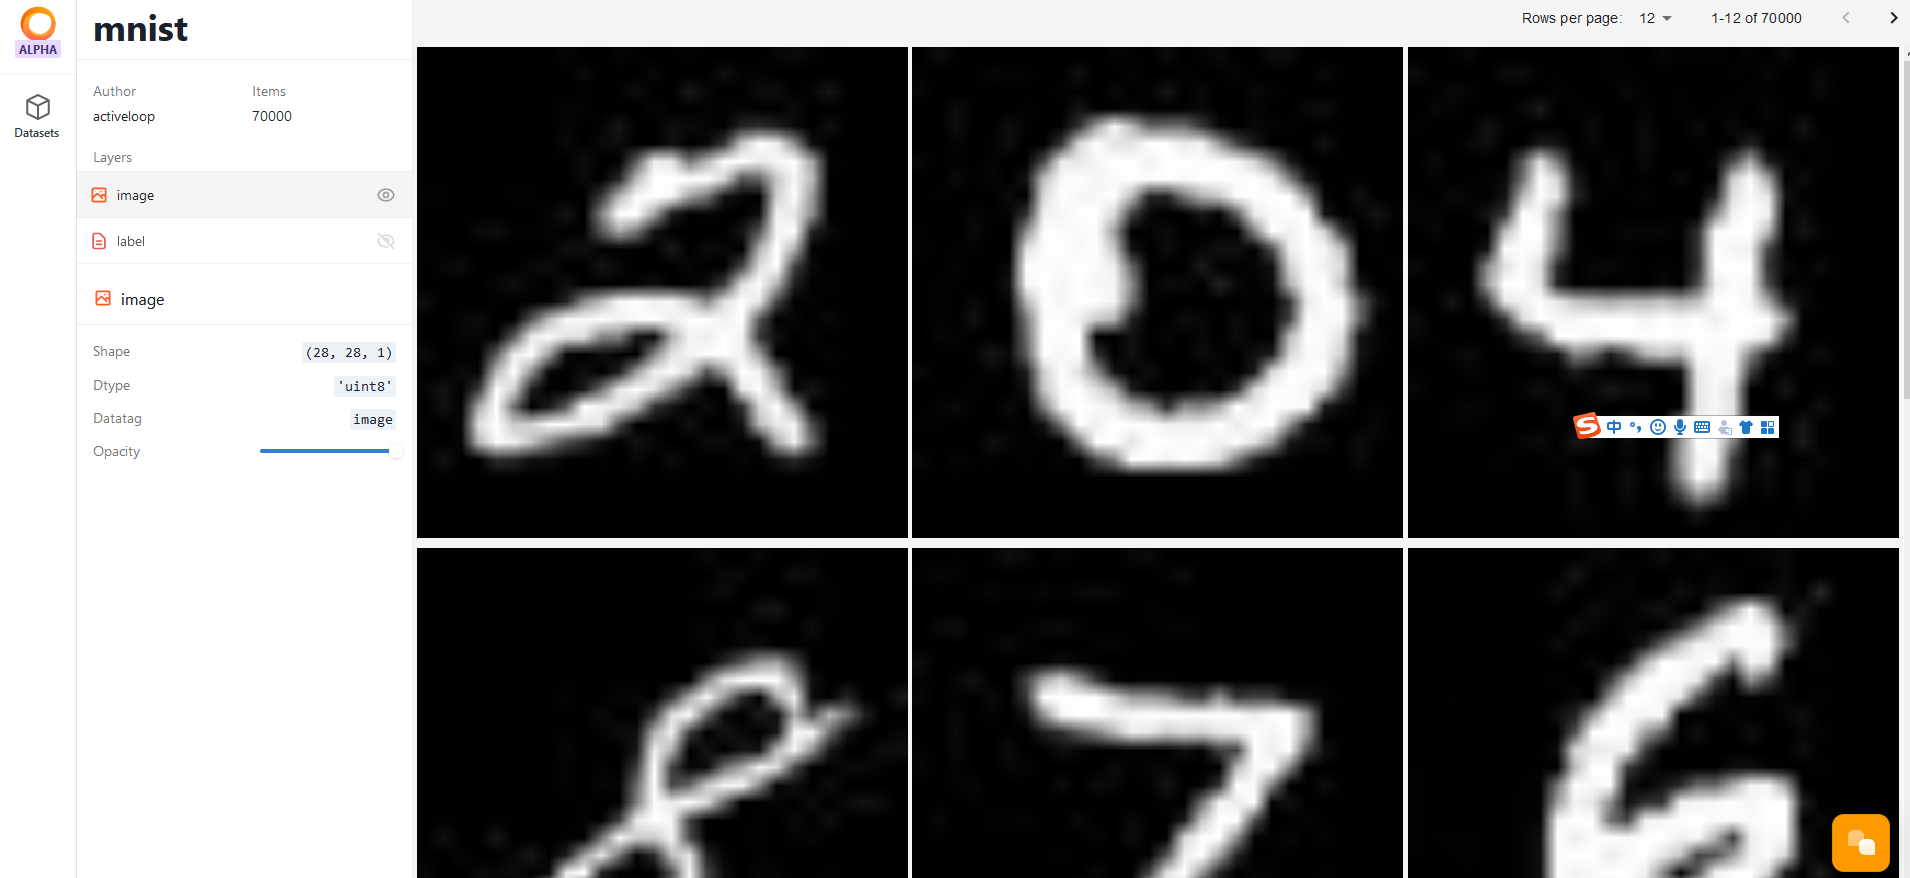
点击右上角“Visualize”按钮,查看数据元信息,
数据总条目为 7万个
包括 image 和 label 属性
点击每个属性, 可以查看属性的 shape
右边可以查看 训练图片的图片展示。
数据源加载
https://github.com/activeloopai/hub#access-public-data-fast
from hub import Dataset
from pprint import pprint

mnist = Dataset("activeloop/mnist")  # loading the MNIST data lazily
# saving time with *compute* to retrieve just the necessary data

print(type(mnist))
print(dir(mnist))
#pprint(mnist.__dict__)
#
print("-----------------------------------")


data = mnist["image"][0:1000].compute()

print(dir(data))

print(type(data))
print(data.shape)
print(data[0])


data = mnist["label"][0:1000].compute()

print(dir(data))

print(type(data))
print(data.shape)
print(data[0])
输出
<class 'hub.api.dataset.Dataset'>
-----------------------------------
<class 'numpy.ndarray'>
(1000, 28, 28, 1)
<class 'numpy.ndarray'>
(1000,)
如果不要输出索引的限制, 即加载所有数据, 则去掉索引
X = mnist["image"].compute()
y = mnist["label"].compute()
https://docs.activeloop.ai/en/latest/concepts/dataset.html#load-the-data
此处给出另一个接口,加载数据,在API上看到解释,跟compute一致,功能上应该是一致的。
ds = Dataset('username/basic')

# Use .numpy() to get the numpy array of the element
print(ds["image"][0].numpy())
print(ds["label", 100:110].numpy())
从源码上看, 与猜想一致。
两种角度的不同命名:
1) compute, 从懒加载角度看, compute是实际加载数据的接口
2)numpy, 从使用者角度看, 从远端获取numpy-like数据后, 转化为 用户需要的 numpy数据, 也是模型需要的。
    def compute(self, label_name=False):
        """Gets the value from different tensorview objects in the datasetview schema

        Parameters
        ----------
        label_name: bool, optional
            If the TensorView object is of the ClassLabel type, setting this to True would retrieve the label names
            instead of the label encoded integers, otherwise this parameter is ignored.
        """
        return self.numpy(label_name=label_name)
改造结果
https://github.com/fanqingsong/code_snippet/blob/master/machine_learning/hub/mnist_sklearn.py
"""
Test mnist learning on sklearn with hub data
"""

import numpy as np
from sklearn.linear_model import LogisticRegression
from sklearn.model_selection import train_test_split
from sklearn.preprocessing import StandardScaler
from sklearn.utils import check_random_state

from hub import Dataset

print(__doc__)

# Author: Arthur Mensch <arthur.mensch@m4x.org>
# License: BSD 3 clause

# Turn down for faster convergence
train_samples = 5000

print("loading mnist data from hub...")
mnist = Dataset("activeloop/mnist")  # loading the MNIST data lazily

X = mnist["image"].compute()
y = mnist["label"].compute()

print("------- X.shape", X.shape)
print("------- y.shape", y.shape)


print("now train mnist model...")

random_state = check_random_state(0)
permutation = random_state.permutation(X.shape[0])

print("---------- permutation")
print(permutation)

X = X[permutation]
y = y[permutation]

print("------- X.shape", X.shape)
print("------- y.shape", y.shape)

X = X.reshape((X.shape[0], -1))

print("------- X.shape", X.shape)

X_train, X_test, y_train, y_test = train_test_split(
    X, y, train_size=train_samples, test_size=10000)

scaler = StandardScaler()
X_train = scaler.fit_transform(X_train)
X_test = scaler.transform(X_test)

# Turn up tolerance for faster convergence
clf = LogisticRegression(
    C=50. / train_samples, penalty='l1', solver='saga', tol=0.1
)
clf.fit(X_train, y_train)

sparsity = np.mean(clf.coef_ == 0) * 100
score = clf.score(X_test, y_test)

# print('Best C % .4f' % clf.C_)
print("Sparsity with L1 penalty: %.2f%%" % sparsity)
print("Test score with L1 penalty: %.4f" % score)
output
root@xxx:~/win10/mine/code-snippet/machine_learning/hub# python mnist_sklearn.py
Test mnist learning on sklearn with hub data
loading mnist data from hub...
------- X.shape (70000, 28, 28, 1)
------- y.shape (70000,)
now train mnist model...
---------- permutation
[10840 56267 14849 ... 42613 43567 68268]
------- X.shape (70000, 28, 28, 1)
------- y.shape (70000,)
------- X.shape (70000, 784)
Sparsity with L1 penalty: 82.72%
Test score with L1 penalty: 0.8358
其中 reshape可以将多维数据进行降低为一维的工具:
X = X.reshape((X.shape[0], -1))
原shape
------- X.shape (70000, 28, 28, 1)
变化后shape
------- X.shape (70000, 784)
后续尝试
(1)安装opencv工具, 转换任意手写图片为 符合 MNIST 标准的数据。
参考
https://www.cnblogs.com/ningskyer/articles/7606174.html
def image2Digit(image):
    # 调整为8*8大小
    im_resized = scipy.misc.imresize(image, (8,8))
    # RGB(三维)转为灰度图(一维)
    im_gray = cv2.cvtColor(im_resized, cv2.COLOR_BGR2GRAY)
    # 调整为0-16之间(digits训练数据的特征规格)像素值——16/255
    im_hex = Fraction(16,255) * im_gray
    # 将图片数据反相(digits训练数据的特征规格——黑底白字)
    im_reverse = 16 - im_hex
    return im_reverse.astype(np.int)
(2)于深度学习工具对接
https://docs.activeloop.ai/en/latest/concepts/dataset.html#convert-to-pytorch
ds = ds.to_pytorch()
ds = torch.utils.data.DataLoader(
    ds,
    batch_size=8,
    num_workers=2,
)

# Iterate over the data
for batch in ds:
    print(batch["image"], batch["label"])
https://docs.activeloop.ai/en/latest/concepts/dataset.html#convert-to-tensorflow
ds = ds.to_tensorflow().batch(8)

# Iterate over the data
for batch in ds:
    print(batch["image"], batch["label"])
pytorch-and-mnist
https://github.com/JaimeTang/PyTorch-and-mnist/blob/master/pytorch-and-mnist.ipynb
MNIST in Keras
https://github.com/wxs/keras-mnist-tutorial/blob/master/MNIST%20in%20Keras.ipynb