唠叨两句
讲真,SOAP跟现在流行的RESTful WebService比起来显得很难用。冗余的XML文本信息太多,可读性差,它的请求信息有时很难手动构造,不太好调试。不过说归说,对某些企业用户来说SOAP的使用率仍然是很高的。
需求背景
接手维护的一个项目,最近客户想开放项目中的功能给第三方调用,而且接入方指定必须是SOAP接口。这项目原来的代码我看着头疼,也不想再改了,除非推倒重写。客户的需求虽然不难但要的很急,为了尽快交付就使用SpringBoot快速搭一个微服务。
开始动手
1.新建一个Spring Starter Project
2.加入cxf的maven配置
    <dependency>
        <groupId>org.apache.cxf</groupId>
        <artifactId>cxf-spring-boot-starter-jaxws</artifactId>
        <version>3.1.15</version>
    </dependency>
编写服务代码(示例代码)
@WebService(targetNamespace="http://demo.example.com/")
public interface IUserService {

    @WebMethod
    User getUserById(@WebParam(name = "id") int id);

    @WebMethod
    int addUser(@WebParam(name = "user") User user);
}
@InInterceptors(interceptors={"com.example.demo.auth.AuthInterceptor"})
@WebService(serviceName = "UserService", targetNamespace = "http://demo.example.com/", endpointInterface = "com.example.demo.soap.IUserService")
@Component
public class UserServiceImpl implements IUserService {

    private Logger logger = LoggerFactory.getLogger(UserServiceImpl.class);

    @Autowired
    private IUserDAO userDAO;

    @Override
    public User getUserById(int id) {
        return userDAO.getUserById(id);
    }

    @Override
    public int addUser(User user) {
        logger.info("save user [" + user.getId() + "]");
        userDAO.addUser(user);
        return 0;
    }
}
鉴权拦截器
public class AuthInterceptor extends AbstractSoapInterceptor {

    private static final String BASIC_PREFIX = "Basic ";
    private static final String USERNAME = "lichmama";
    private static final String PASSWORD = "123456";

    public AuthInterceptor() {
        super(Phase.PRE_INVOKE);
    }

    @Override
    public void handleMessage(SoapMessage message) throws Fault {
        HttpServletRequest request = (HttpServletRequest) message.get(AbstractHTTPDestination.HTTP_REQUEST);
        String auth = request.getHeader("Authorization");
        if (auth == null) {
            SOAPException exception = new SOAPException("auth failed, header [Authorization] not exists");
            throw new Fault(exception);
        }
        if (!auth.startsWith(BASIC_PREFIX)) {
            SOAPException exception = new SOAPException("auth failed, header [Authorization] is illegal");
            throw new Fault(exception);
        }
        String plaintext = new String(Base64.getDecoder().decode(auth.substring(BASIC_PREFIX.length())));
        if (StringUtils.isEmpty(plaintext) || !plaintext.contains(":")) {
            SOAPException exception = new SOAPException("auth failed, header [Authorization] is illegal");
            throw new Fault(exception);
        }
        String[] userAndPass = plaintext.split(":");
        String username = userAndPass[0];
        String password = userAndPass[1];
        if (!USERNAME.equals(username) || !PASSWORD.equals(password)) {
            SOAPException exception = new SOAPException("auth failed, username or password is incorrect");
            throw new Fault(exception);
        }
    }
}
编写配置类
@Configuration
public class SoapConfig {

    @Autowired
    private IUserService userService;

    @Autowired
    @Qualifier(Bus.DEFAULT_BUS_ID)
    private SpringBus bus;

    @Bean
    public Endpoint endpoint() {
        EndpointImpl endpoint = new EndpointImpl(bus, userService);
        endpoint.publish("/userService");
        return endpoint;
    }
}
修改CXF默认发布路径(application.properties)
server.port=8000
cxf.path=/soap
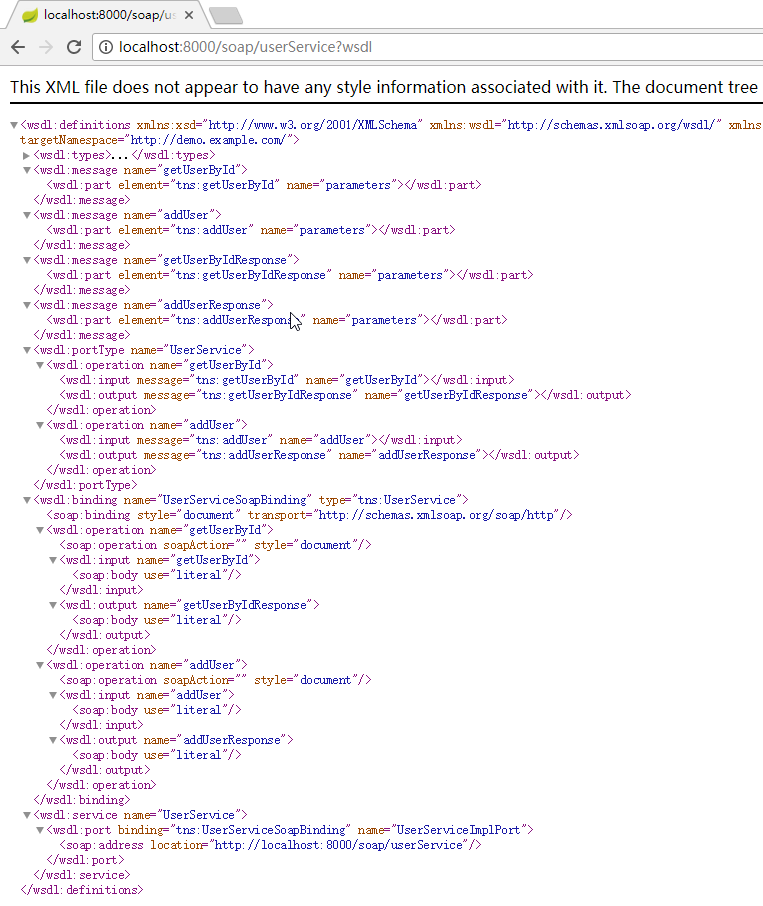
启动项目后访问http://localhost:8000/soap/userService?wsdl
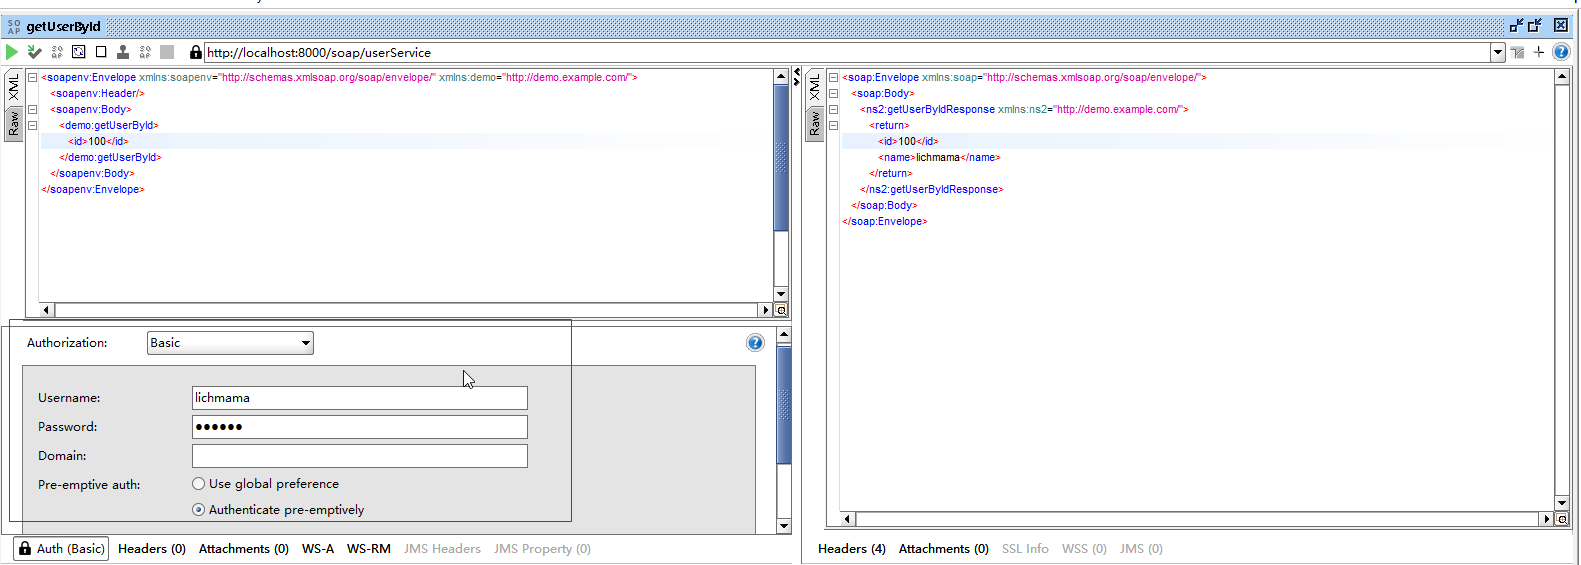
使用SoapUI测试一下,看上去没什么问题
客户端增加对Basic Auth的支持:
/*
  使用Eclipse自动生成Web Service Client,在SoapBingdingStub的createCall()方法中加入一下代码:
*/

// basic auth
_call.setProperty("javax.xml.rpc.security.auth.username", "lichmama");
_call.setProperty("javax.xml.rpc.security.auth.password", "123456");
然后正常调用即可,这里提供一下自己写的SoapClient:


public class GeneralSoapClient {

    private String WSDL;

    private String namespaceURI;

    private String localPart;

    public GeneralSoapClient() {

    }

    public GeneralSoapClient(String WSDL, String namespaceURI, String localPart) {
        this.WSDL = WSDL;
        this.namespaceURI = namespaceURI;
        this.localPart = localPart;
    }

    public String getWSDL() {
        return WSDL;
    }

    public void setWSDL(String WSDL) {
        this.WSDL = WSDL;
    }

    public String getNamespaceURI() {
        return namespaceURI;
    }

    public void setNamespaceURI(String namespaceURI) {
        this.namespaceURI = namespaceURI;
    }

    public String getLocalPart() {
        return localPart;
    }

    public void setLocalPart(String localPart) {
        this.localPart = localPart;
    }

    private boolean requireAuth = false;

    private String username;

    private String password;

    public boolean isRequireAuth() {
        return requireAuth;
    }

    public void setRequireAuth(boolean requireAuth) {
        this.requireAuth = requireAuth;
    }

    public String getUsername() {
        return username;
    }

    public void setUsername(String username) {
        this.username = username;
    }

    public String getPassword() {
        return password;
    }

    public void setPassword(String password) {
        this.password = password;
    }

    /**
     * 创建Soap Service实例
     * @param serviceInterface
     * @return
     * @throws Exception
     */
    public <T> T create(Class<T> serviceInterface) throws Exception {
        URL url = new URL(WSDL);
        QName qname = new QName(namespaceURI, localPart);
        Service service = Service.create(url, qname);
        T port = service.getPort(serviceInterface);
        if (requireAuth) {
            BindingProvider prov = (BindingProvider) port;
            prov.getRequestContext().put(BindingProvider.USERNAME_PROPERTY, username);
            prov.getRequestContext().put(BindingProvider.PASSWORD_PROPERTY, password);
        }
        return port;
    }
}
public class TestSoap {

    public static void main(String[] args) throws Exception {
        String wsdl = "http://localhost:8080/soap/userService?wsdl";
        String namespaceURI = "http://demo.example.com/";
        String localPart = "UserService";
        GeneralSoapClient soapClient = new GeneralSoapClient(wsdl, namespaceURI, localPart);
        soapClient.setRequireAuth(true);
        soapClient.setUsername("lichmama");
        soapClient.setPassword("123456");
        IUserService service = soapClient.create(IUserService.class);
        User user = service.getUserById(101);
    }
}
最后交代一下开发环境
STS 3.7.3 + SpringBoot 2.0.1 + JDK1.8
收工下班了。