参考文档:
http://blog.csdn.net/xinhaoluan/article/details/3605234
环境配置:
实现步骤:
1.eclipse新建Dynamic Web Project,本例工程名为:ws-sample
2.将spring-framework和axis2的lib加入工程中
3.编写测试服务:
IHello.java(interface)
package com.lichmama.ws.demo.intf;

public interface IHello {
    public String sayHello(String name);
}
HelloImpl.java(class)
package com.lichmama.ws.demo.service;

import org.springframework.stereotype.Service;

import com.lichmama.ws.demo.intf.IHello;

@Service("helloService")
public class HelloImpl implements IHello {

    @Override
    public String sayHello(String name) {
        if((name == null) || (name == "")) {
            name = "anonymous";
        }
        return "hello, " + name;
    }

}
3.新建spring配置文件/WEB-INF/applicationContext.xml:
<?xml version="1.0" encoding="UTF-8"?>
<beans xmlns="http://www.springframework.org/schema/beans"
    xmlns:xsi="http://www.w3.org/2001/XMLSchema-instance"
    xmlns:context="http://www.springframework.org/schema/context"
    xsi:schemaLocation="http://www.springframework.org/schema/beans
        http://www.springframework.org/schema/beans/spring-beans-3.0.xsd
        http://www.springframework.org/schema/context
        http://www.springframework.org/schema/context/spring-context-3.0.xsd">

    <context:annotation-config />
    <context:component-scan base-package="com.lichmama.ws.demo" />

    <bean id="applicationContext"
        class="org.apache.axis2.extensions.spring.receivers.ApplicationContextHolder" />
</beans>
4.新建/WEB-INF/services/axis2/META-INF/services.xml:
<?xml version="1.0" encoding="UTF-8" ?>
<serviceGroup>
    <service name="HelloService" scope="application">
        <description>simple spring example</description>
        <parameter name="ServiceObjectSupplier">
            org.apache.axis2.extensions.spring.receivers.SpringAppContextAwareObjectSupplier
        </parameter>
        <parameter name="SpringBeanName">helloService</parameter>
        <messageReceivers>
            <messageReceiver mep= "http://www.w3.org/2004/08/wsdl/in-only"
                 class = "org.apache.axis2.rpc.receivers.RPCInOnlyMessageReceiver"  />
            <messageReceiver mep= "http://www.w3.org/2004/08/wsdl/in-out"
                 class = "org.apache.axis2.rpc.receivers.RPCMessageReceiver"  />
        </messageReceivers>
    </service>
</serviceGroup>
5.配置/WEB-INF/web.xml:
<?xml version="1.0" encoding="UTF-8"?>
<web-app xmlns:xsi="http://www.w3.org/2001/XMLSchema-instance"
    xmlns="http://java.sun.com/xml/ns/javaee"
    xmlns:web="http://java.sun.com/xml/ns/javaee/web-app_2_5.xsd"
    xsi:schemaLocation="http://java.sun.com/xml/ns/javaee
        http://java.sun.com/xml/ns/javaee/web-app_3_0.xsd"
        id="WebApp_ID" version="3.0">

      <display-name>ws-sample</display-name>
    <listener>
        <listener-class>org.springframework.web.context.ContextLoaderListener
        </listener-class>
    </listener>
    <context-param>
        <param-name>contextConfigLocation</param-name>
        <param-value>/WEB-INF/applicationContext.xml</param-value>
    </context-param>

    <servlet>
        <servlet-name>AxisServlet</servlet-name>
        <servlet-class>org.apache.axis2.transport.http.AxisServlet</servlet-class>
    </servlet>

    <servlet-mapping>
        <servlet-name>AxisServlet</servlet-name>
        <url-pattern>/services/*</url-pattern>
    </servlet-mapping>

   <welcome-file-list>
      <welcome-file>index.jsp</welcome-file>
      <welcome-file>index.html</welcome-file>
    </welcome-file-list>

</web-app>
6.完成以上工作后工程目录结构如下:

7.发布工程,启动tomcat
8.访问http://localhost:8080/ws-sample/services/HelloService?wsdl,查看服务是否发布成功。
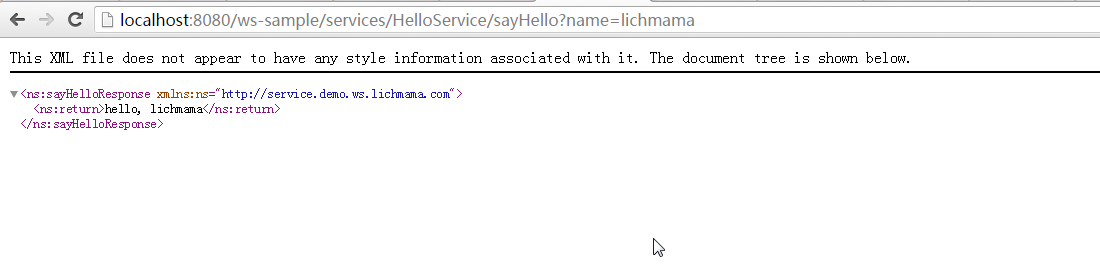
如果发布成功的话,访问http://localhost:8080/ws-sample/services/HelloService/sayHello?name=lichmama结果应该如下:
9.*简易的做法是下载axis2-war.zip(http://archive.apache.org/dist/axis/axis2/java/core/1.6.2/axis2-1.6.2-war.zip),复制WEB-INF下的文件到工程对应目录。
然后再根据实际情况修改各配置文件(application.xml, services.xml, web.xml)。
10.*上述示例工程下载地址:http://pan.baidu.com/s/1hrBsZ4o