补充:https://www.jianshu.com/p/ecc241f22ed5
正则查找替换:
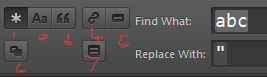
点击下图打开正则模式

中间以 (.*) 通配
//查找[#](xxoo)的内容
[#]((.*))
选择打开tools ->developer->new snippet
<snippet>
<content><![CDATA[
Hello, ${1:this} is a ${2:snippet}.
]]></content>
<!-- Optional: Set a tabTrigger to define how to trigger the snippet -->
<!-- <tabTrigger>hello</tabTrigger> -->
<!-- Optional: Set a scope to limit where the snippet will trigger -->
<!-- <scope>source.python</scope> -->不同类型文件名在scope里用逗号分隔;如: text.html,source.php
</snippet>
将红色的代码替换成你想要快捷生成的代码
<snippet>
<content>
<![CDATA[
<!DOCTYPE html>
<html lang="zh-cn">
<head>
<title>${1:site title}</title>
<meta charset="utf-8">
<meta name="viewport" content="width=device-width,initial-scale=1.0,minimum-scale=1.0,maximum-scale=1.0,user-scalable=no"/>
<link href="" rel="stylesheet">
<script src="" type="text/javascript"></script>
<style>
${2}
</style>
</head>
<body>
${0}
</body>
</html>
]]>
</content>
<!-- Optional: Set a tabTrigger to define how to trigger the snippet -->
<tabTrigger>myhtml</tabTrigger><!-- 触发该短代码段的输入文字 -->
<!-- Optional: Set a scope to limit where the snippet will trigger -->
<scope>text.html,source.php</scope><!--定义在那些文件中生效-->
<description>描述</description></snippet>
保存在user文件夹一般保存会弹出默认的保存地址C:用户计算机用户名AppDataRoamingSublime Text 3PackagesUser;保存格式:文件名.sublime-snippet
如果自定义代码片段太多可以在AppDataRoamingSublime Text 3PackagesUser目录下新建文件夹然后将代码片段文件分类放进去
在html输入myhtml 在按tab键自定义的代码就出现啦!
${1:site title} 表示光标第一次停留的位置并且默认选中site title
${2}光标第二次停留的位置(即地二次按tab键)
${0}光标最后停留的位置
<scope>text.html,source.php</scope><!--定义在那些文件中生效-->
包括的文件类型:
ActionScript: source.actionscript.2
AppleScript: source.applescript
ASP: source.asp
Batch FIle: source.dosbatch
C#: source.cs
C++: source.c++
Clojure: source.clojure
CoffeeScript: source.coffee
CSS: source.css
D: source.d
Diff: source.diff
Erlang: source.erlang
Go: source.go
GraphViz: source.dot
Groovy: source.groovy
Haskell: source.haskell
HTML: text.html(.basic)
JSP: text.html.jsp
Java: source.java
Java Properties: source.java-props
Java Doc: text.html.javadoc
JSON: source.json
Javascript: source.js
BibTex: source.bibtex
Latex Log: text.log.latex
Latex Memoir: text.tex.latex.memoir
Latex: text.tex.latex
LESS: source.css.less
TeX: text.tex
Lisp: source.lisp
Lua: source.lua
MakeFile: source.makefile
Markdown: text.html.markdown
Multi Markdown: text.html.markdown.multimarkdown
Matlab: source.matlab
Objective-C: source.objc
Objective-C++: source.objc++
OCaml campl4: source.camlp4.ocaml
OCaml: source.ocaml
OCamllex: source.ocamllex
Perl: source.perl
PHP: source.php
Regular Expression(python): source.regexp.python
Python: source.python
R Console: source.r-console
R: source.r
Ruby on Rails: source.ruby.rails
Ruby HAML: text.haml
SQL(Ruby): source.sql.ruby
Regular Expression: source.regexp
RestructuredText: text.restructuredtext
Ruby: source.ruby
SASS: source.sass
Scala: source.scala
Shell Script: source.shell
SQL: source.sql
Stylus: source.stylus
TCL: source.tcl
HTML(TCL): text.html.tcl
Plain text: text.plain 纯文本
Textile: text.html.textile
XML: text.xml
XSL: text.xml.xsl
YAML: source.yaml
sublime 不智能提示
首选项-》设置-用户 源博文地址非常感谢
{
    "auto_complete": true,
    "auto_complete_triggers":    #这里针对某个语言提示 ,例如默认情况下代码片段在.html时必须以<开头才提示,加上下面第二个后直接输入快捷语法就能出现提示框
    [
        {
            "characters": "abcdefghijklmnopqrstuvwxyz< :.",
            "selector": "text.wxml"
        },
        {
            "characters": "1234567890abcdefghijklmnopqrstuvwxyzABCDEFGHIJKLMNOPQRSTUVWXYZ.<",
            "selector": "text.html"
        },
        {
            "characters": "1234567890abcdefghijklmnopqrstuvwxyzABCDEFGHIJKLMNOPQRSTUVWXYZ.<",
            "selector": "text.xml"
        },
        {
            "characters": "1234567890abcdefghijklmnopqrstuvwxyzABCDEFGHIJKLMNOPQRSTUVWXYZ.<",
            "selector": "text.php"
        },
        {
            "characters": "1234567890abcdefghijklmnopqrstuvwxyzABCDEFGHIJKLMNOPQRSTUVWXYZ.<",
            "selector": "text.css"
        },
        {
            "characters": "1234567890abcdefghijklmnopqrstuvwxyzABCDEFGHIJKLMNOPQRSTUVWXYZ.<",
            "selector": "text.js"
        }
    ],
    "auto_match_enabled": true,
    "color_scheme": "Packages/User/SublimeLinter/Big Duo (SL).tmTheme",
    "font_size": 9,
    "highlight_line": true,
    "ignored_packages":
    [
        "Highlight Dodgy Chars",
        "BracketHighlighter"
    ],
    "theme": "Soda Dark 3.sublime-theme",
    "update_check": false,
    "word_wrap": "auto"
}
1 AlT+R : 启用正则匹配
2 ALT+C : 启用区分大小写
3 ALT+W : 启用整个字
4 循环查找
快捷键:
删除当前行 Ctrl+Shift+K
Ctrl+L:选择行,重复可依次增加选择下一行
Ctrl+C 复制
Ctrl+M 光标移动到括号里的开始或者结束位置: 比如trim(|'str|'|) 光标会从蓝色的跳到红色的这两个位置
Ctrl+Enter 下一行(当前行后插入新的一行)
Ctrl+SHIFT+Enter 上一行(当前行前插入新的一行)
Ctrl+Shift+M 选择括号(){}里的内容:
ctrl+shift+d 如果你已经选中了文本,它会复制你的选中项。否则,把光标放在行上,会复制整行快速复制光标所在的一整行,并复制到该行之前。
光标定位到某一行-》ctrl+shift+↑↓,上下交换一行。
Ctrl+Shift+ ↑ ↓键:当前行和相邻的行互换内容(上下移动改行)
Ctrl+D:选择单词,重复可增加选择下一个相同的单词
Alt+F3:选择所有相同的词
End 跳转到行尾
Home 跳至本行文本首部 在重复则行首
Ctrl+M:跳转到对应括号 光标在成对的括号之间切换(){}[],
Ctrl+Shift+M:选中当前括号(){}[]内容,重复可选着括号本身
Ctrl+L:选择行,重复可依次增加选择下一行
Ctrl+Shift+L:多行选中时每行末尾同时出现光标
Ctrl+Enter:在当前行前向下插入新行
Ctrl+Shift+Enter:在当前行前向上插入新行
Ctrl+X:删除当前行
Ctrl+R:前往当前文件 的某个method
pgUp和pgDn 以函数为单位跳转?不太确定
Ctrl+Shift+P:打开命令面板
Ctrl+P:搜索项目中的文件
Ctrl+G:跳转到第几行
Ctrl+W:关闭当前打开文件
Ctrl+Shift+W:关闭所有打开文件
Ctrl+Shift+V:粘贴并格式化
Ctrl+U:软撤销,撤销光标位置
Ctrl+J:选择标签内容
Ctrl+F:查找内容
Ctrl+Shift+F:查找并替换
Ctrl+H:替换
Ctrl+N:新建窗口
Ctrl+K+B:开关侧栏
Ctrl+F2:设置/删除标记
Ctrl+/:注释当前行
Ctrl+Shift+/:当前位置插入注释
Ctrl+Alt+/:块注释,并Focus到首行,写注释说明用的
Ctrl+Shift+A:选择当前标签前后,修改标签用的
F11:全屏
Shift+F11:全屏免打扰模式,只编辑当前文件
Alt+.:闭合标签
Alt+Shift+数字:分屏显示
Alt+数字:切换打开第N个文件
Shift+右键拖动:光标多不,用来更改或插入列内容
Ctrl+依次左键点击或选取,可需要编辑的多个位置
设置微信小程序wxml, wxss代码高亮
1. Sublime text打开微信小程序工程文件,找到一个wxml文件,打开。
2. 右下角显示“Plain Text”的地方点一下,会弹出来很长一列选项,拉到最上
Open all current extension as HTML
3. wxss文件同理,除了Open all current extension as CSS

sublime text3 不能安装插件 提示 there are no packages avaiable for install
带命名空间提示的自动提示插件:(不知道怎么用)
从http://github.com/SublimeCodeIntel/SublimeCodeIntel下载最新的源代码并将整个目录复制到Data/Packages目录中(首选项-->浏览插件)。重启
配置:
1.打开preferences->packages settings ->Package Control ->Settings-User
中文:首选项-->插件设置-->Package Control -->设置-用户
文件地址:Data/Packages/User/Package Control.sublime-settings
在打开的此文件下的installed_packages数组选项添加上"SublimeCodeIntel"
选中:preference-->browse packages (首选项-->浏览插件)【DataPackages】找到SublimeCodeIntel文件夹
在里面新建文件.codeintel/config.log
php提示配置如下:
{
   "PHP": {
        "php": 'D:phpStudyphp52php.exe',//php的位置  配置的时候吧这些注释都删了
        "phpExtraPaths": ['D:phpStudyphp52ext'],//php拓展所在的位置
        "phpConfigFile": 'D:phpStudyphp52php.ini' //php.ini所在的位置
    },
    "JavaScript": {
        "javascriptExtraPaths": []
    }
}
貌似没效果??
插件推荐:https://blog.csdn.net/weixin_39000505/article/details/81135628
0.sublimecodeintel 代码提示插件 怎么配置都不行没有会的私信我下吧
1.Emmet:Emmet是一个可以让你更快更高效地编写HTML和CSS,节省你大量时间的插件。只需按约定的缩写形式书写而不用写整个代码,然后按“扩展”键,这些缩写就会自动扩展为对应的代码内容。(必须安装PyV8插件@才能使用)@
Emmet自定义代码片段(省略责不提示代码有点蛋疼)
2.ConvertToUTF8:ConvertToUTF8 能将除UTF8编码之外的其他编码文件在 Sublime Text 中转换成UTF8编码,在打开文件的时候一开始会显示乱码,一会儿自动显示出正常的字体。@
3.Color Highlighter:我很喜欢这个插件。当你输入不同的颜色,就会在该位置显示对应的颜色,特别好看!@ setting--user {"ha_style": "Filled"}

4.BracketHighlighter:这个插件会高亮显示匹配的括号、引号和标签。@
5.ChineseLocalization:各国语言包~~
6.Alignment:代码对齐。包括PHP、CSS、JavaScript语言
7.AutoFileName:帮助你快速地在文件中写路径,自动补全文件(目录)名。
8.CSS Format:它是css序列化插件,支持默认多种序列方案,还可以自己配置。
9.JsFormat:js序列化,能排在下载插件前25位。
10.DocBlockr:DocBlocker 是在Sublime平台上开发一款自动补全注释插件,支持JavaScript (including ES6), PHP, ActionScript, Haxe, CoffeeScript, TypeScript, Java, Apex, Groovy, Objective C, C, C++ and Rust.等众多语言。
11.CTags:实现方法跳转。
12.SublimeTmpl:能快速生成文件模板。
13.SublimeCodeIntel:智能提示.包含命名空间提示
14.HTML/CSS/JS Prettify :HTML、CSS、JS格式化。
15.LiveReload :调试网页实时自动更新。
16.ColorPicker 调色板(快捷键:ctrl+shift+c)@
17、IMESupport 让Sublime Text能够完美支持中文输入法光标更随@
18、Git Gutter 链接 简介: 如果你使用Git做版本控制的话,这个插件可以在行号前标记处哪些行是新加的,删除的和修改过的。@
19、SublimeLinter javascript css html 语法检测 (必须安装node.js), 与sublimelinter-php插件 配合还可以php代码检测(无需安装node.js)


打开控制台,install package
搜 sublimelinter
先安装sublimelinter本体
安装完以后再搜索一下,安装sublimelinter-php
接下来,打开preferences-package settings-sublimeLinter-settings--user

如下配置:

{
    "user": {

        "linters": {

        },

        "paths": {
            "linux": [],
            "osx": [],
            "windows": [
                "D:\xampp\php"
            ]
        },

    }
}


就是添加一下 paths的参数值,指定一下你本地php目录。
然后关闭sublime,再次打开一个php脚本,试试吧。
有错误的地方在行号上会有红点提示在代码上会有红色方框,鼠标放红色方框上,错误信息在编辑器底部状态栏显示。
20、Highlight Dodgy Chars 高亮除了全角标点以外还有其他一些容易出错的字符(还有HighlightAnything 这个插件也是可以自定义范围)
HighlightAnything 配置 匹配中文:
"highlight_anything_regexp": "[u4e00-u9fa5]+",
HighlightAnything配置 只匹配标点符号 (uff5buff5d 分别是{})
"highlight_anything_regexp": "[uff5buff5du3002uff1fuff01uff0cu3001uff1buff1au201cu201du2018u2019uff08uff09u300au300bu3008u3009u3010u3011u300eu300fu300cu300dufe43ufe44u3014u3015u2026u2014uff5eufe4fuffe5]+",
21、Companion 命名空间接口函数自动实现 操作教程
livestyle链接:
简介: 这货太神奇了。在调试页面的样式时,经常会打开Chrome自带的开发者工具,然后编辑CSS,等满意了再把CSS代码黏贴回Sublime里。这货允许你在Chrome里修改CSS,然后相对应的在Sublime里的CSS文件就自动更新了!(你更新Sublime里的CSS并保存,打开的网页也会自动更新)
安装: 需要安装两个插件,一个是Sublime的插件,一个是Chrome的插件。
Sublime插件: Ctrl+Shift+P → Package Control: Install Package → LiveStyle 和 Chrome插件:
用法: 先重启你的Sublime,然后打开一个CSS文件。然后在Chrome里打开包含这个CSS的HTML页面 → 打开Chrome的开发者工具,工具栏的最后会多出一个 LiveStyle选项:
看下方File mapping里被HTML页面引用的CSS文件会自动和Sublime里打开的同名CSS文件关联起来。如果名字都对的话你就可以在Elements里开始编辑CSS了。编辑好后看下Sublime,该CSS文件会被自动更新。
ideBarEnhancements 是一款很实用的右键菜单增强插件,有以 diff 形式显示未保存的修改、在文件管理器中显示该文件、复制文件路径、在侧边栏中定位该文件等功能,也有基础的诸如新建文件/目录,编辑,打开/运行,显示,在选择中/上级目录/项目中查找,剪切,复制,粘贴,重命名,删除,刷新等常见功能。
安装:
Sublime插件: Ctrl+Shift+P → Package Control: Install Package → SideBarEnhancements
Sublime的 phpfmt php格式化插件
下载放入xxxSublime Text 3x64DataPackages
Preference->Package Settings->phpfmt->Settings-User, 添加如下配置
{
    "enable_auto_align": true,
    "indent_with_space": true,
    "passes":
    [
        "OnlyOrderUseClauses"
    ],
    "php_bin": "D:/xampp/php/php.exe",
    "psr1": true,
    "psr2": true,
    "version": 1
}
配置好之后默认ctrl+F11格式化代码,也可以通过命令面板来操作(被堵不列举)注意文件夹名phpfmt
注意phpfmt会自动格式化代码,会将demo_func()转为demoFunc()
可以格式化PHP 、javascript/JSON、HTML、CSS,LESS,SASS、Python、Go、Visual Basic/VBScript、Coldfusion/Railo/Lucee
快捷键 "ctrl+alt+f"
详细配置见github 注意文件夹名CodeFormatter
{
   "codeformatter_php_options": {
        "syntaxes": "php", // Syntax names which must process PHP formatter
        "php_path": "D:/xampp/php/php.exe", // Path for PHP executable, e.g. "/usr/lib/php" or "C:/Program Files/PHP/php.exe". If empty, uses command "php" from system environments
        "format_on_save": false, // Format on save. Either a boolean (true/false) or a string regexp tested on filename. Example : "^((?!.min.|vendor).)*$"
        "psr1": false, // Activate PSR1 style
        "psr1_naming": false, // Activate PSR1 style - Section 3 and 4.3 - Class and method names case
        "psr2": true, // Activate PSR2 style
        "indent_with_space": 4, // Use spaces instead of tabs for indentation
        "enable_auto_align": true, // Enable auto align of = and =>
        "visibility_order": true, // Fixes visibility order for method in classes - PSR-2 4.2
        "smart_linebreak_after_curly": true, // Convert multistatement blocks into multiline blocks

        // Enable specific transformations. Example: ["ConvertOpenTagWithEcho", "PrettyPrintDocBlocks"]
        // You can list all available transformations from command palette: CodeFormatter: Show PHP Transformations
        // You can also see examples of many transformations at https://github.com/akalongman/sublimetext-codeformatter/blob/master/PHP-Transformations.md
        "passes": [],

        // Disable specific transformations
        "excludes": []
       },
   "codeformatter_js_options": {//Javascript/JSON
        "syntaxes": "javascript,json", // Syntax names which must process JS formatter
        "format_on_save": false, // Format on save. Either a boolean (true/false) or a string regexp tested on filename. Example : "^((?!.min.|vendor).)*$"
        "indent_size": 4, // indentation size
        "indent_char": " ", // Indent character
        "indent_with_tabs": false, // Indent with one tab (overrides indent_size and indent_char options)
        "eol": "
", // EOL symbol
        "preserve_newlines": false, // whether existing line breaks should be preserved,
        "max_preserve_newlines": 10, // maximum number of line breaks to be preserved in one chunk
        "space_in_paren": false, // Add padding spaces within paren, ie. f( a, b )
        "space_in_empty_paren": false, // Add padding spaces within paren if parent empty, ie. f(  )
        "e4x": false, // Pass E4X xml literals through untouched
        "jslint_happy": false, // if true, then jslint-stricter mode is enforced. Example function () vs function()
        "brace_style": "collapse", // "collapse" | "expand" | "end-expand". put braces on the same line as control statements (default), or put braces on own line (Allman / ANSI style), or just put end braces on own line.
        "keep_array_indentation": false, // keep array indentation.
        "keep_function_indentation": false, // keep function indentation.
        "eval_code": false, // eval code
        "unescape_strings": false, // Decode printable characters encoded in xNN notation
        "wrap_line_length": 0, // Wrap lines at next opportunity after N characters
        "break_chained_methods": false, // Break chained method calls across subsequent lines
        "end_with_newline": false, // Add new line at end of file
        "comma_first": false // Add comma first
       },
    "codeformatter_html_options":
    {
        "syntaxes": "html,asp,xml", // Syntax names which must process HTML formatter
        "format_on_save": false, // Format on save. Either a boolean (true/false) or a string regexp tested on filename. Example : "^((?!.min.|vendor).)*$"
        "indent_size": 4, // indentation size
        "indent_char": " ", // Indentation character
        "indent_with_tabs": false, // Indent with one tab (overrides indent_size and indent_char options)
        "exception_on_tag_mismatch": false, // If the last closing tag is not at the same indentation level as the first opening tag, there's probably a tag mismatch in the file
        "expand_javascript": false, // Expand JavaScript inside of <script> tags (also affects CSS purely by coincidence)
        "expand_tags": false, // Expand tag attributes onto new lines
        "minimum_attribute_count": 2, // Minimum number of attributes needed before tag attributes are expanded to new lines
        "first_attribute_on_new_line": false, // Put all attributes on separate lines from the tag (only uses 1 indentation unit as opposed to lining all attributes up with the first)
        "reduce_empty_tags": false, // Put closing tags on same line as opening tag if there is no content between them
        "reduce_whole_word_tags": false, // Put closing tags on same line as opening tag if there is whole word between them
        "custom_singletons": "" // Custom singleton tags for various template languages outside of the HTML5 spec
    },
    "codeformatter_css_options":
    {
        "syntaxes": "css,less", // Syntax names which must process CSS formatter
        "format_on_save": false, // Format on save. Either a boolean (true/false) or a string regexp tested on filename. Example : "^((?!.min.|vendor).)*$"
        "indent_size": 4, // Indentation size
        "indent_char": " ", // Indentation character
        "indent_with_tabs": false, // Indent with one tab (overrides indent_size and indent_char options)
        "selector_separator_newline": false, // Add new lines after selector separators
        "end_with_newline": false, // Add new line of end in file
        "newline_between_rules": false, // Add new line between rules
        "eol": "
" // EOL symbol
    },
    "codeformatter_scss_options":
    {
        "syntaxes": "scss", // Indentation size
        "indent_size": 2, // Indentation size
        "format_on_save": false, // Format on save. Either a boolean (true/false) or a string regexp tested on filename. Example : "^((?!.min.|vendor).)*$"
        "indent_char": " ", // Indentation character
        "indent_with_tabs": false, // Indent with one tab (overrides indent_size and indent_char options)
        "selector_separator_newline": true, // Add new lines after selector separators
        "newline_between_rules": true, // Add new line between rules
        "end_with_newline": true // Add new line of end in file
    }

}
自动化编译less
安装node.js,安装less,方法:命令行输入:
npm install -g less
安装clean插件
npm install -g less-plugin-clean-css -g
sublime安装less2css的方法:
ctrl+shift+p>install Package>less2css
配置less2css
Preferences → Package Settings → Less2Css → Settings-Default