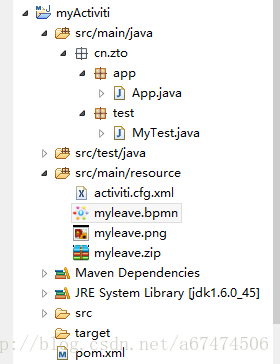
整个项目的目录结构:
pom.xml:
-
<project= =
-
=>
<modelVersion></modelVersion>
<groupId></groupId>
<artifactId></artifactId>
<version></version>
<packaging></packaging>
<name></name>
<url></url>
<properties>
<project.build.sourceEncoding></project.build.sourceEncoding>
</properties>
<dependencies>
-
<dependency>
<groupId></groupId>
<artifactId></artifactId>
<version></version>
</dependency>
<dependency>
<groupId></groupId>
<artifactId></artifactId>
<version></version>
</dependency>
<dependency>
<groupId></groupId>
<artifactId></artifactId>
<version></version>
</dependency>
-
<dependency>
<groupId></groupId>
<artifactId></artifactId>
<version></version>
</dependency>
<dependency>
<groupId></groupId>
<artifactId></artifactId>
<version></version>
</dependency>
-
<dependency>
<groupId></groupId>
<artifactId></artifactId>
<version></version>
</dependency>
<dependency>
<groupId></groupId>
<artifactId></artifactId>
<version></version>
</dependency>
<dependency>
<groupId></groupId>
<artifactId></artifactId>
<version></version>
</dependency>
<dependency>
<groupId></groupId>
<artifactId></artifactId>
<version></version>
</dependency>
<dependency>
<groupId></groupId>
<artifactId></artifactId>
<version></version>
</dependency>
<dependency>
<groupId></groupId>
<artifactId></artifactId>
<version></version>
</dependency>
<dependency>
<groupId></groupId>
<artifactId></artifactId>
<version></version>
</dependency>
-
<dependency>
<groupId></groupId>
<artifactId></artifactId>
<version></version>
</dependency>
<dependency>
<groupId></groupId>
<artifactId></artifactId>
<version></version>
</dependency>
-
<dependency>
<groupId></groupId>
<artifactId></artifactId>
<version></version>
</dependency>
-
<dependency>
<groupId></groupId>
<artifactId></artifactId>
<version></version>
</dependency>
<dependency>
<groupId></groupId>
<artifactId></artifactId>
<version></version>
</dependency>
<dependency>
<groupId></groupId>
<artifactId></artifactId>
<version></version>
</dependency>
<dependency>
<groupId></groupId>
<artifactId></artifactId>
<version></version>
</dependency>
-
<dependency>
<groupId></groupId>
<artifactId></artifactId>
<version></version>
</dependency>
<dependency>
<groupId></groupId>
<artifactId></artifactId>
<version></version>
</dependency>
<dependency>
<groupId></groupId>
<artifactId></artifactId>
<version></version>
</dependency>
-
<dependency>
<groupId></groupId>
<artifactId></artifactId>
<version></version>
</dependency>
<dependency>
<groupId></groupId>
<artifactId></artifactId>
<version></version>
</dependency>
</dependencies>
</project>
activiti.cfg.xml:
-
<?xml= =?>
<beans=
-
=
-
=>
<bean= =>
<property= = />
<property= = />
<property= = />
<property= = />
<property= = />
</bean>
</beans>
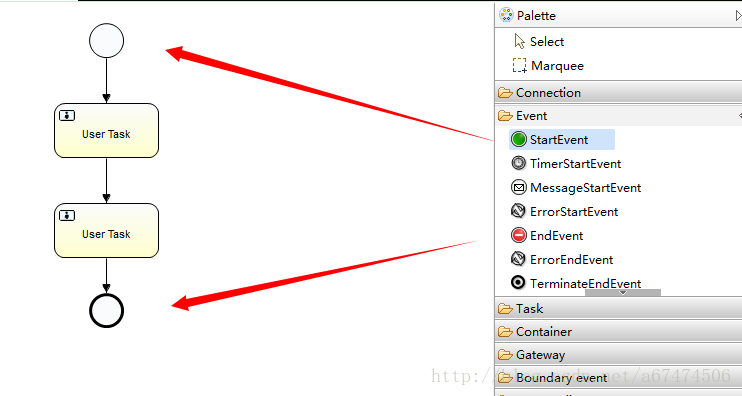
在 resource 下新建Activiti Diagram
可以通过这个地址安装插件 《Activiti BPMN 2.0 designer - http://activiti.org/designer/update/ 》
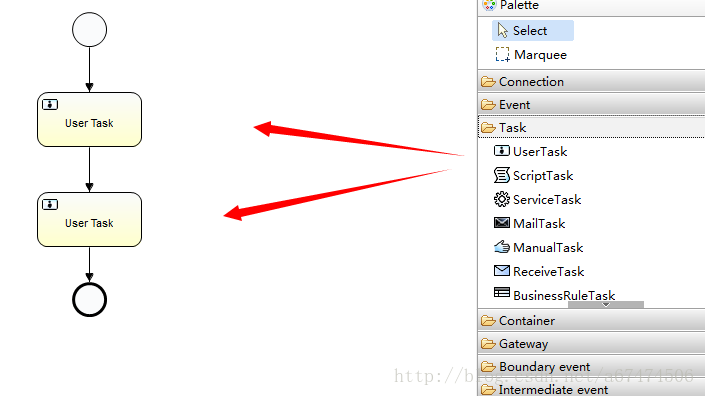
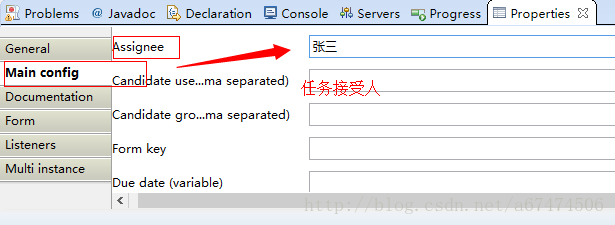
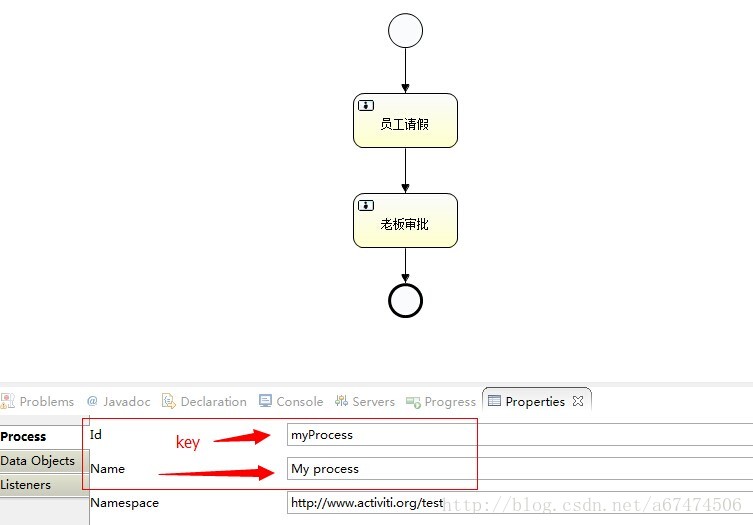
将UserTask分别修改成入下图所示
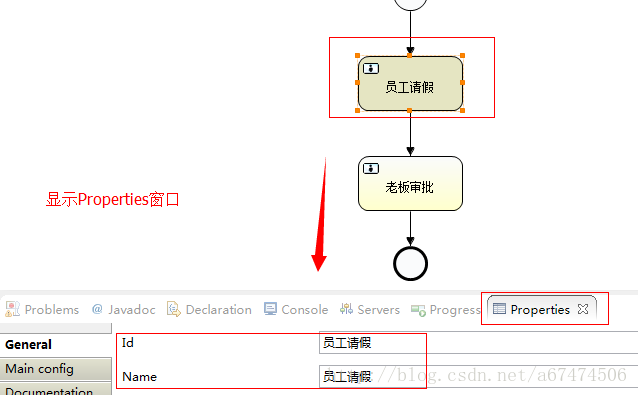
修改好ID 和 NAME然后在修改Main config中的Assignee,员工请假修改为张三,老板审批修改为老板
点击Window--->Preferences--->Activiti--->Save Actions:将Create process definition image when saving the diagram勾选
然后保存bpmn文件的时候会自动帮你截图
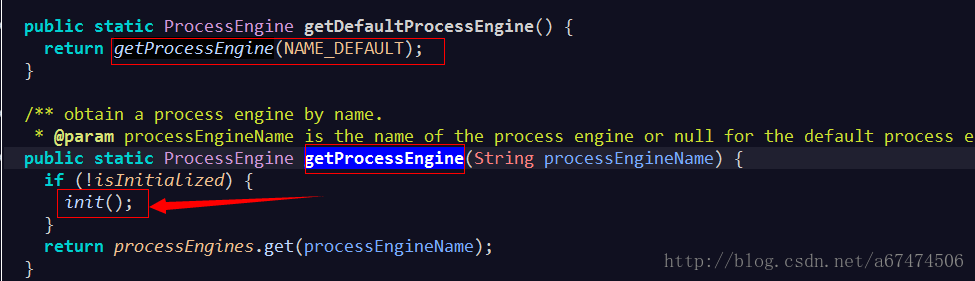
通过ProcessEngines.getDefaultProcessEngine获取流程引擎
-
//通过activiti.cfg.xml获取流程引擎
class"java">
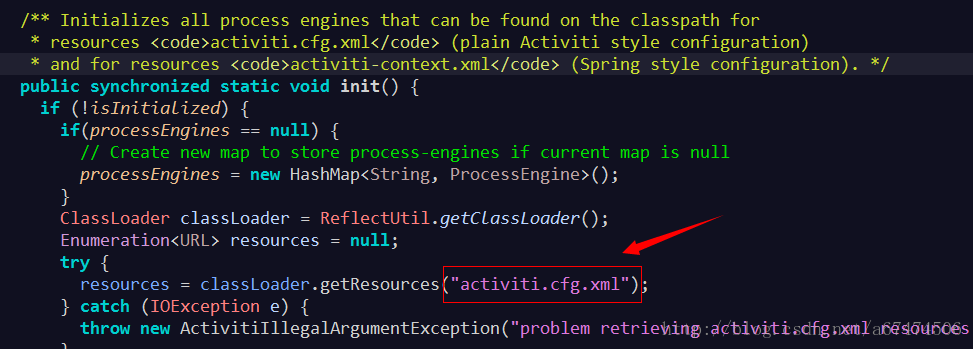
通过源码可以看到 getDefaultProcessEngine方法会通过默认的activiti.cfg.xml文件名或者是activiti-context.xml文件名读取xml文件
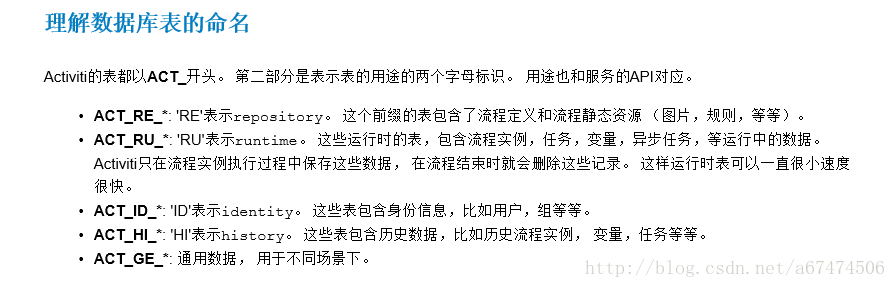
当获取到的processEngine对象不为空时 就会在数据库创建关于activiti的23张表
具体作用如下:

跟详细的情况可以去下面这个地址了解:
http://www.cnblogs.com/llzgzljl/archive/2013/10/07/3356108.html
此时你可以在数据库中看到act_ge_property表中插入了3条数据
将MyLeave.bpmn和MyLeave.png打包成myleave.zip文件(一定要是zip别压缩成rar)
执行以下方法,发布请假流程:
-
/**
-
* 发布流程
-
* 发布流程后,流程文件会保存到数据库中
-
*/
@Test
publicvoid
-
this"myleave.zip"
new
-
)
-
}
查看数据库 发布的流程文件信息会保存在下面的三张表中:
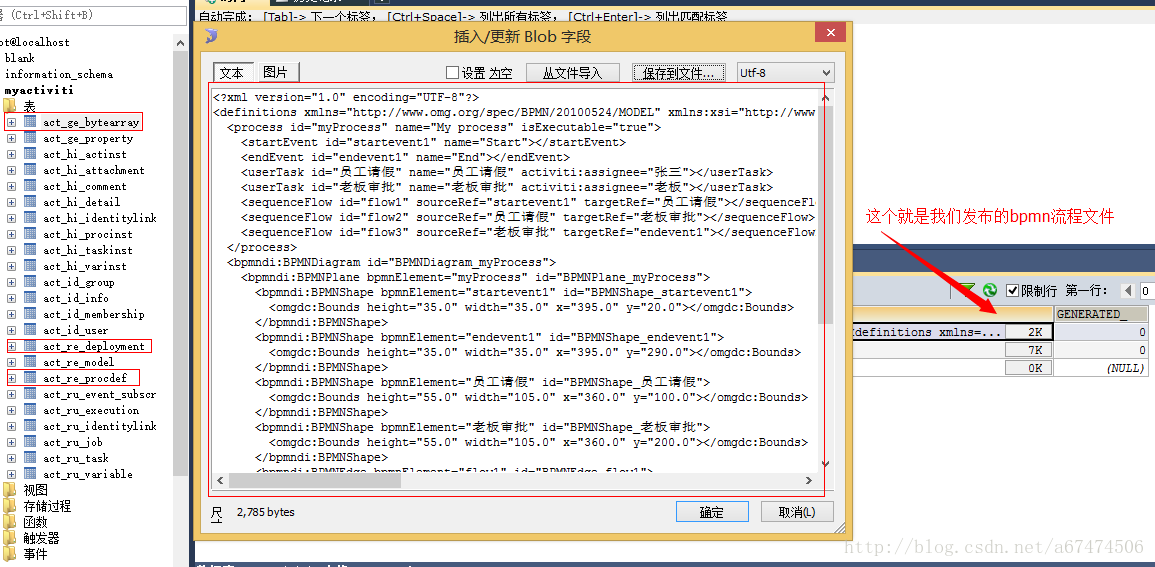
我们可以通过RepositoryService获取详细的流程定义信息
-
@Test
publicvoid
-
-
);
-
-
-
for
+pd.getId()++pd.getName()++pd.getKey()++pd.getVersion()++pd.getResourceName()++pd.getDiagramResourceName());
-
}
key 和 name 就是我们原先画bpmn时候声明的:
使用流程定义的Key发布一个请假流程:
-
/**
-
* 发布流程
-
*/
-
publicvoid
* 启动请假单流程 并获取流程实例
-
* 因为该请假单流程可以会启动多个所以每启动一个请假单流程都会在数据库中插入一条新版本的流程数据
-
* 通过key启动的流程就是当前key下最新版本的流程
-
*
-
*/
);
-
+processInstance.getId()++processInstance.getActivityId());
-
}
当流程发布后在 act_ru_task ,act_ru_execution, act_ru_identitylink 表中插入流程数据
接下来就可以通过用户ID去查看该用户的任务了
-
/**
-
* 查看任务
-
*/
@Test
publicvoid
-
-
)
-
for
+task.getId()++task.getName()++task.getAssignee()++task.getCreateTime());
-
}
提出请假申请,启动流程
查看数据库变化 可以看到 表中的数据已经变成了老板审批相关数据
老板查看任务 ,并审批请假
-
/**
-
* 查看任务
-
*/
@Test
publicvoid
-
-
)
-
for
+task.getId()++task.getName()++task.getAssignee()++task.getCreateTime());
-
}
流程完毕,可以再act_hi_actinst表中看到整个请假流程

整个流程的过程是 1.发布流程 --->2.启动流程--->3.相关人查看任务完成并完成
数据都是存放在数据库中