http://www.cnblogs.com/ufex/p/6382982.html
每个浏览器都有自己的特点,比如今天要做的colorpicker就是,一千个浏览器,一千个哈姆雷特,一千个colorpicker。今天canvas系列就用canvas做一个colorpicker。
**********************************************************************
效果图和demo
突然翻到了之前用js和dom写的一个colorpicker,比较挫,扔张图就好(old)
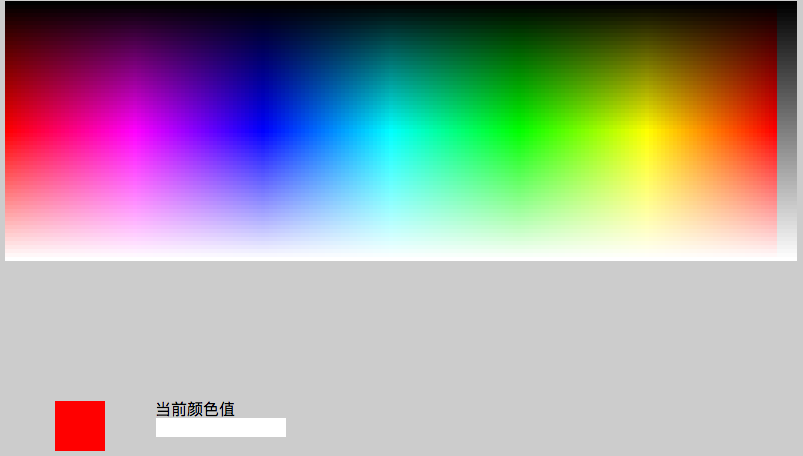
这个真的很挫,性能很差,因为每一个可选的颜色值都是一个dom,如果要实现256*256,那浏览器就爆了~~~~~
好,回到今天的demo(new)
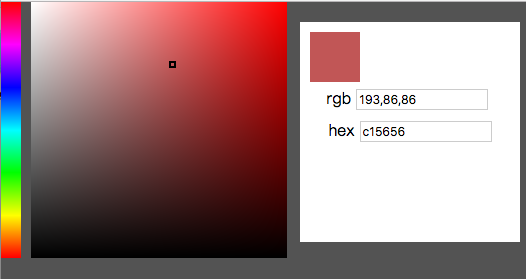
demo链接: https://win7killer.github.io/can_ps/src/demo/color_picker.html
没错,就是照着PS的颜色选择器的样子仿的。
**********************************************************************
实现
首先我们来看效果图分析怎么做:
1.左侧colorbar
![]() 左侧提供一系列过渡色,不难看出,这个是“红黄绿青蓝紫”这六种颜色,然后加以过渡色处理来的。最后紫色还要过渡回到红色。
左侧提供一系列过渡色,不难看出,这个是“红黄绿青蓝紫”这六种颜色,然后加以过渡色处理来的。最后紫色还要过渡回到红色。
另外换成环状的可能更加好识别,如下图:
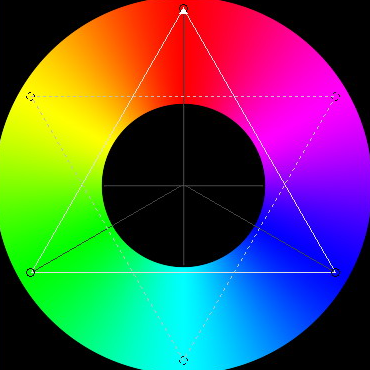
那么,我们就可以用canvas的过渡色来实现左侧这个区域,
代码如下:

 1 function colorBar() {
 2     var gradientBar = ctx.createLinearGradient(0, 0, 0, width);
 3     gradientBar.addColorStop(0, '#f00');
 4     gradientBar.addColorStop(1 / 6, '#f0f');
 5     gradientBar.addColorStop(2 / 6, '#00f');
 6     gradientBar.addColorStop(3 / 6, '#0ff');
 7     gradientBar.addColorStop(4 / 6, '#0f0');
 8     gradientBar.addColorStop(5 / 6, '#ff0');
 9     gradientBar.addColorStop(1, '#f00');
10
11     ctx.fillStyle = gradientBar;
12     ctx.fillRect(0, 0, 20, width);
13 }
这里涉及到canvas的fillStyle或者strokenStyle的填充对象,可以使用过渡色对象(自己瞎叫的名字),了解更多可以去w3cschool。
2.中间颜色区
中间这块乍看很简单,再看有点蒙bi,三看才搞清楚怎么搞。
乍看:其实就是左侧选中的那个颜色(比如A),然后进行过渡处理,不还是过渡么。
再看:恩,颜色,然后黑色,白色,三种颜色三个角怎么过渡~~~~(如果有快捷的过渡实现方式请留言告知我,THX)。
三看:那么,拆借一下,比如红色到白色,然后加一层黑色到透明?是滴,就是这么个方案。(我自己之前弯路到了红色到黑色,白色到透明)
那么就是借助两次过渡色的填充,实现中间色块区域。
代码如下:
 1 function colorBox(color) {
 2     // 底色填充,也就是(举例红色)到白色
 3     var gradientBase = ctx.createLinearGradient(30, 0, width + 30, 0);
 4     gradientBase.addColorStop(1, color);
 5     gradientBase.addColorStop(0, 'rgba(255,255,255,1)');
 6     ctx.fillStyle = gradientBase;
 7     ctx.fillRect(30, 0, width, width);
 8
 9     // 第二次填充,黑色到透明
10     var my_gradient1 = ctx.createLinearGradient(0, 0, 0, width);
11     my_gradient1.addColorStop(0, 'rgba(0,0,0,0)');
12     my_gradient1.addColorStop(1, 'rgba(0,0,0,1)');
13     ctx.fillStyle = my_gradient1;
14     ctx.fillRect(30, 0, width, width);
15 }
需要注意,第一次填充,是从横向填充,这时候中间色块的左边已经不是canvas的原点,所以加了偏移量30px
第二次填充纵向,Y轴还是0。
这个在实际应用中要注意。
到这里,左侧canvas绘制的东西就差不多了。
3. 颜色选择事件处理
首先明确交互事件:
选择左侧colorbar(比如#ff0),中间base颜色要跟着变化,右上角也要是对应颜色(#ff0)【这个时候其实也可以得到选择的颜色,可以结束交互】;
选择中间区域的颜色,左侧不变,可以获取到对应的颜色值,结束交互。
最终就是在右侧的dom区域展示所选到的颜色。
canvas中没有dom对象,所以鼠标点击事件要靠鼠标的位置来确定是否进行相应处理。而且我们绘制的不是path对象,也无法使用inpath之类的方法来判断。
点击事件代码:
 1 can.addEventListener('click', function(e) {
 2     var ePos = {
 3         x: e.offsetX || e.layerX,
 4         y: e.offsetY || e.layerY
 5     }
 6     var rgbaStr = '#000';
 7     if (ePos.x >= 0 && ePos.x < 20 && ePos.y >= 0 && ePos.y < width) {
 8         // in
 9         rgbaStr = getRgbaAtPoint(ePos, 'bar');
10         colorBox('rgba(' + rgbaStr + ')');
11     } else if (ePos.x >= 30 && ePos.x < 30 + width && ePos.y >= 0 && ePos.y < width) {
12         rgbaStr = getRgbaAtPoint(ePos, 'box');
13     } else {
14         return;
15     }
16     outColor(rgbaStr.slice(0, 3).join());
17     cur.style.left = ePos.x + 'px';
18     cur.style.top = ePos.y + 'px';
19     cur.style.outlineColor = (rgbaStr[0] > 256 / 2 || rgbaStr[1] > 256 / 2 || rgbaStr[2] > 256 / 2) ? '#000' : '#fff';
20 });
其中,getRgbaAtPoint是最终的获取颜色值的方法,需要根据不同的鼠标位置传参来决定选取左侧还是右侧图像
获取颜色就比较简单了,就是拿到对应区域的imageData,然后从颜色数组中获取到对应位置的颜色值即可。
做过canvas像素处理的同学会比较明白,不明白的建议先去把getImageData方法看一看,了解一下
获取颜色代码:
 1 function getRgbaAtPoint(pos, area) {
 2     if (area == 'bar') {
 3         var imgData = ctx.getImageData(0, 0, 20, width);
 4     } else {
 5         var imgData = ctx.getImageData(0, 0, can.width, can.height);
 6     }
 7
 8     var data = imgData.data;
 9     var dataIndex = (pos.y * imgData.width + pos.x) * 4;
10     return [
11         data[dataIndex],
12         data[dataIndex + 1],
13         data[dataIndex + 2],
14         (data[dataIndex + 3] / 255).toFixed(2),
15     ];
16 }
这时候拿到的就是rgba颜色对应的值。
需要注意,最后一个数据时alpha通道,canvas的imageData里是0-255【没记错的话】,而不是我们平常用的0-1,所以要做转换。
颜色输出&转换:
拿到颜色后就可以输出到右侧了。
右侧只是用了rgb三通道,所以取数组前三位就好。
至于hex颜色,则用rgb来转换。
转换代码如下:
 1 function rgb2hex(rgb) {
 2     var aRgb = rgb instanceof Array ? rgb : (rgb.split(',') || [0, 0, 0]);
 3     var temp;
 4     return [
 5         (temp = Number(aRgb[0]).toString(16)).length == 1 ? ('0' + temp) : temp,
 6         (temp = Number(aRgb[1]).toString(16)).length == 1 ? ('0' + temp) : temp,
 7         (temp = Number(aRgb[2]).toString(16)).length == 1 ? ('0' + temp) : temp,
 8     ].join('');
 9 }
10
11 function hex2rgb(hex) {
12     if (hex.length == 3) {
13         hex = hex[0] + hex[0] + hex[1] + hex[1] + hex[2] + hex[2];
14     }
15     return [
16         parseInt(hex[0] + hex[1], 16),
17         parseInt(hex[2] + hex[3], 16),
18         parseInt(hex[4] + hex[5], 16),
19     ].join();
20 }
简单来说,就是10进制与16进制的转换。
有个点,就是rgb的三个值,分别对应的是hex的每两个值,比如rgb(255,0,255)对用到hex则分别是 “ff,00,ff”,综合起来就是“#ff00ff”,可以简写“#f0f”。
额外效果:
中间的颜色选择还有个效果,就是鼠标拖拽到哪里,就选中相应的颜色。
鼠标拖拽事件大家都不陌生,直接上代码,不废话
 1 can.addEventListener('mousedown', function(e) {
 2     var ePos = {
 3         x: e.layerX || e.offsetX,
 4         y: e.layerY || e.offsetY
 5     }
 6     if (ePos.x >= 30 && ePos.x < 30 + width && ePos.y >= 0 && ePos.y < width) {
 7         document.onmousemove = function(e) {
 8             var pos = {
 9                 x: e.clientX,
10                 y: e.clientY
11             }
12
13             pos.x = pos.x < 30 ? 30 : pos.x && (pos.x > (30 + width - 1) ? (30 + width - 1) : pos.x);
14             pos.y = pos.y < 0 ? 0 : pos.y && (pos.y > (width - 1) ? (width - 1) : pos.y);
15
16             rgbaStr = getRgbaAtPoint(pos, 'box');
17             cur.style.left = pos.x + 'px';
18             cur.style.top = pos.y + 'px';
19             cur.style.outlineColor = (rgbaStr[0] > 256 / 2 || rgbaStr[1] > 256 / 2 || rgbaStr[2] > 256 / 2) ? '#000' : '#fff';
20             outColor(rgbaStr.slice(0, 3).join());
21         };
22         document.onmouseup = function() {
23             // outColor(rgbaStr.slice(0, 3).join());
24             document.onmouseup = document.onmousemove = null;
25         }
26     }
27
28 });
这样,每段代码拼凑起来,就是整体的架子了,附上最终代码(比较长,折叠了):
 View Code
**********************************************************************
写在最后:
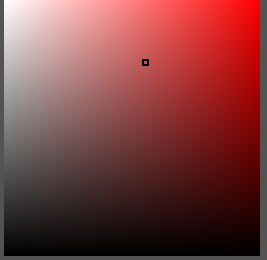
最终写完效果在自己玩耍的过程中,发现浏览器对于canvas的过渡色实现有点问题。chrome很明显,FF稍微好一点。
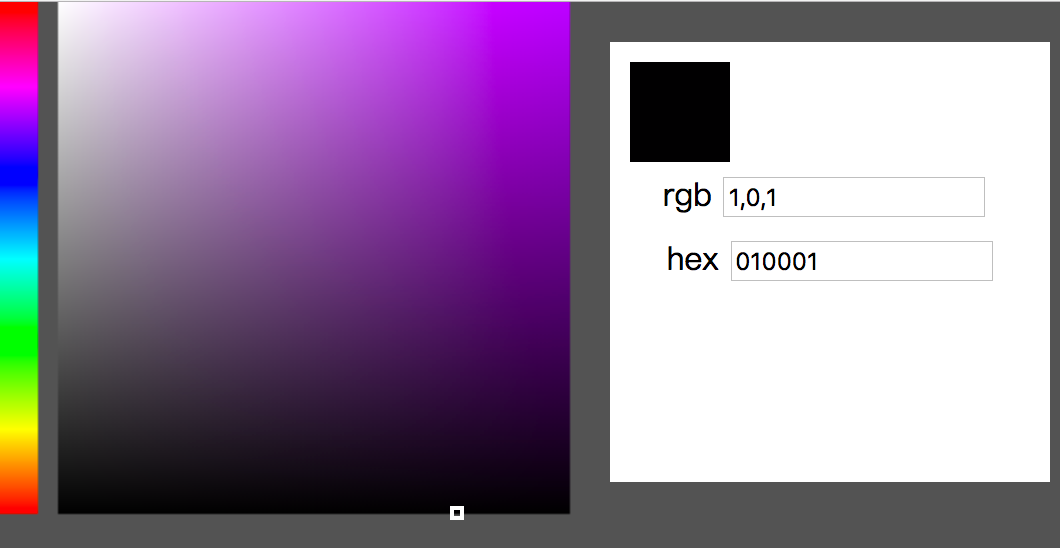
如图: 按道理来说,最下边选到的颜色应该都是rgb(0,0,0)才对,但是图上可见,有些地方并不是~~~
大多数还是000,某些点某个通道有可能会出现1。原因未知。
尝试了email给chrome邮箱,可能我英语比较差人家没看懂,也可能我问题没描述清楚,反正后来没有回复,之后的浏览器更新也没有处理。
相应的,css3的过渡色则没有一丁点问题。
<!DOCTYPE html>
<html lang="zh">

	<head>
		<meta charset="UTF-8">
		<meta name="viewport" content="width=device-width, initial-scale=1.0">
		<meta http-equiv="X-UA-Compatible" content="ie=edge">
		<title>Document</title>
		<style>
			body {
				background: #535353;
				padding: 0;
				margin: 0;
			}

			canvas {
				cursor: crosshair;
			}

			#cur {
				 3px;
				height: 3px;
				outline: 2px solid #535353;
				margin-left: -1px;
				margin-top: -1px;
				position: absolute;
			}

			.wrapper {
				position: relative;
			}

			#color_show {
				 50px;
				height: 50px;
				background: #f00;
			}

			.panel {
				 200px;
				height: 200px;
				position: fixed;
				top: 20px;
				right: 20px;
				background-color: #fff;
				padding: 10px;
				text-align: center;
				line-height: 2em;
			}
		</style>
	</head>

	<body>
		<div class="wrapper">
			<canvas id="canvas" width="600" height="600"></canvas>
			<em id="cur"></em>
			<div class="panel">
				<div id="color_show"></div>
				<label>
            rgb <input type="text"  class="color_input" value="" id="rgb_value">
        </label><br>
				<label>
            hex <input type="text"  class="color_input" value="" id="hex_value">
        </label>
			</div>
		</div>
		<script>
			(function() {
				var width = 256;
				var can = document.getElementById('canvas');
				var ctx = can.getContext('2d');
				var curColor = 'rgba(255,0,0,1)';
				var cur = document.getElementById('cur');
				var rgbValue = document.getElementById('rgb_value');
				var hexValue = document.getElementById('hex_value');
				var colorShow = document.getElementById('color_show');

				var aColorInput = document.getElementsByClassName('color_input');

				function colorBar() {
					var gradientBar = ctx.createLinearGradient(0, 0, 0, width);
					gradientBar.addColorStop(0, '#f00');
					gradientBar.addColorStop(1 / 6, '#f0f');
					gradientBar.addColorStop(2 / 6, '#00f');
					gradientBar.addColorStop(3 / 6, '#0ff');
					gradientBar.addColorStop(4 / 6, '#0f0');
					gradientBar.addColorStop(5 / 6, '#ff0');
					gradientBar.addColorStop(1, '#f00');

					ctx.fillStyle = gradientBar;
					ctx.fillRect(0, 0, 20, width);
				}

				function rgb2hex(rgb) {
					var aRgb = rgb instanceof Array ? rgb : (rgb.split(',') || [0, 0, 0]);
					var temp;
					return [
						(temp = Number(aRgb[0]).toString(16)).length == 1 ? ('0' + temp) : temp,
						(temp = Number(aRgb[1]).toString(16)).length == 1 ? ('0' + temp) : temp,
						(temp = Number(aRgb[2]).toString(16)).length == 1 ? ('0' + temp) : temp,
					].join('');
				}

				function hex2rgb(hex) {
					if(hex.length == 3) {
						hex = hex[0] + hex[0] + hex[1] + hex[1] + hex[2] + hex[2];
					}
					return [
						parseInt(hex[0] + hex[1], 16),
						parseInt(hex[2] + hex[3], 16),
						parseInt(hex[4] + hex[5], 16),
					].join();
				}

				function putCurDom(color) {
					if(/([0-9a-f]{3}|[0-9a-f]{6})/i.test(color)) {
						// hex
						color = hex2rgb(color);
					} else if(color instanceof Array) {
						color = color.join(',');
					} else if(/d{1,3}(\,d{1,3}){2}/i.test(color)) {

					} else {
						return;
					}
				}

				function colorBox(color) {
					// 底色填充,也就是(举例红色)到白色
					var gradientBase = ctx.createLinearGradient(30, 0, width + 30, 0);
					gradientBase.addColorStop(1, color);
					gradientBase.addColorStop(0, 'rgba(255,255,255,1)');
					ctx.fillStyle = gradientBase;
					ctx.fillRect(30, 0, width, width);
					// 第二次填充,黑色到透明
					var my_gradient1 = ctx.createLinearGradient(0, 0, 0, width);
					my_gradient1.addColorStop(0, 'rgba(0,0,0,0)');
					my_gradient1.addColorStop(1, 'rgba(0,0,0,1)');
					ctx.fillStyle = my_gradient1;
					ctx.fillRect(30, 0, width, width);
				}

				function init() {
					colorBar();
					colorBox(curColor);
					bind();
				}

				function bind() {
					can.addEventListener('click', function(e) {
						var ePos = {
							x: e.offsetX || e.layerX,
							y: e.offsetY || e.layerY
						}
						var rgbaStr = '#000';
						if(ePos.x >= 0 && ePos.x < 20 && ePos.y >= 0 && ePos.y < width) {
							// in
							rgbaStr = getRgbaAtPoint(ePos, 'bar');
							colorBox('rgba(' + rgbaStr + ')');
						} else if(ePos.x >= 30 && ePos.x < 30 + width && ePos.y >= 0 && ePos.y < width) {
							rgbaStr = getRgbaAtPoint(ePos, 'box');
						} else {
							return;
						}
						outColor(rgbaStr.slice(0, 3).join());
						cur.style.left = ePos.x + 'px';
						cur.style.top = ePos.y + 'px';
						cur.style.outlineColor = (rgbaStr[0] > 256 / 2 || rgbaStr[1] > 256 / 2 || rgbaStr[2] > 256 / 2) ? '#000' : '#fff';
					});

					can.addEventListener('mousedown', function(e) {
						var ePos = {
							x: e.layerX || e.offsetX,
							y: e.layerY || e.offsetY
						}
						if(ePos.x >= 30 && ePos.x < 30 + width && ePos.y >= 0 && ePos.y < width) {
							document.onmousemove = function(e) {
								var pos = {
									x: e.clientX,
									y: e.clientY
								}

								pos.x = pos.x < 30 ? 30 : pos.x && (pos.x > (30 + width - 1) ? (30 + width - 1) : pos.x);
								pos.y = pos.y < 0 ? 0 : pos.y && (pos.y > (width - 1) ? (width - 1) : pos.y);

								rgbaStr = getRgbaAtPoint(pos, 'box');
								cur.style.left = pos.x + 'px';
								cur.style.top = pos.y + 'px';
								cur.style.outlineColor = (rgbaStr[0] > 256 / 2 || rgbaStr[1] > 256 / 2 || rgbaStr[2] > 256 / 2) ? '#000' : '#fff';
								outColor(rgbaStr.slice(0, 3).join());
							};
							document.onmouseup = function() {
								// outColor(rgbaStr.slice(0, 3).join());
								document.onmouseup = document.onmousemove = null;
							}
						}

					});
				}

				function outColor(rgb) {
					rgbValue.value = rgb;
					hexValue.value = rgb2hex(rgb);
					colorShow.style.backgroundColor = 'rgb(' + rgb + ')';
				}

				function getRgbaAtPoint(pos, area) {
					if(area == 'bar') {
						var imgData = ctx.getImageData(0, 0, 20, width);
					} else {
						var imgData = ctx.getImageData(0, 0, can.width, can.height);
					}

					var data = imgData.data;
					var dataIndex = (pos.y * imgData.width + pos.x) * 4;
					return [
						data[dataIndex],
						data[dataIndex + 1],
						data[dataIndex + 2],
						(data[dataIndex + 3] / 255).toFixed(2),
					];
				}

				init();
			})()
		</script>
	</body>

</html>