Install ADDS on Windows Server 2012 R2 with PowerShell
In this tutorial I’m installing ADDS on Windows Server 2012 R2 with PowerShell.
The old “Dcpromo.exe” is deprecated beginning with Windows Server 2012, but you can still rundcpromo.exe by using an answer file (dcpromo /unattend: or dcpromo /answer:). Since this is deprecated we might as well start using the new method since there is no need to migrate.
If you don’t have a copy, Download Windows Server 2012 R2 here and after installation don’t forget to run the “windows update” so you have all patches up to date.
Virtual Machine Setup:
OS: Windows Server 2012 R2
FQDN: dc01.ethernuno.intra
Processors 2 (1 per core)
Memory: 1Gb
Disk0: 50Gb
NIC: Bridge
IP Address: 192.168.1.10/24
Note: To install a new forest, you must be logged on as the local Administrator for the server.
Installing AD DS by with PowerShell
Open Windows PowerShell console with elevated privileges, and run the following command:
PS C:UsersAdministrator> Import-Module ServerManager
PS C:UsersAdministrator>
Install the AD DS server role, the AD DS and AD LDS server administration tools:
PS C:UsersAdministrator> Install-windowsfeature -name AD-Domain-Services –IncludeManagementTools
Success Restart Needed Exit Code     Feature Result
------- -------------- ---------     --------------
True   No             Success       {Active Directory Domain Services, Group P...
PS C:UsersAdministrator>
Check the available cmdlets in the ADDSDeployment module.
PS C:UsersAdministrator> Get-command –module ADDSDeployment
CommandType     Name                                               ModuleName
-----------     ----                                               ----------
Cmdlet         Add-ADDSReadOnlyDomainControllerAccount           ADDSDeployment
Cmdlet         Install-ADDSDomain                                 ADDSDeployment
Cmdlet         Install-ADDSDomainController                       ADDSDeployment
Cmdlet         Install-ADDSForest                                 ADDSDeployment
Cmdlet         Test-ADDSDomainControllerInstallation             ADDSDeployment
Cmdlet          Test-ADDSDomainControllerUninstallation           ADDSDeployment
Cmdlet         Test-ADDSDomainInstallation                       ADDSDeployment
Cmdlet         Test-ADDSForestInstallation                       ADDSDeployment
Cmdlet         Test-ADDSReadOnlyDomainControllerAccountCreation   ADDSDeployment
Cmdlet         Uninstall-ADDSDomainController                     ADDSDeployment
PS C:UsersAdministrator>
Note that you can run PowerShell cmdlets against remote servers using invoke-command with the ADDSDeployment cmdlet. To install AD DS on a remote server named dc02 in the ethernuno.intradomain, type:
PS C:UsersAdministrator> invoke-command {install-addsdomaincontroller –domainname ethernuno.intra –credential (get-credential) –computername dc02
Installing a new forest root domain using PowerShell
This is the best and simplest way to do it. To install a new forest named ethernuno.intra and be securely prompted to provide the DSRM password, type:
PS C:UsersAdministrator> Install-ADDSForest –domainname "ethernuno.intra"
SafeModeAdministratorPassword: *******
Confirm SafeModeAdministratorPassword: *******
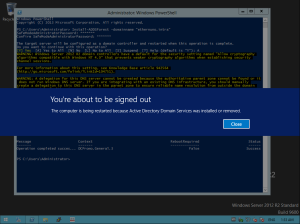
The target server will be configured as a domain controller and restarted when this operation is complete.
Do you want to continue with this operation?
[Y] Yes [A] Yes to All [N] No [L] No to All [S] Suspend [?] Help (default is "Y"): A
Note: DNS server is installed by default when you run Install-ADDSForest.
Side note:
Although this is a lab you might want to install it the right way if you’re bringing your own server up. To do this you might want to separate your logs and database.
To install a new forest named ethernuno.intra, create a DNS delegation in the ethernuno.intradomain, set domain functional level to Windows Server 2008 R2 and set forest functional level to Windows Server 2008, install the Active Directory database and SYSVOL on the D: drive, install the log files on the E: drive, and be prompted to provide the Directory Services Restore Mode password and type:
PS C:UsersAdministrator> Install-ADDSForest –DomainName ethernuno.intra –CreateDNSDelegation –DomainMode Win2008 –ForestMode Win2008R2 –DatabasePath "d:NTDS" –SYSVOLPath "d:SYSVOL" –LogPath "e:Logs"
If you answered “A” it will complete installation without prompting anything else and will also reboot.
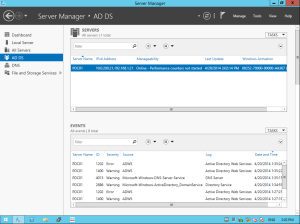
Logon as Administrator on the new domain and check server manager. You can see in server manager that the AD DS is installed:
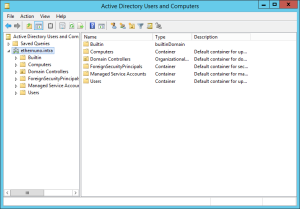
If you goto Start -> Administrative Tools, you can find all ADDS tools and the old AD Users and Computers manager:
How To Remove AD DS using PowerShell
To view the syntax and options for removing AD DS in PowerShell:
PS C:UsersAdministrator> Get-help Uninstall-ADDSDomainController
As an example, to demote with its minimal required arguments, the -credential argument is not required because the user logged on as a member of the Enterprise Admins group:
PS C:UsersAdministrator> Uninstall-ADDSDomainController –Forceremoval -Demoteoperationmasterrole
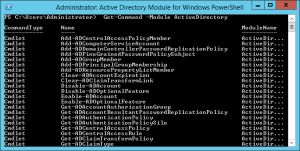
Use the Get-Command –Module ActiveDirectory to check the PowerShell commands that are available. I would advise you to start using PowerShell only and forget about gui manager. That’s where Microsoft is heading!
Hope you found this useful, lab on!


