这两周学习了巡风扫描器的搭建,也在学长的带领下看了各部分的下源代码,为了加深记忆,梳理一下巡风大体的工作流程,主要通过web端的页面分析,错误的地方还请大佬们多多指正。
整体看一下巡风的扫描流程:登陆->配置页面进行配置->到统计页面查看记录总数、IP总数、以及漏斗分析->到搜索页面输入搜索条件->选中一个或多个搜索结果,右上角新增任务->输入任务名称,选择插件->点击任务名称,即可查看任务详情
一:登陆页面
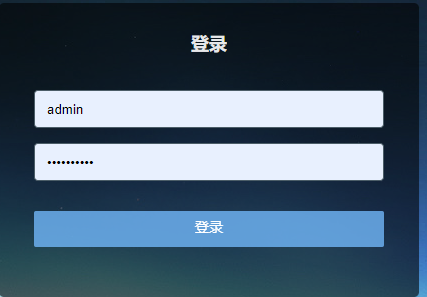
看一下后端的登陆函数,获取前端输入的用户名、密码,并通过app验证,app在__init.py__这个脚本里被初始化,是连接数据库的对象。
# 登录
@app.route('/login', methods=['get', 'post'])
def Login():
    if request.method == 'GET':
        return render_template('login.html')
    else:
        # 获取前端输入的用户名密码
        account = request.form.get('account')
        password = request.form.get('password')
        if account == app.config.get('ACCOUNT') and password == app.config.get('PASSWORD'):
            session['login'] = 'loginsuccess'
            return redirect(url_for('Search'))
        else:
            return redirect(url_for('Login'))
二:配置页面
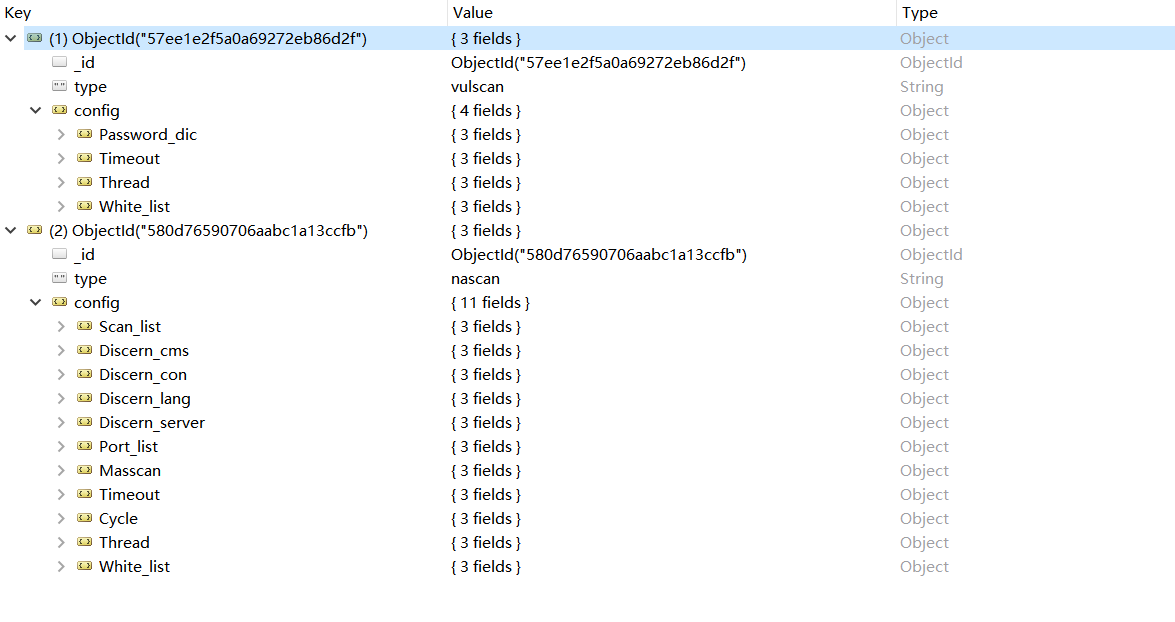
登录之后,点击配置页面,默认是爬虫引擎配置,还有一种是扫描引擎配置,后端是通过get请求的参数区分,在配置页面,可以自定义扫描方式、线程数、超时时间、资产列表等。更改配置后,后端通过UpdateConfig这个视图函数更新配置,
下面让看下每一项配置的作用:
资产探测周期配置:

每天固定的时间点扫描,进行资产探测收集。
网络资产探测列表配置

在这个地方,可以设置需要探测的内网的地址段,可以设置成图中格式,也可以设置成cidr(https://www.cnblogs.com/liangxiyang/p/11628000.html)地址格式,另外,探测列表一旦更改,则会立即触发扫描,进行资产收集。
启用MASSCAN

启用端口探测列表配置:

这两个配置都是用来探测端口的,默认是ICMP方式,只对存活的IP地址进行指定端口的探测,MASSCAN方式探测1-65535的端口,第一个方框内为路径地址,第二个方框内为发包速率。
服务类型识别配置:

用于识别开放端口上所运营的服务。
cms识别规则配置:

CMS英文全称是:Content Management System 中文名称是: 网站内容管理系统 (CMS最擅长的就是建设网站,最流行的CMS有:国外的:Wordpress,Drupal,Joomla,这是国外最流行的3大CMS。国内则是DedeCMS和帝国,PHPCMS等)。CMS识别原理就是得到一些CMS的一些固有特征,通过得到这个特征来判断CMS的类别。 比如使用MD5识别和正则表达式识别的方式,就是用特定的文件路径访问网站,获得这个文件的MD5或者用正则表达式匹配某个关键词,如果匹配成功就说明这个是这个CMS。 所以,这个识别的成功率是根据我们的字典来的。
代码语言识别规则配置:

用于识别web网站的开发语言,通过响应头、文件等
组件容器识别配置:

用于识别web的容器、中间件等组件。对容器、中间件等不了解,网上搜了一下:容器作为操作系统和应用程序之间的桥梁,给处于其中的应用程序组件提供一个环境,使应用程序直接跟容器中的环境变量交互,不必关注其它系统问题。
下面是配置更新页面的视图函数以及数据库里面的内容:

# 配置更新异步
@app.route('/updateconfig', methods=['get', 'post'])
@logincheck
def UpdateConfig():
    rsp = 'fail'
    name = request.form.get('name', 'default')  # 配置名
    value = request.form.get('value', '')       # 配置值
    conftype = request.form.get('conftype', '') # 配置类型
    print name,"
",value,"
",conftype
    # 根据name来判断是哪个配置,就从数据库去取对应的值,然后把提交过来的value加上去更新
    # 如果三个值都存在
    if name and value and conftype:
        # 判断所要更新的配置

        # 端口列表或MAsscan配置
        if name == 'Masscan' or name == 'Port_list':
            origin_value = Mongo.coll['Config'].find_one({'type': 'nascan'})["config"][name]["value"]
            value = origin_value.split('|')[0] + '|' + value
        # 判断是否启用存活探测ICMP
        elif name == 'Port_list_Flag':
            name = 'Port_list'
            origin_value = Mongo.coll['Config'].find_one({'type': 'nascan'})["config"]['Port_list']["value"]
            value = value + '|' + origin_value.split('|')[1]
        # 判断是否启用MASSCAN
        elif name == 'Masscan_Flag':
            name = 'Masscan'
            path = Mongo.coll['Config'].find_one({'type': 'nascan'})["config"]["Masscan"]["value"]
            if len(path.split('|')) == 3:
                path = path.split('|')[1] + "|" + path.split('|')[2]
            else:
                path = path.split('|')[1]
            if value == '1':
                value = '1|' + path
            else:
                value = '0|' + path
        result = Mongo.coll['Config'].update({"type": conftype}, {'$set': {'config.' + name + '.value': value}})
        if result:
            rsp = 'success'
    return rsp
三:统计页面
配置页面完成后,立即开始进行资产探测、可以在统计页面看到资产探测结果(获取数据库数据并在前端进行展示):

下面是加了注释的视图函数源码

# 统计页面
@app.route('/analysis')
@logincheck
def Analysis():
    # distinct获取集合中指定字段的不重复值,以集合的形式返回,就是去重
    ip = len(Mongo.coll['Info'].distinct('ip'))
    print 'ip总数', ip
    # 获取数量
    record = Mongo.coll['Info'].find().count()
    print '记录总数', record
    # 获取任务数量
    task = Mongo.coll['Task'].find().count()
    print '任务总数', task
    # group是mongodb中自带的三种聚合函数之一
    # count:简单统计集合中符合某种条件的文档数量。
    # distinct:用于对集合中的文档针进行去重处理。
    # group:用于提供比count、distinct更丰富的统计需求,可以使用js函数控制统计逻辑
    vul = int(Mongo.coll['Plugin'].group([], {}, {'count': 0},'function(doc,prev){prev.count = prev.count + doc.count}')[0]['count'])
    plugin = Mongo.coll['Plugin'].find().count()
    print "插件总数", plugin
    vultype = Mongo.coll['Plugin'].group(['type'], {"count":{"$ne":0}}, {'count': 0},'function(doc,prev){prev.count = prev.count + doc.count}')
    print "漏斗类型", vultype
    # sort根据date字段降序排列,limit指定读取的数据数量
    cur = Mongo.coll['Statistics'].find().sort('date', -1).limit(30)
    trend = []
    for i in cur:
        trend.append(
            {'time': i['date'], 'add': i['info']['add'], 'update': i['info']['update'], 'delete': i['info']['delete']})
    # 找到Heartbeat集合中的两个文档
    vulbeat = Mongo.coll['Heartbeat'].find_one({'name': 'load'})
    scanbeat = Mongo.coll['Heartbeat'].find_one({'name': 'heartbeat'})
    if vulbeat == None or scanbeat == None:
        taskpercent = 0
        taskalive = False
        scanalive = False
    else:
        taskpercent = vulbeat['value'] * 100
        taskalive = (datetime.now() - vulbeat['up_time']).seconds
        scanalive = (datetime.now() - scanbeat['up_time']).seconds
        taskalive = True if taskalive < 120 else False
        scanalive = True if scanalive < 120 else False
    # aggregate主要用于处理数据(诸如统计平均值,求和等),并返回计算后的数据结果。有点类似sql语句中的 count(*)。
    server_type = Mongo.coll['Info'].aggregate(
        [{'$group': {'_id': '$server', 'count': {'$sum': 1}}}, {'$sort': {'count': -1}}])
    web_type = Mongo.coll['Info'].aggregate([{'$match': {'server': 'web'}}, {'$unwind': '$webinfo.tag'},
                                             {'$group': {'_id': '$webinfo.tag', 'count': {'$sum': 1}}},
                                             {'$sort': {'count': -1}}])
    #把数据传到analysis.html页面进行渲染
    return render_template('analysis.html', ip=ip, record=record, task=task, vul=vul, plugin=plugin, vultype=vultype,
                           trend=sorted(trend, key=lambda x: x['time']), taskpercent=taskpercent, taskalive=taskalive,
                           scanalive=scanalive, server_type=server_type, web_type=web_type)
三:搜索页面
资产探测完成后,就可以根据搜索规则,搜索需要的端口,ip等。
比如:查看所有开放25端口的IP,在搜索框输入port:25。 查看指定IP、IP段等
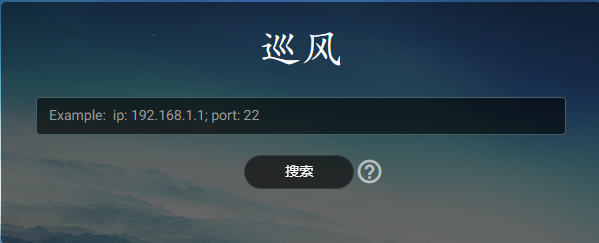
前端输入搜索条件后,后端在search.html接受,并命名为q:
<input type="text" class="form-control"
     placeholder="Example:  ip: 192.168.1.1; port: 22"
     style="color: #797979;" id="filter" name="q">
搜索完成后,会直接对结果展示

四:任务页面
搜索出结果后,可以选中其中的一个或多个(作为目标),然后新增任务,选择插件类型,根据选择的插件数量创建任务,后端就会进行任务扫面扫描,点击任务名称,即可查看该任务的详情。
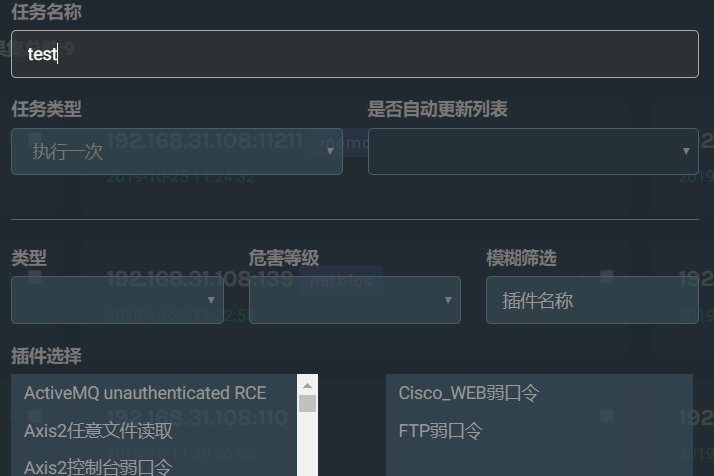

下面是加了注释的视图函数源码

# 新增任务异步
@app.route('/addtask', methods=['get', 'post'])
@logincheck
def Addtask():
    # 先获取了页面传了的值 先默认result为fail
    # 没有plugin的话直接返回fail
    # 有的话,先判断结果集是否全选,将结果集的ip和port都加入列表,否则将当前页的ip将入列表。
    title = request.form.get('title', '')   # 任务名称
    plugin = request.form.get('plugin', '') # 从插件列表里所选择的插件
    condition = unquote(request.form.get('condition', ''))  # 所选结果的ip地址
    print 222222,condition
    plan = request.form.get('plan', 0)  # 执行周期
    print 33333,plan
    ids = request.form.get('ids', '')   # 所选地址的 ip:端口
    print 44444,ids
    isupdate = request.form.get('isupdate', '0')    # 是否自动更新列表
    resultcheck = request.form.get('resultcheck', '0')  # 结果集是否全选
    print title,plugin,condition,plan,ids,isupdate,resultcheck
    result = 'fail'
    if plugin:
        targets = []
        if resultcheck == 'true':  # 结果集全选
            list = condition.strip().split(';')
            print list
            query = querylogic(list)
            cursor = Mongo.coll['Info'].find(query)
            for i in cursor:
                tar = [i['ip'], i['port']]
                targets.append(tar)
        else:  # 当前页结果选择
            for i in ids.split(','):
                tar = [i.split(':')[0], int(i.split(':')[1])]
                targets.append(tar)
        temp_result = True
        for p in plugin.split(','):
            query = querylogic(condition.strip().split(';'))
            item = {'status': 0, 'title': title, 'plugin': p, 'condition': condition, 'time': datetime.now(),
                    'target': targets, 'plan': int(plan), 'isupdate': int(isupdate), 'query': dumps(query)}
            # 插入到数据库
            insert_reuslt = Mongo.coll['Task'].insert(item)
            if not insert_reuslt:
                temp_result = False
        if temp_result:
            result = 'success'
    return result
五:插件页面
插件的展示主要是获取数据库内容,并传到前端,主要看一下插件的增加

# 插件列表页
@app.route('/plugin')
@logincheck
def Plugin():
    # 获取前端页面
    page = int(request.args.get('page', '1'))
    print 1111,page
    # 从数据库里面找到有关插件数据
    cursor = Mongo.coll['Plugin'].find().limit(page_size).skip((page - 1) * page_size)
    # 在前端页面展示
    return render_template('plugin.html', cursor=cursor, vultype=cursor.distinct('type'), count=cursor.count())
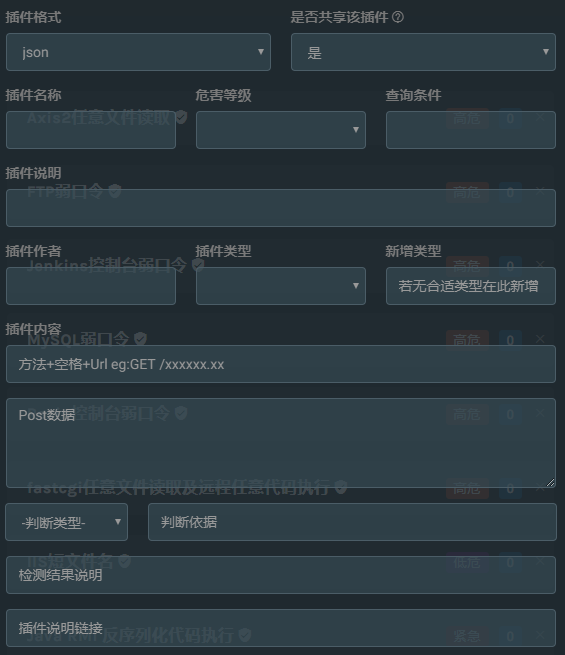
插件有两种格式,一是json格式,二是py脚本格式。
json格式的上传较为简单,只需要在前端填写对应的内容就行
而py脚本方式,则需要按指定的格式编写代码,大概如下:

def get_plugin_info():
    plugin_info = {
        "name": "MySQL弱口令",
        "info": "导致数据库敏感信息泄露,严重可导致服务器直接被入侵。",
        "level": "高危",
        "type": "弱口令",
        "author": "wolf@YSRC",
        "url": "",
        "keyword": "server:mysql",
        "source": 1
    }
    return plugin_info

def get_hash(password, scramble):
    hash_stage1 = hashlib.sha1(password).digest()
    hash_stage2 = hashlib.sha1(hash_stage1).digest()
    to = hashlib.sha1(scramble + hash_stage2).digest()
    reply = [ord(h1) ^ ord(h3) for (h1, h3) in zip(hash_stage1, to)]
    hash = struct.pack('20B', *reply)
    return hash

def get_scramble(packet):
    tmp = packet[15:]
    m = re.findall("x00?([x01-x7F]{7,})x00", tmp)
    if len(m) > 3: del m[0]
    scramble = m[0] + m[1]
    try:
        plugin = m[2]
    except:
        plugin = ''
    return plugin, scramble


def get_auth_data(user, password, scramble, plugin):
    user_hex = binascii.b2a_hex(user)
    pass_hex = binascii.b2a_hex(get_hash(password, scramble))
    if not password:
        data = "85a23f0000000040080000000000000000000000000000000000000000000000" + user_hex + "0000"
    else:
        data = "85a23f0000000040080000000000000000000000000000000000000000000000" + user_hex + "0014" + pass_hex
    if plugin: data += binascii.b2a_hex(
        plugin) + "0055035f6f73076f737831302e380c5f636c69656e745f6e616d65086c69626d7973716c045f7069640539323330360f5f636c69656e745f76657273696f6e06352e362e3231095f706c6174666f726d067838365f3634"
    len_hex = hex(len(data) / 2).replace("0x", "")
    auth_data = len_hex + "000001" + data
    return binascii.a2b_hex(auth_data)


def check(ip, port, timeout):
    socket.setdefaulttimeout(timeout)
    user_list = ['root']
    for user in user_list:
        for pass_ in PASSWORD_DIC:
            try:
                pass_ = str(pass_.replace('{user}', user))
                sock = socket.socket(socket.AF_INET, socket.SOCK_STREAM)
                sock.connect((ip, int(port)))
                packet = sock.recv(254)
                # print packet
                plugin, scramble = get_scramble(packet)
                auth_data = get_auth_data(user, pass_, scramble, plugin)
                sock.send(auth_data)
                result = sock.recv(1024)
                if result == "x07x00x00x02x00x00x00x02x00x00x00":
                    return u"存在弱口令,账号:%s,密码:%s" % (user, pass_)
            except Exception, e:
                if "Errno 10061" in str(e) or "timed out" in str(e): return
其中get_plugin_info()与check()方法是必须的,用来获取插件信息和检查。
***************不积跬步无以至千里***************
