Mock服务moco系列(三)
重定向、正则表达式、延迟、模板、事件、分模块设计
目录
- 1、重定向
- 2、正则表达式
- 3、延迟
- 4、模板
- 5、事件
- 5.1、完整事件
- 5.2、异步事件
- 6、分模块设计
1、重定向
moco可以帮我们模拟重定向,将请求重定向到不同的url,可以模拟一些请求拦截、请求验证失败等情况。
一、重定向到百度
1、创建09Redirect.json配置文件。
redirectTo:将请求重定向到指定的url上。
内容如下:
[
{
"description":"重定向到百度",
"request":{
"uri":"/redirect"
},
"redirectTo":"https://www.baidu.com/"
}
]
2、输入启动moco服务命令。
java -jar moco-runner-0.12.0-standalone.jar http -p 8083 -c 09Redirect.json
3、浏览器访问moco服务地址。
访问地址:http://localhost:8083/redirect
访问结果显示:访问http://localhost:8083/redirect跳转到https://www.baidu.com/页面。

二、重定向到自定义网页
1、创建10Redirect2.json配置文件。
该配置文件有2个接口(重定向请求、被重定向到的请求)。
redirectTo:将请求重定向到指定的url上。
内容如下:
[
{
"description":"重定向到自定义网页",
"request":{
"uri":"/redirect/topath"
},
"redirectTo":"/redirect/new"
},
{
"description":"被重定向到的请求",
"request":{
"uri":"/redirect/new"
},
"response":{
"headers":{
"Content-Type":"text/html;charset=gbk"
},
"text":"重定向成功"
}
}
]
2、输入启动moco服务命令。
java -jar moco-runner-0.12.0-standalone.jar http -p 8083 -c 10Redirect2.json
3、浏览器访问moco服务地址。
访问地址:http://localhost:8083/redirect/topath
访问结果显示:
访问http://localhost:8083/redirect/topath跳转到http://localhost:8083/redirect/new页面。

2、正则表达式
1、创建11Match.json配置文件。
match:正则表达式。
\w 匹配字母、数字、下划线的字符。
* 表示任意多个字符。
\w* 表示任意多个\w
内容如下:
[
{
"description":"正则表达式",
"request":{
"uri":{
"match": "/\w*/demo"
}
},
"response":{
"text": "Moco Match"
}
}
]
2、输入启动moco服务命令。
java -jar moco-runner-0.12.0-standalone.jar http -p 8083 -c 11Match.json
3、浏览器访问moco服务地址。
由于请求地址使用正则表达式,以下地址都可以访问:
http://localhost:8083/123/demo
http://localhost:8083/abc/demo
http://localhost:8083/123abc/demo
访问结果显示:

moco是由Java正则表达式实现的,可以在这里查看更多的细节。
https://docs.oracle.com/javase/7/docs/api/java/util/regex/Pattern.html
3、延迟
有时,我们需要一个延迟来模拟缓慢的服务器端操作。
1、创建12Latency.json配置文件。
latency:延迟。例如设置延迟5秒:
"latency":{
"duration": 5,
"unit": "second"
}
内容如下:
[
{
"description":"延迟",
"request":{
"uri":"/demo",
"method":"get"
},
"response":{
"latency":{
"duration": 5,
"unit": "second"
},
"text":"Moco Latency"
}
}
]
2、输入启动moco服务命令。
java -jar moco-runner-0.12.0-standalone.jar http -p 8083 -c 12Latency.json
3、浏览器访问moco服务地址。
访问地址:http://localhost:8083/demo
访问结果显示:延迟5秒后,返回响应内容。

4、模板
有时,我们需要基于某些内容定制我们的响应,例如响应应该具有与请求相同的头。可以通过模板来实现:可以在模板中使用req获取请求信息。
方法:
"template": "${req.version}"
"template": "${req.method}"
"template": "${req.content}"
"template": "${req.headers['foo']}"
"template": "${req.queries['foo']}"
"template": "${req.forms['foo']}"
"template": "${req.cookies['foo']}"
"template": "${req.json.foo}"
1、创建13Template.json配置文件。
template:模板。
例如:在响应内容里获取请求参数字段值。
"template": "${req.queries['username']}"
内容如下:
[
{
"description":"模板",
"request":{
"uri":"/demo",
"method":"get"
},
"response":{
"text": {
"template": "${req.queries['username']}"
}
}
}
]
2、输入启动moco服务命令。
java -jar moco-runner-0.12.0-standalone.jar http -p 8083 -c 13Template.json
3、浏览器访问moco服务地址。
访问地址:http://localhost:8083/demo?username=admin
访问结果显示:响应内容获取请求参数username的值(admin)。

5、事件
5.1、完整事件
有时,我们请求一些特定接口的时候,可能需要去请求别的地址,从而才能完成请求。
完整事件将在你的请求被完全处理后触发。
一、Get请求
1、创建14Complete.json配置文件。
内容如下:
[
{
"description":"完整事件(Get请求)",
"request":{
"uri":"/event",
"method":"get"
},
"response": {
"text": "event"
},
"on": {
"complete": {
"get" : {
"url":"https://www.baidu.com/"
}
}
}
}
]
2、输入启动moco服务命令。
java -jar moco-runner-0.12.0-standalone.jar http -p 8083 -c 14Complete.json
3、浏览器访问moco服务地址。
访问地址:http://localhost:8083/event
访问结果显示:

二、Post请求
1、创建15Complete2.json配置文件。
内容如下:
[
{
"description":"完整事件(Post请求)",
"request":{
"uri":"/event",
"method":"get"
},
"response":{
"text":"event"
},
"on":{
"complete":{
"post":{
"url":"https://www.baidu.com/",
"content": "content"
}
}
}
}
]
2、输入启动moco服务命令。
java -jar moco-runner-0.12.0-standalone.jar http -p 8083 -c 15Complete2.json
3、浏览器访问moco服务地址。
访问地址:http://localhost:8083/event
访问结果显示:

5.2、异步事件
前面的请求默认都是同步的,这意味着只有等到服务器处理完后才会返回给客户端。当然你也可以进行异步请求,还可以指定等待此异步请求的等待时间。
1、创建16Asynchronous.json配置文件。
"async":"true"开启异步请求。
"latency":5000设置等待此异步请求的等待时间。
内容如下:
[
{
"description":"异步事件",
"request":{
"uri":"/event",
"method":"get"
},
"response":{
"text":"event"
},
"on":{
"complete":{
"async":"true",
"latency":5000,
"post":{
"url":"https://www.baidu.com/",
"content":"content"
}
}
}
}
]
2、输入启动moco服务命令。
java -jar moco-runner-0.12.0-standalone.jar http -p 8083 -c 16Asynchronous.json
3、浏览器访问moco服务地址。
访问地址:http://localhost:8083/event
访问结果显示:

6、分模块设计
在实际工作中,每个业务模块都有自己的业务(很多请求),如果把这些不同的业务模块都写在一个配置文件里,显然不是很好管理。这里采用分模块设计思路解决这个问题。
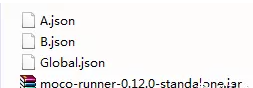
1、创建配置文件。
如图所示:
Global.json为全局配置文件(指定A业务模块、B业务模块),moco支持在全局的配置文件中引入其他配置文件,这样就可以按不同业务定义配置文件,便于管理。
A.json为A业务模块配置文件。
B.json为B业务模块配置文件。
Global.json内容如下:
[
{ "context":"/a", "include":"A.json" },
{ "context":"/b", "include":"B.json" }
]
A.json内容如下:
[
{
"description":"模块A",
"request":{
"uri":"/demoa"
},
"response":{
"text":"A Module"
}
}
]
B.json内容如下:
[
{
"description":"模块B",
"request":{
"uri":"/demob"
},
"response":{
"text":"B Module"
}
}
]
2、输入启动moco服务命令。
java -jar moco-runner-0.12.0-standalone.jar http -p 8083 -g Global.json
注意,此时需要通过参数-g来加载全局配置文件,而不是使用-c。
3、浏览器访问moco服务地址。
(1)访问A业务模块
访问地址:http://localhost:8083/a/demoa
访问结果显示:
(2)访问B业务模块
访问地址:http://localhost:8083/b/demob
访问结果显示: