须知:
(1). orabbix使用root用户安装。
(2). orabbix安装在zabbix server端,而不是安装在Oracle端。
1.下载 Orabbix
2. 解压软件
unzip到这个目录: /opt/orabbix
3.复制启动脚本
#cp /opt/orabbix/init.d/orabbix /etc/init.d/orabbix
4.添加运行权限:
#chmod +x /etc/init.d/orabbix
#chmod +x /opt/orabbix/run.sh
#chkconfig --add orabbix
建立监控用户及授权
CREATE USER ZABBIX
IDENTIFIED BY ZABBIX;
GRANT CONNECT TO ZABBIX;
GRANT RESOURCE TO ZABBIX;
ALTER USER ZABBIX DEFAULT ROLE ALL;
GRANT SELECT ANY TABLE TO ZABBIX;
GRANT CREATE SESSION TO ZABBIX;
GRANT SELECT ANY DICTIONARY TO ZABBIX;
GRANT UNLIMITED TABLESPACE TO ZABBIX;
GRANT SELECT ANY DICTIONARY TO ZABBIX;
如果是11g以上数据库,执行下列语句:
exec dbms_network_acl_admin.create_acl(acl => 'resolve.xml',description => 'resolve acl', principal =>'ZABBIX', is_grant => true, privilege => 'resolve');
exec dbms_network_acl_admin.assign_acl(acl => 'resolve.xml', host =>'*');
commit;
5.修改orabbix配置文件
#cd /opt/orabbix/conf
#cp config.props.sample config.props
根据实际的部署情况修改文件,比如:
#comma separed list of Zabbix servers
ZabbixServerList=ZabbixServer1
ZabbixServer1.Address=192.168.190.10
ZabbixServer1.Port=10051
#pidFile
OrabbixDaemon.PidFile=./logs/orabbix.pid
#frequency of item's refresh
OrabbixDaemon.Sleep=300
#MaxThreadNumber should be >= than the number of your databases
OrabbixDaemon.MaxThreadNumber=100
#put here your databases in a comma separated list
DatabaseList=DB1
#Configuration of Connection pool
#if not specified Orabbis is going to use default values (hardcoded)
#Maximum number of active connection inside pool
DatabaseList.MaxActive=10
#The maximum number of milliseconds that the pool will wait
#(when there are no available connections) for a connection to be returned
#before throwing an exception, or <= 0 to wait indefinitely.
DatabaseList.MaxWait=100
DatabaseList.MaxIdle=1
#define here your connection string for each database
DB1.Url=jdbc:oracle:thin:@192.168.56.156:1521:orcl
DB1.User=zabbix
DB1.Password=zabbix
#Those values are optionals if not specified Orabbix is going to use the general values
DB1.MaxActive=10
DB1.MaxWait=100
DB1.MaxIdle=1
DB1.QueryListFile=./conf/query.props
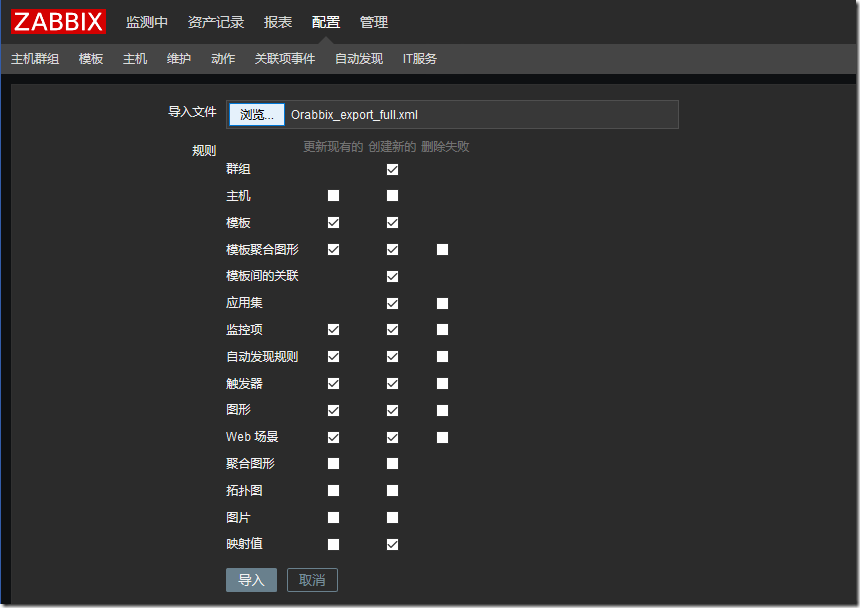
6.导入模板
在orabbix的软件包里面有4各模板文件,导入下面途中这个模板文件就可以了,包含了其他所有模板文件的内容。

在zabbix界面上配置数据库监控时,要注意,orabbix是把每个数据库都配置成一个“主机”的,这块看着有点别扭,而且,注意在配置主机时,名称一定要和config.props文件中配置的数据库名称一样,比如我这里就是DB1:
