Running Rosbridge
Description: This tutorial shows you how to launch a rosbridge server and talk to it.Keywords: rosbridge, roslibjs, teleoperation, Robot Web Tools
Tutorial Level: BEGINNER
Installing Rosbridge
Rosbridge depends on a basic installation of ROS. Check out the ROS Installation Guide for installing ROS on your machine.
After ROS is installed, you can install Rosbridge from a .deb package:
sudo apt-get install ros-<rosdistro>-rosbridge-suite
This will install the suite of rosbridge packages needed to get started.
Running Rosbridge
After installing ROS and rosbridge, you need to make sure your system is aware of the packages. To set up your environment for ROS and rosbridge:
source /opt/ros/<rosdistro>/setup.bash
All that's left is to run rosbridge. To launch rosbridge and its packages like rosbridge_server and rosapi, a launch file is included in the install. To launch the file, run:
roslaunch rosbridge_server rosbridge_websocket.launch
This will run rosbridge and create a WebSocket on port 9090 by default.
You can configure the port by setting the ~/port param in ROS. An example launch file that will run rosbridge on port 8080 would look like:
<launch>
  <include file="$(find rosbridge_server)/launch/rosbridge_websocket.launch" >
     <arg name="port" value="8080"/>
  </include>
</launch>
Talking to Rosbridge
Now that rosbridge has been launched and a WebSocket connection is available, we can create a basic HTML webpage to send and receive calls to rosbridge. Roslibjs is a JavaScript library that handles the communication for you. Check out the getting started with roslibjs tutorial to create a webpage with roslibjs and rosbridge.
AGVS Tutorials
In this page there's a list of tutorial to start using the Agvs robot.
Contents
Launching gazebo model and controller
1. Launch Gazebo model
roslaunch agvs_gazebo agvs.launch
2. Launch Gazebo controller
roslaunch agvs_robot_control agvs_robot_control.launch
3. Launch pad to control the robot with a ps3 joystick
roslaunch agvs_pad agvs_pad.launch
Building a map of Willow Garage
1. Launch Gazebo model
roslaunch agvs_gazebo agvs_office.launch
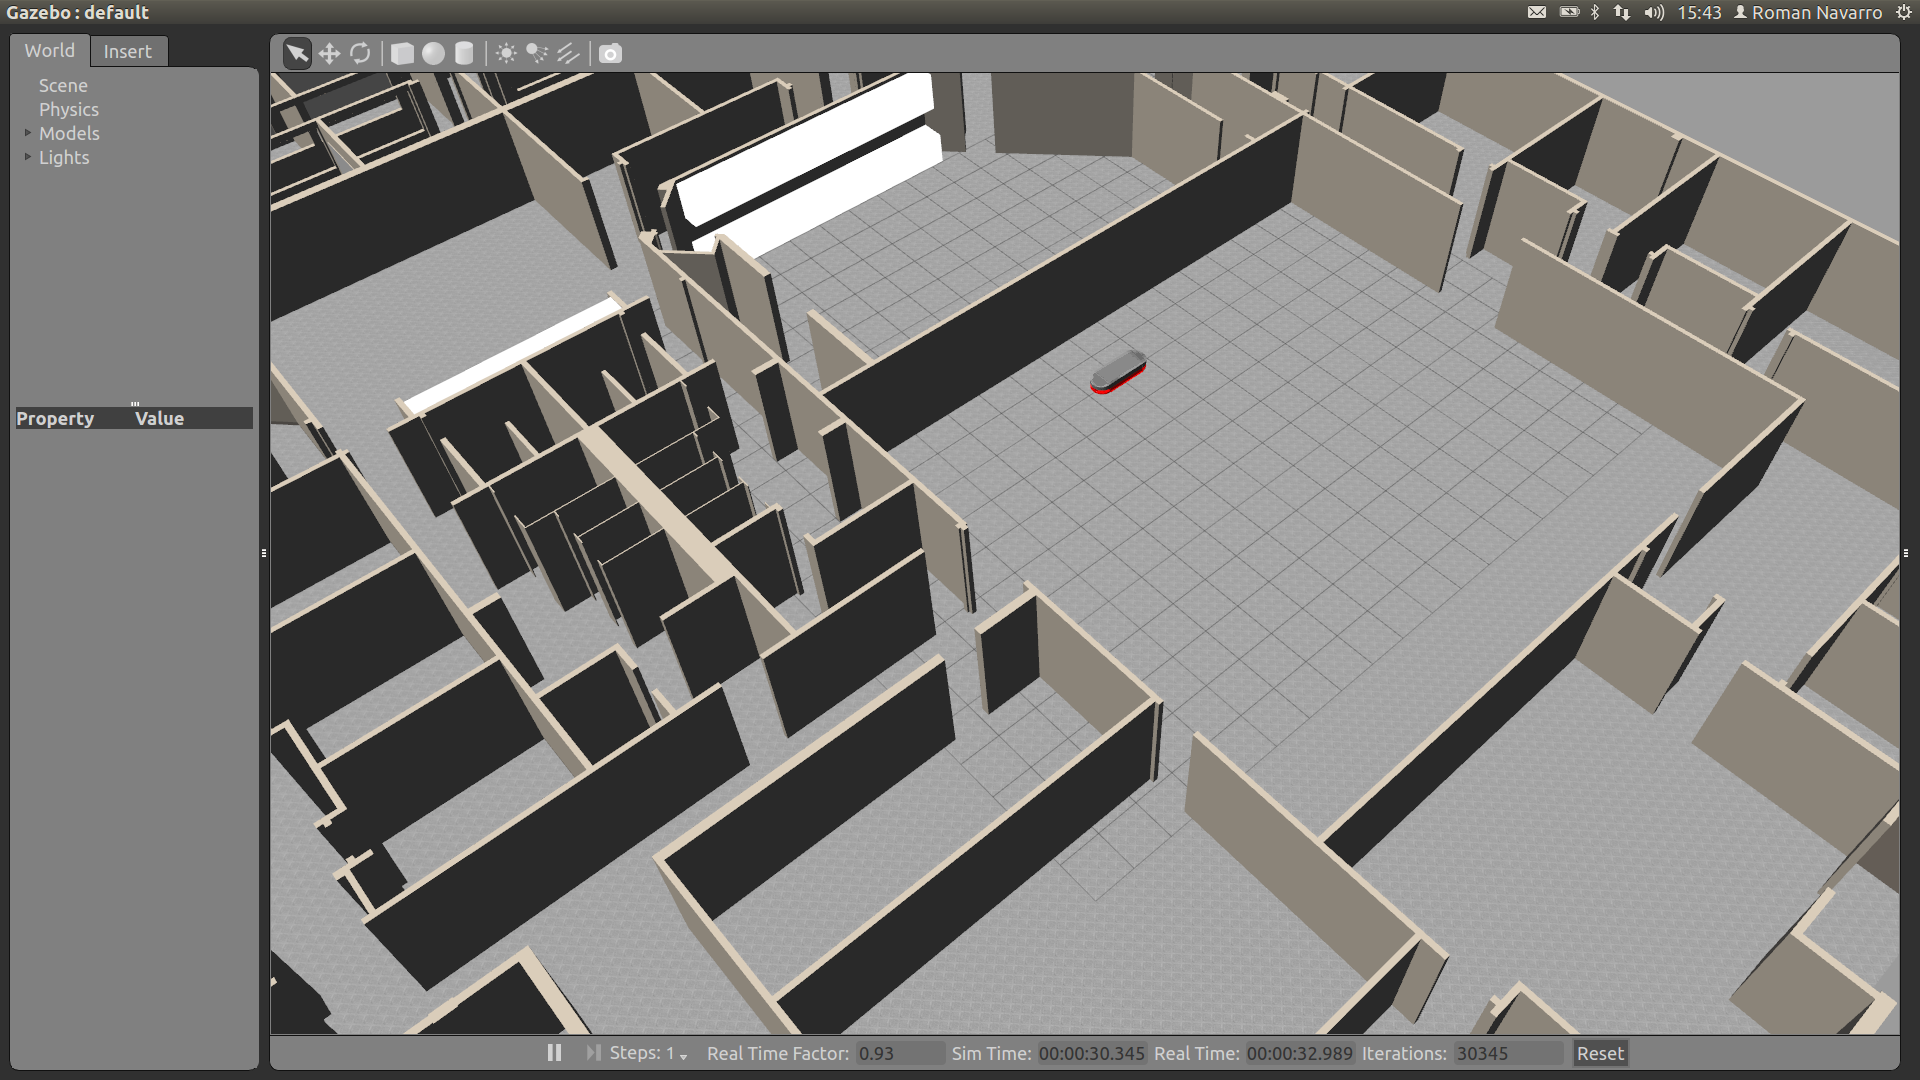
2. Launch Gazebo controller
roslaunch agvs_robot_control agvs_robot_control.launch
3. Launch pad to control the robot with a ps3 joystick
roslaunch agvs_pad agvs_pad.launch
4. Launch gmapping to create the map
roslaunch agvs_complete agvs_gmapping.launch
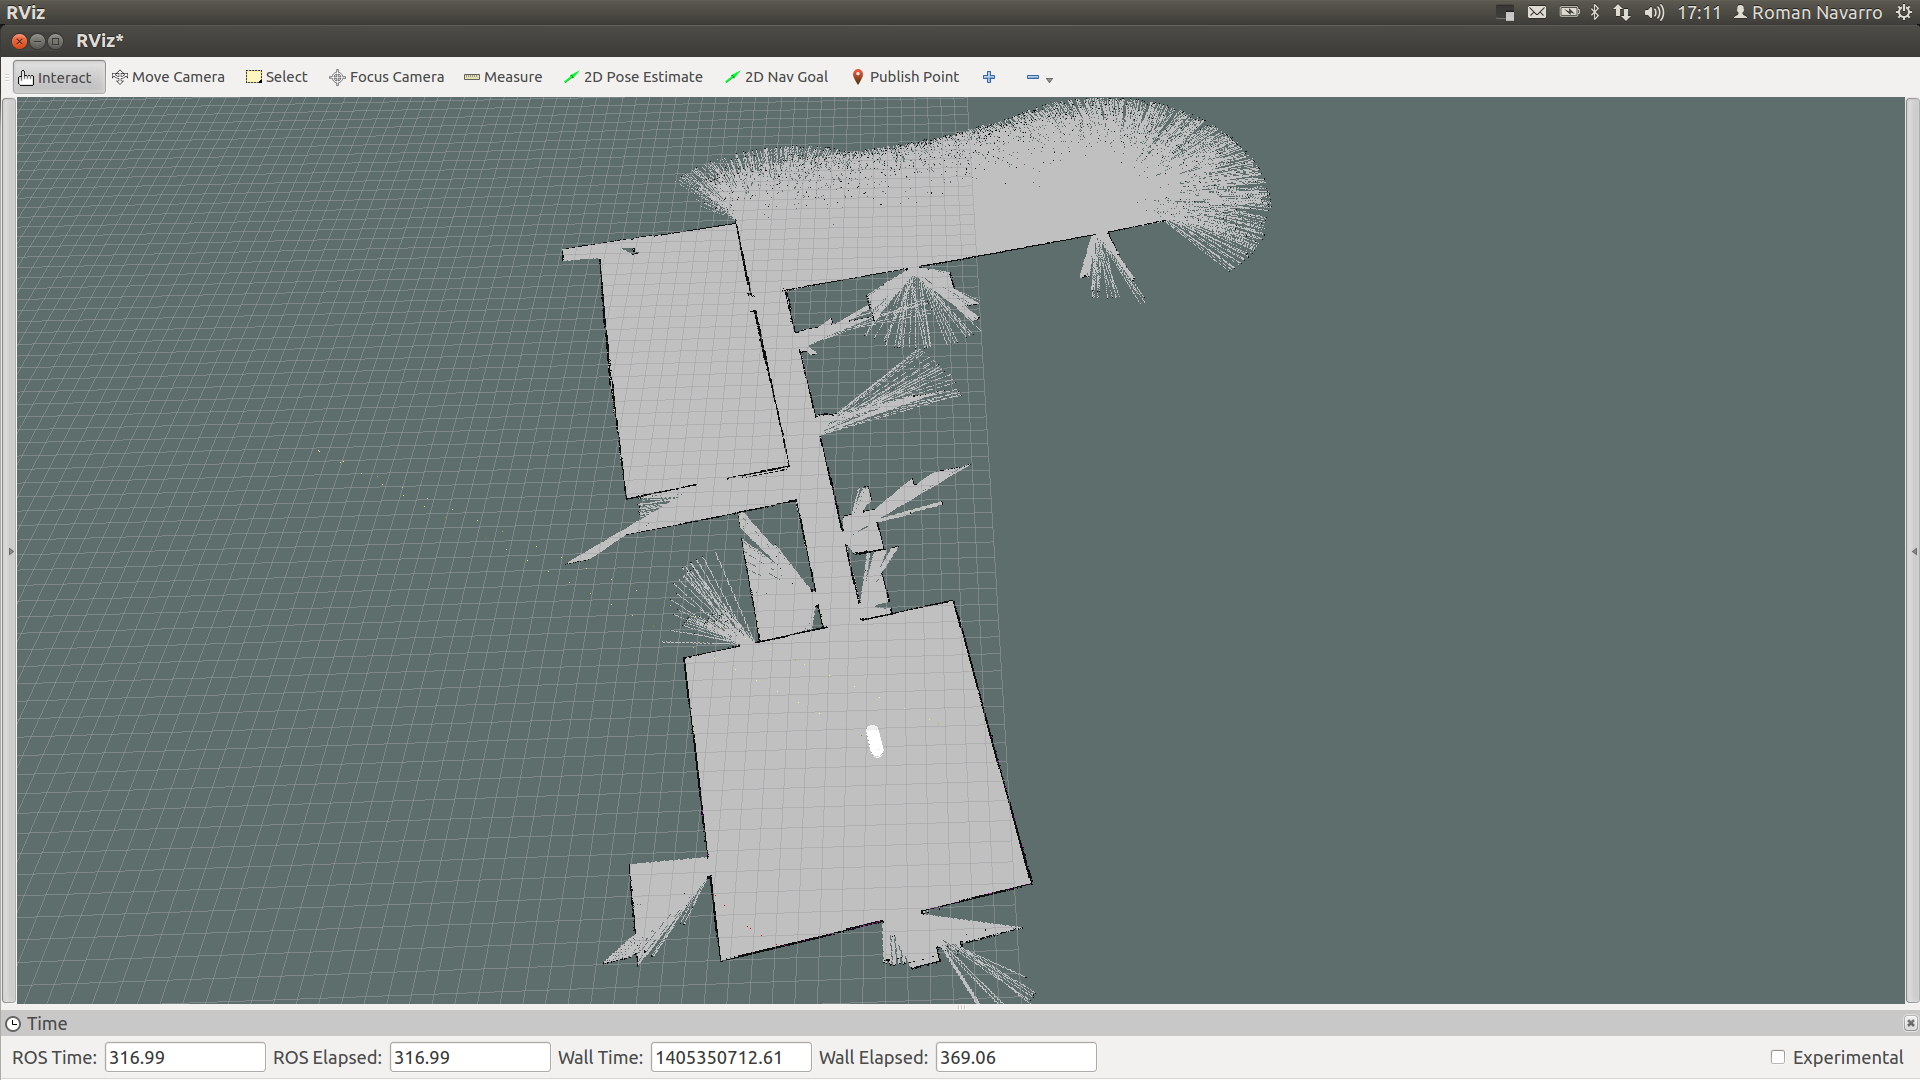
5. Move around and create the map. You can use rviz to see how the map is being created.
6. Save the map
rosrun map_server map_saver -f name_map
Autonomous movement (Pure Pursuit)
It is possible to move the robot through a path by using the package purepursuit_planner. First of all, we'll need to load a map.
1. Loading a previous saved map of Willow Garage
roslaunch agvs_complete map_server.launch
2. Launch amcl to have a pose estimation in the map
roslaunch agvs_complete amcl_diff_2.launch
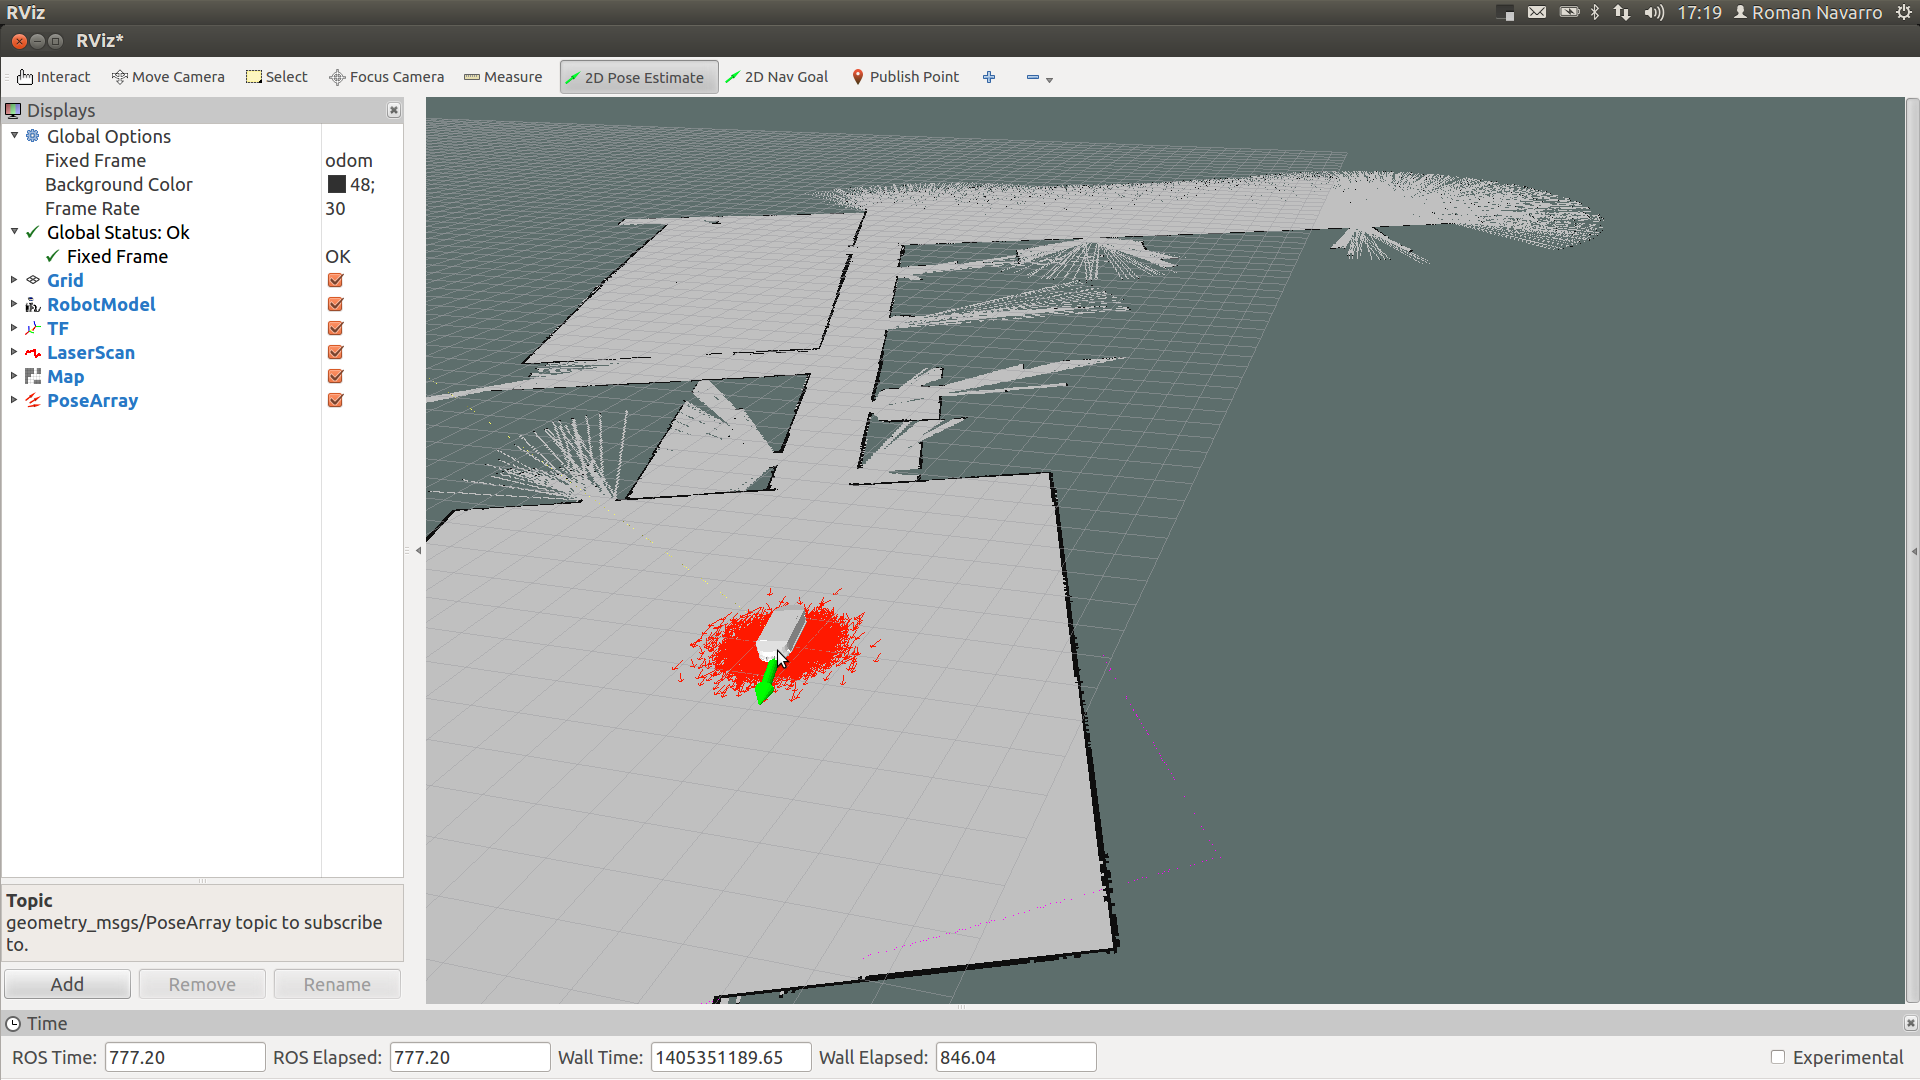
3. Launch the planner to move the robot following the desired path
roslaunch purepursuit_planner purepursuit.launch
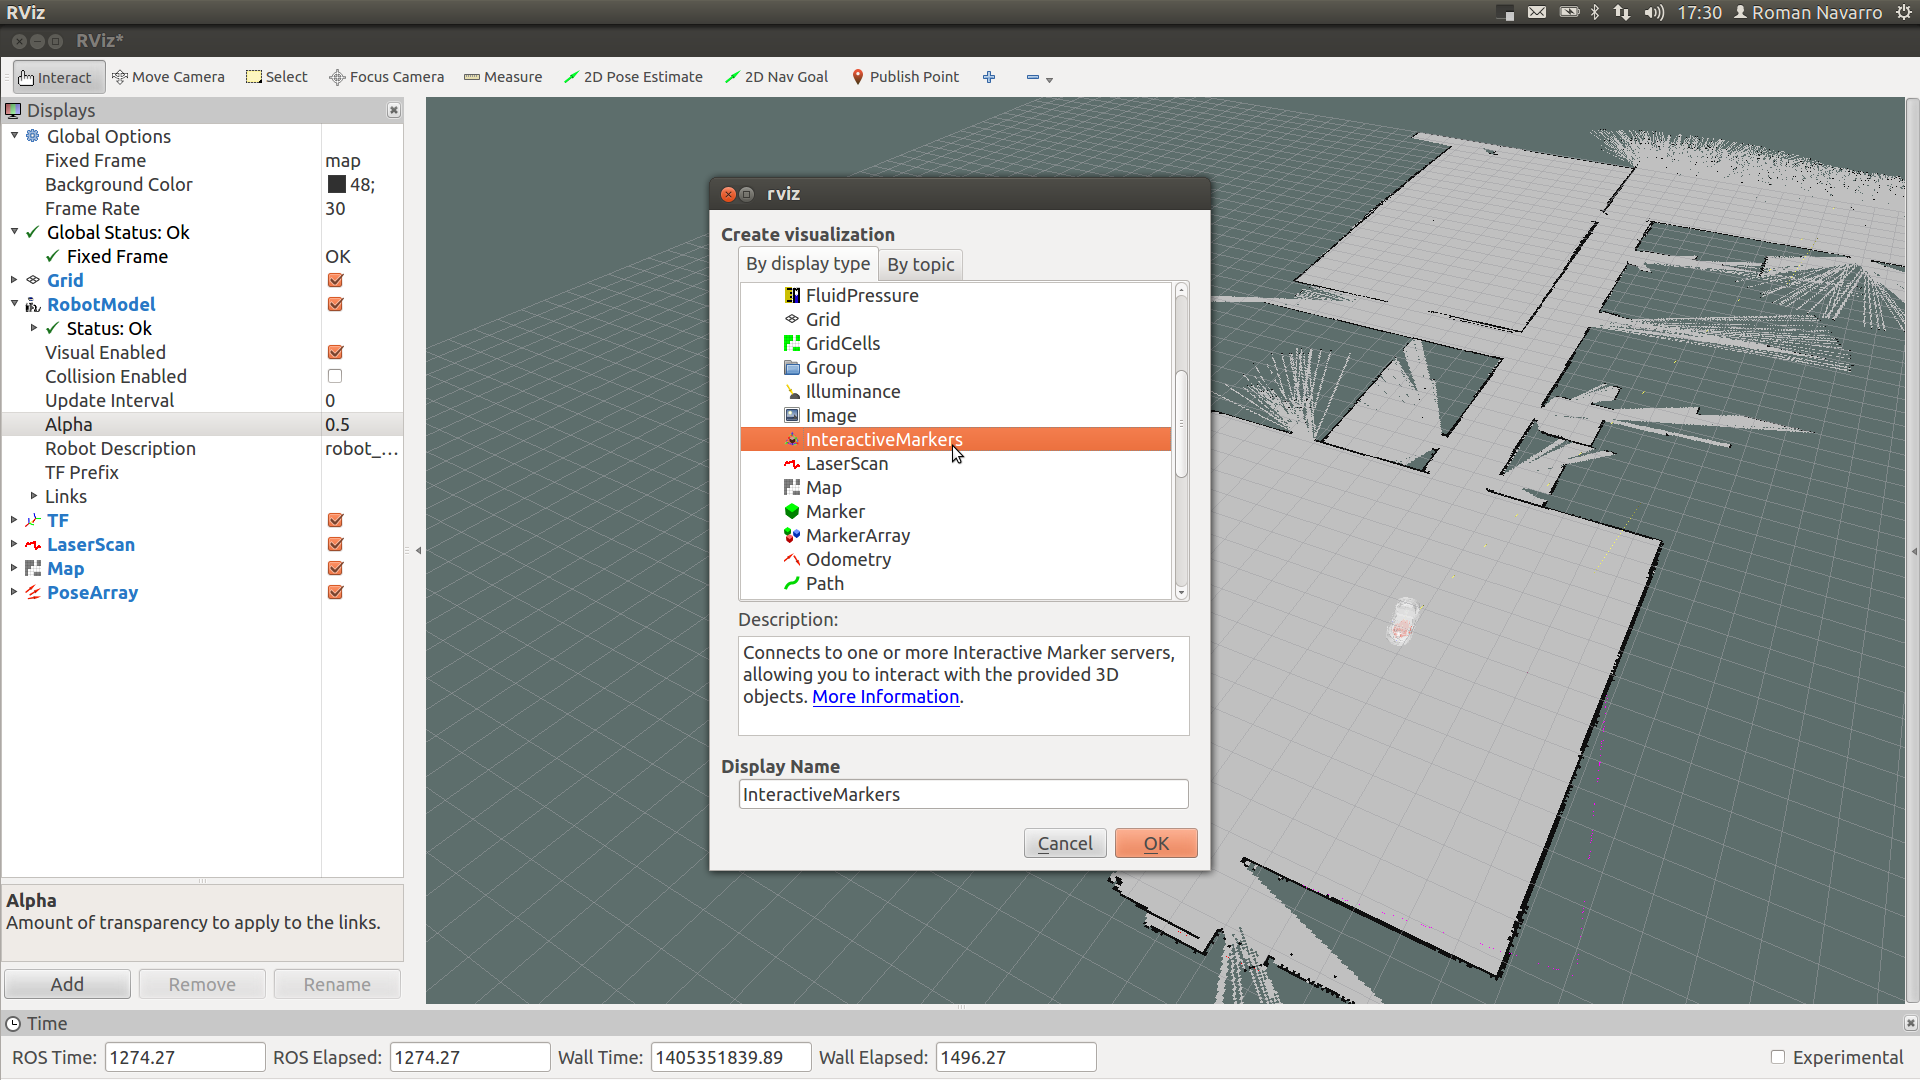
4. Launch an interactive marker to set the path in the map
roslaunch purepursuit_planner purepursuit_marker.launch
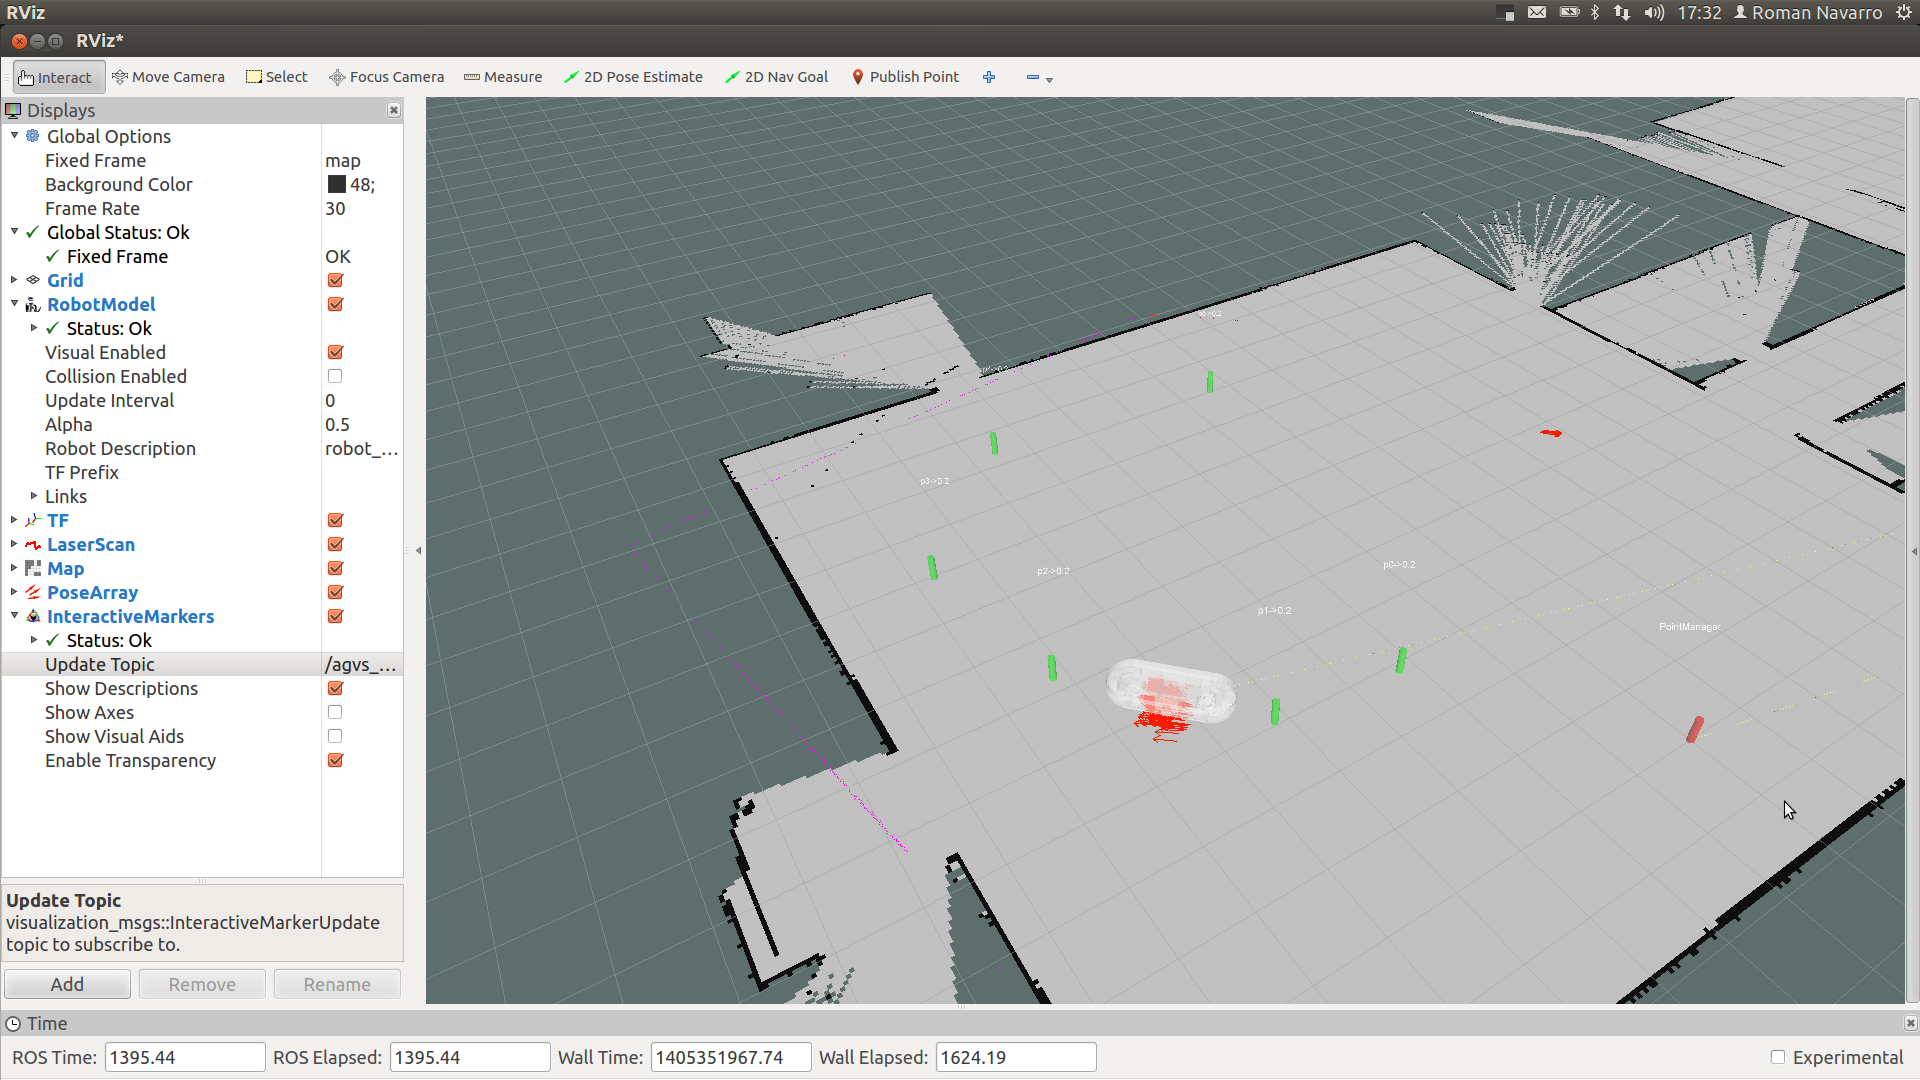
VREP model
1. Install latest V-REP version (after 3_1_2 packages do also work in catkin).
2. Link and compile the vrep ros packages
 cd catkin_ws/src
 ln -sf /opt/V-REP_PRO_EDU_V3_1_2_64_Linux/programming/ros_packages/vrep_common/
 ln -sf /opt/V-REP_PRO_EDU_V3_1_2_64_Linux/programming/ros_packages/vrep_joy/
 ln -sf /opt/V-REP_PRO_EDU_V3_1_2_64_Linux/programming/ros_packages/vrep_plugin/
3. Start the roscore (before starting V-REP)
4. Start VREP
 cd /opt/vrep
 ./vrep.sh &
5. Load the requested scene or import the robot model.
- the scene (*.ttt) can be found under the agvs_description/vrep folder
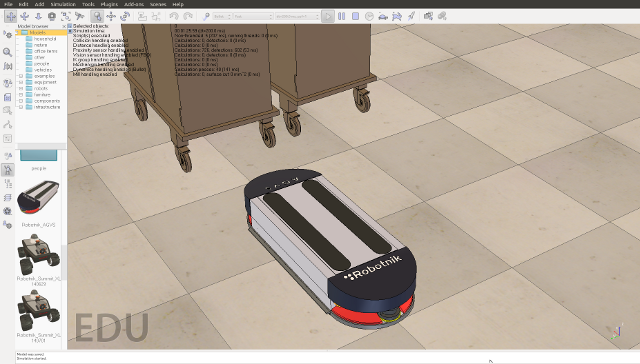
6. Press play in V-REP to start simulation Note that in order to allow the agvs_robot_control node to perform an accurate estimation of the odometry, the RT mode in V-REP has to be selected. Otherwise the robot motion won't match the motion published in the joint_states.
7. Start robot pad (to move the robot manually)
roslaunch agvs_pad agvs_pad.launch
8. Start robot control
roslaunch agvs_robot_control agvs_robot_control.launchpioneer_teleop
Package Summary
Continuous integration Documented
The pioneer_teleop package provides teleoperation using keyboard, sockets or command line for the Adept MobileRobots Pioneer and Pioneer-compatible robots (Including Pioneer 2, Pioneer 3, Pioneer LX, AmigoBot, PeopleBot, PatrolBot, PowerBot, Seekur and Seekur Jr.).
- Maintainer status: maintained
- Maintainer: Amine BENDAHMANE <bendahmane.amine AT gmail DOT com>
- Author: Amine BENDAHMANE <bendahmane.amine AT gmail DOT com>
- License: ISC
- Bug / feature tracker: https://github.com/amineHorseman/pioneer_teleop/issues
- Source: git https://github.com/amineHorseman/pioneer_teleop.git (branch: master)
Pioneer_teleop
A ROS package providing scripts for teleoperation using keyboard, sockets and command line.
The package is compatible with any robot using ROS ecosystem, but is originally implemented for Adept MobileRobots Pioneer and Pioneer-compatible robots (Including Pioneer 2, Pioneer 3, Pioneer LX, AmigoBot, PeopleBot, PatrolBot, PowerBot, Seekur and Seekur Jr.).
In case you have a different robot, please read http://wiki.ros.org/pioneer_teleop#What_if_my_robot_is_not_Pionner-compatible section
Contents
Use GitHub to report bugs or submit feature requests. [View active issues]
Dependencies
You need first to get and install pioneer_bringup package
Installation
After installing the dependencies, download or clone this repository in your caktin workspace:
cd ~/catkin_ws/src
git clone https://github.com/amineHorseman/pioneer_teleop.git
rosdep install pioneer_teleop
Build your workspace:
{{ cd ~/catkin_ws catkin_make }}}
Now, make sure that python scripts are executable:
cd ~/catkin_ws/src/pioneer_teleop/nodes
sudo chmod +x *.py
Usage
In this package, there are 3 teleoperation modes:
Keyboard teleoperation
roslaunch pioneer_teleop keyboard_teleop.launch
This allow you to control the robot motors using keyboard arrows, use + and - to increase or decrease the speed, and s to stop
A different version of keyboard teleoperation is also available using this command:
roslaunch pioneer_teleop discrete_keyboard_teleop.launch
In this case, the robot moves only for a small period of time (1.5 seconds by default) and then stops.
Sockets teleoperation
Controls the robot remotely throught socket commands (especially if you want to move the robot using a web interface via internet/LAN).
roslaunch pionner_teleop socket_teleop.launch
The expected commands are "forward", "backward", "left" or "right"
By default, the script listens to port 50001, and the robot moves only for 1.5 seconds. To change these parameters, you can use extra arguments as mentioned bellow:
roslaunch pionner_teleop socket_teleop.launch _port:=12345 _speed:=0.3 _move_time:=2.0
Command line teleoperation
Useful if you want to move the robot using command line throught a terminal or ssh:
roslaunch pionner_teleop socket_commandline.launch _direction:=forward
The expected commands (_direction argument) are "forward", "backward", "left" or "right"
By default, the robot moves only for 1.5 seconds at 0.2 speed. To change these parameters, you can use extra arguments as mentionned bellow:
roslaunch pionner_teleop socket_teleop.launch _direction:=backward _speed:=0.3 _move_time:=2.0
What if my robot is not Pionner-compatible?
This package is compatible with any robot using ROS as long as:
The velocity commands are published in /cmd_vel topic (see the next section). You modify the .launch scripts to remove the pionner_bringup call, or you execute directly the python scripts located in /nodes folder.
Known issues
Velocity command topic
By default, the scripts publish velocity commands to /cmd_vel topic.
In case your velocity commands topic has a different name, or you are not using Pionner-compatible robots, you will have to remap your velocity topic to /cmd_vel or change the topic name in the python scripts which are located in /nodes folder
nao
Aldebaran Nao

Nao is a commercially available humanoid robot built by Aldebaran. The ROS driver was originally developed by Freiburg's Humanoid Robots Lab and Armin Hornung. It essentially wraps the needed parts of Aldebaran's NaoQI API (versions 1.14 and 2.1) and makes it available in ROS. It also provides a complete robot model (URDF).
Robots using ROS: Aldebaran Nao
Robots using ROS: Uni Freiburg's "Osiris" Nao
Contents
Community
There is an official SIG for NaoQI and Aldebaran's robots at https://groups.google.com/forum/?fromgroups#!forum/ros-sig-aldebaran. Please subscribe to it to get the latest news !
Tutorials
A complete list of tutorials can be found under tutorials. This includes the installation, startup and further advanced instructions how to connect ROS with your NAO.
Start all robot nodes: nao_bringup
See getting started for a walk-through guide to installing ROS, NAOqi, and rviz (may be outdated by now).
Library Overview
The core functionality is implemented in the nao_robot stack (can be installed on the robot or on a remote PC), extended with further functionality in nao_extras (should be installed on a remote PC).
sudo apt-get install ros-.*-nao-robot
sudo apt-get install ros-.*-nao-extras
For an outline of the libraries included, please see the tables below.
Basic Configuration
Capability | ROS package/stack |
Robot-specific Messages and Services | |
Robot model (URDF) | |
Robot meshes |
Hardware Drivers and Simulation
Component | ROS package/stack |
Actuator drivers | naoqi_driver naoqi driver C++ |
| naoqi_driver_py naoqi driver Python |
Basic sensor drivers | naoqi_driver naoqi driver C++ |
| naoqi_driver_py naoqi driver Python |
Sensor drivers | |
Robot control |
High-Level Capabilities
Component | ROS package/stack |
Teleop | |
Footstep planning | |
Execute / manage body poses | |
Follow 2D path / walk to target | |
Diagnostics / Visualization | |
Interaction | |
Planning / MoveIt! |
And more at nao_extras.
Simulation
You have the following options for simulating NAO:
You can use a simulated Nao in Webots and connect the driver to NaoQI on your local machine.
You can use a simulated Nao in Gazebo using plain ros_control architecture and no NaoQI features.
You can use a simulated Nao in Gazebo and connect the driver to NaoQI on your local machine.
TurtleBot
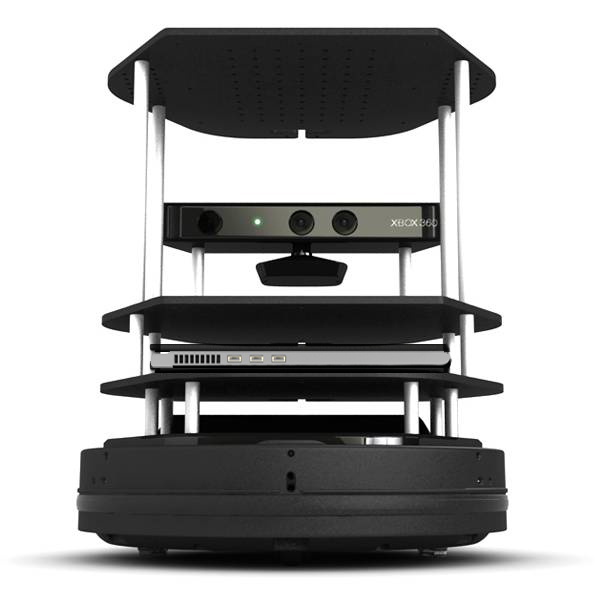
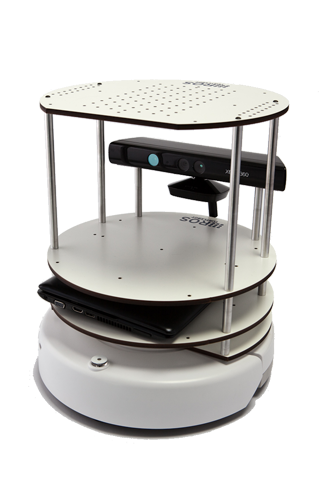
TurtleBot combines popular off-the-shelf robot components like the iRobot Create, Yujin Robot's Kobuki, Microsoft's Kinect and Asus' Xtion Pro into an integrated development platform for ROS applications. For more information about hardware, please see http://turtlebot.com.
BDFLs: Tully Foote (OSRF), Melonee Wise (Fetch Robotics)
ROS SW Maintainers: Michael Ferguson (Fetch Robotics), Tully Foote (OSRF), JihoonLee (Yujin Robot), Daniel Stonier (Yujin Robot)
Contents
Recently overhauled entire tutorial for indigo (24/03/15). |
Overview
Migration - what's new and shiny in your indigo turtlebot software!
About
- Turtlebot-Developer Habitats
Various usage scenarios for turtlebots and their developers.
- Interacting with your Turtlebot
The many ways you can provoke/inspire your turtlebot to action!
Preparation
- Turtlebot Installation
Installing software onto the turtlebot.
- PC Installation
Installing the software for your monitoring workstation pc.
- Network Configuration
Get turtlebot and your pc chatting to each other.
Bringup
- TurtleBot Bringup
How to start the TurtleBot software.
- PC Bringup
Connecting to the turtlebot from the PC.
- TurtleBot Care and Feeding
This tutorials explains how to charge and maintain your TurtleBot.
- Create Odometry and Gyro Calibration
 This is only necessary if you have a Create base. The Kobuki comes with a factory calibrated gyro. This will show you how to calibrate or test the calibration of a TurtleBot which is highly recommended when running any navigation based application.
Applications
Looking Around
- A First Interaction
Run your first interaction with the turtlebot - chatter!
- Visualisation
Find and call launchers to visualise the turtle and its data streams.
- 3D Visualisation
Visualising 3d and camera data from the kinect/asus.
Teleoperation
- Keyboard Teleop
Keyboard teleoperation of a turtlebot.
- Joystick Teleop
Joystick teleoperation of a turtlebot.
- Qt Teleop
Qt teleoperation of a turtlebot.
- Interactive Markers Teleop
A tutorial describing how to use rviz interactive markers for controlling the TurtleBot.
Navigation
- SLAM Map Building with TurtleBot
How to generate a map using gmapping
- Autonomous Navigation of a Known Map with TurtleBot
This tutorial describes how to use the TurtleBot with a previously known map.
Something Funny
- The TurtleBot Follower Demo
This describes how to run the TurtleBot Follower Demo on your TurtleBot.
- The TurtleBot Panorama Demo
This describes how to run the TurtleBot Panorama Demo on your TurtleBot.
Android Interactions
- Download Turtlebot Android Apps from Play Store
Download android apps from Play Store to run turtlebot rapps on your turtlebot via android device
- How to Run Turtlebot Andorid Application
Instructions how to run turtlebot android application
- Turtlebot Android Application Dev Tutorial
Instructions how to develop turtlebot android app
Simulation
Stage
- TurtleBot in Stage Simulator
How to start turtlebot stage simulation
- Customizing the Stage Simulator
Explains how to use your own map with the stage simulator for turtlebot and adjust configurations for your needs
Gazebo
- Gazebo Bringup Guide
See the simulated turtlebot in Gazebo.
- Explore the Gazebo world
Cruise around in the Gazebo world and use RViz to "see" what's in it.
- Make a map and navigate with it
Use the navigation stack to create a map of the Gazebo world and start navigation based on it.
Development Corner
- Customising the Turtle
Pre-load your own customisations/configuration on the turtle.
- Create your First Rapp
Create, load and execute a 'babbler' rapp, and, is it really worth the effort?
- Create your First Interaction
Create, load and execute a 'babbler' interaction.
- Adding New 3D Sensor
Add support for a new 3D sensor to the turtlebot stack.
Tutorials describing how to develop android interactions can be found in the android corner.
Appendix
Rocon QT App manager
- Start Rapp with QT App manager
How to start implementation rapps with Rocon Qt App manager
Multi TurtleBot Concert
Teleop Concert
Teleoperate multiple turtlebots!
- TurtleBot Concert Bringup
how to start the turtlebot concert
- Bring up Turtlebot as Concert Client
how to start the turtlebot concert
- Teleop a turtlebot via Concert
how to teleoperate turtlebot in concert