Alamofire是AFNetworking的swift版本,功能灰常强大。
github:https://github.com/Alamofire/Alamofire
SwiftyJSON是操作json的非常棒的开源库
github:https://github.com/SwiftyJSON/SwiftyJSON
接下来我做一个简单的入门小例子,
我使用cocoaPods来管理依赖,需要在Podfile里添加我们需要的两个库
source 'https://github.com/CocoaPods/Specs.git'
platform :ios, '9.0'
use_frameworks!

target 'AlamofireDemo' do
  pod 'Alamofire', '~> 3.4'
  pod 'SwiftyJSON', :git => 'https://github.com/SwiftyJSON/SwiftyJSON.git'
end
在terminal里运行

cocoapods会为我们自动生成需要导入的第三方库的信息。
关闭工程打开cocoaPods为我们生成的工程文件,编辑通过后就能导入这两个库了
import Alamofire
import SwiftyJSON
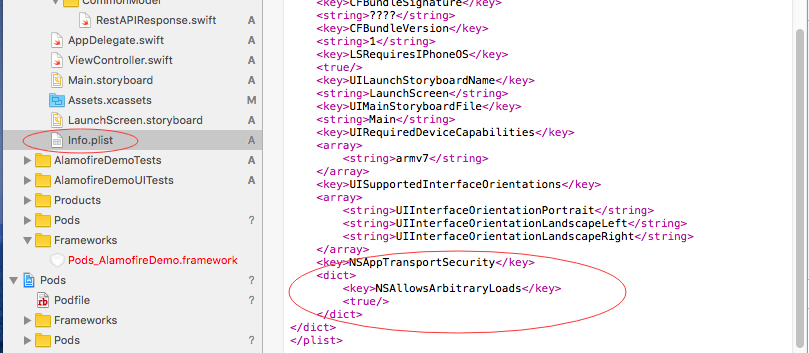
因为我们要访问网络,需要在info.plist里开放权限,加入下面的代码
 <key>NSAppTransportSecurity</key>
    <dict>
        <key>NSAllowsArbitraryLoads</key>
        <true/>
    </dict>
接下来就可以用它Alamofire请求网络使用swiftyJson解析Json
let currRequest = Alamofire.request(.POST, "http://www.yourweb.com", parameters: ["para1":"aaa",
            "para2":[0,1,2,3],
            "para3":NSNull()],
            encoding: .JSON, headers: ["Content-Type":"application/json"])

        currRequest.responseJSON{(responseJson) -> Void in
            print(responseJson.response?.statusCode)
            print(responseJson.request)
            print(responseJson.response)
            print(responseJson.data)
            print(responseJson.result)

            switch responseJson.result {
            case .Success(let value):
                print("Value:(value)")
                print("------")
                let swiftyJsonVar = JSON(value)
                print(swiftyJsonVar)

            case .Failure(let error):
                print(error)
            }
        }
好了这个简单的例子就写完了,还有一个更方便的方法就是用下边这个库,他是集成了上边说的两个库,有时间你可以玩一下