vue-router, vue自带的路由,下面是一些简单的操作说明:
一、安装
1、cnpm install vue-router --save 命令进行安装
2、在main.js或者使用vue-router的地方,通过import 来导入import vRouter from 'vue-router'
3、Vue.use(vRouter )
4、开始配置路由
 1 import Vue from 'vue'
 2 import App from './App'
 3 import VRouter from 'vue-router'
 4 import Apple from './components/apple'
 5 import Banana from './components/banana'
 6 import Redapple from './components/redapple'
 7 //使用vue.use来注册使用VRouter插件
 8 Vue.use(VRouter);
 9 //这样VRouter作为一个类来使用,我们自己实例化这样的一个类
10 let router = new VRouter({
11     mode: 'history',
12    routes: [
13      {
14         path: '/apple/:color',//为页面设置路由参数
15         component: Apple,
16         //路由嵌套
17         children: [
18             {
19               path: 'redapple',
20               component: Redapple               注意:在路径上加上‘/’表示从根目录开始跳转
21                                                      不加‘/’表示从当前页面进行跳转
23             },
               {
                 path:'/redapple',
                 component: Redapple
               }
24         ]
25      },
26      {
27         path: '/banana',
28         component: Banana
29      }
30    ]
31 });
32 /* eslint-disable no-new */
33 new Vue({
34   el: '#app',
35   router,//将这样的router放到根目录里面
36   //  es6 通过render方法来使用外部引入的App组件
37   render: h => h(App)
38 })
二、常用的路由方式
1、常规的路由
 1 var routes = [
 2     {
 3         path:"/one",
 4
 5         component: a
 6     },
 7     {
 8         path:"/two",
 9         component: b
10     },
11 ]
2、嵌套路由
 1    routes: [
 2 13      {
 3 14         path: '/apple',
 4 15         component: Apple,
 5 16         //路由嵌套
 6 17         children: [
 7 18             {
 8 19               path: 'redapple',
 9 20               component: Redapple               注意:在路径上加上‘/’表示从根目录开始跳转
10 21                                                      不加‘/’表示从当前页面进行跳转
11 23             },
12                {
13                  path:'/redapple',
14                  component: Redapple
15                }
16 24         ]
3、动态路由,一般适用于详情页
1 {
2     path:"/two:id",
3     component: b
4 }
4、路由跳转的方式与传参,适合写入一些方法中:
a、 router.push(location)
 1  //  字符串
 2    router.push('home')
 3
 4  //  对象
 5     router.push({path: 'home'})
 6
 7  //  命名的路由
 8     router.push({ name: 'user',  params: { userId: 123 }})
 9
10  // 带查询参数,变成 /register?plan=private
11     router.push ({ path: 'register', query: { plan: 'private' }})
b、标签跳转,其中传参的方式和上面的一样
1 <router-link :to="{ name: 'one'}">User</router-link>
2 <router-link :to="{ name: 'two'}">User</router-link>
5、路由的重定向
重定向(Redirect)就是通过各种方法将各种网络请求重新定个方向转到其它位置,用于网站调整或网页被移到一个新地址,它也是通过routes配置来完成,下面例子是从/a 重定向到 /b, 如果a 找不到,直接跳到b:
1 var router = new VueRouter({
2   routes: [
3     { path: '/a', redirect: '/b' }
4   ]
5 })
6、路由的别名
/a 的别名是 /b,意味着,当用户访问 /b 时,URL 会保持为 /b,但是路由匹配则为 /a,就像用户访问 /a 一样。简单的说就是给 /a 起了一个外号叫做 /b ,但是本质上还是 /a。适合页面的推广:
1 var router = new VueRouter({
2   routes: [
3     { path: '/a', component: A, alias: '/b' }
4   ]
5 })
7、路由中props传递
1     {
2       path: '/personal/:id',
3       name: 'personal',
4       component: personal,
5       props: true     // 这一步非常重要
6     }
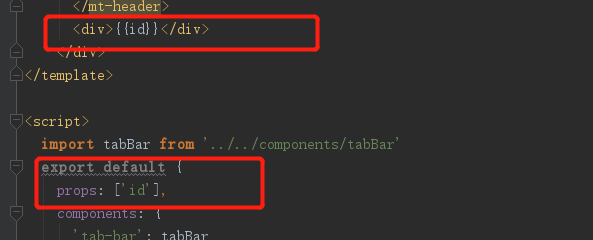
页面中会直接被渲染出来
三、常用的路由方法
1、返回上一页, 一个全局的goBack 事件
1 Router.prototype.goBack = function() {
2   window.history.go(-1)
3 }
1 // 在浏览器记录中前进一步,等同于 history.forward()
2
3    router.go(1)
4
5 // 后退一步记录,等同于 history.back()
6
7     router.go(-1)

  // 前进 3步记录
     router.go(3)

  // 如果history 记录不够用, 那就默默地的失败呗
     router.go(-100)
     router.go(100)
2、router.replace()
类型: boolean
默认值: false
设置 replace 属性的话,当点击时,会调用 router.replace() 而不是 router.push(),于是导航后不会留下 history 记录。即使点击返回按钮也不会回到这个页面。
/加上replace: true后,它不会向 history 添加新记录,而是跟它的方法名一样 —— 替换掉当前的 history 记录。
1   this.$router.push({path: '/home', replace: true})
2     //如果是声明式就是像下面这样写:
3    <router-link :to="..." replace></router-link>
4     // 编程式:
5     router.replace(...)
3、需要先跳转到登录的页面


将登录收的token存在localstory中。
4、路由过渡效果(App.vue)
  1 <template>
  2   <div id="app" class="app">
  3     <transition :name='transitionName'>
  4      <router-view class="child-view"></router-view>
  5     </transition>
  6   </div>
  7 </template>
  8
  9 <script>
 10 export default {
 11   name: 'app',
 12   data () {
 13     return {
 14       data: 'abcd',
 15       info: 'nono',
 16       transitionName: 'slide-left'
 17     }
 18   },
 19   watch: {
 20    '$route' (to, from) {
 21      const toDepth = to.path.split('/').length
 22      const fromDepth = from.path.split('/').length
 23      this.transitionName = toDepth < fromDepth ? 'slide-right' : 'slide-left'
 24     }
 25   },
      // 判断左右滑动

 26   beforeCreate () {
 27     console.log('创建前……')
 28     console.log(this.data)
 29     console.log(this.$el)
 30   },
 31 //  created () {
 32 //    console.log('已创建……')
 33 //    console.log(this.info)
 34 //    console.log(this.data)
 35 //  },
 36 //  beforeMount () {
 37 //    console.log('mounted之前……')
 38 //    console.log(this.info)
 39 //    console.log(this.$el)
 40 //  },
 41 //  mounted () {
 42 //    console.log('mounted……')
 43 //    console.log(this.info)
 44 //    console.log(this.$el)
 45 //  },
 46 //  beforeUpdate () {
 47 //    console.log('更新前========')
 48 //  },
 49 //  updated () {
 50 //    console.log('更新完成')
 51 //  },
 52 //  beforeDestroy () {
 53 //    console.log('销毁前……')
 54 //    console.log(this.info)
 55 //    console.log(this.$el)
 56 //  },
 57   destroyed () {
 58     console.log('已销毁……')
 59     console.log(this.info)
 60     console.log(this.$el)
 61   },
 62   beforeRouteUpdate (to, from, next) {
 63     let isBack = this.$router.isBack
 64     if (isBack) {
 65       this.transitionName = 'slide-right'
 66     } else {
 67       this.transitionName = 'slide-left'
 68     }
 69     this.$router.isBack = false
 70   }
 71 }
 72 </script>
 73
 74 <style>
 75   @import "./common/css/reset.css";
 76 .app {
 77   font-family: 'Avenir', Helvetica, Arial, sans-serif;
 78   -webkit-font-smoothing: antialiased;
 79   -moz-osx-font-smoothing: grayscale;
 80   text-align: center;
 81   color: #000;
 82   font-size:.14rem;
 83   height:2rem;
 84 }
 85   .child-view {
 86     position: absolute;
 87     width:100%;
 88     transition: all .8s cubic-bezier(.55,0,.1,1);
 89   }
 90   .slide-left-enter, .slide-right-leave-active {
 91     opacity: 0;
 92     -webkit-transform: translate(50px, 0);
 93     transform: translate(50px, 0);
 94   }
 95
 96   .slide-left-leave-active, .slide-right-enter {
 97     opacity: 0;
 98     -webkit-transform: translate(-50px, 0);
 99     transform: translate(-50px, 0);
100   }
101 </style>
5、 路由的封装
 1 import Vue from 'vue'
 2 import Router from 'vue-router'
 3 import {storage} from '../assets/js/utils/storage'
 4 import routeConfig from './route.config.json';
 5 var registerRoute = (routeConfig) => {
 6   let route = [];
 7   routeConfig.map(pages => {
 8     route.push({
 9       path: pages.path,
10       name: pages.name !== undefined ? pages.name : null,
11       redirect: pages.redirect !== undefined ? pages.redirect : null,
12       component: require(`@/pages${pages.component}`).default,
13       meta: pages.meta !== undefined ? pages.meta : null,
14       children: pages.children !== undefined ? registerRoute(pages.children) : null
15     })
16   });
17
18   return route;
19 };
20
21 var route = registerRoute(routeConfig);
22
23 Vue.use(Router)
24
25 Router.prototype.goBack = function() {
26   this.isBack = true
27   window.history.go(-1)
28 }
29
30 const routeInstance = new Router({
31   routes: route
32 })
33
34 routeInstance.beforeEach((to, from, next) => {
35   if (to.path !== '/') {
36     let familyId = storage.cookie.get('familyId');
37     if ((familyId !== null)) {
38       next()
39     } else {
40       routeInstance.replace({path: '/'})
41     }
42   }
43   next()
44 })
45
46 export default routeInstance