安装过程:
官方安装教程:
https://google-cartographer-ros.readthedocs.io/en/latest/index.html
# Install wstool and rosdep.
sudo apt-get update
sudo apt-get install -y python-wstool python-rosdep ninja-build

# Create a new workspace in 'catkin_ws'.
mkdir catkin_ws
cd catkin_ws
wstool init src

# Merge the cartographer_ros.rosinstall file and fetch code for dependencies.
wstool merge -t src https://raw.githubusercontent.com/googlecartographer/cartographer_ros/master/cartographer_ros.rosinstall
wstool update -t src
//在这一步可能会显示无法下载cere-solver
/*
解决办法手动下载cere-solver 然后放到src中
下载链接:https://ceres-solver.googlesource.com/ceres-solver.git/+/1.13.0
点击页面中的tgz可以下载,下载后解压到src中

# Install proto3.
src/cartographer/scripts/install_proto3.sh

# Install deb dependencies.
# The command 'sudo rosdep init' will print an error if you have already
# executed it since installing ROS. This error can be ignored.
sudo rosdep init
rosdep update
rosdep install --from-paths src --ignore-src --rosdistro=${ROS_DISTRO} -y
//这里要修改ROS_DISTRO为自己的ros版本如kinetic或者indigo
# Build and install.
catkin_make_isolated --install --use-ninja
source install_isolated/setup.bash
下载安装完毕以后,运行数据集。
下载数据集。
# Download the 2D backpack example bag.
wget -P ~/Downloads https://storage.googleapis.com/cartographer-public-data/bags/backpack_2d/cartographer_paper_deutsches_museum.bag

# Launch the 2D backpack demo.
roslaunch cartographer_ros demo_backpack_2d.launch bag_filename:=${HOME}/Downloads/cartographer_paper_deutsches_museum.bag

# Download the 3D backpack example bag.
wget -P ~/Downloads https://storage.googleapis.com/cartographer-public-data/bags/backpack_3d/with_intensities/b3-2016-04-05-14-14-00.bag

# Launch the 3D backpack demo.
roslaunch cartographer_ros demo_backpack_3d.launch bag_filename:=${HOME}/Downloads/b3-2016-04-05-14-14-00.bag
二维数据集运行
结果如下所示: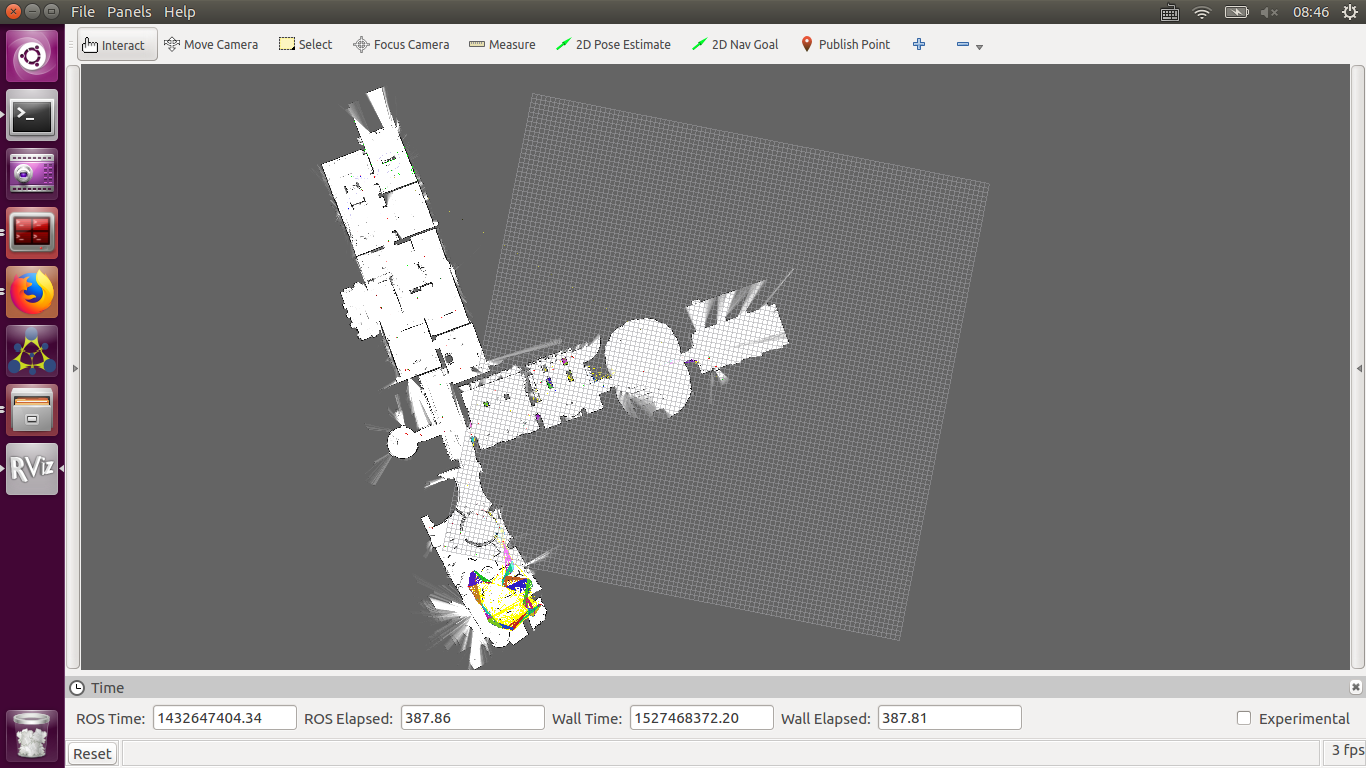
rosbag内容:
 1 //输入命令
 2 rostopic list
 3 //得到数据包内容,并且用rostopic echo /topic_name 来查看各个topic的内容
 4 /clicked_point
 5 /clock
 6 /horizontal_laser_3d//有数据,  frame_id: "horizontal_vlp16_link"
 7 /imu//有数据,frame_id: "imu_link"
 8 /initialpose
 9 /map
10 /map_updates
11 /move_base/DWAPlannerROS/global_plan
12 /move_base/global_costmap/costmap
13 /move_base/global_costmap/costmap_updates
14 /move_base/global_costmap/footprint
15 /move_base/local_costmap/costmap
16 /move_base/local_costmap/costmap_updates
17 /move_base_simple/goal
18 /particlecloud
19 /rosout
20 /rosout_agg
21 /scan
22 /tf
23 /tf_static
24 /velodyne_points//没有数据
25 /vertical_laser_3d//有数据,frame_id: "vertical_vlp16_link"
这里有vertical和horizaontal两个laser_3d,如何理解,还有velodyne_points。
利用rostopic查看各个数据信息:
发现
跑3维度数据集效果:

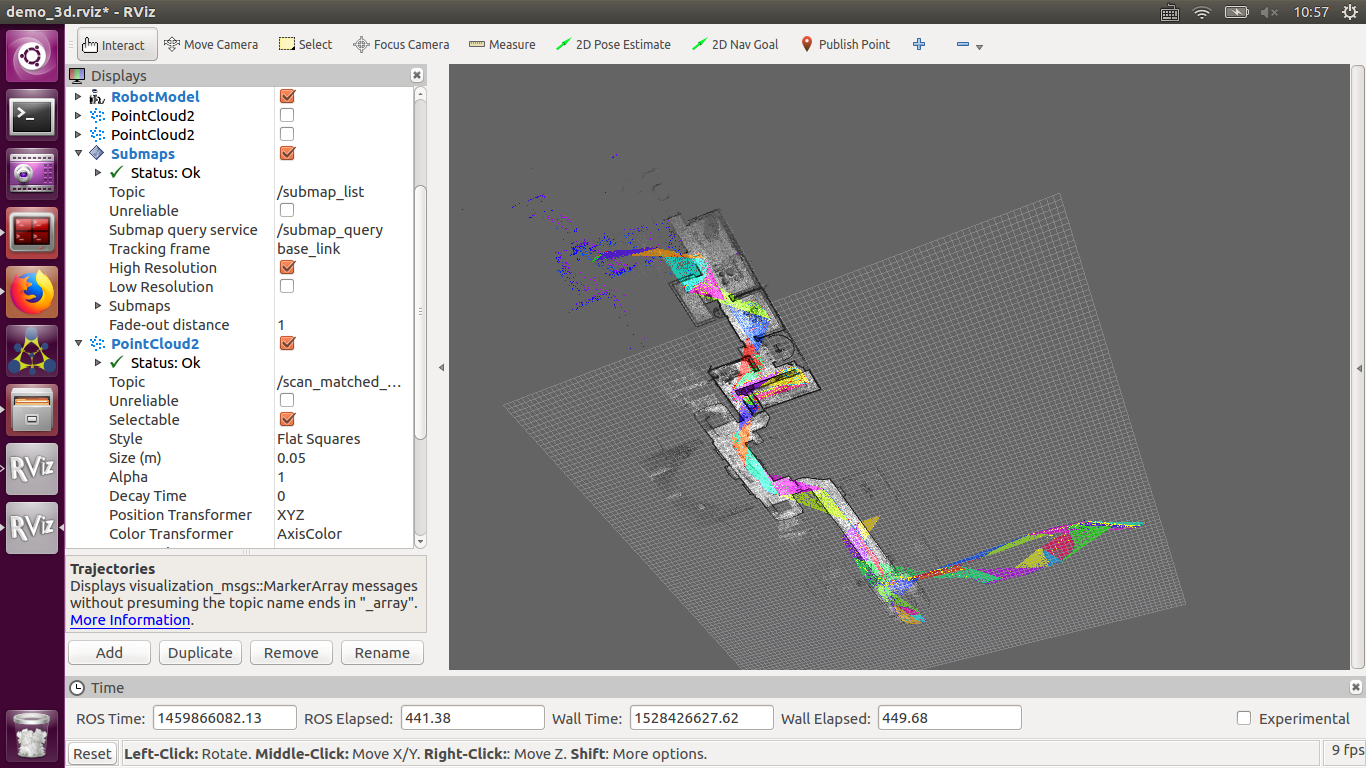
在跑3维数据集的时候,查看rostopic
 1 rostopic list
 2 /clicked_point
 3 /clock
 4 /constraint_list
 5 /horizontal_laser_3d
 6 /imu
 7 /initialpose
 8 /joint_states
 9 /landmark_poses_list
10 /map
11 /move_base_simple/goal
12 /rosout
13 /rosout_agg
14 /scan_matched_points2
15 /submap_list
16 /tf
17 /tf_static
18 /trajectory_node_list
19 /vertical_laser_3d
用自己的传感器跑cartographer
由于传感器的rostopic不同,我们需要对cartographer订阅的名称进行修改,需要在launch文件中进行修改,但是修改后发现没有任何作用,这是因为修改后需要重新按照上面的流程进行编译安装,这个可能是因为在安装的时候其实已经把launch文件安装到系统中了,所以我们调用的时候还是调用系统中的launch文件
但是按照网络上的修改版本后可以直接修改,不用走以上的流程
修改好名称接入以后出现问题
Queue(0,imu)exceeds maximum size.
Queue(0,points2_1) exceeds maximum size.