1- 环境
1.1- 查看现有环境信息
[root@master ~]# kubectl get node -o wide
NAME     STATUS   ROLES    AGE   VERSION   INTERNAL-IP       EXTERNAL-IP   OS-IMAGE                KERNEL-VERSION                CONTAINER-RUNTIME
master   Ready    master   40h   v1.14.0   192.168.118.130   <none>        CentOS Linux 7 (Core)   4.4.227-1.el7.elrepo.x86_64   docker://19.3.12
node-1   Ready    <none>   40h   v1.14.0   192.168.118.131   <none>        CentOS Linux 7 (Core)   4.4.227-1.el7.elrepo.x86_64   docker://19.3.12
node-2   Ready    <none>   40h   v1.14.0   192.168.118.132   <none>        CentOS Linux 7 (Core)   4.4.227-1.el7.elrepo.x86_64   docker://19.3.12
1.2-安装helm
安装客户端Helm命令
wget https://storage.googleapis.com/kubernetes-helm/helm-v2.13.1-linux-amd64.tar.gz

tar -xvf helm-v2.13.1-linux-amd64.tar.gz
cp linux-amd64/helm /usr/local/bin/
查看helm版本
[root@master ~]# helm version
Client: &version.Version{SemVer:"v2.13.1", GitCommit:"618447cbf203d147601b4b9bd7f8c37a5d39fbb4", GitTreeState:"clean"}
Error: could not find tiller
1.3- 安装Tiller服务
Tiller是helm的服务器端,一般运行于kubernetes集群之上,当然少不了RBAC授权,事先创建相关的ServiceAccount才能进行安装。
下面给出了一个样例yaml清单,定义了一个名为tiller的ServiceAccount,并通过ClusterRoleBinding将其绑定至集群管理员角色cluster-admin,从而使得它拥有集群级别所有的最高权限:
[root@k8s-master ~]# cat till-rbac-config.yaml
apiVersion: v1
kind: ServiceAccount
metadata:
  name: tiller
  namespace: kube-system
---
apiVersion: rbac.authorization.k8s.io/v1
kind: ClusterRoleBinding
metadata:
  name: tiller
roleRef:
  apiGroup: rbac.authorization.k8s.io
  kind: ClusterRole
  name: cluster-admin
subjects:
  - kind: ServiceAccount
    name: tiller
    namespace: kube-system
应用:
[root@master ~]# kubectl apply -f till-rbac-config.yaml
serviceaccount/tiller created
clusterrolebinding.rbac.authorization.k8s.io/tiller created
初始化Tiller服务:
使用阿里云的镜像和helm仓库:
helm init --upgrade --service-account tiller --tiller-image registry.cn-hangzhou.aliyuncs.com/google_containers/tiller:v2.13.1 --stable-repo-url https://kubernetes.oss-cn-hangzhou.aliyuncs.com/charts
[root@master ~]# helm init --upgrade --service-account tiller  --tiller-image registry.cn-hangzhou.aliyuncs.com/google_containers/tiller:v2.13.1  --stable-repo-url https://kubernetes.oss-cn-hangzhou.aliyuncs.com/charts
Creating /root/.helm
Creating /root/.helm/repository
Creating /root/.helm/repository/cache
Creating /root/.helm/repository/local
Creating /root/.helm/plugins
Creating /root/.helm/starters
Creating /root/.helm/cache/archive
Creating /root/.helm/repository/repositories.yaml
Adding stable repo with URL: https://kubernetes.oss-cn-hangzhou.aliyuncs.com/charts
Adding local repo with URL: http://127.0.0.1:8879/charts
$HELM_HOME has been configured at /root/.helm.

Tiller (the Helm server-side component) has been installed into your Kubernetes Cluster.

Please note: by default, Tiller is deployed with an insecure 'allow unauthenticated users' policy.
To prevent this, run `helm init` with the --tiller-tls-verify flag.
For more information on securing your installation see: https://docs.helm.sh/using_helm/#securing-your-helm-installation
Happy Helming!
查看tiller的pod创建成功:
[root@master ~]# kubectl get pod -n kube-system -o wide|grep tiller
tiller-deploy-7cb87ddf7d-999tw   1/1     Running   0          3m53s   10.96.2.5         node-2   <none>           <none>
如果部署失败,执行以下命令删除tiller再重新部署:
[root@master ~]# helm reset -f
Tiller (the Helm server-side component) has been uninstalled from your Kubernetes Cluster.
1.4- helm命令使用
- 查看版本
[root@master ~]# helm version
Client: &version.Version{SemVer:"v2.13.1", GitCommit:"618447cbf203d147601b4b9bd7f8c37a5d39fbb4", GitTreeState:"clean"}
Server: &version.Version{SemVer:"v2.13.1", GitCommit:"618447cbf203d147601b4b9bd7f8c37a5d39fbb4", GitTreeState:"clean"}
- 查看helm仓库
[root@master ~]# helm repo list
NAME    URL
stable  https://kubernetes.oss-cn-hangzhou.aliyuncs.com/charts
local   http://127.0.0.1:8879/charts
- 更新仓库
[root@master ~]# helm repo update
Hang tight while we grab the latest from your chart repositories...
...Skip local chart repository
...Successfully got an update from the "stable" chart repository
Update Complete. ⎈ Happy Helming!⎈
- 搜索charts
[root@master ~]# helm search nginx
NAME                    CHART VERSION   APP VERSION     DESCRIPTION
stable/nginx-ingress    0.9.5           0.10.2          An nginx Ingress controller that uses ConfigMap to store ...
stable/nginx-lego       0.3.1                           Chart for nginx-ingress-controller and kube-lego
stable/gcloud-endpoints 0.1.0                           Develop, deploy, protect and monitor your APIs with Googl...
- 查看charts详细信息
[root@master ~]# helm inspect stable/nginx-lego
deprecated: true
description: Chart for nginx-ingress-controller and kube-lego
engine: gotpl
keywords:
- kube-lego
- nginx-ingress-controller
- nginx
- letsencrypt
*****
Installs the chart without kube-lego and the ability to generate certs.
Alternatively, a YAML file that specifies the values for the parameters can be provided while installing the chart. For example,
```bash
$ helm install --name my-release -f values.yaml stable/nginx-lego
```
> **Tip**: You can use the default [values.yaml](values.yaml)
- 安装
helm install stable/nginx
- 查看已经安装的charts
helm list
- helm命令
[root@master ~]# helm --help
The Kubernetes package manager

To begin working with Helm, run the 'helm init' command:

        $ helm init

This will install Tiller to your running Kubernetes cluster.
It will also set up any necessary local configuration.

Common actions from this point include:

- helm search:    search for charts
- helm fetch:     download a chart to your local directory to view
- helm install:   upload the chart to Kubernetes
- helm list:      list releases of charts

Environment:
  $HELM_HOME           set an alternative location for Helm files. By default, these are stored in ~/.helm
  $HELM_HOST           set an alternative Tiller host. The format is host:port
  $HELM_NO_PLUGINS     disable plugins. Set HELM_NO_PLUGINS=1 to disable plugins.
  $TILLER_NAMESPACE    set an alternative Tiller namespace (default "kube-system")
  $KUBECONFIG          set an alternative Kubernetes configuration file (default "~/.kube/config")
  $HELM_TLS_CA_CERT    path to TLS CA certificate used to verify the Helm client and Tiller server certificates (default "$HELM_HOME/ca.pem")
  $HELM_TLS_CERT       path to TLS client certificate file for authenticating to Tiller (default "$HELM_HOME/cert.pem")
  $HELM_TLS_KEY        path to TLS client key file for authenticating to Tiller (default "$HELM_HOME/key.pem")
  $HELM_TLS_ENABLE     enable TLS connection between Helm and Tiller (default "false")
  $HELM_TLS_VERIFY     enable TLS connection between Helm and Tiller and verify Tiller server certificate (default "false")
  $HELM_TLS_HOSTNAME   the hostname or IP address used to verify the Tiller server certificate (default "127.0.0.1")
  $HELM_KEY_PASSPHRASE set HELM_KEY_PASSPHRASE to the passphrase of your PGP private key. If set, you will not be prompted for
                       the passphrase while signing helm charts

Usage:
  helm [command]

Available Commands:
  completion  Generate autocompletions script for the specified shell (bash or zsh)
  create      create a new chart with the given name
  delete      given a release name, delete the release from Kubernetes
  dependency  manage a chart's dependencies
  fetch       download a chart from a repository and (optionally) unpack it in local directory
  get         download a named release
  help        Help about any command
  history     fetch release history
  home        displays the location of HELM_HOME
  init        initialize Helm on both client and server
  inspect     inspect a chart
  install     install a chart archive
  lint        examines a chart for possible issues
  list        list releases
  package     package a chart directory into a chart archive
  plugin      add, list, or remove Helm plugins
  repo        add, list, remove, update, and index chart repositories
  reset       uninstalls Tiller from a cluster
  rollback    roll back a release to a previous revision
  search      search for a keyword in charts
  serve       start a local http web server
  status      displays the status of the named release
  template    locally render templates
  test        test a release
  upgrade     upgrade a release
  verify      verify that a chart at the given path has been signed and is valid
  version     print the client/server version information

Flags:
      --debug                           enable verbose output
  -h, --help                            help for helm
      --home string                     location of your Helm config. Overrides $HELM_HOME (default "/root/.helm")
      --host string                     address of Tiller. Overrides $HELM_HOST
      --kube-context string             name of the kubeconfig context to use
      --kubeconfig string               absolute path to the kubeconfig file to use
      --tiller-connection-timeout int   the duration (in seconds) Helm will wait to establish a connection to tiller (default 300)
      --tiller-namespace string         namespace of Tiller (default "kube-system")

Use "helm [command] --help" for more information about a command.
2- 安装rainbond 平台
github地址: https://github.com/goodrain/rainbond
rainbond对环境的要求:
-
Kubernetes 的版本需要大于等于 1.13
-
NFS 客户端【所有节点】
-
helm 3
2.1- 安装NFS 客户端
yum install -y nfs-utils
2.2- 安装 Helm 3
wget https://goodrain-pkg.oss-cn-shanghai.aliyuncs.com/pkg/helm
chmod +x helm
rm -rf /usr/local/bin/helm ##删除原来的helm 2版本
mv helm /usr/local/bin/
查看版本:
[root@master hel]# helm version
version.BuildInfo{Version:"v3.0.3", GitCommit:"ac925eb7279f4a6955df663a0128044a8a6b7593", GitTreeState:"clean", GoVersion:"go1.13.6"}
## helm 3 已经不需要tiller
2.3- 安装 Rainbond Operator
- 创建 Rainbond 使用的 namespace:
rbd-system:
kubectl create ns rbd-system
- 下载 Rainbond Operator 的 chart 包
wget https://rainbond-pkg.oss-cn-shanghai.aliyuncs.com/offline/5.2/rainbond-operator-v1.1.0-v5.2.1.tgz && tar xvf rainbond-operator-v1.1.0-v5.2.1.tgz
- 安装 Rainbond Operator
helm install rainbond-operator ./chart --namespace=rbd-system
[root@master ~]# helm install rainbond-operator ./chart --namespace=rbd-system
NAME: rainbond-operator
LAST DEPLOYED: Fri Aug 28 19:16:41 2020
NAMESPACE: rbd-system
STATUS: deployed
REVISION: 1
TEST SUITE: None
NOTES:
Rainbond Operator can be accessed via port 30008 on your gateway ips.
使用的镜像:
registry.cn-hangzhou.aliyuncs.com/goodrain/rainbond-operator:v1.1.0
registry.cn-hangzhou.aliyuncs.com/goodrain/rbd-op-ui:v1.1.0
- 确认 Rainbond Operator 状态
[root@master ~]# kubectl get pod -n rbd-system -o wide
NAME                  READY   STATUS    RESTARTS   AGE   IP          NODE     NOMINATED NODE   READINESS GATES
rainbond-operator-0   2/2     Running   0          13m   10.96.2.6   node-2   <none>           <none>
- 浏览器打开http://[node_ip]/30008
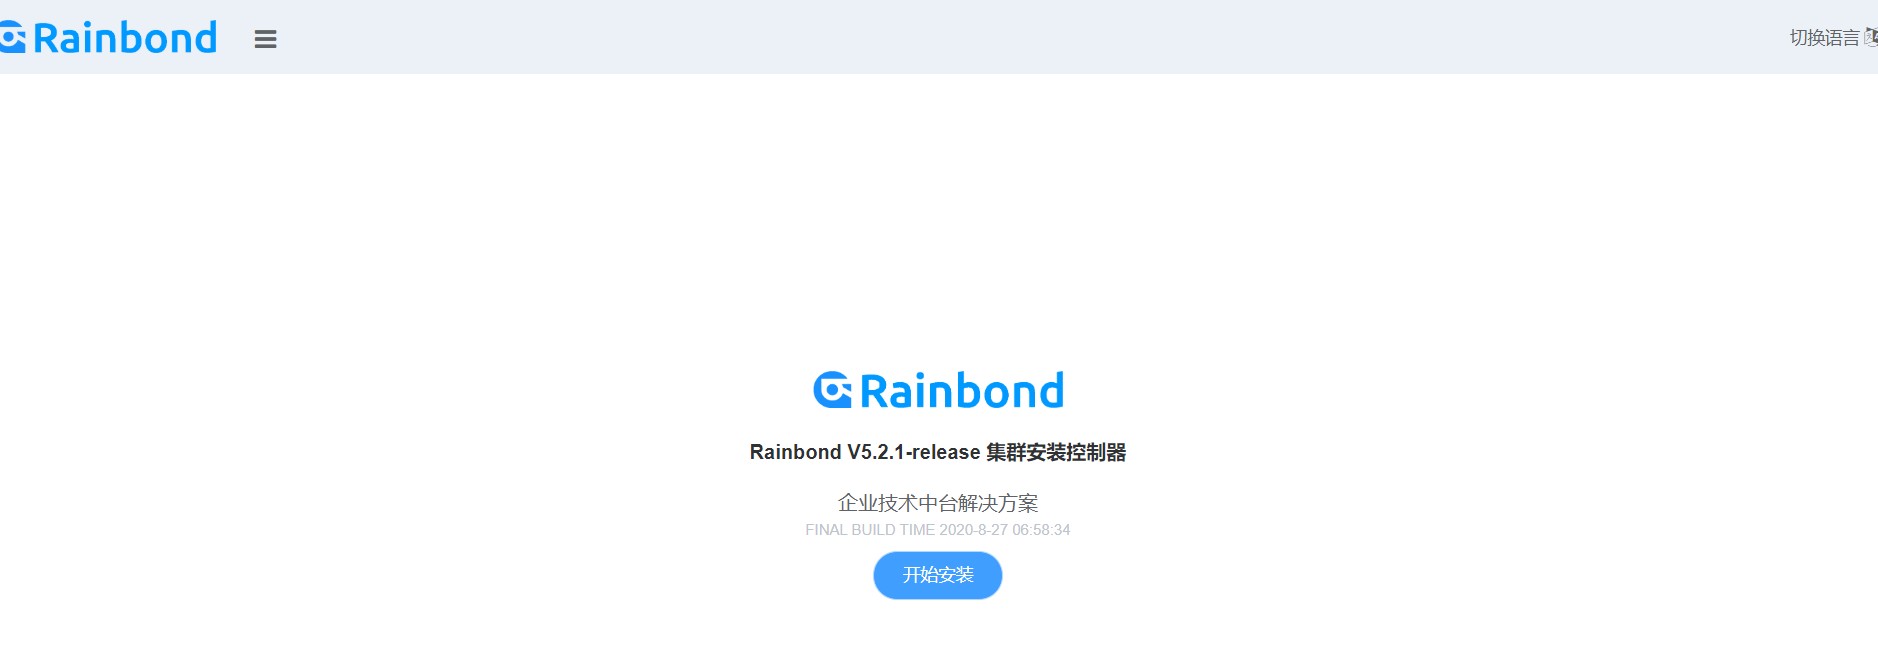
- 开始安装

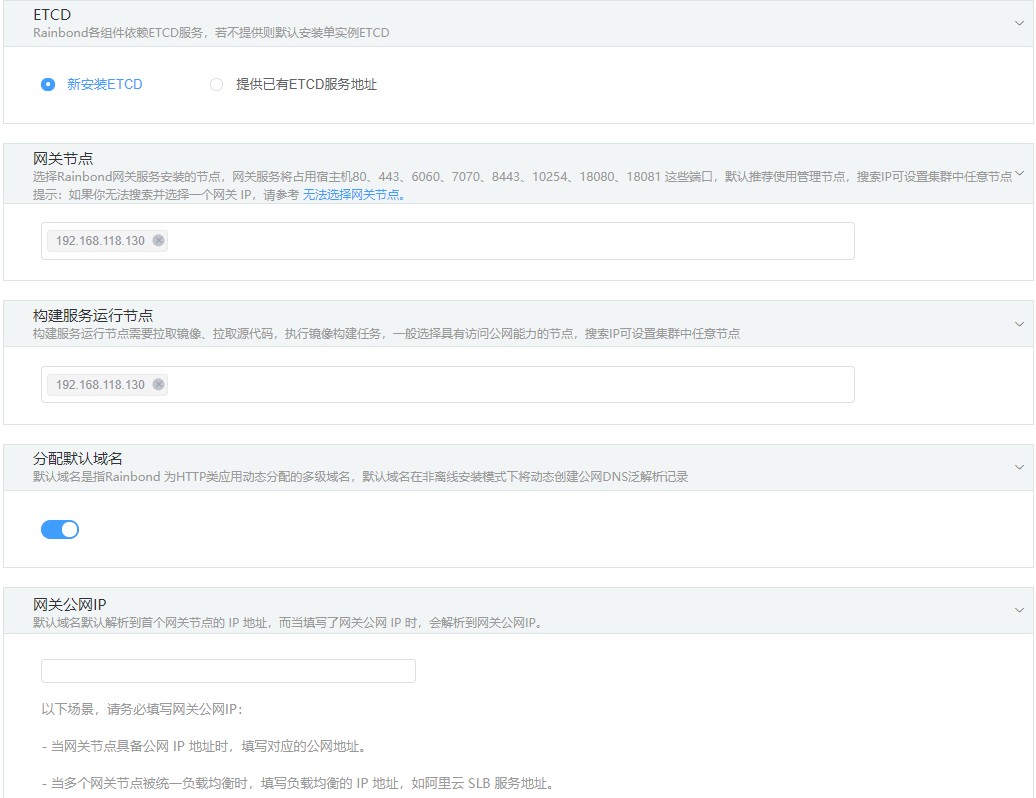

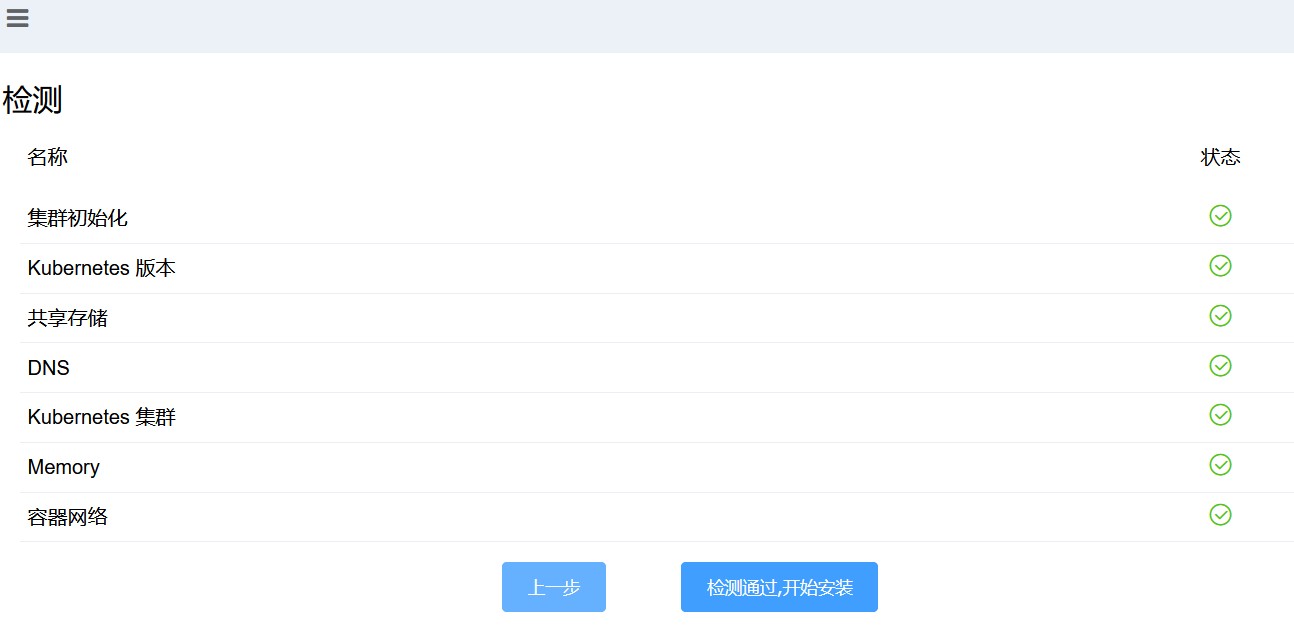
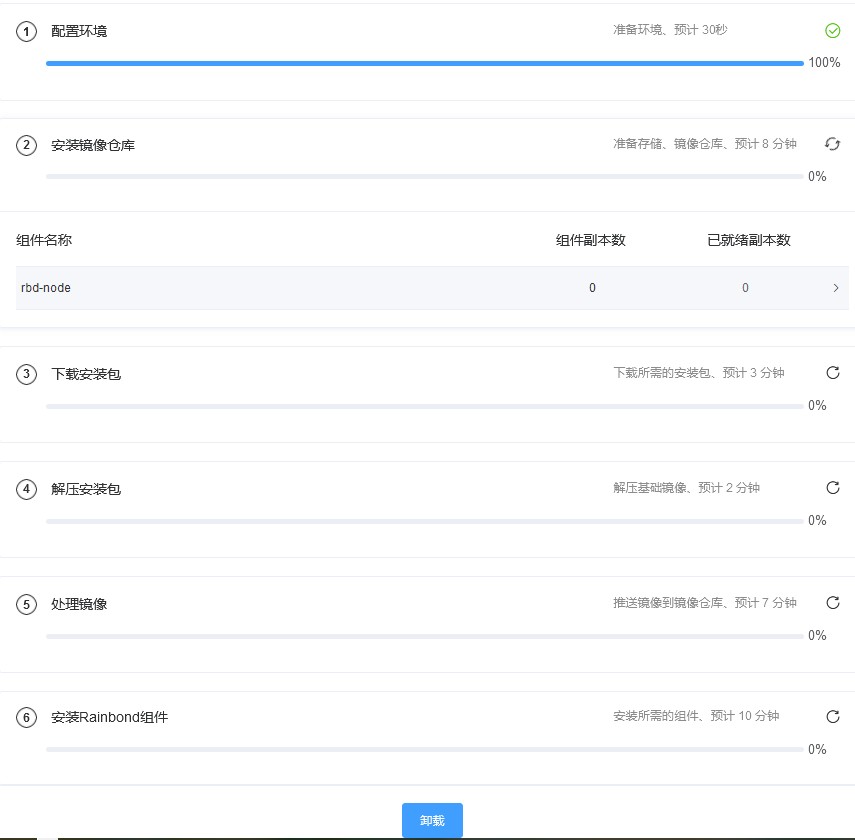
查看pod状态:
[root@master ~]# kubectl get pod -n rbd-system
NAME                                       READY   STATUS      RESTARTS   AGE
dashboard-metrics-scraper-9d8b5c8f-shq6l   1/1     Running     0          2d19h
kubernetes-dashboard-c68cb869b-zzmc6       1/1     Running     0          2d19h
metrics-server-7c4d5d7f58-rjt2s            1/1     Running     0          99s
nfs-provisioner-0                          1/1     Running     0          2d23h
rainbond-operator-0                        2/2     Running     0          2d23h
rainbond-operator-sentinel-97ks7           1/1     Running     0          2d23h
rainbond-operator-sentinel-ps54w           1/1     Running     0          2d23h
rainbond-operator-sentinel-tsq2s           1/1     Running     0          2d23h
rbd-api-77c587664d-9kstn                   1/1     Running     0          2d19h
rbd-app-ui-8459768fc4-dswg5                1/1     Running     0          14m
rbd-app-ui-migrations-45rb6                0/1     Completed   0          30m
rbd-chaos-5g5tq                            1/1     Running     0          2d19h
rbd-db-0                                   2/2     Running     0          2d19h
rbd-etcd-0                                 1/1     Running     0          2d23h
rbd-eventlog-0                             1/1     Running     0          2d19h
rbd-gateway-gl4qf                          1/1     Running     0          2d22h
rbd-hub-757f789cc9-bdnk8                   1/1     Running     0          2d23h
rbd-monitor-0                              1/1     Running     0          2d19h
rbd-mq-8657fc7fd7-wnw59                    1/1     Running     0          2d19h
rbd-node-mjvlr                             1/1     Running     0          2d23h
rbd-node-qcqxk                             1/1     Running     0          2d23h
rbd-node-x6p29                             1/1     Running     0          2d23h
rbd-repo-0                                 1/1     Running     2          2d19h
rbd-webcli-787dc6df8f-8l2lv                1/1     Running     0          2d19h
rbd-worker-86b66457d7-74szf                1/1     R
unning     0          39m
安装完成:
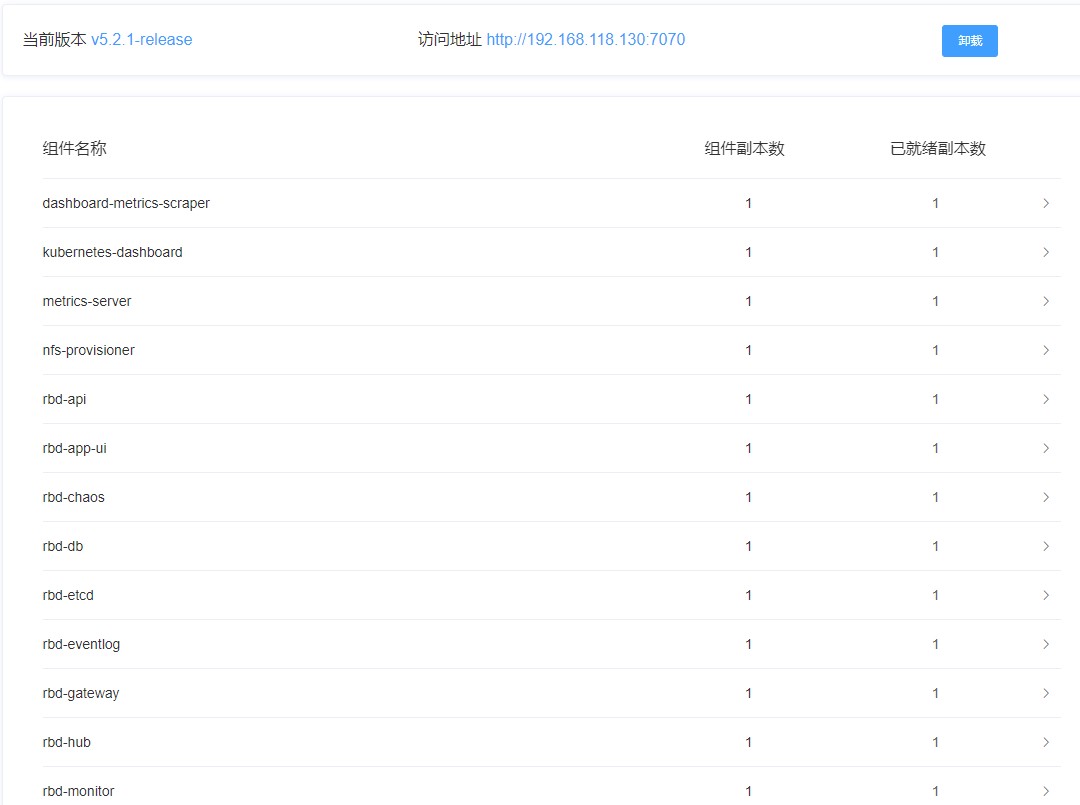

卸载 Rainbond Operator:【如果想要重新安装】
helm delete rainbond-operator -n rbd-system
3- rainbond使用
浏览器打开: http://master_ip:7070
注册管理员
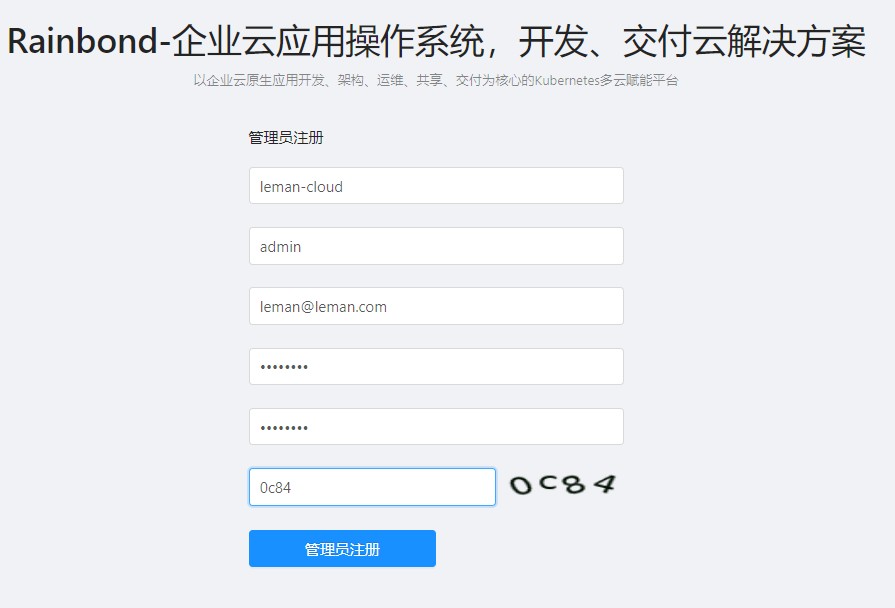

至此平台安装完成。