一、准备环境
1、swap要求
swap最好设置3G以上,如果安装过程中报swap不足,可参考:
https://www.jianshu.com/p/46635a12c8d0
2、官网必须安装包列表:


binutils-2.20.51.0.2-5.11.el6 (x86_64)
compat-libcap1-1.10-1 (x86_64)
compat-libstdc++-33-3.2.3-69.el6 (x86_64)
compat-libstdc++-33-3.2.3-69.el6.i686
gcc-4.4.4-13.el6 (x86_64)
gcc-c++-4.4.4-13.el6 (x86_64)
glibc-2.12-1.7.el6 (i686)
glibc-2.12-1.7.el6 (x86_64)
glibc-devel-2.12-1.7.el6 (x86_64)
glibc-devel-2.12-1.7.el6.i686
ksh
libgcc-4.4.4-13.el6 (i686)
libgcc-4.4.4-13.el6 (x86_64)
libstdc++-4.4.4-13.el6 (x86_64)
libstdc++-4.4.4-13.el6.i686
libstdc++-devel-4.4.4-13.el6 (x86_64)
libstdc++-devel-4.4.4-13.el6.i686
libaio-0.3.107-10.el6 (x86_64)
libaio-0.3.107-10.el6.i686
libaio-devel-0.3.107-10.el6 (x86_64)
libaio-devel-0.3.107-10.el6.i686
make-3.81-19.el6
sysstat-9.0.4-11.el6 (x86_64)
binutils-2.23.52.0.1-12.el7.x86_64
compat-libcap1-1.10-3.el7.x86_64
compat-libstdc++-33-3.2.3-71.el7.i686
compat-libstdc++-33-3.2.3-71.el7.x86_64
gcc-4.8.2-3.el7.x86_64
gcc-c++-4.8.2-3.el7.x86_64
glibc-2.17-36.el7.i686
glibc-2.17-36.el7.x86_64
glibc-devel-2.17-36.el7.i686
glibc-devel-2.17-36.el7.x86_64
ksh
libaio-0.3.109-9.el7.i686
libaio-0.3.109-9.el7.x86_64
libaio-devel-0.3.109-9.el7.i686
libaio-devel-0.3.109-9.el7.x86_64
libgcc-4.8.2-3.el7.i686
libgcc-4.8.2-3.el7.x86_64
libstdc++-4.8.2-3.el7.i686
libstdc++-4.8.2-3.el7.x86_64
libstdc++-devel-4.8.2-3.el7.i686
libstdc++-devel-4.8.2-3.el7.x86_64
libXi-1.7.2-1.el7.i686
libXi-1.7.2-1.el7.x86_64
libXtst-1.2.2-1.el7.i686
libXtst-1.2.2-1.el7.x86_64
make-3.82-19.el7.x86_64
sysstat-10.1.5-1.el7.x86_64
详细信息参考官网:
https://docs.oracle.com/cd/E11882_01/install.112/e47689/pre_install.htm#BABCFJFG
本例子采用Oracle Linux自带的预装包实现:
详细参考:
https://docs.oracle.com/cd/E11882_01/install.112/e47689/pre_install.htm#LADBI1091

2.1.5 Installing the Oracle Preinstallation RPM or Oracle Validated RPM with ULN Support
操作系统安装后,使用oracle-rdbms-server-11gR2-preinstall包准备环境
https://docs.oracle.com/cd/E11882_01/install.112/e47689/pre_install.htm#LADBI1091

Start a terminal session and enter the following command as root, depending on your platform.

Oracle Linux 6:

# yum install oracle-rdbms-server-11gR2-preinstall
Oracle Linux 5 or Oracle Linux 4:

# yum install oracle-validated
You should see output indicating that you have subscribed to the Oracle Linux channel, and that packages are being installed. For example:

el5_u6_i386_base
el5_u6_x86_64_patch
Oracle Linux automatically creates a standard (not role-allocated) Oracle installation owner and groups, and sets up other kernel configuration settings as required for Oracle installations.
选择对应6.5的版本,使enable=1
[root@Oracle-A ~]# vi /etc/yum
yum/         yum.conf     yum.repos.d/

[root@Oracle-A ~]# vi /etc/yum.repos.d/public-yum-ol6.repo
[public_ol6_latest]
name=Oracle Linux $releasever Latest ($basearch)
baseurl=http://public-yum.oracle.com/repo/OracleLinux/OL6/latest/$basearch/
gpgkey=http://public-yum.oracle.com/RPM-GPG-KEY-oracle-ol6
gpgcheck=1
enabled=0

[public_ol6_ga_base]
name=Oracle Linux $releasever GA installation media copy ($basearch)
baseurl=http://public-yum.oracle.com/repo/OracleLinux/OL6/0/base/$basearch/
gpgkey=http://public-yum.oracle.com/RPM-GPG-KEY-oracle-ol6
gpgcheck=1
enabled=0

[public_ol6_u1_base]
name=Oracle Linux $releasever Update 1 installation media copy ($basearch)
baseurl=http://public-yum.oracle.com/repo/OracleLinux/OL6/1/base/$basearch/
gpgkey=http://public-yum.oracle.com/RPM-GPG-KEY-oracle-ol6
gpgcheck=1
enabled=0

[public_ol6_u2_base]
name=Oracle Linux $releasever Update 2 installation media copy ($basearch)
baseurl=http://public-yum.oracle.com/repo/OracleLinux/OL6/2/base/$basearch/
gpgkey=http://public-yum.oracle.com/RPM-GPG-KEY-oracle-ol6
gpgcheck=1
enabled=0

[public_ol6_u3_base]
name=Oracle Linux $releasever Update 3 installation media copy ($basearch)
baseurl=http://public-yum.oracle.com/repo/OracleLinux/OL6/3/base/$basearch/
gpgkey=http://public-yum.oracle.com/RPM-GPG-KEY-oracle-ol6
gpgcheck=1
enabled=0

[public_ol6_u4_base]
name=Oracle Linux $releasever Update 4 installation media copy ($basearch)
baseurl=http://public-yum.oracle.com/repo/OracleLinux/OL6/4/base/$basearch/
gpgkey=http://public-yum.oracle.com/RPM-GPG-KEY-oracle-ol6
gpgcheck=1
enabled=0

[public_ol6_u5_base]
name=Oracle Linux $releasever Update 5 installation media copy ($basearch)
baseurl=http://public-yum.oracle.com/repo/OracleLinux/OL6/5/base/$basearch/
gpgkey=http://public-yum.oracle.com/RPM-GPG-KEY-oracle-ol6
gpgcheck=1
enabled=1

[public_ol6_UEK_latest]
name=Latest Unbreakable Enterprise Kernel for Oracle Linux $releasever ($basearch)
baseurl=http://public-yum.oracle.com/repo/OracleLinux/OL6/UEK/latest/$basearch/
gpgkey=http://public-yum.oracle.com/RPM-GPG-KEY-oracle-ol6
gpgcheck=1
enabled=$uek

[public_ol6_UEKR3_latest]
name=Unbreakable Enterprise Kernel Release 3 for Oracle Linux $releasever ($basearch)
baseurl=http://public-yum.oracle.com/repo/OracleLinux/OL6/UEKR3/latest/$basearch/
gpgkey=http://public-yum.oracle.com/RPM-GPG-KEY-oracle-ol6
gpgcheck=1
enabled=$uekr3

[public_ol6_UEK_base]
name=Unbreakable Enterprise Kernel for Oracle Linux $releasever ($basearch)
baseurl=http://public-yum.oracle.com/repo/OracleLinux/OL6/UEK/base/$basearch/
gpgkey=http://public-yum.oracle.com/RPM-GPG-KEY-oracle-ol6
gpgcheck=1
enabled=1
~
"/etc/yum.repos.d/public-yum-ol6.repo" 69L, 2545C written
[root@Oracle-A ~]# yum install oracle-rdbms-server-11gR2-preinstall
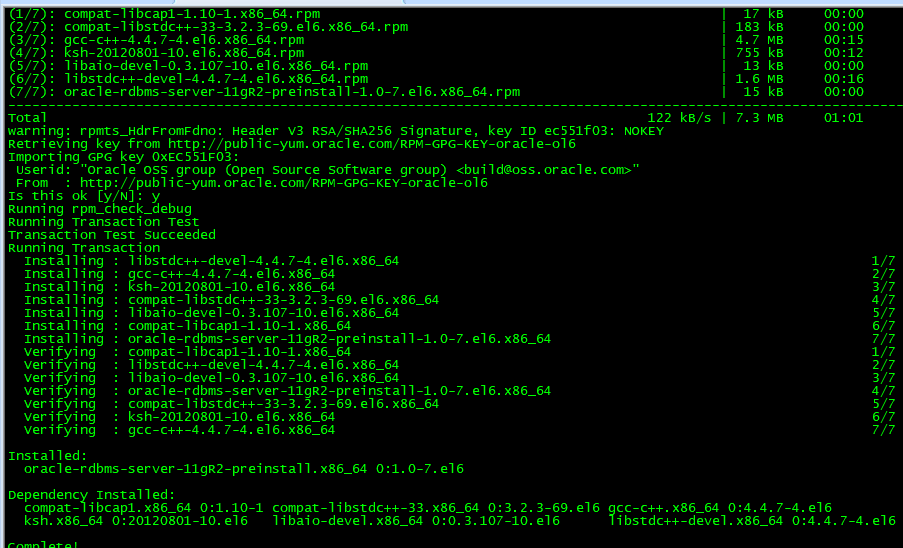
校验结果:
[root@oel63 ~]# cd /var/log/oracle-rdbms-server-11gR2-preinstall/results/
[root@oel63 results]# ls
orakernel.log
[root@oel63 results]# more orakernel.log
Adding group oinstall with gid 54321
Adding group dba
Adding user oracle with user id 54321, initial login group oinstall, supplementary group dba and  home directory /home/oracle
Changing ownership of /home/oracle to oracle:oinstall
Please set password for oracle user
uid=54321(oracle) gid=54321(oinstall) groups=54321(oinstall),54322(dba)
Creating oracle user passed

Verifying  kernel parameters as per Oracle recommendations...
Adding fs.file-max = 6815744
Adding kernel.sem = 250 32000 100 128
Adding kernel.shmmni = 4096
kernel.shmall is higher than preinstall config.
kernel.shmall = 4294967296
kernel.shmmax = 4398046511104
Changing kernel.shmmax to match preinstall config
Adding net.core.rmem_default = 262144
Adding net.core.rmem_max = 4194304
Adding net.core.wmem_default = 262144
Adding net.core.wmem_max = 1048576
Adding fs.aio-max-nr = 1048576
Adding net.ipv4.ip_local_port_range = 9000 65500
Setting kernel parameters as per oracle recommendations...
Altered file /etc/sysctl.conf
Original file backed up at /etc/sysctl.conf.orabackup
Verifying & setting of kernel parameters passed

Setting user limits using /etc/security/limits.conf

Verifying oracle user OS limits as per Oracle recommendations...
Adding oracle soft nofile  1024
Adding oracle hard nofile  65536
  .............

Setting kernel boot parameters as per Oracle recommendations...
Boot parameters will be effected on next reboot
Altered file /boot/grub/grub.conf
Original file backed up at /boot/grub/grub.conf.orabackup
Verifying & setting of boot parameters passed

Disabling Transparent Hugepages.
Refer Oracle Note:1557478.1

Disabling defrag.
Refer Oracle Note:1557478.1

Taking a backup of old config files under /var/log/oracle-rdbms-server-11gR2-preinstall/backup/May-16-2014-14-53-37
#最后一句给出了相关的备份信息

#下面是查看备份文件
[root@oel63 results]# cd /var/log/oracle-rdbms-server-11gR2-preinstall/backup
[root@oel63 backup]# ls
May-16-2014-14-53-37
[root@oel63 backup]# cd May-16-2014-14-53-37/
[root@oel63 May-16-2014-14-53-37]# ls
grub.conf  limits.conf  orakernel.log  sysctl.conf

#校验Oracle用户,注,需要为Oracle用户修改密码,此处省略
[root@oel63 ~]# cat /etc/passwd |grep oracle
oracle:x:54321:54321::/home/oracle:/bin/bash
[root@oel63 ~]# cat /etc/group |grep dba
dba:x:54322:oracle
[root@oel63 ~]# cat /etc/group |grep oinstall
oinstall:x:54321:
参考链接:
How I Simplified Oracle Database 12c and 11g Installations on Oracle Linux 6
How I Simplified Oracle Database Installation on Oracle Linux 5
Oracle 11g 在RedHat Linux 5.8_x64平台的安装手册 http://www.linuxidc.com/Linux/2014-07/104745.htm
Linux-6-64下安装Oracle 12C笔记 http://www.linuxidc.com/Linux/2013-07/86805.htm
在CentOS 6.4下安装Oracle 11gR2(x64) http://www.linuxidc.com/Linux/2014-02/97374.htm
Oracle 11gR2 在VMWare虚拟机中安装步骤 http://www.linuxidc.com/Linux/2013-09/89579p2.htm
Debian 下 安装 Oracle 11g XE R2 http://www.linuxidc.com/Linux/2014-03/98881.htm
更多Oracle相关信息见Oracle 专题页面 http://www.linuxidc.com/topicnews.aspx?tid=12
本文永久更新链接地址:http://www.linuxidc.com/Linux/2014-09/106127.htm
二、安装数据库软件
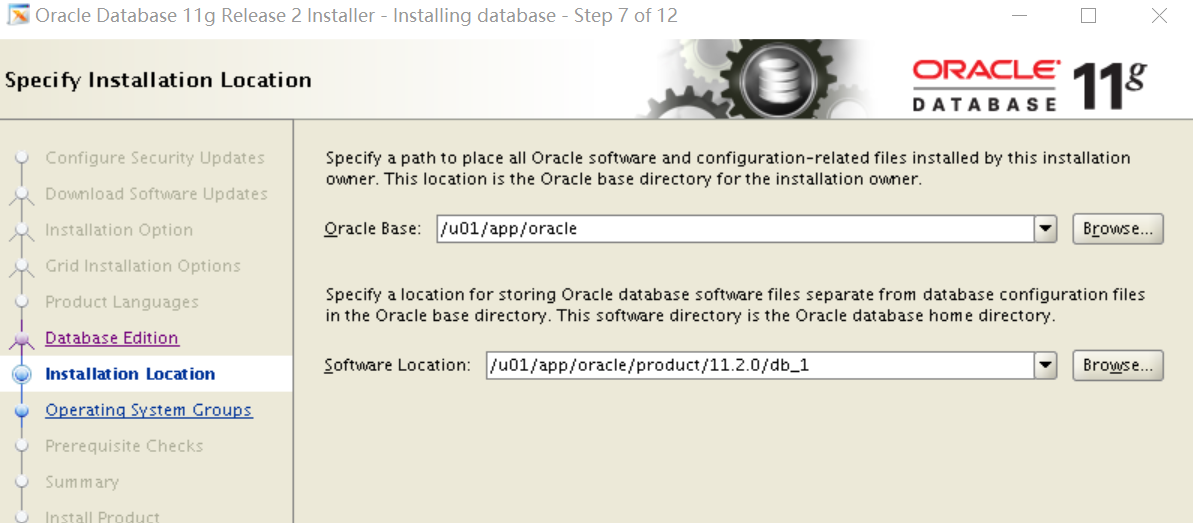
创建所需目录:
Oracle Base Directory: [root@Oracle-A /]# mkdir -p /u01/app/oracle
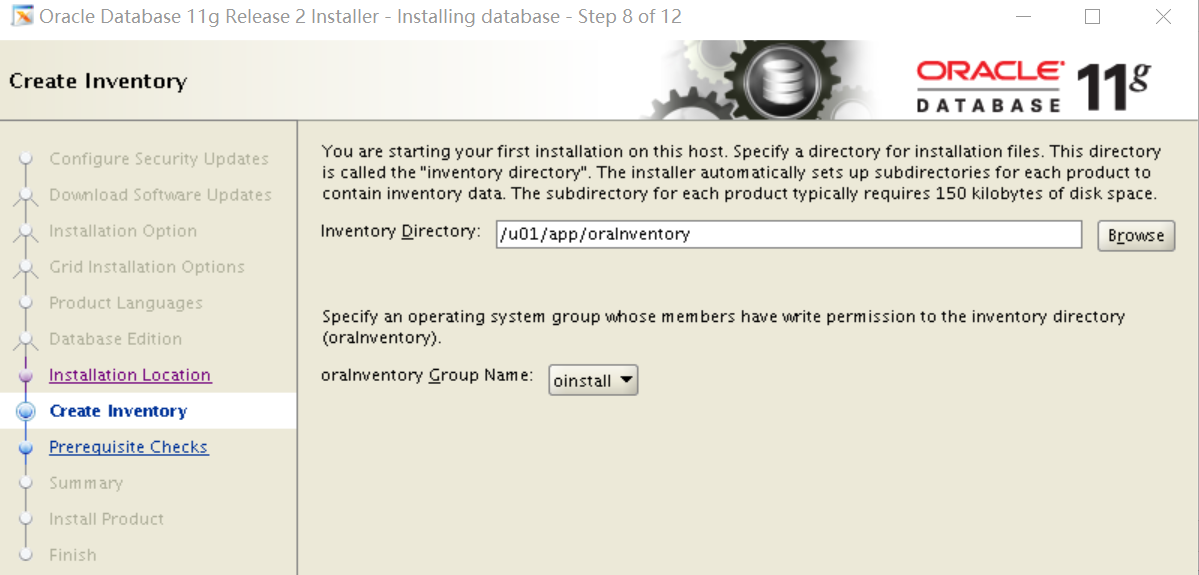
Oracle Inventory Directory:
[root@Oracle-A /]# mkdir -p /u01/app/oraInventory
Oracle Home Directory:
[root@Oracle-A /]# mkdir -p /u01/app/oracle/product/11.2.0/db_1
可选:
Direcotories for Oracle DATA or Recovery Files:
[root@Oracle-A /]# mkdir -p /u01/oradata
[root@Oracle-A /]# mkdir -p /u01/fast_recovery_area
本例中使用默认的$oracle_base/flash_recovery_area
Software Installation Directories
You must specify the directory in which the Oracle Database software is installed, or the location where the product binary files are copied from the installation media. You must choose a location that has enough disk space to contain the software and is accessible by the operating system user performing the installation.

You also specify the location of the Oracle base directory, which is used by all Oracle software products installed on the server. The first time you install Oracle Database software on a server, you are prompted to specify the location of the inventory directory, called oraInventory. This directory provides a centralized inventory of all Oracle software products installed on the server. You should use the same value for the Oracle inventory directory each time you perform an Oracle software installation on the server.
修改目录属性:
chown -R oracle.oinstalll /u01
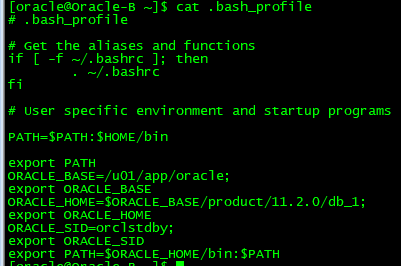
修改环境变更
# vi /home/oracle/.bash_profile  #添加如下内容

ORACLE_BASE=/u01/app/oracle;
export ORACLE_BASE
ORACLE_HOME=$ORACLE_BASE/product/11.2.0/db_1;
export ORACLE_HOME
ORACLE_SID=orcl;
export ORACLE_SID
LD_LIBRARY_PATH=$ORACLE_HOME/lib;
export LD_LIBRARY_PATH
PATH=$PATH:$ORACLE_HOME/bin:$HOME/bin;
export PATH
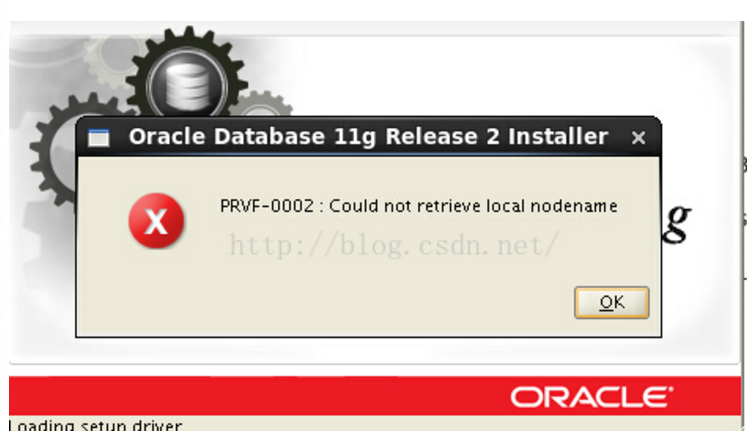
修改/etc/hosts文件
[root@Oracle-A tmp]# vi /etc/hosts
127.0.0.1 localhost localhost.localdomain localhost4 localhost4.localdomain4
::1 localhost localhost.localdomain localhost6 localhost6.localdomain6
192.168.56.201 Oracle-A
上传安装文件
[root@Oracle-A tmp]# unzip p13390677_112040_Linux-x86-64_1of7.zip
[root@Oracle-A tmp]# unzip p13390677_112040_Linux-x86-64_2of7.zip
[root@Oracle-A tmp]# xhost +
[root@Oracle-A tmp]$ export DISPLAY=192.168.56.1:0.0
[oracle@Oracle-A 11.2.0]$ cd /tmp/database/
配置xmanager
设置好连接后,在命令输入如下内容:
/usr/bin/xterm -ls -display $DISPLAY

用Xstart命令行中启动安装程序

成功后,调用出安装界面,忘记修改/etc/hosts/时,会报如下图的错误
安装过程,本例先安装软件,再创建数据库。
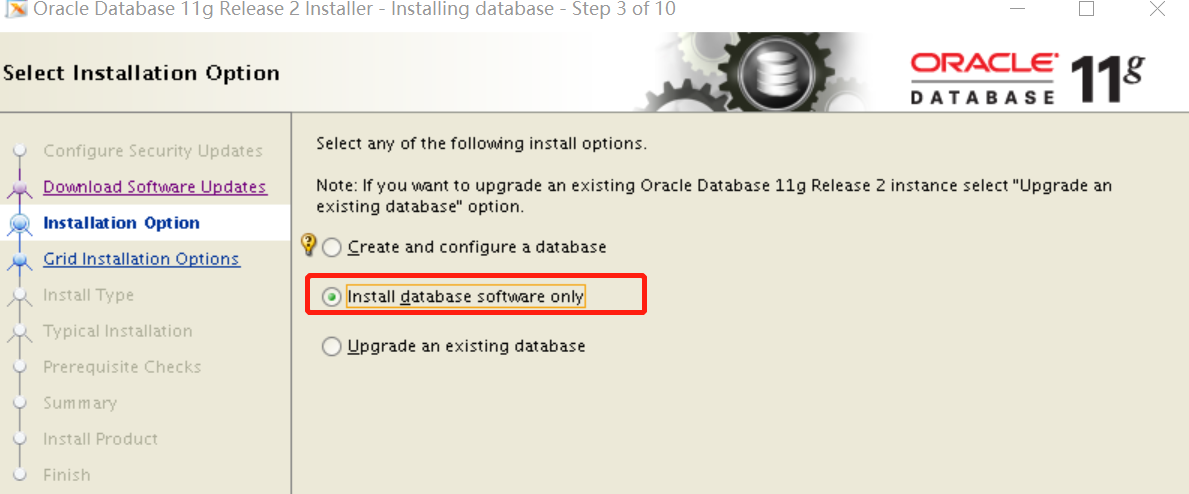
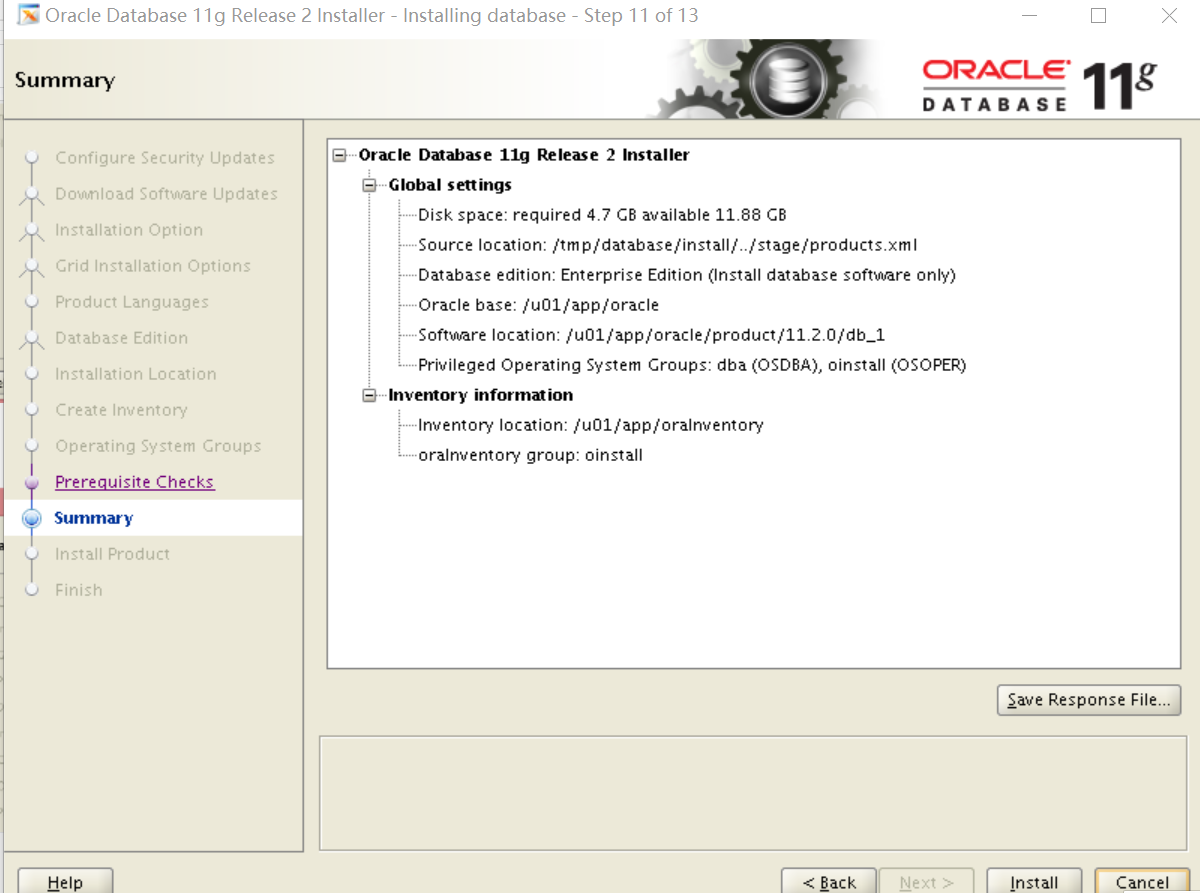
开始进行安装。
最后运行两个脚本
VirtualBox克隆另一台虚拟机
复制时候,选择重新初始化所有MAC地址

配置从库的主机信息。

删除UUID
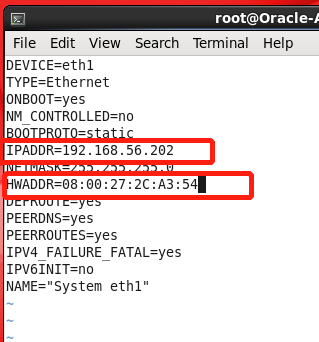
如果网络不通,可以采取以下两种方法,我用的第1种,直接删除:
解决办法:
通过查看新VM的文件/etc/udev/rules.d/70-persistent-net.rules,发现多了几个网卡接口,我们每更新一次网卡MAC地址,都只会在该文件内追加信息。我们有两种方法解决该问题:
1. 删除70-persistent-net.rules文件,重启;
2. 我们只需按照新VM的设置信息将70-persistent-net.rules文件内的多余网卡去掉,然后将正确MAC地址那一行改为对应于eth0即可,然后重启;
主库上创建数据库,发现不认dbca命令
oracle@edrsr12p1 Desktop]$ . oraenv
ORACLE_SID = [orcl] ? orcl
ORACLE_HOME = [/home/oracle] ? /u01/app/oracle/product/11.2.0/dbhome_1
The Oracle base remains unchanged with value /u01/app/oracle
[oracle@edrsr12p1 Desktop]$ dbca

修改Standby的环境变量
修改后正常:

字符集选择时,要慎重。
创建监听:
$netca,第一个listener一路回车即可。
SQL> desc v$instance;
 Name                                      Null?    Type
 ----------------------------------------- -------- ----------------------------
 INSTANCE_NUMBER                                    NUMBER
 INSTANCE_NAME                                      VARCHAR2(16)
 HOST_NAME                                          VARCHAR2(64)
 VERSION                                            VARCHAR2(17)
 STARTUP_TIME                                       DATE
 STATUS                                             VARCHAR2(12)
 PARALLEL                                           VARCHAR2(3)
 THREAD#                                            NUMBER
 ARCHIVER                                           VARCHAR2(7)
 LOG_SWITCH_WAIT                                    VARCHAR2(15)
 LOGINS                                             VARCHAR2(10)
 SHUTDOWN_PENDING                                   VARCHAR2(3)
 DATABASE_STATUS                                    VARCHAR2(17)
 INSTANCE_ROLE                                      VARCHAR2(18)
 ACTIVE_STATE                                       VARCHAR2(9)
 BLOCKED                                            VARCHAR2(3)

SQL> select instance_name from v$instance;

INSTANCE_NAME
----------------
orcl
完成安装后,开始安装物理DATAGuard,先调整主库
1、Enable force logging
SQL> alter database force logging;

Database altered.
SQL> select force_logging from v$database;
FOR
---
YES
2、查询当前日志组和文件分布并创建转化为备库时使用的redo log文件,要求Standby redo log的组数要多于online redo log,并且二者的日志文件大小相同。
SQL> col member format a50
SQL> select group#,member from v$logfile;

    GROUP# MEMBER
---------- --------------------------------------------------
         3 /u01/app/oracle/oradata/orcl/redo03.log
         2 /u01/app/oracle/oradata/orcl/redo02.log
         1 /u01/app/oracle/oradata/orcl/redo01.log
SQL> select group#,bytes/(1024*1024) from v$log;
GROUP# BYTES/(1024*1024)
---------- -----------------
1 50
2 50
3 50
SQL> alter database add standby logfile
2 group 4 '/u01/app/oracle/oradata/orcl/std_redo04.log' size 50m;
Database altered.
SQL> alter database add standby logfile
2 group 5 '/u01/app/oracle/oradata/orcl/std_redo05.log' size 50m;
Database altered.
SQL> alter database add standby logfile
2 group 6 '/u01/app/oracle/oradata/orcl/std_redo06.log' size 50m;
Database altered.
SQL> alter database add standby logfile
2 group 7 '/u01/app/oracle/oradata/orcl/std_redo07.log' size 50m;
Database altered.
查看一下当前的redo log
SQL> select member from v$logfile;
MEMBER
--------------------------------------------------
/u01/app/oracle/oradata/orcl/redo03.log
/u01/app/oracle/oradata/orcl/redo02.log
/u01/app/oracle/oradata/orcl/redo01.log
/u01/app/oracle/oradata/orcl/std_redo04.log
/u01/app/oracle/oradata/orcl/std_redo05.log
/u01/app/oracle/oradata/orcl/std_redo06.log
/u01/app/oracle/oradata/orcl/std_redo07.log
注:Standby redo log 的组数参考公式:(online redolog级数+1)*数据库线程数,RAC线程为2.
Standby redolog的组成员数和大小也尽量和online redo一样。
设置主库初始化参数
SQL> create pfile from spfile;

File created.

SQL> !
[oracle@Oracle-A bin]$ ls -l $ORACLE_HOME/dbs
total 24
-rw-rw---- 1 oracle oinstall 1544 Jun 23 14:54 hc_orcl.dat
-rw-r--r-- 1 oracle oinstall 2851 May 15  2009 init.ora
-rw-r--r-- 1 oracle oinstall  938 Jun 23 15:43 initorcl.ora #新创建的
-rw-r----- 1 oracle oinstall   24 Jun 23 14:52 lkORCL
-rw-r----- 1 oracle oinstall 1536 Jun 23 14:54 orapworcl
-rw-r----- 1 oracle oinstall 2560 Jun 23 14:55 spfileorcl.ora
编辑这个生成的初始化参数文件
查看归档的路径:
Oracle11g版本,ORACLE默认的日志归档路径为闪回恢复区($ORACLE_BASE/fast_recovery_area)。对于这个路径,Oracle有一个限制,就是默认只有4G的空间,而且不只是归档日志的默认路径,也是备份文件和闪回日志的默认地址,这样的话归档日志锁使用的空间就达不到4G,在没有设置好这个路径大小的情况下,很多系统都遇到过归档日志满而无法归档导致数据库夯住的问题。
SQL> archive log list;
Database log mode              Archive Mode
Automatic archival             Enabled
Archive destination            USE_DB_RECOVERY_FILE_DEST
Oldest online log sequence     1
Next log sequence to archive   3
Current log sequence           3
这里可以看到Archive destination的值为USE_DB_RECOVERY_FILE_DEST,可以理解为USE(使用)DB_RECOVERY_FILE_DEST这个路径
查看DB_RECOVERY_FILE_DEST路径
SQL> show parameter db_recovery;

NAME                                 TYPE        VALUE
------------------------------------ ----------- ------------------------------
db_recovery_file_dest                string      /u01/app/oracle/fast_recovery_area
db_recovery_file_dest_size           big integer 4182M

下面的参数是空的
SQL> show parameter log_archive_dest_1;
NAME TYPE VALUE
------------------------------------ ----------- ------------------------------
log_archive_dest_1 string
log_archive_dest_10 string
log_archive_dest_11 string
log_archive_dest_12 string
log_archive_dest_13 string
log_archive_dest_14 string
log_archive_dest_15 string
log_archive_dest_16 string
log_archive_dest_17 string
log_archive_dest_18 string
log_archive_dest_19 string
由上可以很清楚的看到DB_RECOVERY_FILE_DEST路径参数的值默认为/u01/oracle/fast_recovery_area,并且Oracle设置的大小为4G。
默认情况下,归档日志会存放到闪回恢复区($ORACLE_BASE/fast_recovery_area)内,如果闪回恢复区已经使用到4G,归档日志就有可能无法继续归档,数据库夯住。
具体参考:https://blog.csdn.net/u011364306/article/details/49276717
vi /u01/app/oracle/product/11.2.0/db_1/dbs/initorcl.ora

以下为增加内容:
db_unique_name=orcl
log_archive_config='dg_config=(orcl,orclstdby)'
log_archive_dest_1='location=/u01/app/oracle/fast_recovery_area valid_for=(all_logfiles,all_roles) db_unique_name=orcl'
log_archive_dest_2='service=orclstdby lgwro async valid_for=(online_logfiles,primary_roles) db_unique_name=orclstdby' #lgwro async选一
log_archive_dest_state_1=enable
log_archive_dest_stat_2=enable
db_file_name_convert='/u01/app/oracle/oradata/orclstdby','/u01/app/oracle/oradata/orcl'
log_file_name_convert='/u01/app/oracle/oradata/orclstdby','/u01/app/oracle/oradata/orcl'
fal_server=orclstdby
fal_client=orcl
standby_file_management=auto
standby_archive_dest='/u01/app/oracle/fast_recovery_area'
比原文少了创建相关archive log的目录,这里临时使用默认路径,有问题,后面再修改。
shutdown 实例
SQL> shutdown immediate;
Database closed.
Database dismounted.
ORACLE instance shut down.
测试一下参数文件:
SQL> startup pfile='/u01/app/oracle/product/11.2.0/db_1/dbs/initorcl.ora';
再shutdown实例
启动到mount状态:
SQL> startup mount pfile='/u01/app/oracle/product/11.2.0/db_1/dbs/initorcl.ora';
[oracle@Oracle-A ~]$ rman target /
Recovery Manager: Release 11.2.0.4.0 - Production on Mon Jun 25 15:35:31 2018
Copyright (c) 1982, 2011, Oracle and/or its affiliates. All rights reserved.
connected to target database: ORCL (DBID=1507351096, not open)
RMAN>
编辑standby数据库参数文件
[oracle@Oracle-A dbs]$ scp initorcl.ora oracle@192.168.56.202:/u01/app/oracle/product/11.2.0/db_1/dbs/initorclstdby.ora

$vi initorclstdby.ora
[oracle@Oracle-B dbs]$ vi initorclstdby.ora
fal_server=orclstdby
fal_client=orcl
orcl.__db_cache_size=352321536
orcl.__java_pool_size=4194304
orcl.__large_pool_size=8388608
orcl.__oracle_base='/u01/app/oracle'#ORACLE_BASE set from environment
orcl.__pga_aggregate_target=335544320
orcl.__sga_target=503316480
orcl.__shared_io_pool_size=0
orcl.__shared_pool_size=125829120
orcl.__streams_pool_size=0
*.audit_file_dest='/u01/app/oracle/admin/orcl/adump'
*.audit_trail='db'
*.compatible='11.2.0.4.0'
*.control_files='/u01/app/oracle/oradata/orclstdby/control01.ctl','/u01/app/oracle/fast_recovery_area/orclstdby/control02.ctl'
*.db_block_size=8192
*.db_domain=''
*.db_name='orcl'
*.db_recovery_file_dest='/u01/app/oracle/fast_recovery_area'
*.db_recovery_file_dest_size=4385144832
*.diagnostic_dest='/u01/app/oracle'
*.dispatchers='(PROTOCOL=TCP) (SERVICE=orclXDB)'
*.log_archive_format='%t_%s_%r.dbf'
*.memory_target=838860800
*.open_cursors=300
*.processes=150
*.remote_login_passwordfile='EXCLUSIVE'
*.undo_tablespace='UNDOTBS1'
db_unique_name=orclstdby
log_archive_config='dg_config=(orcl,orclstdby)'
log_archive_dest_1='location=/u01/app/oracle/fast_recovery_area
valid_for=(all_logfiles,all_roles) db_unique_name=orclstdby'
log_archive_dest_2='service=orcl async
valid_for=(online_logfiles,primary_roles) db_unique_name=orcl'
log_archive_dest_state_1=enable
log_archive_dest_state_2=enable
db_file_name_convert='/u01/app/oracle/oradata/orcl','/u01/app/oracle/oradata/orclstdby'
log_file_name_convert='/u01/app/oracle/oradata/orcl','/u01/app/oracle/oradata/orclstdby'
fal_server=orcl
standby_file_management=auto
standby_archive_dest='/u01/app/oracle/fast_recovery_area'
在主库上创建备库的控制文件
SQL> alter database create standby controlfile as '/u01/app/oracle/oradata/orcl/orclstdby01.ctl';
在备库上创建对应目录,如backup、归档目录,本例为闪回下,control文件存放目录,并将相应文件复制过去
cd /u01/app/oracle/oradata/
mkdir -p orclstdby

scp initorcl.ora oracle@192.168.56.202:/u01/app/oracle/product/11.2.0/db_1/dbs/initorclstdby.ora
scp /u01/app/oracle/oradata/orcl/orclstdby01.ctl oracle@192.168.56.202:/u01/app/oracle/oradata/orclstdby/
scp orapworcl oracle@192.168.56.202:/u01/app/oracle/product/11.2.0/db_1/dbs/
[oracle@Oracle-A dbs]$ scp -r /u01/app/oracle/fast_recovery_area/ORCL oracle@192.168.56.202:/u01/app/oracle/fast_recovery_area/orclstdby/
经过一系列的目录对比、复制文件、修改参数文件后,终于可以把备库启动到Mount状态
对备库的参数文件再次修改,控制文件名的名称,不符合:
*.control_files='/u01/app/oracle/oradata/orclstdby/orclstdby01.ctl','/u01/app/oracle/fast_recovery_area/orclstdby/orclstdby02.ctl'
SQL> startup mount pfile='/u01/app/oracle/product/11.2.0/db_1/dbs/initorclstdby.ora';
ORA-32006: STANDBY_ARCHIVE_DEST initialization parameter has been deprecated
ORACLE instance started.
Total System Global Area 835104768 bytes
Fixed Size 2257840 bytes
Variable Size 536874064 bytes
Database Buffers 289406976 bytes
Redo Buffers 6565888 bytes
Database mounted.
创建主库和备库的监听,可用图形界面或直接编辑listener.ora
编辑Net service names,主库和备份库复制即可,监听也折腾了一段时间,图形创建的可以,而手工编辑按文档的不行,后用图形配置后,进行了些更改,OK!
主库的监听配置文件
$cd /u01/app/oracle/product/11.2.0/db_1/network/admin
[oracle@Oracle-A admin]$ cat listener.ora
# listener.ora Network Configuration File: /u01/app/oracle/product/11.2.0/db_1/network/admin/listener.ora
# Generated by Oracle configuration tools.
SID_LIST_LISTENER =
(SID_LIST =
(SID_DESC =
(GLOBAL_DBNAME = orcl)
(ORACLE_HOME = /u01/app/oracle/product/11.2.0/db_1)
(SID_NAME = orcl)
)
)
LISTENER =
(DESCRIPTION_LIST =
(DESCRIPTION =
(ADDRESS = (PROTOCOL = TCP)(HOST = 192.168.56.201)(PORT = 1521))
(ADDRESS = (PROTOCOL = IPC)(KEY = EXTPROC1521))
)
)
ADR_BASE_LISTENER = /u01/app/oracle
备库的listener.ora
[oracle@Oracle-B admin]$ cat listener.ora
# listener.ora Network Configuration File: /u01/app/oracle/product/11.2.0/db_1/network/admin/listener.ora
# Generated by Oracle configuration tools.
SID_LIST_LISTENER =
(SID_LIST =
(SID_DESC =
(GLOBAL_DBNAME = orclstdby)
(SID_NAME = orclstdby)
(ORACLE_HOME = /u01/app/oracle/product/11.2.0/db_1)
)
)
LISTENER =
(DESCRIPTION_LIST =
(DESCRIPTION =
(ADDRESS = (PROTOCOL = IPC)(KEY = EXTPROC1521))
)
(DESCRIPTION =
(ADDRESS = (PROTOCOL = TCP)(HOST = 192.168.56.202)(PORT = 1521))
)
)
编辑tnsnames.ora
[oracle@Oracle-A admin]$ cat tnsnames.ora
orcl =
  (DESCRIPTION=
    (address = (protocol=tcp)(host = 192.168.56.201)(PORT = 1521))
    (connect_data =
      (SERVER = DEDICATED)
      (SERVICE_NAME = orcl)
    )
   )

orclstdby =
  (DESCRIPTION=
    (address = (protocol=tcp)(host = 192.168.56.202)(PORT = 1521))
    (connect_data =
      (SERVER = DEDICATED)
      (SERVICE_NAME = orclstdby)
    )
   )
复制至备库
[oracle@Oracle-A admin]$ scp tnsnames.ora oracle@192.168.56.202:/u01/app/oracle/product/11.2.0/db_1/network/admin

[oracle@Oracle-A admin]$ lsnrctl stop
oracle@Oracle-A admin]$ lsnrctl start
LSNRCTL for Linux: Version 11.2.0.4.0 - Production on 26-JUN-2018 21:42:02
Copyright (c) 1991, 2013, Oracle. All rights reserved.
Starting /u01/app/oracle/product/11.2.0/db_1//bin/tnslsnr: please wait...
TNSLSNR for Linux: Version 11.2.0.4.0 - Production
System parameter file is /u01/app/oracle/product/11.2.0/db_1/network/admin/listener.ora
Log messages written to /u01/app/oracle/diag/tnslsnr/Oracle-A/listener/alert/log.xml
Listening on: (DESCRIPTION=(ADDRESS=(PROTOCOL=tcp)(HOST=Oracle-A)(PORT=1521)))
Listening on: (DESCRIPTION=(ADDRESS=(PROTOCOL=ipc)(KEY=EXTPROC1521)))
Connecting to (DESCRIPTION=(ADDRESS=(PROTOCOL=TCP)(HOST=Oracle-A)(PORT=1521)))
STATUS of the LISTENER
------------------------
Alias LISTENER
Version TNSLSNR for Linux: Version 11.2.0.4.0 - Production
Start Date 26-JUN-2018 21:42:05
Uptime 0 days 0 hr. 0 min. 0 sec
Trace Level off
Security ON: Local OS Authentication
SNMP OFF
Listener Parameter File /u01/app/oracle/product/11.2.0/db_1/network/admin/listener.ora
Listener Log File /u01/app/oracle/diag/tnslsnr/Oracle-A/listener/alert/log.xml
Listening Endpoints Summary...
(DESCRIPTION=(ADDRESS=(PROTOCOL=tcp)(HOST=Oracle-A)(PORT=1521)))
(DESCRIPTION=(ADDRESS=(PROTOCOL=ipc)(KEY=EXTPROC1521)))
The listener supports no services
The command completed successfully
备库也启动lsnrctl start
TNSPing测试一下,在主库备库分别操作
oracle@Oracle-A admin]$ tnsping orclstdby
TNS Ping Utility for Linux: Version 11.2.0.4.0 - Production on 26-JUN-2018 21:42:48
Copyright (c) 1997, 2013, Oracle. All rights reserved.
Used parameter files:
Used TNSNAMES adapter to resolve the alias
Attempting to contact (DESCRIPTION= (address = (protocol=tcp)(host = 192.168.56.202)(PORT = 1521)) (connect_data = (SERVER = DEDICATED) (SERVICE_NAME = orclstdby)))
OK (0 msec)
[oracle@Oracle-B admin]$ tnsping orcl
TNS Ping Utility for Linux: Version 11.2.0.4.0 - Production on 26-JUN-2018 21:46:47
Copyright (c) 1997, 2013, Oracle. All rights reserved.
Used parameter files:
Used TNSNAMES adapter to resolve the alias
Attempting to contact (DESCRIPTION= (address = (protocol=tcp)(host = 192.168.56.201)(PORT = 1521)) (connect_data = (SERVER = DEDICATED) (SERVICE_NAME = orcl)))
OK (0 msec)
停掉备库监听
在备库创建spfile
SQL> conn / as sysdba
Connected to an idle instance.
SQL> create spfile from pfile
File created.
SQL> startup nomount;
ORA-32004: obsolete or deprecated parameter(s) specified for RDBMS instance
ORACLE instance started.
Total System Global Area 835104768 bytes
Fixed Size 2257840 bytes
Variable Size 536874064 bytes
Database Buffers 289406976 bytes
Redo Buffers 6565888 bytes
SQL> alter database mount standby database;
Database altered.
在备库恢复主库备份的数据
[oracle@Oracle-B dbs]$ rman target /

RMAN> restore database;

Starting restore at 26-JUN-18
Starting implicit crosscheck backup at 26-JUN-18
using target database control file instead of recovery catalog
allocated channel: ORA_DISK_1
channel ORA_DISK_1: SID=134 device type=DISK
Crosschecked 4 objects
Finished implicit crosscheck backup at 26-JUN-18

Starting implicit crosscheck copy at 26-JUN-18
using channel ORA_DISK_1
Finished implicit crosscheck copy at 26-JUN-18

searching for all files in the recovery area
cataloging files...
no files cataloged

using channel ORA_DISK_1

channel ORA_DISK_1: starting datafile backup set restore
channel ORA_DISK_1: specifying datafile(s) to restore from backup set
channel ORA_DISK_1: restoring datafile 00001 to /u01/app/oracle/oradata/orclstdby/system01.dbf
channel ORA_DISK_1: restoring datafile 00002 to /u01/app/oracle/oradata/orclstdby/sysaux01.dbf
channel ORA_DISK_1: restoring datafile 00003 to /u01/app/oracle/oradata/orclstdby/undotbs01.dbf
channel ORA_DISK_1: restoring datafile 00004 to /u01/app/oracle/oradata/orclstdby/users01.dbf
channel ORA_DISK_1: restoring datafile 00005 to /u01/app/oracle/oradata/orclstdby/example01.dbf
channel ORA_DISK_1: reading from backup piece /u01/app/oracle/fast_recovery_area/ORCL/backupset/2018_06_25/o1_mf_nnndf_TAG20180625T173322_fm1fq2md_.bkp
channel ORA_DISK_1: piece handle=/u01/app/oracle/fast_recovery_area/ORCL/backupset/2018_06_25/o1_mf_nnndf_TAG20180625T173322_fm1fq2md_.bkp tag=TAG20180625T173322
channel ORA_DISK_1: restored backup piece 1
channel ORA_DISK_1: restore com

RMAN> restore archivelog all;

Starting restore at 26-JUN-18
using channel ORA_DISK_1

channel ORA_DISK_1: starting archived log restore to default destination
channel ORA_DISK_1: restoring archived log
archived log thread=1 sequence=3
channel ORA_DISK_1: restoring archived log
archived log thread=1 sequence=4
channel ORA_DISK_1: restoring archived log
archived log thread=1 sequence=5
channel ORA_DISK_1: restoring archived log
archived log thread=1 sequence=6
channel ORA_DISK_1: restoring archived log
archived log thread=1 sequence=7
channel ORA_DISK_1: restoring archived log
archived log thread=1 sequence=8
channel ORA_DISK_1: reading from backup piece /u01/app/oracle/fast_recovery_area/ORCL/backupset/2018_06_25/o1_mf_annnn_TAG20180625T174228_fm1g84xw_.bkp
channel ORA_DISK_1: piece handle=/u01/app/oracle/fast_recovery_area/ORCL/backupset/2018_06_25/o1_mf_annnn_TAG20180625T174228_fm1g84xw_.bkp tag=TAG20180625T174228
channel ORA_DISK_1: restored backup piece 1
channel ORA_DISK_1: restore complete, elapsed time: 00:00:01
Finished restore at 26-JUN-18
备库准备接收Redo log
SQL> alter database drop standby logfile group 4;

Database altered.

SQL>  alter database drop standby logfile group 5;

Database altered.

SQL>  alter database drop standby logfile group 6;

Database altered.

SQL>  alter database drop standby logfile group 7;

Database altered.
SQL> select member from v$logfile;
MEMBER
--------------------------------------------------------------------------------
/u01/app/oracle/oradata/orclstdby/redo03.log
/u01/app/oracle/oradata/orclstdby/redo02.log
/u01/app/oracle/oradata/orclstdby/redo01.log
SQL> alter database add standby logfile
2 group 4 ('/u01/app/oracle/oradata/orclstdby/orclstdby_redo04.log') size 50m,
3 group 5 ('/u01/app/oracle/oradata/orclstdby/orclstdby_redo05.log') size 50m,
4 group 6 ('/u01/app/oracle/oradata/orclstdby/orclstdby_redo06.log') size 50m,
5 group 7 ('/u01/app/oracle/oradata/orclstdby/orclstdby_redo07.log') size 50m;
Database altered.
SQL> select member from v$logfile;
MEMBER
--------------------------------------------------------------------------------
/u01/app/oracle/oradata/orclstdby/redo03.log
/u01/app/oracle/oradata/orclstdby/redo02.log
/u01/app/oracle/oradata/orclstdby/redo01.log
/u01/app/oracle/oradata/orclstdby/orclstdby_redo04.log
/u01/app/oracle/oradata/orclstdby/orclstdby_redo05.log
/u01/app/oracle/oradata/orclstdby/orclstdby_redo06.log
/u01/app/oracle/oradata/orclstdby/orclstdby_redo07.log
检查主备库监听状态
打开主库
SQL> select open_mode from v$database;

OPEN_MODE
--------------------
MOUNTED

SQL> alter database open;

Database altered.
打开备库并应用redo
SQL> select open_mode from v$database;

OPEN_MODE
--------------------
MOUNTED

SQL> alter database open;

Database altered.

SQL> alter database recover managed standby database using current logfile disconnect from session;

Database altered.
检查后有错误,参数文件可能需要修改后面继续。
Dataguard运行状态检查:
检查生产端:
SQL> select database_role from v$database;
DATABASE_ROLE
----------------
PRIMARY
SQL> select max(sequence#) from v$archived_log;
MAX(SEQUENCE#)
--------------
            18
SQL> select dest_name,status,error from v$archive_dest where dest_id=1 or dest_id=2;
DEST_NAME                      STATUS    ERROR
------------------------------ --------- ----------------------------------------------------------------------------------------------------
LOG_ARCHIVE_DEST_1             VALID
LOG_ARCHIVE_DEST_2             ERROR     ORA-16191: Primary log shipping client not logged on standby
SQL> show parameter log_archive_dest_2
NAME                                 TYPE        VALUE
------------------------------------ ----------- ------------------------------
log_archive_dest_2                   string      SERVICE=standby arch ASYNC VAL
                                                 ID_FOR=(ONLINE_LOGFILES,PRIMAR
                                                 Y_ROLE) DB_UNIQUE_NAME=orcl

SQL> show parameter log_archive_dest_state_2
NAME                                 TYPE        VALUE
------------------------------------ ----------- ------------------------------
log_archive_dest_state_2             string      ENABLE
SQL> show parameter remote_login_passwordfile
NAME                                 TYPE        VALUE
------------------------------------ ----------- ------------------------------
remote_login_passwordfile            string      EXCLUSIVE
经查,参数配置均没问题
检查DG端;
SQL> select database_role from v$database;
DATABASE_ROLE
----------------
PHYSICAL STANDBY
SQL> select max(sequence#) from v$archived_log;
MAX(SEQUENCE#)
--------------
            13

主库进程检查,应有lns进程:
SQL> select process from v$managed_standby;
PROCESS
---------
ARCH
ARCH
ARCH
ARCH
LNS
备库进程检查:
SQL> select process,pid,status from v$managed_standby;
PROCESS          PID STATUS
--------- ---------- ------------
ARCH            2400 CONNECTED
ARCH            2402 CONNECTED
ARCH            2404 CONNECTED
ARCH            2406 CONNECTED
未发现RFS进程
查alert日志
[oracle@primary trace]$ tail -f alert_orcl.log |more
      returning error ORA-16191
------------------------------------------------------------
Wed Aug 05 16:43:54 2015
Error 1017 received logging on to the standby
------------------------------------------------------------
Check that the primary and standby are using a password file
and remote_login_passwordfile is set to SHARED or EXCLUSIVE,
and that the SYS password is same in the password files.
      returning error ORA-16191
------------------------------------------------------------
remote_login_passwordfile参数配置,经查没问题
问题估计在密码文件这块,当初搭建DG时,在主备两端通过 orapwd file=orapworcl password=oracle 生成
现将DG端密码文件删掉,从生产端scp密码文件到DG端,问题解决
[oracle@standby dbs]$ rm -rf orapworcl
[oracle@primary dbs]$ scp orapworcl oracle@192.168.186.88:/u01/app/base/product/11.2.0/db_1/dbs/
oracle@192.168.186.88's password:
orapworcl                                                                                                                         100% 1536     1.5KB/s   00:00
验证生产端:
SQL> select database_role from v$database;
DATABASE_ROLE
----------------
PRIMARY
SQL> alter system set log_archive_dest_state_2 = DEFER scope=both;
System altered.
SQL> alter system set log_archive_dest_state_2 = ENABLE scope=both;
System altered.
SQL> select max(sequence#) from v$archived_log;
MAX(SEQUENCE#)
--------------
            20

SQL> select dest_name,status,error from v$archive_dest where dest_id=1 or dest_id=2;
DEST_NAME                      STATUS    ERROR
------------------------------ --------- ----------------------------------------------------------------------------------------------------
LOG_ARCHIVE_DEST_1             VALID
LOG_ARCHIVE_DEST_2             VALID
验证DG端:
SQL> select database_role from v$database;
DATABASE_ROLE
----------------
PHYSICAL STANDBY
SQL> select max(sequence#) from v$archived_log;
MAX(SEQUENCE#)
--------------
            20
SQL> select process,pid,status from v$managed_standby;
PROCESS          PID STATUS
--------- ---------- ------------
ARCH            2400 CONNECTED
ARCH            2402 CONNECTED
ARCH            2404 CONNECTED
ARCH            2406 CONNECTED
RFS             2611 IDLE
RFS             2613 IDLE
RFS             2615 IDLE
7 rows selected.
RFS进程正常,归档日志已经同步
如果进程有问题:
不存在的话,查看oracle alert.log日志,查看日志是否报错。如果日志没有报错,执行如下脚本

在主库和备库均执行

alter system set LOG_ARCHIVE_DEST_STATE_1=ENABLE;
alter system set LOG_ARCHIVE_DEST_STATE_2=ENABLE;

作者:若有所思11
链接:https://www.jianshu.com/p/c96b73f8df80
來源:简书
简书著作权归作者所有,任何形式的转载都请联系作者获得授权并注明出处。
从我这边实际情况看,把复制过来的orapworcl复制一个备库的实例名的密码文件,故障排除。
cp /u01/app/oracle/product/11.2.0/db_1/dbs/orapworcl /u01/app/oracle/product/11.2.0/db_1/dbs/orapworclstdby
校验命令:
SELECT STATUS, GAP_STATUS FROM V$ARCHIVE_DEST_STATUS WHERE DEST_ID = 2;
角色切换
Data Guard provides the V$DATAGUARD_STATS view that can be used to evaluate each standby database in terms of the currency of the data in the standby database, and the time it will take to perform a role transition if all available redo data is applied to the standby database. For example:
SQL> COLUMN NAME FORMAT A24
SQL> COLUMN VALUE FORMAT A16
SQL> COLUMN DATUM_TIME FORMAT A24
SQL> SELECT NAME, VALUE, DATUM_TIME FROM V$DATAGUARD_STATS;

NAME                     VALUE            DATUM_TIME
------------------------ ---------------- ------------------------
transport lag            +00 00:00:00     06/18/2009 12:22:06
apply lag                +00 00:00:00     06/18/2009 12:22:06
apply finish time        +00 00:00:00.000
estimated startup time   9
This query output shows that the standby database has received and applied all redo generated by the primary database. These statistics were computed using data received from the primary database as of 12:22.06 on 06/18/09.
If a standby database currently running in maximum protection mode will be involved in the failover, first place it in maximum performance mode by issuing the following statement on the standby database:
SQL> ALTER DATABASE SET STANDBY DATABASE TO MAXIMIZE PERFORMANCE;
Query the SWITCHOVER_STATUS column of the V$DATABASE view on the primary database.For example:
SQL> SELECT SWITCHOVER_STATUS FROM V$DATABASE;

SWITCHOVER_STATUS
 -----------------
 TO STANDBY
 1 row selected
Issue the following SQL statement on the target physical standby database:
SQL> ALTER DATABASE COMMIT TO SWITCHOVER TO PRIMARY WITH SESSION SHUTDOWN;
Open the new primary database.
SQL> ALTER DATABASE OPEN;
Start Redo Apply on the new physical standby database.
SQL> ALTER DATABASE RECOVER MANAGED STANDBY DATABASE USING CURRENT LOGFILE DISCONNECT FROM SESSION;
Restart Redo Apply if it has stopped at any of the other physical standby databases in your Data Guard configuration.
SQL> ALTER DATABASE RECOVER MANAGED STANDBY DATABASE USING CURRENT LOGFILE DISCONNECT FROM SESSION;
故障处理一
ORA-02253:an incompatible media recovery is active
天在standby 数据库上执行

alter database  recover managed standby database using current logfile disconnect from session;

报如下错误:

ERROR at line 1:
ORA-01153: an incompatible media recovery is active

从字面意思理解应该是“存在一个不兼容的介质恢复”。

仔细检查发现上面已经执行过一次

alter database  recover managed standby database disconnect from session;

猜想应该是重复启用日志应用所致。故取消应用

alter database recover managed standby database cancel;

重新开启应用

alter database  recover managed standby database using current logfile disconnect from session;

问题解决,没有报错。
参考
https://docs.oracle.com/cd/E11882_01/server.112/e41134/toc.htm