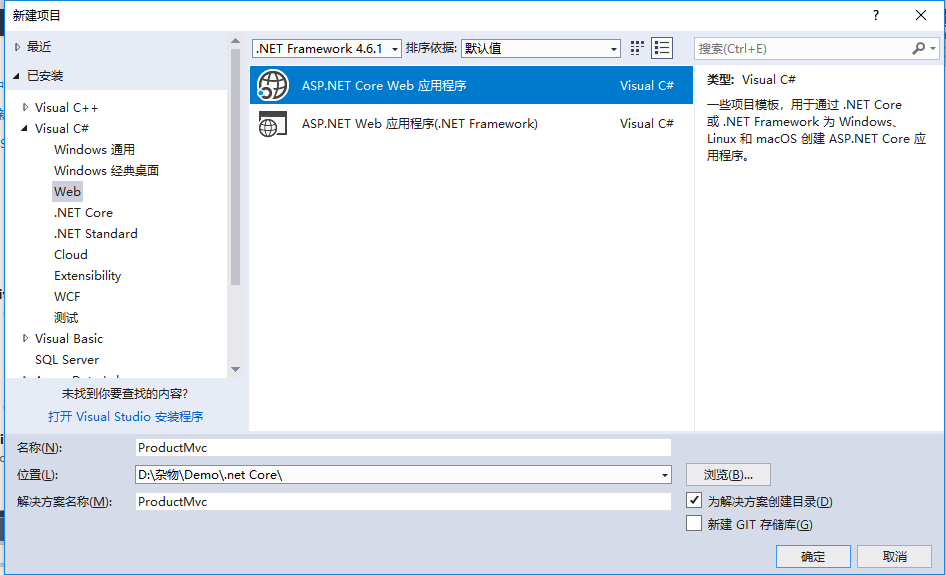
1.打开vs2017>Web

1:创建实体类:
namespace ProductMvc.Models
{
    //商品类型
    public class ProductType
    {
        public int ID { get; set; }
        public string TypeName { get; set; }

        public Product Product { get; set; }
    }
}


namespace ProductMvc.Models
{
    //商品
    public class Product
    {
        public int ID { get; set; }
        public string ProductName { get; set; }

        public DateTime ProductDate { get; set; }

        public decimal Price { get; set; }
        public int TypeID { get; set; }

        public ICollection<ProductType> ProductType;
    }
}
2:创建数据库上下文
namespace ProductMvc.Models
{
    public class ProductContext:DbContext
    {
        public ProductContext(DbContextOptions<ProductContext> options):base (options)
        {
        }
        public DbSet<ProductType> ProductType { get; set; }
        public DbSet<Product> Product { get; set; }
        protected override void OnModelCreating(ModelBuilder modelBuilder)
        {
            modelBuilder.Entity<ProductType>().ToTable("ProductType");
            modelBuilder.Entity<Product>().ToTable("Product");
        }

    }
}
3:打开Startup.cs文件,上下文依赖注入关系
    public void ConfigureServices(IServiceCollection services)
        {
            services.AddDbContext<SchoolContext>(options =>
            options.UseSqlServer(Configuration.GetConnectionString("ProductConnection")));
            services.AddMvc();
        }
打开appsettings.json文件并添加连接字符串
{
  "Logging": {
    "IncludeScopes": false,
    "LogLevel": {
      "Default": "Warning"
    }
  },
  "ConnectionStrings": {
    "ProductConnection": "Server=(localdb)\mssqllocaldb;Database=DBProcuct;Trusted_Connection=True;MultipleActiveResultSets=true"
  }
}
添加数据:添加类DbInitializer
 public class DbInitializer
    {
        public static void Initialize(ProductContext context)
        {
            context.Database.EnsureCreated();
            if (context.Product.Any())
            {
                return;
            }
            var products = new Product[]
            {
                new Product{ProductName="牙膏",ProductDate=DateTime.Parse("2017-12-12"),Price=25,TypeID=1},
                new Product{ProductName="毛巾",ProductDate=DateTime.Parse("2017-12-15"),Price=15,TypeID=1},
                 new Product{ProductName="电磁炉",ProductDate=DateTime.Parse("2017-12-12"),Price=25,TypeID=2},
                new Product{ProductName="苹果",ProductDate=DateTime.Parse("2018-01-15"),Price=6,TypeID=3},
            };
            foreach (var item in products)
            {
                context.Product.Add(item);
            }
            context.SaveChanges();

            var productType = new ProductType[]
                 {
                     new ProductType{ID=1,TypeName="百货类"},
                     new ProductType{ID=2,TypeName="电器类"},
                     new ProductType{ID=3,TypeName="水果类"},
                 };
            foreach (var item in productType)
            {
                context.ProductType.Add(item);
            }
            context.SaveChanges();

        }
    }
在Program.cs,修改Main方法来执行以下操作,在应用程序启动:
  using (var scope = BuildWebHost(args).Services.CreateScope())
            {
                var services = scope.ServiceProvider;
                try
                {
                    var context = services.GetRequiredService<ProductContext>();
                    DbInitializer.Initialize(context);
                }
                catch (Exception ex)
                {
                    var logger = services.GetRequiredService<ILogger<Program>>();
                    logger.LogError(ex, "Have error!!!");

                }
            }
            BuildWebHost(args).Run();
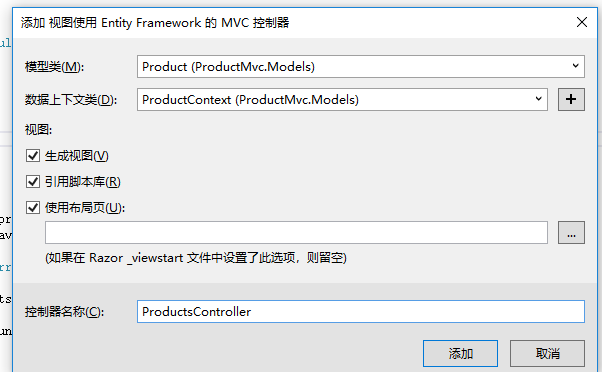
添加控制器和视图:视图带有EF的MVC控制器

以上操作即创建好了一个简单的 .net Core项目