数字布料模拟技术简介
http://www.tsinghuadmpx.com/zhuantilanmu/shuzibuliaomonijishu/2010/0205/1157.html
导读:首先,这是一篇牵扯到数学和物理知识的文章,如果您对文中所涉及的公式有所不明白的话,请在边上摆上一本《高等数学》以及一些物理学常识的知识。
首先来讲布,第一个问题是:为什么要模拟布的运动?游戏中很多地方都有布,那么目前大部分的做法是什么样的呢?目前大多数游戏所采用的方法是对布建立骨骼,然后由美工针对每个动作做不同的布料骨骼动画,这种做法带来的弊端就是布料不会随着周围环境的变化来变化。比如说,周围刮来一阵风,或者骑在马上,披风不能披落在马背上,等等之类的。而且如果游戏中动作很多的情况下,针对每个动作都需要做不同的布料骨骼的调整,加大的美工的工作量以及工作复杂度,另外如果披风的骨骼的数目不多的话,还会导致即使是调出来的动作也会产生很不美观的效果。
OK,罗嗦了一大堆,那么我们要实现什么呢?我们要实现一套针对布料的物理系统,要求在没有风的情况下,布料会受重力的影响,慢慢的飘落,并且在有风刮起来的时候,你的布要能“随风飘摆”。
下面来看看传统物理中,布料的模型。根据流体力学来说,布料上每个顶点的力可以用圣维南方程组来求,但是在数学里面来说,圣维南方程组是没有精确解的,那么我们就需来设计一种模型来求该方程的近似解。无数的物理高手,在模拟布的过程中,总结出了两套经典的模型,一套是“质点-弹簧”模型,另外一套是由微软中国研究院研究出来的“半钢体-复杂摆”模型,在我的布料引擎中所用到的是“质点-弹簧”模型,理由是该模型所存在的时间比“半钢体-复杂摆”模型要久很多,在稳定性,以及效率方面几乎没有风险。而如果采用“半钢体-复杂摆”,这还只是一个实验品,目前来讲还没有任何的应用,采用这种模型有一定的风险。
那么我们下面就来详细看看经典的“质点-弹簧”模型究竟是怎么样一回事:
在“质点-弹簧”模型中,任何的流体(柔体)都被分解为由N个质点,每个质点之间由各种不同方式的弹簧连接着。主要的连接方式有三种,一种是矩形连接法,即每个质点和他的“上下左右”四个点用弹簧进行连接。另外一种是交叉连接法,即每个质点和他的“左上,右下,左下,右下”四个点用弹簧进行连接。最后一种方法叫隔点连接法,既每个质点和他的“左边的左边,右边的右边,上面的上面和下面的下面”四个点用弹簧体进行连接,这种连接方式主要是用来简化之后的关于弹簧的弯取应力的计算,一般要和前两种连接方式混合起来使用。在我的布料运算的DEMO中,我采用了第一中矩形连接法,然后自己精确计算弹簧的弯取应力来实现的。
物理模型选定之后,就需要我们来针对传送进来的顶点进行编程进行建模,一般的方法是将布料的顶点,按照从左到右,从上到下的顺序传递进来,然后按照布料的宽度来进行程序上的物理建模。当模型建立好之后,我们就需要每一帧对模型中的每一个质点进行物理运算:
那么每个质点所受到的力具体该如何算呢?这里分为两步来进行计算,首先是内力,然后是外力:
每个质点都受到由弹簧建立成的模型所带来的弹簧的拉力,以及弹簧本身的弯取应力。
那么首先来算弹簧的拉力,首先获得当前质点在空间中的位置P0,然后获得和他用弹簧相连的周围各个质点的位置P1-P5,然后循环计算P1-P5和P0的距离,并用这个距离减去弹簧本身的长度,然后乘以弹簧的虎克系数,就是这个点在这一帧受到的弹簧拉力。
另外来算弹簧的弯取应力,在矩形模型中,则是通过计算“上面质点”和“下面质点”的夹角以及“左边质点”和“右边质点”的夹角来乘以一个弯取应系数来获得一个以当前质点为圆,两个质点的距离为半径的圆在邻质点的切线方向的一个力。
到这里,布料的内力都已经计算完成了,那么就需要来计算布料所受的外力了。
首先是重力,重力是根据质点的密度(质量)乘以重力加速度的一个值,然后是一个全局的阻力,否则弹簧会不停的弹来弹去没有个完,注意,这里的被乘数一定要是上一帧的速度向量,而不是当前的力向量。接下来就是风力,我对风力的处理可以理解为在质点的法线方向施加的一个力,力的大小跟风力向量以及质点的方向的夹角有关,当夹角为2*PI的时候,风力达到最大。
至此,质点的内力和外力都计算完毕,那么接下来如果通过这个力来获得下一帧的质点的位置呢?首先根据质点的质量和合力的大小来获得一个带方向的加速度,这一步只需要将算出来的力乘以1/质点的质量,得到加速度之后,就可以根据vt = v0 + at来计算这一帧的速度向量,随后将当前质点在空间中的位置加上v * t就是下一帧的质点的位置。
至此,对于布的模拟已经完全搞定了,不用怀疑,就这么简单,但是目前所实现的东西还无法应用,为什么?很简单,因为还没有做布的碰撞,如果一块披风在人身上穿过来穿过去的,那么做不做布还有什么意义?
对布做精确碰撞检测?这是不可能的,如果你要这样做你的游戏将只有20帧不到的FPS,用AABB包围盒碰撞?你希望看到一阵风吹过来,你的披风贴在一个正正方方的“人”上面?那么这里就提出一个新的概念“椭球包围体”碰撞。注意,这里的椭球体是不存在的,只是一个数学模型,并不是由三角型等组成的,这种椭球体可以绑定在人物骨骼上,随人物骨骼的运动而动,比如说人的头,就是一个x-y-z轴相等的椭球体,髋骨,盆骨,肩胛骨等都可以比较好的用椭球体体现出来。
椭球体是个很有意思的东西,在做FPS类游戏的时候,要实现上下楼梯的效果,用椭球包围体碰撞就是个非常好的方法,而在这里,不是椭球体跟三角型碰,而是顶点跟椭球体碰。那么下面来看看究竟如何比较好的描叙,以及来使用一个椭球体:
椭球体用三个向量来进行描叙,一个是椭球体在空间中的中点,另外一个向量是储存椭球体在x,y,z轴三个方向的半径的长度,另外一个向量则是指定椭球体的方向,我在DEMO中是以椭球体x轴的方向为椭球体的方向。
椭球体的方程是:(x^2 / a^2 + y^2 / b^2 + z^2 / c^2) = 1
那么相应的碰撞检测就是将某个顶点的x,y,z三个值带入方程,看结果是大于1还是小于1,如果小于1则发生了碰撞。那么发生碰撞之后怎么办呢?首先需要把这个顶点强行移动到离椭球体表面最近的点,这一步通过解从椭球体中点,过那个顶点的射线和椭球体方程一起连解,可以获得那个点,具体的推导这里就不列出来了,化简后方程如下:
设:x0,y0,z0为椭球体中点,x1,y1,z1为在椭球体内一点:
那么离它最近的椭球体表面一点为:
t = sqrt(1 / (sqr((x1-x0)/a) + sqr((y1-y0)/b) + sqr((z1-z0)/c)));
x = x0 + t*(x1-x0);
y = y0 + t*(y1-y0);
z = z0 + t*(z1-z0);
最后,由于整个布料的运算是基于物理模型的,所以并不能直接把它弄到椭球体表面就了事了,应该给它一个在椭球体上这一点的法线方向的支持力。
椭球体的法线的计算在化简之后为:
D3DXVECTOR3(sqr((x - x0) / a),sqr((y - y0) / b),sqr((z - z0) / c));
然后通过一个点乘算出当前质点所受的力在负法线方向的分量,然后用当前的力向量减去这个分量即可,之后再需要乘上一个这个椭球体的摩擦系数。
至此,整个布料运算+椭球体碰撞的模型介绍完毕。
http://www.andrew-hoyer.com/experiments/cloth
Cloth Simulation:
Cloths
 Having mastered the string. It is now very easy to make a cloth. Take a close look at a cloth, and you will find that it is simply a whole load of interwoven strings. You just need to add an extra dimension to your string routine. Imagine a cloth to be a sheet of points all connected together by springs. If two points get pulled further apart, then they experience a force pulling them together and vice versa.
This very simple model of a cloth seems to be resonably accurate. I have managed to get a very realistic cloth, draping over tables and wrinkling up at the edges (see picture below). You can lay a cloth over a torus, then drop a sphere onto it so that they both fall through the hole and the cloth ends up in a crumpled heap on the floor. I have tested this cloth routine against a real sheet and it compares very well. I have rendered some nice animation files of cloth which I will put here if I have space.
Actually, the picture above is rather misleading. It implies that you compare each point with its 4 nearest neighbours. Infact, if you do this, you will find that the cloth behaves much more like a fisherman's net. It is best if the points are connected to at least their 8 nearest neighbours. This will produce a very flexable cloth. If you go one step wider, and join to the 24 nearest neighbours, you will get a more realistic, stiffer cloth, though it's much slower to compute.
Here's some pseudo code do describe a massless cloth routine:
Every point on the cloth moves at a rate proportional to the sum of the forces acting on it from the neighbouring points.Create a 2-dimensional array of co-ordinates to hold the x, y and z positions of the cloth in space. Initialise the values of cloth(p,q) to (p,q,0). You will need two of these arrays. One to hold the current state of the cloth, and the other to hold the new cloth that is being calculated. When you have finished calculating the cloth, copy all the values from your second array back to the first. For those who don't already know, a vector is an (x, y, z) of numbers. Numbers here are considered non-integers.
cloth1 (0 to 31, 0 to 31)
cloth2 (0 to 31, 0 to 31)

Variables:

VECTOR: MovementVector
VECTOR: SpringVector
VECTOR: ForceVector
VECTOR: Gravity  (initialised to (0, 0, g) where g is gravity, 0.02 is a good number)
NUMBER: Length
NUMBER: ForceScaler
NUMBER: NormalLength

For every point (p,q) on the cloth:

    MovementVector = Gravity

    For each of the 24 neighbouring points (NB obviously less at edges)
	SpringVector = (position in space of neighbour) - (position in space of point (p,q))
	Length       = length of SpringVector
	NormalLength = The length SpringVector would be if the cloth were unstretched
	ForceScaler  = (Length - NormalLength) / NormalLength
	SpringVector = SpringVector * (1/Length)
	ForceVector  = SpringVector * ForceScaler
	ForceVector  = ForceVector * SmallAmount
	add ForceVector to MovementVector
    end of loop

    Add MovementVector to cloth1(p,q) and store it in cloth2(p,q)

    make sure this point does not move inside an object
end of loop

Copy all the values in cloth2 to cloth1

keep doing all this forever
You will need some objects for the cloth to interact with. The simplest is a floor. Check each point on the cloth to see if it is below the floor, and if it is, then move it to the surface.
It is quite easy to make a sphere for the cloth to fall over. Check each point to see if it is inside the sphere. If it is, then move it to the nearest point on the surface of the sphere.
NUMBER: Distance
Distance = distance from the point(p,q) to the center of the sphere

if Distance < (radius of sphere) then:
    ForceVector = (position of point in space) - (center of sphere)
    ForceVector = Forcevector / Distance * radius
    point(p,q) = (center of sphere) + ForceVector
end if
It is also easy to make a torus and other objects. I'll leave that up to you though.Adding wind


Pseudocode to calculate effect of wind on cloth:
VECTOR: force
VECTOR: normal
VECTOR: wind

set force vector to (0,0,0) on all points on cloth

loop through all triangles
    force = unitvector(normal) * dotproduct(normal, wind)
    add force to all points making up this triangle
end of loop

loop through all points on cloth
    add gravity to force
    add force to velocity
end of loop

	-- rest of cloth routine --
 | Just to spur you on to make your own cloth routine, and to show how useful it can be for importing into proper rendering engines, here's one I did earlier. This cloth was draped over a cylinder and a torus to make the edges rounded, then imported into 3D Studio. Definately very cool indeed. Might make a good chat-up line..."hello, wanna come home and see my cloths...."
|
http://www.paulsprojects.net/opengl/cloth/cloth.html
Cloth Simulation


Description:
This demo displays a cloth modelled using a "ball-and-spring" model. A grid of balls is created and these are linked using springs. Each ball is connected to all 8 neighbours (up, down, left, right and diagonally) and to its next-but-one neighbour in the up, down, left and right directions.
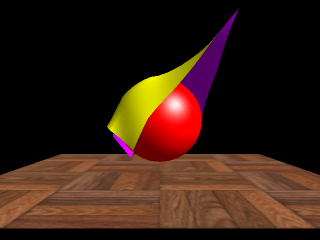
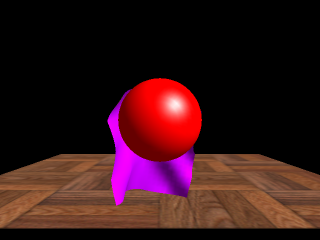
The cloth begins suspended from its four corners above a sphere, above the floor. Pressing 1, 2, 3 or 4 will release a corner.
The physics for the model are updated every 10ms. For each ball, the overall force on it due to gravity and the springs is calculated. This is then used to calculate a new position and velocity. If the new position is within the sphere or below the floor, the ball is moved outside the object.
The cloth can be drawn in two ways. Either triangles can be drawn between the balls to create a simple triangle mesh, or each 4x4 subgrid of balls can be submitted to the OpenGL evaluators for interpolation and subdivision to create a smoother look.
