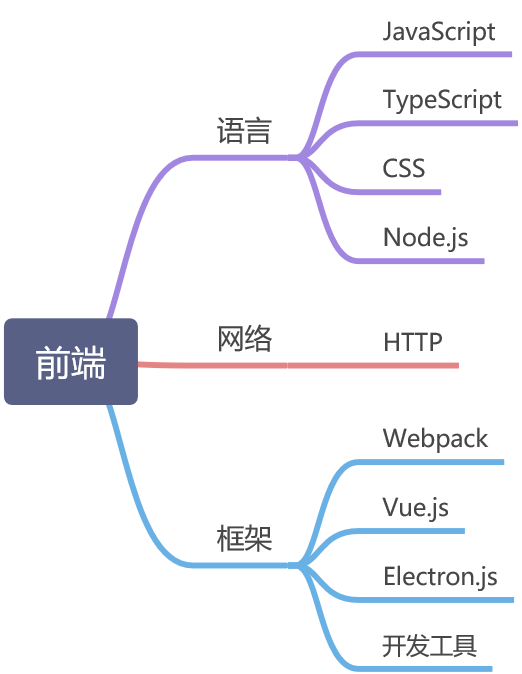
学习路径
Node.js·
1、Node.js入门
1.1 构建基础的HTTP服务器
让我们先从服务器模块开始。在你的项目的根目录下创建一个叫server.js的文件,并写入以下代码:
var http = require("http");

http.createServer(function(request, response) {
  response.writeHead(200, {"Content-Type": "text/plain"});
  response.write("Hello World");
  response.end();
}).listen(8888);
搞定!你刚刚完成了一个可以工作的HTTP服务器。为了证明这一点,我们来运行并且测试这段代码。首先,用Node.js执行你的脚本:
node server.js
接下来,打开浏览器访问http://localhost:8888/,你会看到一个写着“Hello World”的网页。
1)第一行请求(require)Node.js自带的 http 模块,并且把它赋值给 http 变量。
2)接下来我们调用http模块提供的函数: createServer 。这个函数会返回一个对象,这个对象有一个叫做 listen 的方法,这个方法有一个数值参数,指定这个HTTP服务器监听的端口号。
我们本来可以用这样的代码来启动服务器并侦听8888端口:
var http = require("http");

var server = http.createServer();
server.listen(8888);
这段代码只会启动一个侦听8888端口的服务器,它不做任何别的事情,甚至连请求都不会应答。
1.2 基于事件驱动的回调
当我们使用 http.createServer 方法的时候,我们当然不只是想要一个侦听某个端口的服务器,我们还想要它在服务器收到一个HTTP请求的时候做点什么。
问题是,这是异步的:请求任何时候都可能到达,但是我们的服务器却跑在一个单进程中。
写PHP应用的时候,我们一点也不为此担心:任何时候当有请求进入的时候,网页服务器(通常是Apache)就为这一请求新建一个进程,并且开始从头到尾执行相应的PHP脚本。
我们利用node.js创建了服务器,并且向创建它的方法传递了一个函数。无论何时我们的服务器收到一个请求,这个函数就会被调用。这个就是传说中的 回调 。我们给某个方法传递了一个函数,这个方法在有相应事件发生时调用这个函数来进行 回调 。
var http = require("http");

function onRequest(request, response) {
  console.log("Request received.");
  response.writeHead(200, {"Content-Type": "text/plain"});
  response.write("Hello World");
  response.end();
}

http.createServer(onRequest).listen(8888);

console.log("Server has started.");
注意:在 onRequest (我们的回调函数)触发的地方,我用 console.log 输出了一段文本。在HTTP服务器开始工作之后,也输出一段文本。
接下来我们简单分析一下我们服务器代码中剩下的部分,也就是我们的回调函数 onRequest() 的主体部分。
当回调启动,我们的 onRequest() 函数被触发的时候,有两个参数被传入: request 和 response 。
它们是对象,你可以使用它们的方法来处理HTTP请求的细节,并且响应请求(比如向发出请求的浏览器发回一些东西)。
所以我们的代码就是:当收到请求时,使用 response.writeHead() 函数发送一个HTTP状态200和HTTP头的内容类型(content-type),使用 response.write() 函数在HTTP相应主体中发送文本“Hello World"。
最后,我们调用 response.end() 完成响应。
1.3 代码模块化
目前,我们的HTTP服务器需要导出的功能非常简单,因为请求服务器模块的脚本仅仅是需要启动服务器而已
我们把我们的服务器脚本放到一个叫做 start 的函数里,然后我们会导出这个函数。
var http = require("http");

function start() {
  function onRequest(request, response) {
    console.log("Request received.");
    response.writeHead(200, {"Content-Type": "text/plain"});
    response.write("Hello World");
    response.end();
  }

  http.createServer(onRequest).listen(8888);
  console.log("Server has started.");
}

exports.start = start;
这样,我们现在就可以创建我们的主文件 index.js 并在其中启动我们的HTTP了,虽然服务器的代码还在 server.js 中。
创建 index.js 文件并写入以下内容:
var server = require("./server");

server.start();
正如你所看到的,我们可以像使用任何其他的内置模块一样使用server模块:请求这个文件并把它指向一个变量,其中已导出的函数就可以被我们使用了。
好了。我们现在就可以从我们的主要脚本启动我们的的应用了,而它还是老样子:
node index.js
1.4 处理请求及路由
我们需要的所有数据都会包含在request对象中,该对象作为onRequest()回调函数的第一个参数传递。但是为了解析这些数据,我们需要额外的Node.JS模块,它们分别是url和querystring模块。
                               url.parse(string).query
                                           |
           url.parse(string).pathname      |
                       |                   |
                       |                   |
                     ------ -------------------
http://localhost:8888/start?foo=bar&hello=world
                                ---       -----
                                 |          |
                                 |          |
              querystring(string)["foo"]    |
                                            |
                         querystring(string)["hello"]
当然我们也可以用querystring模块来解析POST请求体中的参数,稍后会有演示。
现在我们来给onRequest()函数加上一些逻辑,用来找出浏览器请求的URL路径:
var http = require("http");
var url = require("url");

function start() {
  function onRequest(request, response) {
    var pathname = url.parse(request.url).pathname;
    console.log("Request for " + pathname + " received.");
    response.writeHead(200, {"Content-Type": "text/plain"});
    response.write("Hello World");
    response.end();
  }

  http.createServer(onRequest).listen(8888);
  console.log("Server has started.");
}

exports.start = start;
现在我们可以来编写路由了,建立一个名为router.js的文件,添加以下内容:
function route(pathname) {
  console.log("About to route a request for " + pathname);
}

exports.route = route;
首先,我们来扩展一下服务器的start()函数,以便将路由函数作为参数传递过去:
var http = require("http");
var url = require("url");

function start(route) {
  function onRequest(request, response) {
    var pathname = url.parse(request.url).pathname;
    console.log("Request for " + pathname + " received.");

    route(pathname);

    response.writeHead(200, {"Content-Type": "text/plain"});
    response.write("Hello World");
    response.end();
  }

  http.createServer(onRequest).listen(8888);
  console.log("Server has started.");
}

exports.start = start;
同时,我们会相应扩展index.js,使得路由函数可以被注入到服务器中:
var server = require("./server");
var router = require("./router");

server.start(router.route)
现在启动应用(node index.js,始终记得这个命令行)
bash$ node index.js
Request for /foo received.
About to route a request for /foo
1.5 requestHandlers模块
那么我们要怎么传递这些请求处理程序呢?别看现在我们只有2个处理程序,在一个真实的应用中,请求处理程序的数量会不断增加,我们当然不想每次有一个新的URL或请求处理程序时,都要为了在路由里完成请求到处理程序的映射而反复折腾。除此之外,在路由里有一大堆if request == x then call handler y也使得系统丑陋不堪。
应用程序需要新的部件,因此加入新的模块 -- 已经无需为此感到新奇了。我们来创建一个叫做requestHandlers的模块,并对于每一个请求处理程序,添加一个占位用函数,随后将这些函数作为模块的方法导出:
function start() {
  console.log("Request handler 'start' was called.");
}

function upload() {
  console.log("Request handler 'upload' was called.");
}

exports.start = start;
exports.upload = upload;
这样我们就可以把请求处理程序和路由模块连接起来,让路由“有路可寻”。
最后再回到代码上来。现在我们已经确定将一系列请求处理程序通过一个对象来传递,并且需要使用松耦合的方式将这个对象注入到route()函数中。
我们先将这个对象引入到主文件index.js中:
var server = require("./server");
var router = require("./router");
var requestHandlers = require("./requestHandlers");

var handle = {}
handle["/"] = requestHandlers.start;
handle["/start"] = requestHandlers.start;
handle["/upload"] = requestHandlers.upload;

server.start(router.route, handle);
在完成了对象的定义后,我们把它作为额外的参数传递给服务器,为此将server.js修改如下:
var http = require("http");
var url = require("url");

function start(route, handle) {
  function onRequest(request, response) {
    var pathname = url.parse(request.url).pathname;
    console.log("Request for " + pathname + " received.");

    route(handle, pathname);

    response.writeHead(200, {"Content-Type": "text/plain"});
    response.write("Hello World");
    response.end();
  }

  http.createServer(onRequest).listen(8888);
  console.log("Server has started.");
}

exports.start = start;
这样我们就在start()函数里添加了handle参数,并且把handle对象作为第一个参数传递给了route()回调函数。
然后我们相应地在route.js文件中修改route()函数:
function route(handle, pathname) {
  console.log("About to route a request for " + pathname);
  if (typeof handle[pathname] === 'function') {
    handle[pathname]();
  } else {
    console.log("No request handler found for " + pathname);
  }
}

exports.route = route;
有了这些,我们就把服务器、路由和请求处理程序在一起了。现在我们启动应用程序并在浏览器中访问http://localhost:8888/start,以下日志可以说明系统调用了正确的请求处理程序:
Server has started.
Request for /start received.
About to route a request for /start
Request handler 'start' was called.
并且在浏览器中打开http://localhost:8888/可以看到这个请求同样被start请求处理程序处理了:
Request for / received.
About to route a request for /
Request handler 'start' was called.
1.6 阻塞与非阻塞
Node一向是这样来标榜自己的:“在node中除了代码,所有一切都是并行执行的”。
这句话的意思是说,Node.js可以在不新增额外线程的情况下,依然可以对任务进行并行处理 —— Node.js是单线程的。它通过事件轮询(event loop)来实现并行操作,对此,我们应该要充分利用这一点 —— 尽可能的避免阻塞操作,取而代之,多使用非阻塞操作。
然而,要用非阻塞操作,我们需要使用回调,通过将函数作为参数传递给其他需要花时间做处理的函数(比方说,休眠10秒,或者查询数据库,又或者是进行大量的计算)。
这次我们还是拿start请求处理程序来“开刀”。将其修改成如下形式:
var exec = require("child_process").exec;

function start() {
  console.log("Request handler 'start' was called.");
  var content = "empty";

  exec("ls -lah", function (error, stdout, stderr) {
    content = stdout;
  });

  return content;
}

function upload() {
  console.log("Request handler 'upload' was called.");
  return "Hello Upload";
}

exports.start = start;
exports.upload = upload;
上述代码中,我们引入了一个新的Node.js模块,child_process。之所以用它,是为了实现一个既简单又实用的非阻塞操作:exec()。
exec()做了什么呢?它从Node.js来执行一个shell命令。在上述例子中,我们用它来获取当前目录下所有的文件(“ls -lah”),然后,当/startURL请求的时候将文件信息输出到浏览器中。
上述代码是非常直观的: 创建了一个新的变量content(初始值为“empty”),执行“ls -lah”命令,将结果赋值给content,最后将content返回。
和往常一样,我们启动服务器,然后访问“http://localhost:8888/start” 。
之后会载入一个漂亮的web页面,其内容为“empty”。怎么回事?
这个时候,你可能大致已经猜到了,exec()在非阻塞这块发挥了神奇的功效。它其实是个很好的东西,有了它,我们可以执行非常耗时的shell操作而无需迫使我们的应用停下来等待该操作。
1.7 以非阻塞操作进行请求响应
先从server.js开始:
var http = require("http");
var url = require("url");

function start(route, handle) {
  function onRequest(request, response) {
    var pathname = url.parse(request.url).pathname;
    console.log("Request for " + pathname + " received.");

    route(handle, pathname, response);
  }

  http.createServer(onRequest).listen(8888);
  console.log("Server has started.");
}

exports.start = start;
router.js:
function route(handle, pathname, response) {
  console.log("About to route a request for " + pathname);
  if (typeof handle[pathname] === 'function') {
    handle[pathname](response);
  } else {
    console.log("No request handler found for " + pathname);
    response.writeHead(404, {"Content-Type": "text/plain"});
    response.write("404 Not found");
    response.end();
  }
}

exports.route = route;
将requestHandlers.js修改为如下形式:
var exec = require("child_process").exec;

function start(response) {
  console.log("Request handler 'start' was called.");

  exec("find /",
    { timeout: 10000, maxBuffer: 20000*1024 },
    function (error, stdout, stderr) {
      response.writeHead(200, {"Content-Type": "text/plain"});
      response.write(stdout);
      response.end();
    });
}

function upload(response) {
  console.log("Request handler 'upload' was called.");
  response.writeHead(200, {"Content-Type": "text/plain"});
  response.write("Hello Upload");
  response.end();
}

exports.start = start;
exports.upload = upload;
这样一来,当请求http://localhost:8888/start的时候,会花10秒钟的时间才载入,而当请求http://localhost:8888/upload的时候,会立即响应,纵然这个时候/start响应还在处理中。
1.8 应用-POST
这里采用非阻塞方式处理是明智的,因为POST请求一般都比较“重” —— 用户可能会输入大量的内容。用阻塞的方式处理大数据量的请求必然会导致用户操作的阻塞。
为了使整个过程非阻塞,Node.js会将POST数据拆分成很多小的数据块,然后通过触发特定的事件,将这些小数据块传递给回调函数。这里的特定的事件有data事件(表示新的小数据块到达了)以及end事件(表示所有的数据都已经接收完毕)。
我们需要告诉Node.js当这些事件触发的时候,回调哪些函数。怎么告诉呢? 我们通过在request对象上注册监听器(listener) 来实现。这里的request对象是每次接收到HTTP请求时候,都会把该对象传递给onRequest回调函数。
如下所示:
request.addListener("data", function(chunk) {
  // called when a new chunk of data was received
});

request.addListener("end", function() {
  // called when all chunks of data have been received
});
先从server.js开始:
var http = require("http");
var url = require("url");

function start(route, handle) {
  function onRequest(request, response) {
    var postData = "";
    var pathname = url.parse(request.url).pathname;
    console.log("Request for " + pathname + " received.");

    request.setEncoding("utf8");

    request.addListener("data", function(postDataChunk) {
      postData += postDataChunk;
      console.log("Received POST data chunk '"+
      postDataChunk + "'.");
    });

    request.addListener("end", function() {
      route(handle, pathname, response, postData);
    });

  }

  http.createServer(onRequest).listen(8888);
  console.log("Server has started.");
}

exports.start = start;
上述代码做了三件事情: 首先,我们设置了接收数据的编码格式为UTF-8,然后注册了“data”事件的监听器,用于收集每次接收到的新数据块,并将其赋值给postData 变量,最后,我们将请求路由的调用移到end事件处理程序中,以确保它只会当所有数据接收完毕后才触发,并且只触发一次。我们同时还把POST数据传递给请求路由,因为这些数据,请求处理程序会用到。
修改router.js为如下形式:
function route(handle, pathname, response, postData) {
  console.log("About to route a request for " + pathname);
  if (typeof handle[pathname] === 'function') {
    handle[pathname](response, postData);
  } else {
    console.log("No request handler found for " + pathname);
    response.writeHead(404, {"Content-Type": "text/plain"});
    response.write("404 Not found");
    response.end();
  }
}

exports.route = route;
在requestHandlers.js中,我们将数据包含在对upload请求的响应中:
function start(response, postData) {
  console.log("Request handler 'start' was called.");

  var body = '<html>'+
    '<head>'+
    '<meta http-equiv="Content-Type" content="text/html; '+
    'charset=UTF-8" />'+
    '</head>'+
    '<body>'+
    '<form action="/upload" method="post">'+
    '<textarea name="text" rows="20" cols="60"></textarea>'+
    '<input type="submit" value="Submit text" />'+
    '</form>'+
    '</body>'+
    '</html>';

    response.writeHead(200, {"Content-Type": "text/html"});
    response.write(body);
    response.end();
}

function upload(response, postData) {
  console.log("Request handler 'upload' was called.");
  response.writeHead(200, {"Content-Type": "text/plain"});
  response.write("You've sent: " + postData);
  response.end();
}

exports.start = start;
exports.upload = upload;
现在可以接收POST数据并在请求处理程序中处理该数据了。
我们可以使用此前介绍过的querystring模块来实现:
var querystring = require("querystring");

function start(response, postData) {
  console.log("Request handler 'start' was called.");

  var body = '<html>'+
    '<head>'+
    '<meta http-equiv="Content-Type" content="text/html; '+
    'charset=UTF-8" />'+
    '</head>'+
    '<body>'+
    '<form action="/upload" method="post">'+
    '<textarea name="text" rows="20" cols="60"></textarea>'+
    '<input type="submit" value="Submit text" />'+
    '</form>'+
    '</body>'+
    '</html>';

    response.writeHead(200, {"Content-Type": "text/html"});
    response.write(body);
    response.end();
}

function upload(response, postData) {
  console.log("Request handler 'upload' was called.");
  response.writeHead(200, {"Content-Type": "text/plain"});
  response.write("You've sent the text: "+
  querystring.parse(postData).text);
  response.end();
}

exports.start = start;
exports.upload = upload;
以上就是关于处理POST数据的全部内容。
1.9 处理文件上传
使用该模块,首先需要安装该模块。Node.js有它自己的包管理器,叫NPM。它可以让安装Node.js的外部模块变得非常方便。通过如下一条命令就可以完成该模块的安装:
npm install formidable
我们来添加/showURL的请求处理程序,该处理程序直接硬编码将文件/tmp/test.png内容展示到浏览器中。当然了,首先需要将该图片保存到这个位置才行。
将requestHandlers.js修改为如下形式:
var querystring = require("querystring"),
    fs = require("fs"),
    formidable = require("formidable");

function start(response) {
  console.log("Request handler 'start' was called.");

  var body = '<html>'+
    '<head>'+
    '<meta http-equiv="Content-Type" content="text/html; '+
    'charset=UTF-8" />'+
    '</head>'+
    '<body>'+
    '<form action="/upload" enctype="multipart/form-data" '+
    'method="post">'+
    '<input type="file" name="upload" multiple="multiple">'+
    '<input type="submit" value="Upload file" />'+
    '</form>'+
    '</body>'+
    '</html>';

    response.writeHead(200, {"Content-Type": "text/html"});
    response.write(body);
    response.end();
}

function upload(response, request) {
  console.log("Request handler 'upload' was called.");

  var form = new formidable.IncomingForm();
  console.log("about to parse");
  form.parse(request, function(error, fields, files) {
    console.log("parsing done");
    fs.renameSync(files.upload.path, "/tmp/test.png");
    response.writeHead(200, {"Content-Type": "text/html"});
    response.write("received image:<br/>");
    response.write("<img src='/show' />");
    response.end();
  });
}

function show(response) {
  console.log("Request handler 'show' was called.");
  fs.readFile("/tmp/test.png", "binary", function(error, file) {
    if(error) {
      response.writeHead(500