一、什么是springcloud,有什么作用
Spring Cloud是一系列框架的有序集合。它利用Spring Boot的开发便利性巧妙地简化了分布式系统基础设施的开发,如服务发现注册、配置中心、消息总线、负载均衡、断路器、数据监控等,都可以用Spring Boot的开发风格做到一键启动和部署。
二、springcloud的基本使用
1.服务的注册与发现
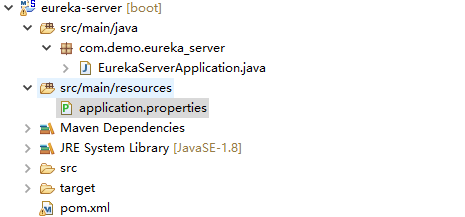
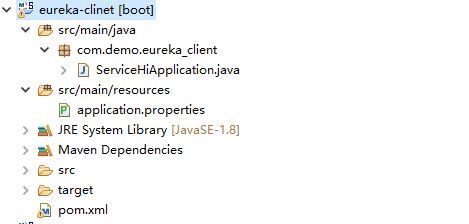
①创建一个parent maven项目springcloud,然后在该maven项目下面创建两个子项目eureka-server,eureka-client
Ⅰ、springcloud

<project xmlns="http://maven.apache.org/POM/4.0.0" xmlns:xsi="http://www.w3.org/2001/XMLSchema-instance" xsi:schemaLocation="http://maven.apache.org/POM/4.0.0 http://maven.apache.org/xsd/maven-4.0.0.xsd">
  <modelVersion>4.0.0</modelVersion>
  <groupId>com.demo</groupId>
  <artifactId>springcloud</artifactId>
  <version>0.0.1-SNAPSHOT</version>
  <packaging>pom</packaging>


  <modules>
      <module>eureka-server</module>
      <module>eureka-clinet</module>
  </modules>

  <parent>
        <groupId>org.springframework.boot</groupId>
        <artifactId>spring-boot-starter-parent</artifactId>
        <version>2.0.4.RELEASE</version>
        <relativePath/>
    </parent>

    <properties>
        <project.build.sourceEncoding>UTF-8</project.build.sourceEncoding>
        <project.reporting.outputEncoding>UTF-8</project.reporting.outputEncoding>
        <java.version>1.8</java.version>
        <spring-cloud.version>Finchley.RELEASE</spring-cloud.version>
    </properties>

    <dependencies>
        <dependency>
            <groupId>org.springframework.boot</groupId>
            <artifactId>spring-boot-starter-test</artifactId>
            <scope>test</scope>
        </dependency>
    </dependencies>

    <dependencyManagement>
        <dependencies>
            <dependency>
                <groupId>org.springframework.cloud</groupId>
                <artifactId>spring-cloud-dependencies</artifactId>
                <version>${spring-cloud.version}</version>
                <type>pom</type>
                <scope>import</scope>
            </dependency>
        </dependencies>
    </dependencyManagement>

    <build>
        <plugins>
            <plugin>
                <groupId>org.springframework.boot</groupId>
                <artifactId>spring-boot-maven-plugin</artifactId>
            </plugin>
        </plugins>
    </build>
</project>
Ⅱ.eureka-server
<?xml version="1.0"?>
<project xsi:schemaLocation="http://maven.apache.org/POM/4.0.0 http://maven.apache.org/xsd/maven-4.0.0.xsd" xmlns="http://maven.apache.org/POM/4.0.0"
    xmlns:xsi="http://www.w3.org/2001/XMLSchema-instance">
  <modelVersion>4.0.0</modelVersion>
  <groupId>com.demo</groupId>
  <artifactId>eureka-server</artifactId>
  <version>0.0.1-SNAPSHOT</version>
  <packaging>war</packaging>
  <name>eureka-server Maven Webapp</name>
  <url>http://maven.apache.org</url>


  <parent>
    <groupId>com.demo</groupId>
    <artifactId>springcloud</artifactId>
    <version>0.0.1-SNAPSHOT</version>
  </parent>

  <dependencies>
     <dependency>
        <groupId>org.springframework.cloud</groupId>
        <artifactId>spring-cloud-starter-netflix-eureka-server</artifactId>
     </dependency>
  </dependencies>

</project>
@SpringBootApplication
@EnableEurekaServer
public class EurekaServerApplication {

    public static void main(String[] args) {
        SpringApplication.run( EurekaServerApplication.class, args );
    }
}
#eureka-server 配置文件application.properties
#该服务名称
spring.application.name=eurka-server
#该服务的端口号
server.port=8000

#设置当前实例的主机名称
eureka.instance.hostname=localhost
#是否向服务注册中心注册自己
eureka.client.registerWithEureka=false
#检索服务
eureka.client.fetchRegistry=false
#服务注册中心的配置内容,指定服务注册中心的位置(在单注册中心的情况下,自己本身是注册中心,那么不需要配置这个)
#eureka.client.serviceUrl.defaultZone=http://${eureka.instance.hostname}:${server.port}/eureka/
Ⅲ.eureka-client
<?xml version="1.0"?>
<project xsi:schemaLocation="http://maven.apache.org/POM/4.0.0 http://maven.apache.org/xsd/maven-4.0.0.xsd" xmlns="http://maven.apache.org/POM/4.0.0"
    xmlns:xsi="http://www.w3.org/2001/XMLSchema-instance">
  <modelVersion>4.0.0</modelVersion>
  <groupId>com.demo</groupId>
  <artifactId>eureka-clinet</artifactId>
  <version>0.0.1-SNAPSHOT</version>
  <packaging>war</packaging>
  <name>eureka-clinet Maven Webapp</name>
  <url>http://maven.apache.org</url>

  <parent>
    <groupId>com.demo</groupId>
    <artifactId>springcloud</artifactId>
    <version>0.0.1-SNAPSHOT</version>
  </parent>

  <dependencies>
        <dependency>
            <groupId>org.springframework.cloud</groupId>
            <artifactId>spring-cloud-starter-netflix-eureka-client</artifactId>
        </dependency>
        <dependency>
            <groupId>org.springframework.boot</groupId>
            <artifactId>spring-boot-starter-web</artifactId>
        </dependency>
    </dependencies>

    <build>
        <plugins>
            <plugin>
                <groupId>org.springframework.boot</groupId>
                <artifactId>spring-boot-maven-plugin</artifactId>
            </plugin>
        </plugins>
    </build>
</project>
package com.demo.eureka_client;

import org.springframework.boot.SpringApplication;
import org.springframework.boot.autoconfigure.SpringBootApplication;
import org.springframework.cloud.netflix.eureka.EnableEurekaClient;

@SpringBootApplication
@EnableEurekaClient
public class ServiceClientApplication {

    public static void main(String[] args) {
        SpringApplication.run( ServiceClientApplication.class, args );
    }

}
server.port=8001
spring.application.name=eureka-client
eureka.client.serviceUrl.defaultZone=http://localhost:8000/eureka/
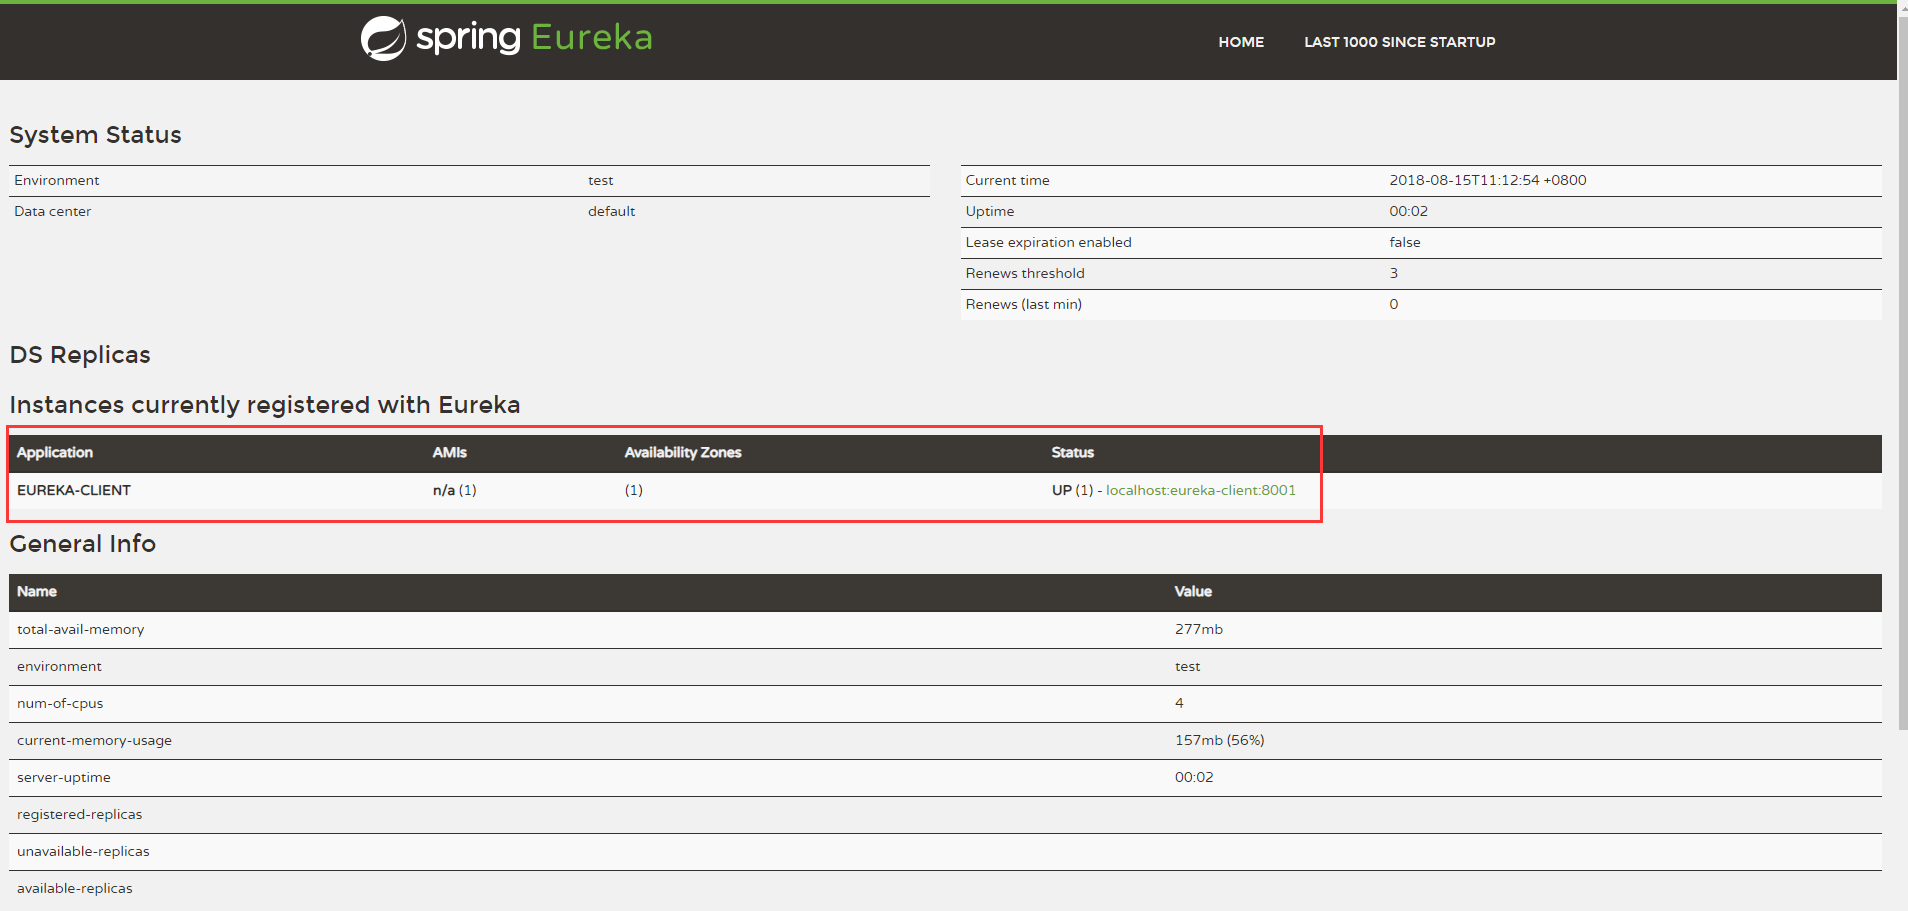
将eureka-server和eureka-client启动后,访问localhost:8000将会看到如下页面,说明服务 注册成功
2.服务消费者(ribbon+restTemplate)
Ⅰ.还是用上面的例子中的erueka-server作为服务注册中心;
Ⅱ.创建服务提供者eureka-echo
<?xml version="1.0"?>
<project
    xsi:schemaLocation="http://maven.apache.org/POM/4.0.0 http://maven.apache.org/xsd/maven-4.0.0.xsd"
    xmlns="http://maven.apache.org/POM/4.0.0" xmlns:xsi="http://www.w3.org/2001/XMLSchema-instance">
    <modelVersion>4.0.0</modelVersion>
    <groupId>com.demo</groupId>
    <artifactId>eureka-echo</artifactId>
    <version>0.0.1-SNAPSHOT</version>
    <packaging>war</packaging>
    <name>eureka-echo Maven Webapp</name>
    <url>http://maven.apache.org</url>

    <parent>
        <groupId>com.demo</groupId>
        <artifactId>springcloud</artifactId>
        <version>0.0.1-SNAPSHOT</version>
    </parent>

    <dependencies>
        <dependency>
            <groupId>org.springframework.cloud</groupId>
            <artifactId>spring-cloud-starter-netflix-eureka-client</artifactId>
        </dependency>
        <dependency>
            <groupId>org.springframework.boot</groupId>
            <artifactId>spring-boot-starter-web</artifactId>
        </dependency>
    </dependencies>
    <build>
        <finalName>eureka-echo</finalName>
    </build>
</project>
@SpringBootApplication
@EnableEurekaClient
@RestController
public class ServiceEchoApplication {

    public static void main(String[] args) {
        SpringApplication.run( ServiceEchoApplication.class, args );
    }

    @Value("${server.port}")
    String port;

    @RequestMapping("/echo")
    public String home(@RequestParam(value = "name") String name) {
        return "hello " + name + " ,this is port:" + port;
    }

}
#application.properties
spring.application.name=eureka-echo
server.port=8001
eureka.client.serviceUrl.defaultZone=http://localhost:8000/eureka/
修改application.properties中的端口号,并启动两次eureka-echo两次,这样就相当于一个服务集群
Ⅲ.创建服务消费者consumer-ribbon,并启动
<?xml version="1.0"?>
<project
    xsi:schemaLocation="http://maven.apache.org/POM/4.0.0 http://maven.apache.org/xsd/maven-4.0.0.xsd"
    xmlns="http://maven.apache.org/POM/4.0.0" xmlns:xsi="http://www.w3.org/2001/XMLSchema-instance">
    <modelVersion>4.0.0</modelVersion>
    <groupId>com.demo</groupId>
    <artifactId>consumer-ribbon</artifactId>
    <version>0.0.1-SNAPSHOT</version>
    <packaging>war</packaging>
    <name>consumer-ribbon Maven Webapp</name>
    <url>http://maven.apache.org</url>

    <parent>
        <groupId>com.demo</groupId>
        <artifactId>springcloud</artifactId>
        <version>0.0.1-SNAPSHOT</version>
    </parent>

    <dependencies>
        <dependency>
            <groupId>org.springframework.cloud</groupId>
            <artifactId>spring-cloud-starter-netflix-eureka-client</artifactId>
        </dependency>
        <dependency>
            <groupId>org.springframework.boot</groupId>
            <artifactId>spring-boot-starter-web</artifactId>
        </dependency>
        <dependency>
            <groupId>org.springframework.cloud</groupId>
            <artifactId>spring-cloud-starter-netflix-ribbon</artifactId>
        </dependency>
    </dependencies>

</project>
package com.demo.consumer_ribbon;

import org.springframework.boot.SpringApplication;
import org.springframework.boot.autoconfigure.SpringBootApplication;
import org.springframework.cloud.client.discovery.EnableDiscoveryClient;
import org.springframework.cloud.client.loadbalancer.LoadBalanced;
import org.springframework.cloud.netflix.eureka.EnableEurekaClient;
import org.springframework.context.annotation.Bean;
import org.springframework.web.client.RestTemplate;

@SpringBootApplication
@EnableEurekaClient
@EnableDiscoveryClient
//如果注册中心是EUREKA则只需要@EnableEurekaClient即可,如果是其他服务注册中心,则需要@EnableDiscoveryClient
public class ConsumerRibbonApplication {

    public static void main(String[] args) {
        SpringApplication.run( ConsumerRibbonApplication.class, args );
    }

    @Bean
    @LoadBalanced //实现负载均衡
    RestTemplate restTemplate() {
        return new RestTemplate();
    }

}
package com.demo.consumer_ribbon.controller;

import org.springframework.beans.factory.annotation.Autowired;
import org.springframework.web.bind.annotation.GetMapping;
import org.springframework.web.bind.annotation.RequestParam;
import org.springframework.web.bind.annotation.RestController;

import com.demo.consumer_ribbon.service.EchoService;

@RestController
public class EchoController {

    @Autowired
    EchoService echoService;

    @GetMapping(value = "/echo")
    public String hi(@RequestParam String name) {
        return echoService.echo( name );
    }
}
package com.demo.consumer_ribbon.service;

import org.springframework.beans.factory.annotation.Autowired;
import org.springframework.stereotype.Service;
import org.springframework.web.client.RestTemplate;

@Service
public class EchoService {

    @Autowired
    RestTemplate restTemplate;

    public String echo(String name) {
        return restTemplate.getForObject("http://EUREKA-ECHO/echo?name="+name,String.class);
    }


}
#application.properties
spring.application.name=consumer-ribbon
server.port=8003
eureka.client.serviceUrl.defaultZone=http://localhost:8000/eureka/
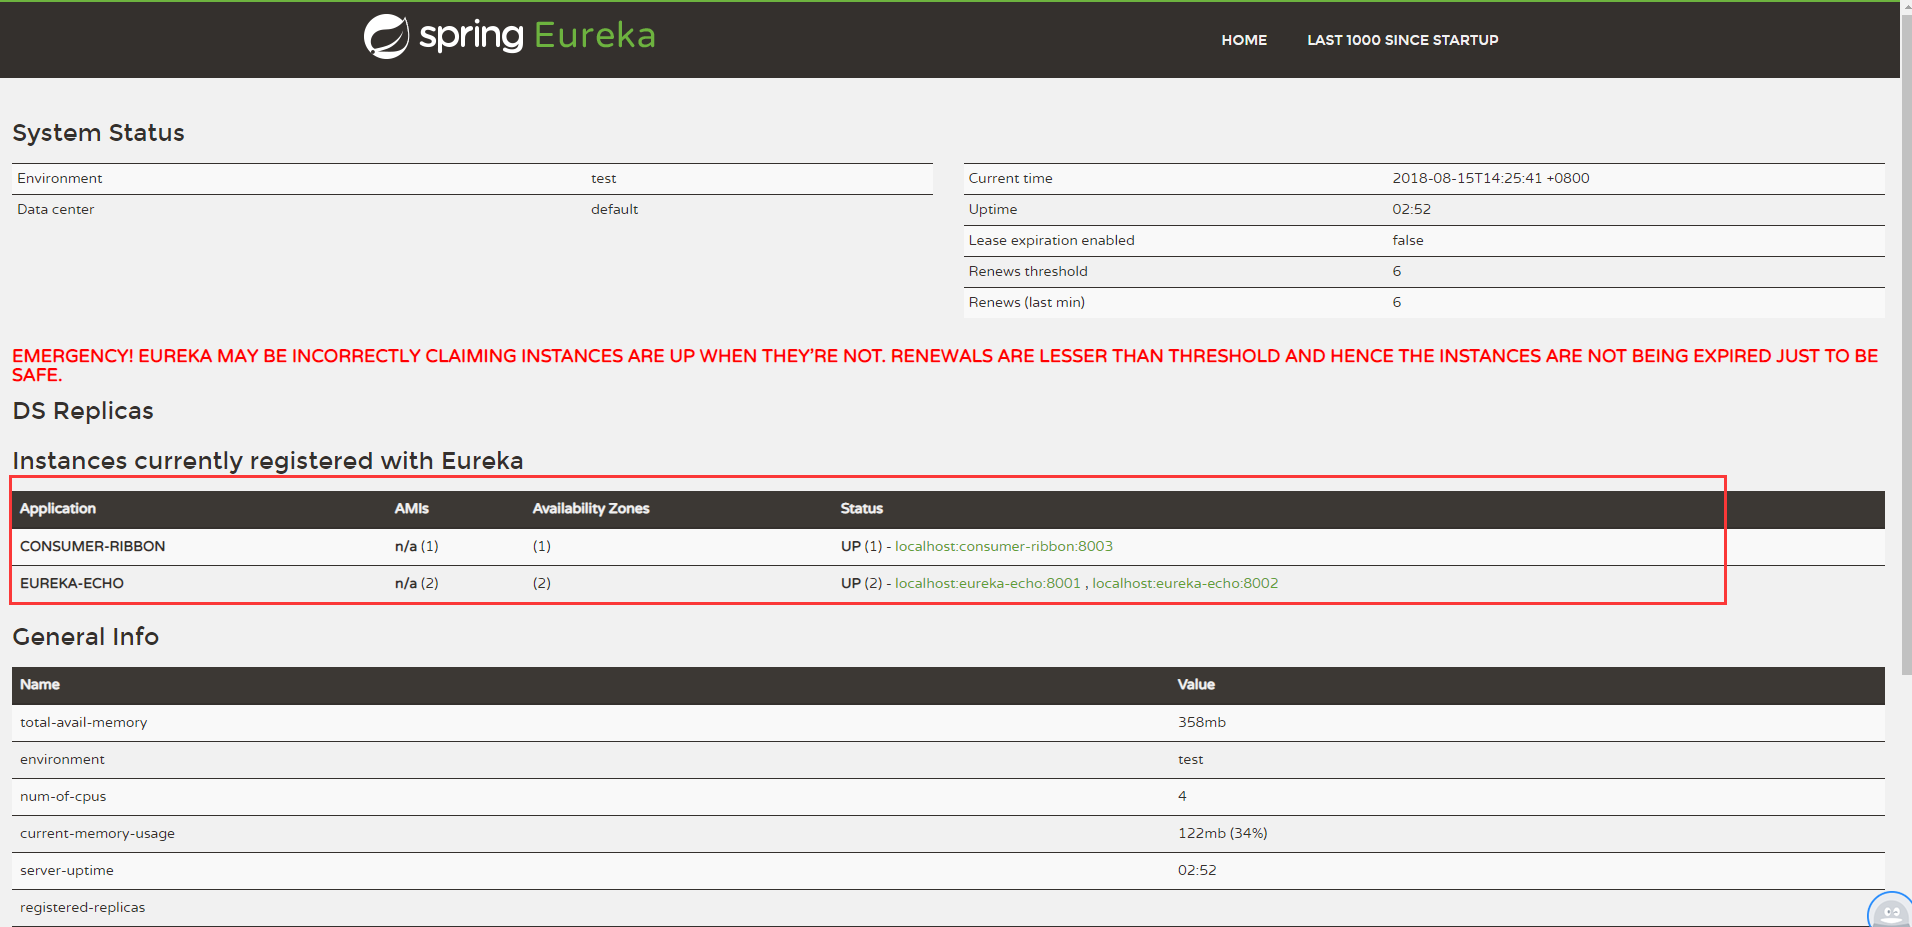
Ⅳ、通过http://localhost:8000/ 查看注册的服务;访问http://localhost:8003/echo?name=kyle 可以看到会间隔调用两个eureka-echo服务,达到负载均衡的效果。
3.服务消费者(feign)
Ⅰ.继续使用上面eureka-server,eureka-echo
Ⅱ.创建消费者consumer-feign,并启动
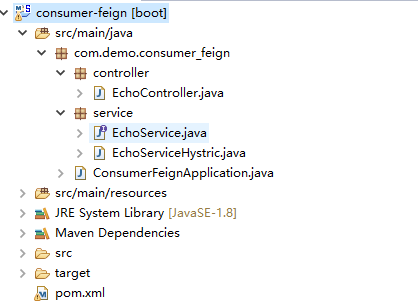
<?xml version="1.0"?>
<project
    xsi:schemaLocation="http://maven.apache.org/POM/4.0.0 http://maven.apache.org/xsd/maven-4.0.0.xsd"
    xmlns="http://maven.apache.org/POM/4.0.0" xmlns:xsi="http://www.w3.org/2001/XMLSchema-instance">
    <modelVersion>4.0.0</modelVersion>
    <groupId>consumer-feign</groupId>
    <artifactId>consumer-feign</artifactId>
    <version>0.0.1-SNAPSHOT</version>
    <packaging>war</packaging>
    <name>consumer-feign Maven Webapp</name>
    <url>http://maven.apache.org</url>

    <parent>
        <groupId>com.demo</groupId>
        <artifactId>springcloud</artifactId>
        <version>0.0.1-SNAPSHOT</version>
    </parent>

    <dependencies>
        <dependency>
            <groupId>org.springframework.cloud</groupId>
            <artifactId>spring-cloud-starter-netflix-eureka-client</artifactId>
        </dependency>
        <dependency>
            <groupId>org.springframework.boot</groupId>
            <artifactId>spring-boot-starter-web</artifactId>
        </dependency>
        <dependency>
            <groupId>org.springframework.cloud</groupId>
            <artifactId>spring-cloud-starter-openfeign</artifactId>
        </dependency>
    </dependencies>

</project>
package com.demo.consumer_feign;

import org.springframework.boot.SpringApplication;
import org.springframework.boot.autoconfigure.SpringBootApplication;
import org.springframework.cloud.client.discovery.EnableDiscoveryClient;
import org.springframework.cloud.netflix.eureka.EnableEurekaClient;
import org.springframework.cloud.openfeign.EnableFeignClients;

@SpringBootApplication
@EnableEurekaClient
@EnableDiscoveryClient
@EnableFeignClients
public class ConsumerFeignApplication {

    public static void main(String[] args) {
        SpringApplication.run( ConsumerFeignApplication.class, args );
    }
}
package com.demo.consumer_feign.controller;

import org.springframework.beans.factory.annotation.Autowired;
import org.springframework.web.bind.annotation.GetMapping;
import org.springframework.web.bind.annotation.RequestParam;
import org.springframework.web.bind.annotation.RestController;

import com.demo.consumer_feign.service.EchoService;

@RestController
public class EchoController {


    @Autowired
    private EchoService echoService;

    @GetMapping(value = "/echo")
    public String sayHi(@RequestParam String name) {
        return echoService.echo( name );
    }
}
package com.demo.consumer_feign.service;

import org.springframework.cloud.openfeign.FeignClient;
import org.springframework.web.bind.annotation.RequestMapping;
import org.springframework.web.bind.annotation.RequestMethod;
import org.springframework.web.bind.annotation.RequestParam;

@FeignClient(value = "eureka-echo")//value值是指定调用哪个服务
public interface EchoService {

    //value值是指定调用那个方法
    @RequestMapping(value = "/echo",method = RequestMethod.GET)
    String echo(@RequestParam(value = "name") String name);
}
spring.application.name=consumer-feign
server.port=8004
eureka.client.serviceUrl.defaultZone=http://localhost:8000/eureka/
Ⅲ.访问http://localhost:8004/echo?name=kyle 可以看出在两种结果之间切换
4.断路器
Ⅰ.改造erueka-ribbon,增加熔断功能
①pom文件增加
  <dependency>
      <groupId>org.springframework.cloud</groupId>
      <artifactId>spring-cloud-starter-netflix-hystrix</artifactId>
  </dependency>
②在启动类ConsumerRibbonApplication上面增加注解@EnableHystrix
@SpringBootApplication
@EnableEurekaClient
@EnableDiscoveryClient
//如果注册中心是EUREKA则只需要@EnableEurekaClient即可,如果是其他服务注册中心,则需要@EnableDiscoveryClient
@EnableHystrix
public class ConsumerRibbonApplication {

    public static void main(String[] args) {
        SpringApplication.run( ConsumerRibbonApplication.class, args );
    }

    @Bean
    @LoadBalanced //实现负载均衡
    RestTemplate restTemplate() {
        return new RestTemplate();
    }

}
③在Service方法上增加 @HystrixCommand(fallbackMethod = "error"),并新增出错后调用的方法error();
@Service
public class EchoService {

    @Autowired
    RestTemplate restTemplate;

    @HystrixCommand(fallbackMethod = "error")
    public String echo(String name) {
        return restTemplate.getForObject("http://EUREKA-ECHO/echo?name="+name,String.class);
    }

    public String error(String name) {
        return "hi,"+name+",Service is error!";
    }
}
④调用http://localhost:8004/echo?name=kyle,发现可以在两个服务之间切换。然后停掉其中一个eureka-echo服务,刚开始可能会返回"hi,kyle,Service is error!",然后不会再去访问该服务,而去调用集群中的其他服务。
Ⅱ.改造consumer-feign,增加熔断功能。
①feign自带熔断功能,只需要在application.properties中添加feign.hystrix.enabled=true,就可以开启。
spring.application.name=consumer-feign
server.port=8004
eureka.client.serviceUrl.defaultZone=http://localhost:8000/eureka/
feign.hystrix.enabled=true
②在EchoService接口的注解上增加fallback属性,并且属性值为EchoService的实现类。
package com.demo.consumer_feign.service;

import org.springframework.cloud.openfeign.FeignClient;
import org.springframework.web.bind.annotation.RequestMapping;
import org.springframework.web.bind.annotation.RequestMethod;
import org.springframework.web.bind.annotation.RequestParam;

@FeignClient(value = "eureka-echo",fallback = EchoServiceHystric.class)//value值是指定调用哪个服务
public interface EchoService {

    //value值是指定调用那个方法
    @RequestMapping(value = "/echo",method = RequestMethod.GET)
    String echo(@RequestParam(value = "name") String name);
}
③创建EchoServiceHystric 类
package com.demo.consumer_feign.service;

import org.springframework.stereotype.Component;

@Component
public class EchoServiceHystric implements EchoService{

    @Override
    public String echo(String name) {
        return "sorry service is error;";
    }

}
④把eureka-echo服务停掉之后就会返回 sorry service is error;
5.路由网关
Ⅰ.创建eureka-zuul

<?xml version="1.0"?>
<project
    xsi:schemaLocation="http://maven.apache.org/POM/4.0.0 http://maven.apache.org/xsd/maven-4.0.0.xsd"
    xmlns="http://maven.apache.org/POM/4.0.0" xmlns:xsi="http://www.w3.org/2001/XMLSchema-instance">
    <modelVersion>4.0.0</modelVersion>
    <groupId>com.demo</groupId>
    <artifactId>erueka-zuul</artifactId>
    <version>0.0.1-SNAPSHOT</version>
    <packaging>war</packaging>
    <name>erueka-zuul Maven Webapp</name>
    <url>http://maven.apache.org</url>

    <parent>
        <groupId>com.demo</groupId>
        <artifactId>springcloud</artifactId>
        <version>0.0.1-SNAPSHOT</version>
    </parent>

    <dependencies>
        <dependency>
            <groupId>org.springframework.cloud</groupId>
            <artifactId>spring-cloud-starter-netflix-eureka-client</artifactId>
        </dependency>
        <dependency>
            <groupId>org.springframework.boot</groupId>
            <artifactId>spring-boot-starter-web</artifactId>
        </dependency>
        <dependency>
            <groupId>org.springframework.cloud</groupId>
            <artifactId>spring-cloud-starter-netflix-zuul</artifactId>
        </dependency>
    </dependencies>
    <build>
        <finalName>erueka-zuul</finalName>
    </build>
</project>
package com.demo.erueka_zuul;

import org.springframework.boot.SpringApplication;
import org.springframework.boot.autoconfigure.SpringBootApplication;
import org.springframework.cloud.client.discovery.EnableDiscoveryClient;
import org.springframework.cloud.netflix.eureka.EnableEurekaClient;
import org.springframework.cloud.netflix.zuul.EnableZuulProxy;

@SpringBootApplication
@EnableZuulProxy
@EnableEurekaClient
@EnableDiscoveryClient
public class EurekaZuulApplication {

    public static void main(String[] args) {
        SpringApplication.run( EurekaZuulApplication.class, args );
    }
}
spring.application.name=eureka-zuul
server.port=8005
eureka.client.serviceUrl.defaultZone=http://localhost:8000/eureka/

#api-a,api-b这个可以随意配置
zuul.routes.api-a.path=/ribbon/**
zuul.routes.api-a.serviceId=consumer-ribbon

zuul.routes.api-b.path=/feign/**
zuul.routes.api-b.serviceId=consumer-feign
Ⅱ.访问http://localhost:8005/ribbon/echo?name=kyle ,根据路由配置,会去调用consumer-ribbon的服务
Ⅲ.访问http://localhost:8005/feign/echo?name=kyle,根据路由配置,会去调用consumer-feign的服务
6.分布式配置中心
由于在分布式系统中服务数量很多,为了方便统一管理服务配置文件并且实时更新,就需要用到分布式配置中心。在spring cloud config 组件中,分两个角色,一是config server,二是config client
Ⅰ.创建config-server
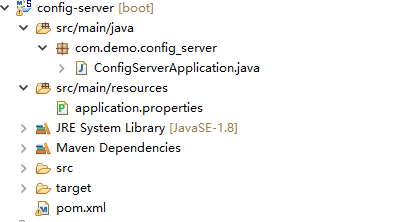
<?xml version="1.0"?>
<project
    xsi:schemaLocation="http://maven.apache.org/POM/4.0.0 http://maven.apache.org/xsd/maven-4.0.0.xsd"
    xmlns="http://maven.apache.org/POM/4.0.0" xmlns:xsi="http://www.w3.org/2001/XMLSchema-instance">
    <modelVersion>4.0.0</modelVersion>
    <groupId>com.demo</groupId>
    <artifactId>config-server</artifactId>
    <version>0.0.1-SNAPSHOT</version>
    <packaging>war</packaging>
    <name>config-server Maven Webapp</name>
    <url>http://maven.apache.org</url>

    <parent>
        <groupId>com.demo</groupId>
        <artifactId>springcloud</artifactId>
        <version>0.0.1-SNAPSHOT</version>
    </parent>

    <dependencies>
        <dependency>
            <groupId>org.springframework.boot</groupId>
            <artifactId>spring-boot-starter-web</artifactId>
        </dependency>
        <dependency>
            <groupId>org.springframework.cloud</groupId>
            <artifactId>spring-cloud-config-server</artifactId>
        </dependency>
    </dependencies>

</project>
package com.demo.config_server;

import org.springframework.boot.SpringApplication;
import org.springframework.boot.autoconfigure.SpringBootApplication;
import org.springframework.cloud.config.server.EnableConfigServer;

@SpringBootApplication
@EnableConfigServer
public class ConfigServerApplication {

    public static void main(String[] args) {
        SpringApplication.run(ConfigServerApplication.class, args);
    }
}
spring.application.name=config-server
server.port=9000

spring.cloud.config.server.git.uri=https://github.com/kyleInJava/gitworkspace/
spring.cloud.config.server.git.searchPaths=
spring.cloud.config.label=master
spring.cloud.config.server.git.username=
spring.cloud.config.server.git.password=
Ⅱ.创建config-client
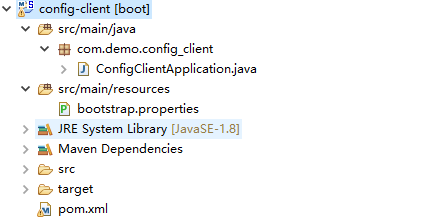
<?xml version="1.0"?>
<project
    xsi:schemaLocation="http://maven.apache.org/POM/4.0.0 http://maven.apache.org/xsd/maven-4.0.0.xsd"
    xmlns="http://maven.apache.org/POM/4.0.0" xmlns:xsi="http://www.w3.org/2001/XMLSchema-instance">
    <modelVersion>4.0.0</modelVersion>
    <groupId>com.demo</groupId>
    <artifactId>config-client</artifactId>
    <version>0.0.1-SNAPSHOT</version>
    <packaging>war</packaging>
    <name>config-client Maven Webapp</name>
    <url>http://maven.apache.org</url>

    <parent>
        <groupId>com.demo</groupId>
        <artifactId>springcloud</artifactId>
        <version>0.0.1-SNAPSHOT</version>
    </parent>

    <dependencies>
        <dependency>
            <groupId>org.springframework.boot</groupId>
            <artifactId>spring-boot-starter-web</artifactId>
        </dependency>
        <dependency>
            <groupId>org.springframework.cloud</groupId>
            <artifactId>spring-cloud-starter-config</artifactId>
        </dependency>
    </dependencies>

</project>
package com.demo.config_client;

import org.springframework.beans.factory.annotation.Value;
import org.springframework.boot.SpringApplication;
import org.springframework.boot.autoconfigure.SpringBootApplication;
import org.springframework.web.bind.annotation.RequestMapping;
import org.springframework.web.bind.annotation.RestController;

@SpringBootApplication
@RestController
public class ConfigClientApplication {

    public static void main(String[] args) {
        SpringApplication.run(ConfigClientApplication.class, args);
    }

    @Value("${name}")
    String name;

    @RequestMapping(value = "/getName")
    public String hi(){
        return name;
    }
}
spring.application.name=config-client
server.port=9001

spring.cloud.config.label=master
spring.cloud.config.profile=pro
spring.cloud.config.uri= http://localhost:9000/
Ⅲ、分布式配置中心的使用说明
①在启动config-server后,访问http://localhost:9000/kyle/pro/master 如果得到下面的返回,则说明配置服务中心可以从远程程序获取配置信息。

②访问http://localhost:9001/getName 会返回如下文件中的值
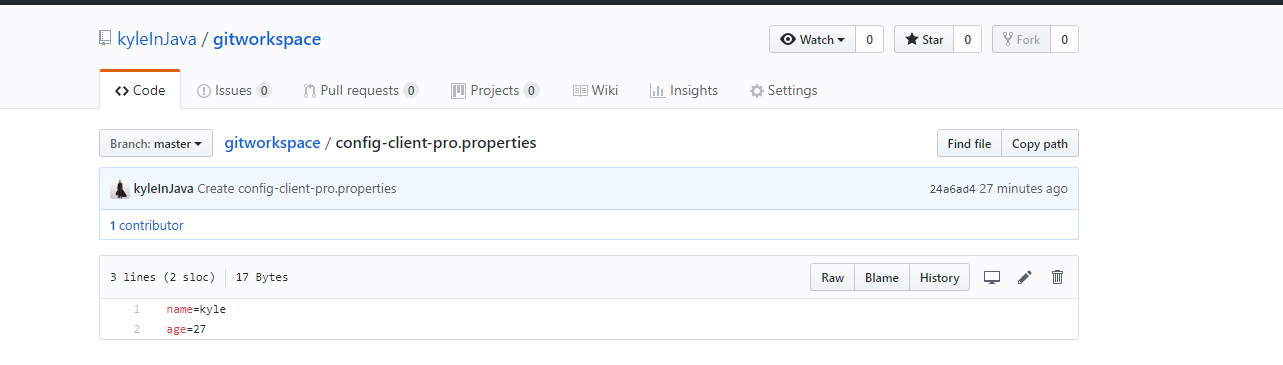
③请求地址和对应资源的映射关系

上面的映射关系中
{application} 对应的就是下面的spring.application.name
{profile} 对应的是spring.cloud.config.profile,表示运行环境:dev表示开发环境,test表示测试环境,pro表示生产环境。
{label} 对应的就是下面的spring.cloud.config.label 表示资源文件的分支,默认为master
所以下面的config-client的配置文件对应的资源文件为config-client-pro.properties

Ⅳ.配置高可用分布式配置中心
只需要将config-server和config-client在服务注册中心进行注册,这样就可以直接通过服务名称来代替uri进行访问。
①config-server 和 config-client 的pom文件中引入jar包
     <dependency>
            <groupId>org.springframework.cloud</groupId>
            <artifactId>spring-cloud-starter-netflix-eureka-client</artifactId>
        </dependency>
②config-server 的application.properties配置文件
spring.application.name=config-server
server.port=9002

spring.cloud.config.server.git.uri=https://github.com/kyleInJava/gitworkspace/
spring.cloud.config.server.git.searchPaths=
spring.cloud.config.label=master
spring.cloud.config.server.git.username=
spring.cloud.config.server.git.password=
#增加下面一行,进行服务注册
eureka.client.serviceUrl.defaultZone=http://localhost:8000/eureka/
③config-client 的配置文件bootstrap.properties 配置文件
spring.application.name=config-client
server.port=9001

spring.cloud.config.label=master
spring.cloud.config.profile=pro
#spring.cloud.config.uri= http://localhost:9000/

#增加下面三行,注释掉上面的spring.cloud.config.uri,用服务名来访问服务
eureka.client.serviceUrl.defaultZone=http://localhost:8000/eureka/
spring.cloud.config.discovery.enabled=true
spring.cloud.config.discovery.serviceId=config-server
7.服务链路追踪(Spring Cloud Sleuth)
Ⅰ.构建server-zipkin,只需要从网上下载jar包运行即可。
https://dl.bintray.com/openzipkin/maven/io/zipkin/java/zipkin-server/

Ⅱ.改造前面的eureka-echo和consumer-ribbon
在pom文件中引入
     <dependency>
            <groupId>org.springframework.cloud</groupId>
            <artifactId>spring-cloud-starter-zipkin</artifactId>
        </dependency>
在application.properties文件中加入spring.zipkin.base-url=http://localhost:9411
改造完成,分别启动eureka-server,eureka-echo,consumer-ribbon,然后调用http://localhost:8003/echo?name=kyle ,会得到如下的效果显示

8.构建高可用服务注册中心
Ⅰ.创建eureka-server和eureka-server2,具体构建和上面的erueka-server创建一样,只是application.properties需要改动,配置如下:
#eureka-server 配置文件application.properties
#该服务名称
spring.application.name=eurka-server
#该服务的端口号
server.port=8000

#设置当前实例的主机名称
eureka.instance.hostname=peer1
#是否向服务注册中心注册自己
eureka.client.registerWithEureka=false
#检索服务
eureka.client.fetchRegistry=false
#服务注册中心的配置内容,指定服务注册中心的位置
eureka.client.serviceUrl.defaultZone=http://peer2:8009/eureka/
#eureka-server2 配置文件application.properties
#该服务名称
spring.application.name=eurka-server
#该服务的端口号
server.port=8009

#设置当前实例的主机名称
eureka.instance.hostname=peer2
#是否向服务注册中心注册自己
eureka.client.registerWithEureka=false
#检索服务
eureka.client.fetchRegistry=false
#服务注册中心的配置内容,指定服务注册中心的位置
eureka.client.serviceUrl.defaultZone=http://peer1:8000/eureka/
提示:需要在hosts文件中配置peer1 和peer2映射到127.0.0.1
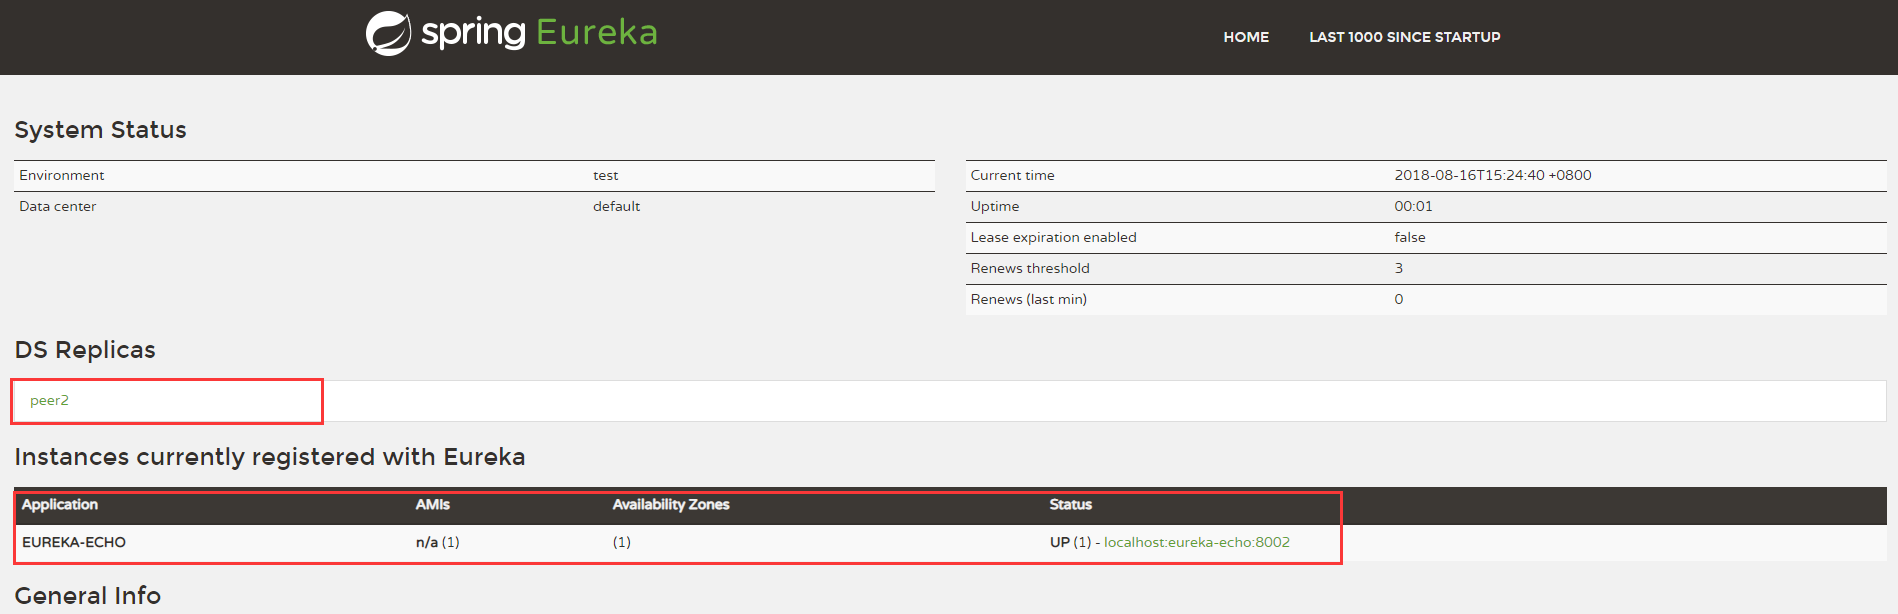
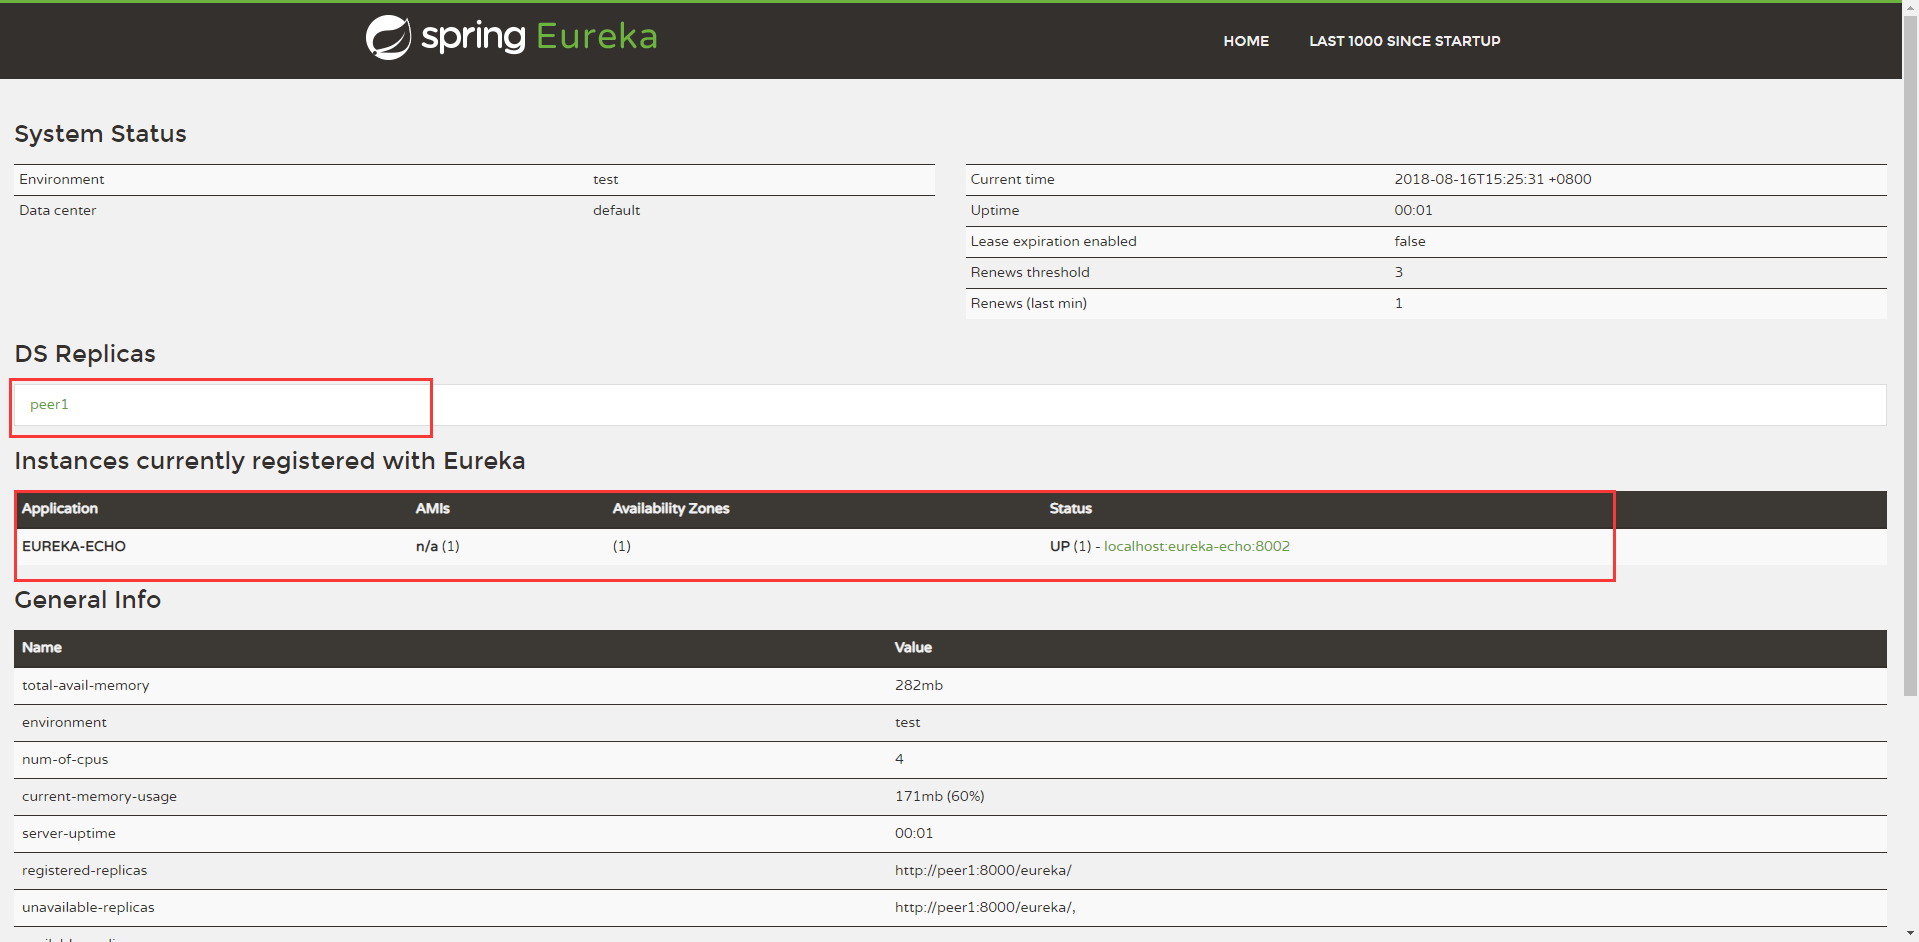
Ⅱ.访问http://localhost:8000/和http://localhost:8009/可以看出两个注册服务都相互在对方有注册,并且其他服务只需要在某一台上注册,就会在两台上面注册。
9.断路监控仪表盘
Ⅰ.改造erueka-ribbon,改造后的配置如下

<?xml version="1.0"?>
<project
    xsi:schemaLocation="http://maven.apache.org/POM/4.0.0 http://maven.apache.org/xsd/maven-4.0.0.xsd"
    xmlns="http://maven.apache.org/POM/4.0.0" xmlns:xsi="http://www.w3.org/2001/XMLSchema-instance">
    <modelVersion>4.0.0</modelVersion>
    <groupId>com.demo</groupId>
    <artifactId>consumer-ribbon</artifactId>
    <version>0.0.1-SNAPSHOT</version>
    <packaging>war</packaging>
    <name>consumer-ribbon Maven Webapp</name>
    <url>http://maven.apache.org</url>

    <parent>
        <groupId>com.demo</groupId>
        <artifactId>springcloud</artifactId>
        <version>0.0.1-SNAPSHOT</version>
    </parent>

    <dependencies>
        <dependency>
            <groupId>org.springframework.cloud</groupId>
            <artifactId>spring-cloud-starter-netflix-eureka-client</artifactId>
        </dependency>
        <dependency>
            <groupId>org.springframework.boot</groupId>
            <artifactId>spring-boot-starter-web</artifactId>
        </dependency>
        <dependency>
            <groupId>org.springframework.cloud</groupId>
            <artifactId>spring-cloud-starter-netflix-ribbon</artifactId>
        </dependency>
        <dependency>
            <groupId>org.springframework.cloud</groupId>
            <artifactId>spring-cloud-starter-netflix-hystrix</artifactId>
        </dependency>
        <dependency>
            <groupId>org.springframework.cloud</groupId>
            <artifactId>spring-cloud-starter-zipkin</artifactId>
        </dependency>
        <dependency>
            <groupId>org.springframework.boot</groupId>
            <artifactId>spring-boot-starter-actuator</artifactId>
        </dependency>
        <dependency>
            <groupId>org.springframework.cloud</groupId>
            <artifactId>spring-cloud-starter-netflix-hystrix-dashboard</artifactId>
        </dependency>
    </dependencies>

</project>
package com.demo.consumer_ribbon;

import org.springframework.boot.SpringApplication;
import org.springframework.boot.autoconfigure.SpringBootApplication;
import org.springframework.cloud.client.circuitbreaker.EnableCircuitBreaker;
import org.springframework.cloud.client.discovery.EnableDiscoveryClient;
import org.springframework.cloud.client.loadbalancer.LoadBalanced;
import org.springframework.cloud.netflix.eureka.EnableEurekaClient;
import org.springframework.cloud.netflix.hystrix.EnableHystrix;
import org.springframework.cloud.netflix.hystrix.dashboard.EnableHystrixDashboard;
import org.springframework.context.annotation.Bean;
import org.springframework.web.client.RestTemplate;

@SpringBootApplication
@EnableEurekaClient
@EnableDiscoveryClient
//如果注册中心是EUREKA则只需要@EnableEurekaClient即可,如果是其他服务注册中心,则需要@EnableDiscoveryClient
@EnableHystrix
@EnableHystrixDashboard
@EnableCircuitBreaker
public class ConsumerRibbonApplication {

    public static void main(String[] args) {
        SpringApplication.run( ConsumerRibbonApplication.class, args );
    }

    @Bean
    @LoadBalanced //实现负载均衡
    RestTemplate restTemplate() {
        return new RestTemplate();
    }

}
package com.demo.consumer_ribbon.controller;

import org.springframework.beans.factory.annotation.Autowired;
import org.springframework.web.bind.annotation.GetMapping;
import org.springframework.web.bind.annotation.RequestParam;
import org.springframework.web.bind.annotation.RestController;

import com.demo.consumer_ribbon.service.EchoService;

@RestController
public class EchoController {

    @Autowired
    EchoService echoService;

    @GetMapping(value = "/echo")
    public String hi(@RequestParam String name) {
        return echoService.echo( "ribbon:"+name );
    }
}
package com.demo.consumer_ribbon.service;

import org.springframework.beans.factory.annotation.Autowired;
import org.springframework.stereotype.Service;
import org.springframework.web.client.RestTemplate;

import com.netflix.hystrix.contrib.javanica.annotation.HystrixCommand;

@Service
public class EchoService {

    @Autowired
    RestTemplate restTemplate;

    @HystrixCommand(fallbackMethod = "error")
    public String echo(String name) {
        return restTemplate.getForObject("http://EUREKA-ECHO/echo?name="+name,String.class);
    }

    public String error(String name) {
        return "hi,"+name+",Service is error!";
    }
}
spring.application.name=consumer-ribbon
server.port=8003
eureka.client.serviceUrl.defaultZone=http://localhost:8000/eureka/


spring.zipkin.base-url=http://localhost:9411


management.endpoints.web.exposure.include=*
management.endpoints.web.cors.allowed-origins=*
management.endpoints.web.cors.allowed-methods=*
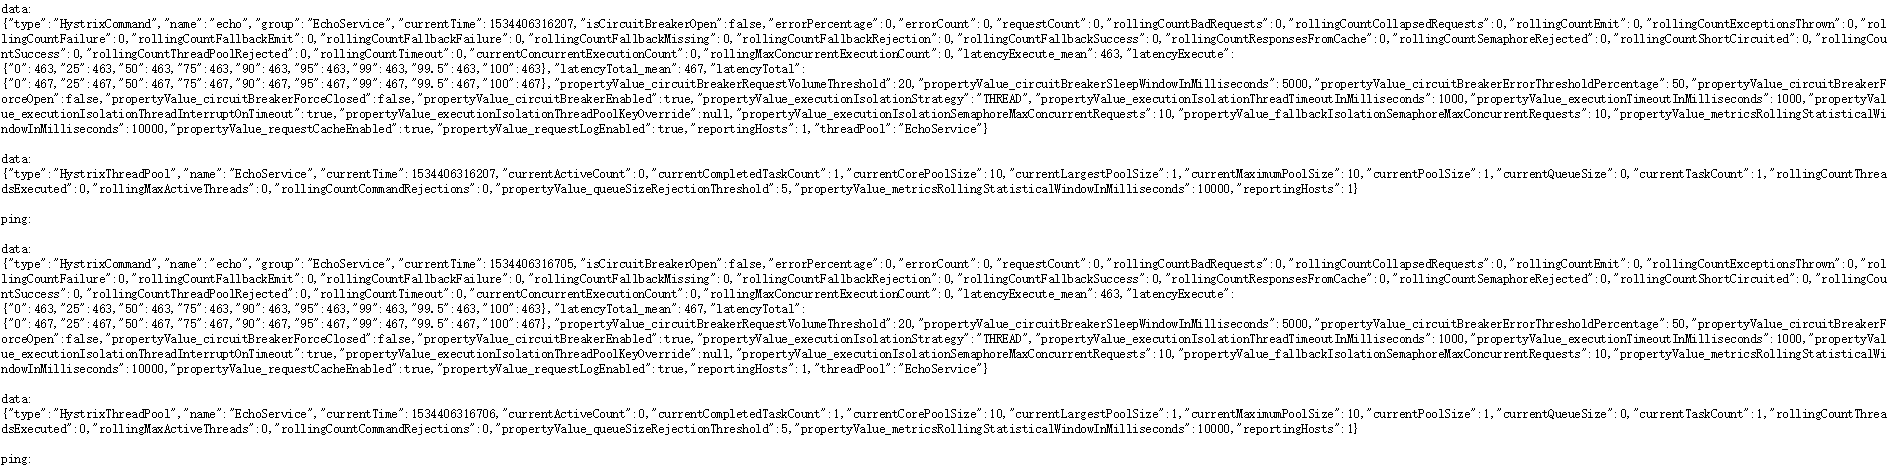
Ⅱ.访问http://localhost:8003/actuator/hystrix.stream 得到下面的效果,则说明监控成功
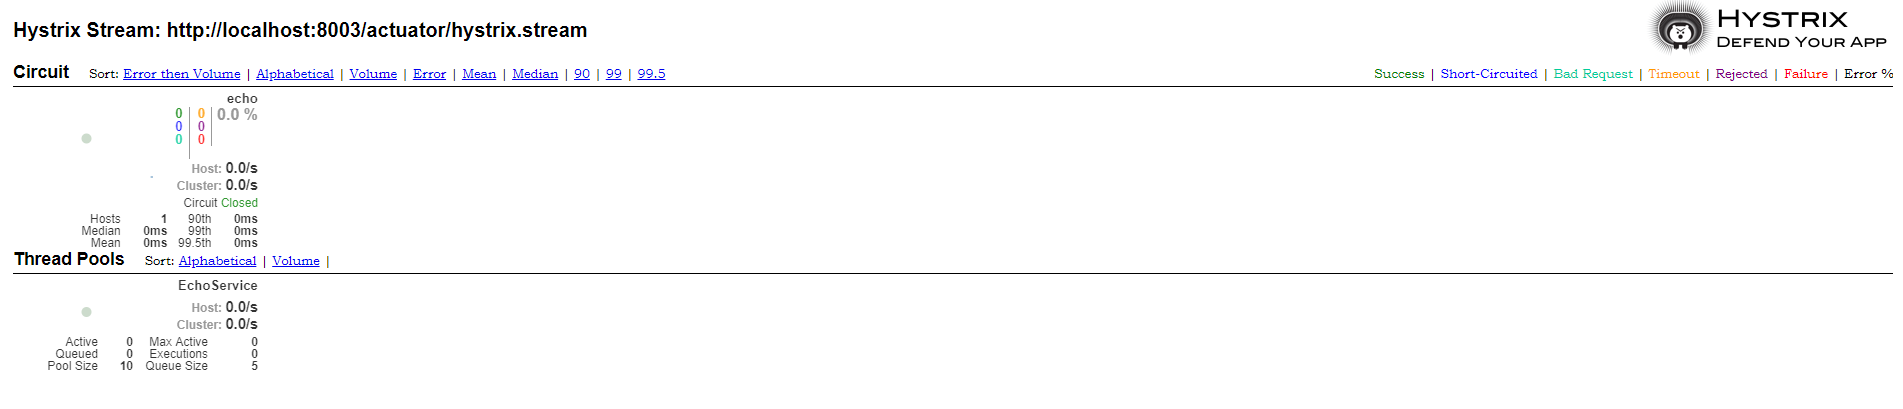
Ⅲ.访问http://localhost:8003/hystrix 得到下图

输入http://localhost:8003/actuator/hystrix.stream ,就能看到仪表盘监控
10.断路器聚合监控(Hystrix Turbine)
Ⅰ.构建eureka-turbine,来进行聚合监控
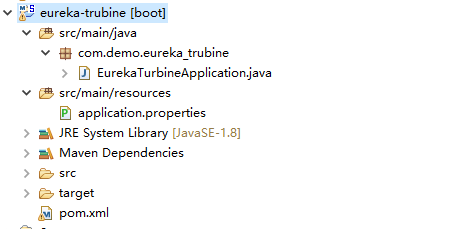
<?xml version="1.0"?>
<project
    xsi:schemaLocation="http://maven.apache.org/POM/4.0.0 http://maven.apache.org/xsd/maven-4.0.0.xsd"
    xmlns="http://maven.apache.org/POM/4.0.0" xmlns:xsi="http://www.w3.org/2001/XMLSchema-instance">
    <modelVersion>4.0.0</modelVersion>
    <groupId>com.demo</groupId>
    <artifactId>eureka-trubine</artifactId>
    <version>0.0.1-SNAPSHOT</version>
    <packaging>war</packaging>
    <name>eureka-trubine Maven Webapp</name>
    <url>http://maven.apache.org</url>

    <parent>
        <groupId>com.demo</groupId>
        <artifactId>springcloud</artifactId>
        <version>0.0.1-SNAPSHOT</version>
    </parent>

    <dependencies>
        <dependency>
            <groupId>org.springframework.cloud</groupId>
            <artifactId>spring-cloud-starter-netflix-eureka-client</artifactId>
        </dependency>
        <dependency>
            <groupId>org.springframework.boot</groupId>
            <artifactId>spring-boot-starter-web</artifactId>
        </dependency>
        <dependency>
            <groupId>org.springframework.boot</groupId>
            <artifactId>spring-boot-starter-actuator</artifactId>
        </dependency>
        <dependency>
            <groupId>org.springframework.cloud</groupId>
            <artifactId>spring-cloud-starter-netflix-hystrix</artifactId>
        </dependency>
        <dependency>
            <groupId>org.springframework.cloud</groupId>
            <artifactId>spring-cloud-starter-netflix-hystrix-dashboard</artifactId>
        </dependency>
        <dependency>
            <groupId>org.springframework.cloud</groupId>
            <artifactId>spring-cloud-starter-netflix-turbine</artifactId>
        </dependency>

    </dependencies>
</project>
package com.demo.eureka_trubine;

import org.springframework.boot.SpringApplication;
import org.springframework.boot.autoconfigure.SpringBootApplication;
import org.springframework.cloud.client.circuitbreaker.EnableCircuitBreaker;
import org.springframework.cloud.client.discovery.EnableDiscoveryClient;
import org.springframework.cloud.netflix.eureka.EnableEurekaClient;
import org.springframework.cloud.netflix.hystrix.EnableHystrix;
import org.springframework.cloud.netflix.hystrix.dashboard.EnableHystrixDashboard;
import org.springframework.cloud.netflix.turbine.EnableTurbine;
import org.springframework.web.bind.annotation.RestController;

@SpringBootApplication
@EnableEurekaClient
@EnableDiscoveryClient
@EnableHystrix
@EnableHystrixDashboard
@EnableCircuitBreaker
@EnableTurbine
public class EurekaTurbineApplication {

    public static void main(String[] args) {
        SpringApplication.run( EurekaTurbineApplication.class, args );
    }
}
#####application.properties 配置文件
spring.application.name=eureka-turbine
server.port=8008
eureka.client.serviceUrl.defaultZone=http://localhost:8000/eureka/

management.endpoints.web.exposure.include=*
management.endpoints.web.cors.allowed-origins=*
management.endpoints.web.cors.allowed-methods=*

#监控这两个服务
turbine.app-config=consumer-ribbon,consumer-feign
turbine.aggregator.clusterConfig=default
turbine.clusterNameExpression="default"
turbine.combine-host=true
turbine.instanceUrlSuffix.default=actuator/hystrix.stream
Ⅱ.改造前面的eureka-ribbon和eureka-feign
①改造后的eureka-ribbon配置如下:
package com.demo.consumer_ribbon;

import org.springframework.boot.SpringApplication;
import org.springframework.boot.autoconfigure.SpringBootApplication;
import org.springframework.cloud.client.circuitbreaker.EnableCircuitBreaker;
import org.springframework.cloud.client.discovery.EnableDiscoveryClient;
import org.springframework.cloud.client.loadbalancer.LoadBalanced;
import org.springframework.cloud.netflix.eureka.EnableEurekaClient;
import org.springframework.cloud.netflix.hystrix.EnableHystrix;
import org.springframework.cloud.netflix.hystrix.dashboard.EnableHystrixDashboard;
import org.springframework.context.annotation.Bean;
import org.springframework.web.client.RestTemplate;

@SpringBootApplication
@EnableEurekaClient
@EnableDiscoveryClient
//如果注册中心是EUREKA则只需要@EnableEurekaClient即可,如果是其他服务注册中心,则需要@EnableDiscoveryClient
@EnableHystrix
@EnableHystrixDashboard
@EnableCircuitBreaker //新增的注解
public class ConsumerRibbonApplication {

    public static void main(String[] args) {
        SpringApplication.run( ConsumerRibbonApplication.class, args );
    }

    @Bean
    @LoadBalanced //实现负载均衡
    RestTemplate restTemplate() {
        return new RestTemplate();
    }

}
②改造eureka-feign
<?xml version="1.0"?>
<project
    xsi:schemaLocation="http://maven.apache.org/POM/4.0.0 http://maven.apache.org/xsd/maven-4.0.0.xsd"
    xmlns="http://maven.apache.org/POM/4.0.0" xmlns:xsi="http://www.w3.org/2001/XMLSchema-instance">
    <modelVersion>4.0.0</modelVersion>
    <groupId>eureka-feign</groupId>
    <artifactId>eureka-feign</artifactId>
    <version>0.0.1-SNAPSHOT</version>
    <packaging>war</packaging>
    <name>eureka-feign Maven Webapp</name>
    <url>http://maven.apache.org</url>

    <parent>
        <groupId>com.demo</groupId>
        <artifactId>springcloud</artifactId>
        <version>0.0.1-SNAPSHOT</version>
    </parent>

    <dependencies>
        <dependency>
            <groupId>org.springframework.cloud</groupId>
            <artifactId>spring-cloud-starter-netflix-eureka-client</artifactId>
        </dependency>
        <dependency>
            <groupId>org.springframework.boot</groupId>
            <artifactId>spring-boot-starter-web</artifactId>
        </dependency>
        <dependency>
            <groupId>org.springframework.cloud</groupId>
            <artifactId>spring-cloud-starter-openfeign</artifactId>
        </dependency>
        <dependency>
            <groupId>org.springframework.cloud</groupId>
            <artifactId>spring-cloud-starter-netflix-hystrix</artifactId>
        </dependency>
        <dependency>
            <groupId>org.springframework.boot</groupId>
            <artifactId>spring-boot-starter-actuator</artifactId>
        </dependency>

    </dependencies>

</project>
package com.demo.consumer_feign;

import org.springframework.boot.SpringApplication;
import org.springframework.boot.autoconfigure.SpringBootApplication;
import org.springframework.cloud.client.circuitbreaker.EnableCircuitBreaker;
import org.springframework.cloud.client.discovery.EnableDiscoveryClient;
import org.springframework.cloud.netflix.eureka.EnableEurekaClient;
import org.springframework.cloud.openfeign.EnableFeignClients;

@SpringBootApplication
@EnableEurekaClient
@EnableDiscoveryClient
@EnableFeignClients
@EnableCircuitBreaker //新增注解
public class ConsumerFeignApplication {

    public static void main(String[] args) {
        SpringApplication.run( ConsumerFeignApplication.class, args );
    }
}
#####application.properties

spring.application.name=consumer-feign
server.port=8004
eureka.client.serviceUrl.defaultZone=http://localhost:8000/eureka/
feign.hystrix.enabled=true

management.endpoints.web.exposure.include=*
management.endpoints.web.cors.allowed-origins=*
management.endpoints.web.cors.allowed-methods=*
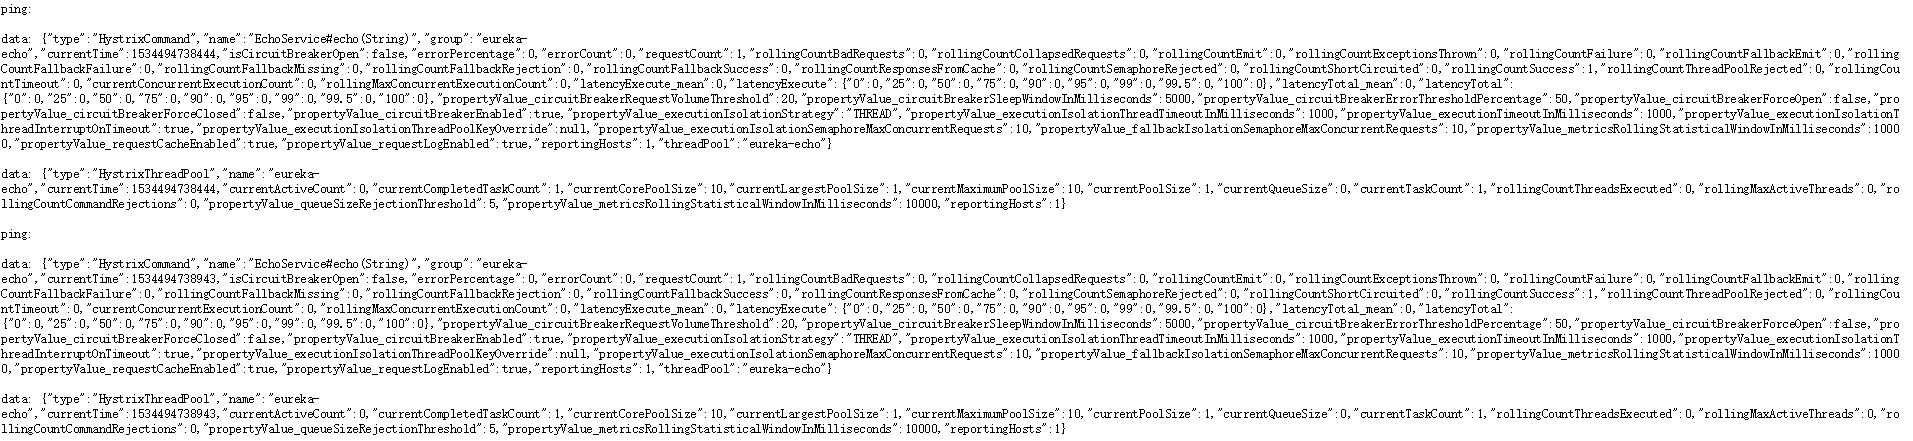
Ⅲ.分别访问http://localhost:8003/actuator/hystrix.stream 、 http://localhost:8004/actuator/hystrix.stream 以及http://localhost:8008/turbine.stream,能够得到类似下面的返回值则说明改造成功
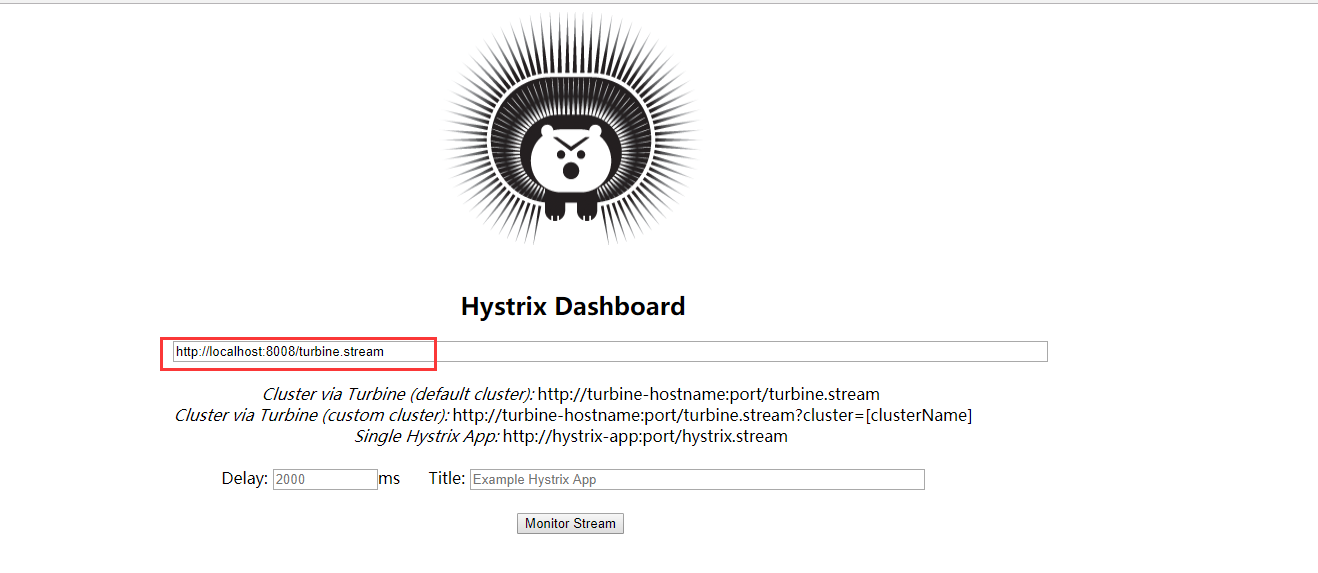
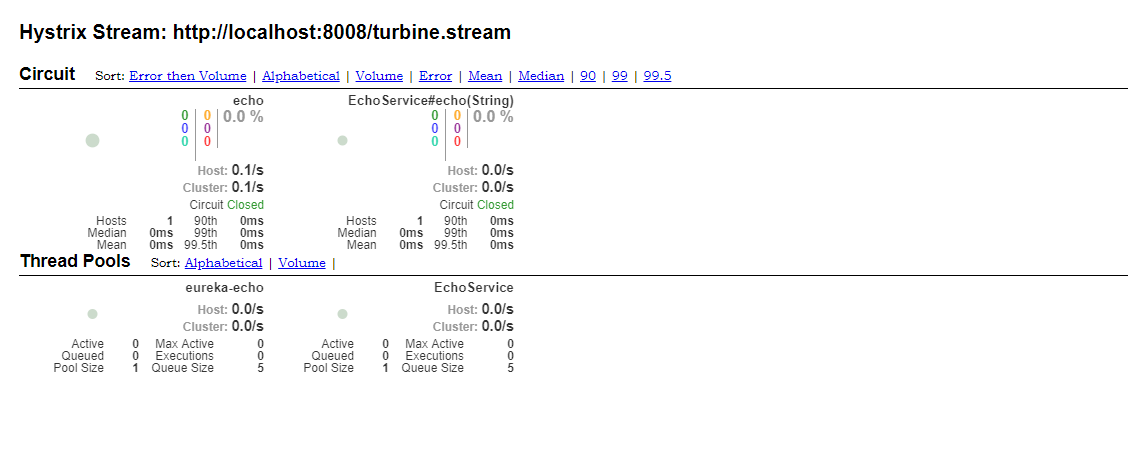
Ⅳ.访问http://localhost:8008/hystrix,然后输入http://localhost:8008/turbine.stream,进行服务监控
11.消息总线
安装rabbitmq不成功,环境一直配不好,以后再弄