在上一篇文章Spring Security OAuth2.0认证授权一:框架搭建和认证测试 详细讲解了如何搭建一个基于spring boot + oauth2.0的认证服务,这篇文章将会介绍如何搭建一个资源服务。
根据oath2.0协议内容,应当有一个资源服务管理资源并提供访问安全控制。
1. 引入maven依赖
<dependency>
    <groupId>org.springframework.boot</groupId>
    <artifactId>spring-boot-starter-web</artifactId>
</dependency>
<dependency>
    <groupId>org.springframework.cloud</groupId>
    <artifactId>spring-cloud-starter-security</artifactId>
</dependency>
<dependency>
    <groupId>org.springframework.cloud</groupId>
    <artifactId>spring-cloud-starter-oauth2</artifactId>
</dependency>
<dependency>
    <groupId>org.springframework.security</groupId>
    <artifactId>spring-security-jwt</artifactId>
</dependency>
<dependency>
    <groupId>com.alibaba</groupId>
    <artifactId>fastjson</artifactId>
</dependency>
<dependency>
    <groupId>org.projectlombok</groupId>
    <artifactId>lombok</artifactId>
</dependency>
这里虽然引入了jwt的依赖,但是暂时还未用到。
2. 配置配置文件
server:
  port: 30001
spring:
  application:
    name: resource-server
3. 新建启动类
@SpringBootApplication
public class ResourceServerApplication {

    public static void main(String[] args) {
        SpringApplication.run(ResourceServerApplication.class, args);
    }
}
4. Resource服务核心配置
4.1 新建ResouceServerConfig类
该类需要继承ResourceServerConfigurerAdapter类并需要使用@EnableResourceServer注解注释。
@Configuration
@EnableResourceServer
public class ResouceServerConfig extends ResourceServerConfigurerAdapter {
    ......
}
4.2 核心配置
重写ResouceServerConfig类以下方法以实现ResourceServer的基本配置:
org.springframework.security.oauth2.config.annotation.web.configuration.ResourceServerConfigurerAdapter#configure(org.springframework.security.oauth2.config.annotation.web.configurers.ResourceServerSecurityConfigurer)
@Override
public void configure(ResourceServerSecurityConfigurer resources) throws Exception {
    resources
        .resourceId(RESOURCE_ID)
        .tokenServices(resourceServerTokenServices)//令牌服务
        .stateless(true);
}
- resourceId方法标志了该服务的id,需要和在auth-center服务中配置的id一致。
- tokenServices方法指定了令牌管理的实例,Bean创建方法如下
@Bean public ResourceServerTokenServices resourceServerTokenServices(){ RemoteTokenServices remoteTokenServices = new RemoteTokenServices(); remoteTokenServices.setCheckTokenEndpointUrl("http://127.0.0.1:30000/oauth/check_token"); remoteTokenServices.setClientId("c1"); remoteTokenServices.setClientSecret("secret"); return remoteTokenServices; } - stateless方法指定了当前资源是否仅仅允许token验证的方法进行校验,默认为true
4.3 auth2.0安全配置
@Override
public void configure(HttpSecurity http) throws Exception {
    http
        .authorizeRequests()
        .antMatchers("/**").access("#oauth2.hasScope('all')")
        .and()
        .csrf().disable()
        .sessionManagement().sessionCreationPolicy(SessionCreationPolicy.NEVER);
}
该配置和下面的Web安全配置很像,但是不一样,这里仅仅对auth2.0的安全进行配置。这里的.antMatchers("/**").access("#oauth2.hasScope('all')")表示所有的请求携带的令牌都必须拥有all的授权范围,其中all授权范围必须和认证服务中的配置相一致。
4.4 Web安全配置
@Configuration
@EnableGlobalMethodSecurity(securedEnabled = true,prePostEnabled = true)
public class WebSecurityConfig extends WebSecurityConfigurerAdapter {

    @Override
    protected void configure(HttpSecurity http) throws Exception {
        http.csrf()
                .disable()
                .authorizeRequests()
                .antMatchers("/r/r1").hasAuthority("p2")
                .antMatchers("/r/r2").hasAuthority("p2")
                .antMatchers("/**").authenticated()//所有的r/**请求必须认证通过
                .anyRequest().permitAll();//其它所有请求都可以随意访问
    }
}
4.5 暴露资源接口
@RestController
@Slf4j
public class OrderController {

    @GetMapping("/r1")
    @PreAuthorize("hasAnyAuthority('p1')")
    public String r1(){
        return "访问资源r1";
    }
}
由于4.4启用了prePostEnabled,所以这里可以使用@PreAuthorize注解对资源安全请求进行管理。
@PreAuthorize("hasAnyAuthority('p1')")表示请求者必须拥有p1权限,p1权限定义在auth-center服务表的t_permission表。
5. 接口测试
源代码地址:https://gitee.com/kdyzm/spring-security-oauth-study/tree/v3.0.0
5.1 准备工作
首先,阅读下 https://gitee.com/kdyzm/spring-security-oauth-study/tree/v3.0.0/auth-center 项目的自述文件,配置好数据库和表、配置文件,配置完成之后分别启动认证服务auth-center服务(端口号30000)和资源服务resource-server(端口号30001)。
5.2 获取token
阅读下 https://gitee.com/kdyzm/spring-security-oauth-study/tree/v3.0.0/auth-center 项目的自述文件,有四种获取token的方式。
5.3 请求资源服务
假设在5.2已经成功获取到了token:
{
    "access_token": "11c5eaec-768f-400a-85e1-e2b52276b83d",
    "token_type": "bearer",
    "refresh_token": "34eb5d57-de7e-4f26-b35e-64162c64117e",
    "expires_in": 7199,
    "scope": "all"
}
接下来要携带着token请求资源服务:
| header | value |
|---|---|
| Authorization | Bearer 0cc2da26-b634-4ccb-a8fe-14f454a13090 |
GET请求:http://127.0.0.1:30001/r1
请求成功,结果返回:
访问资源r1
请求失败,结果返回:
{
    "error": "invalid_token",
    "error_description": "0cc2da26-b634-4ccb-a8fe-14f454a13090"
}
5.4 请求演示
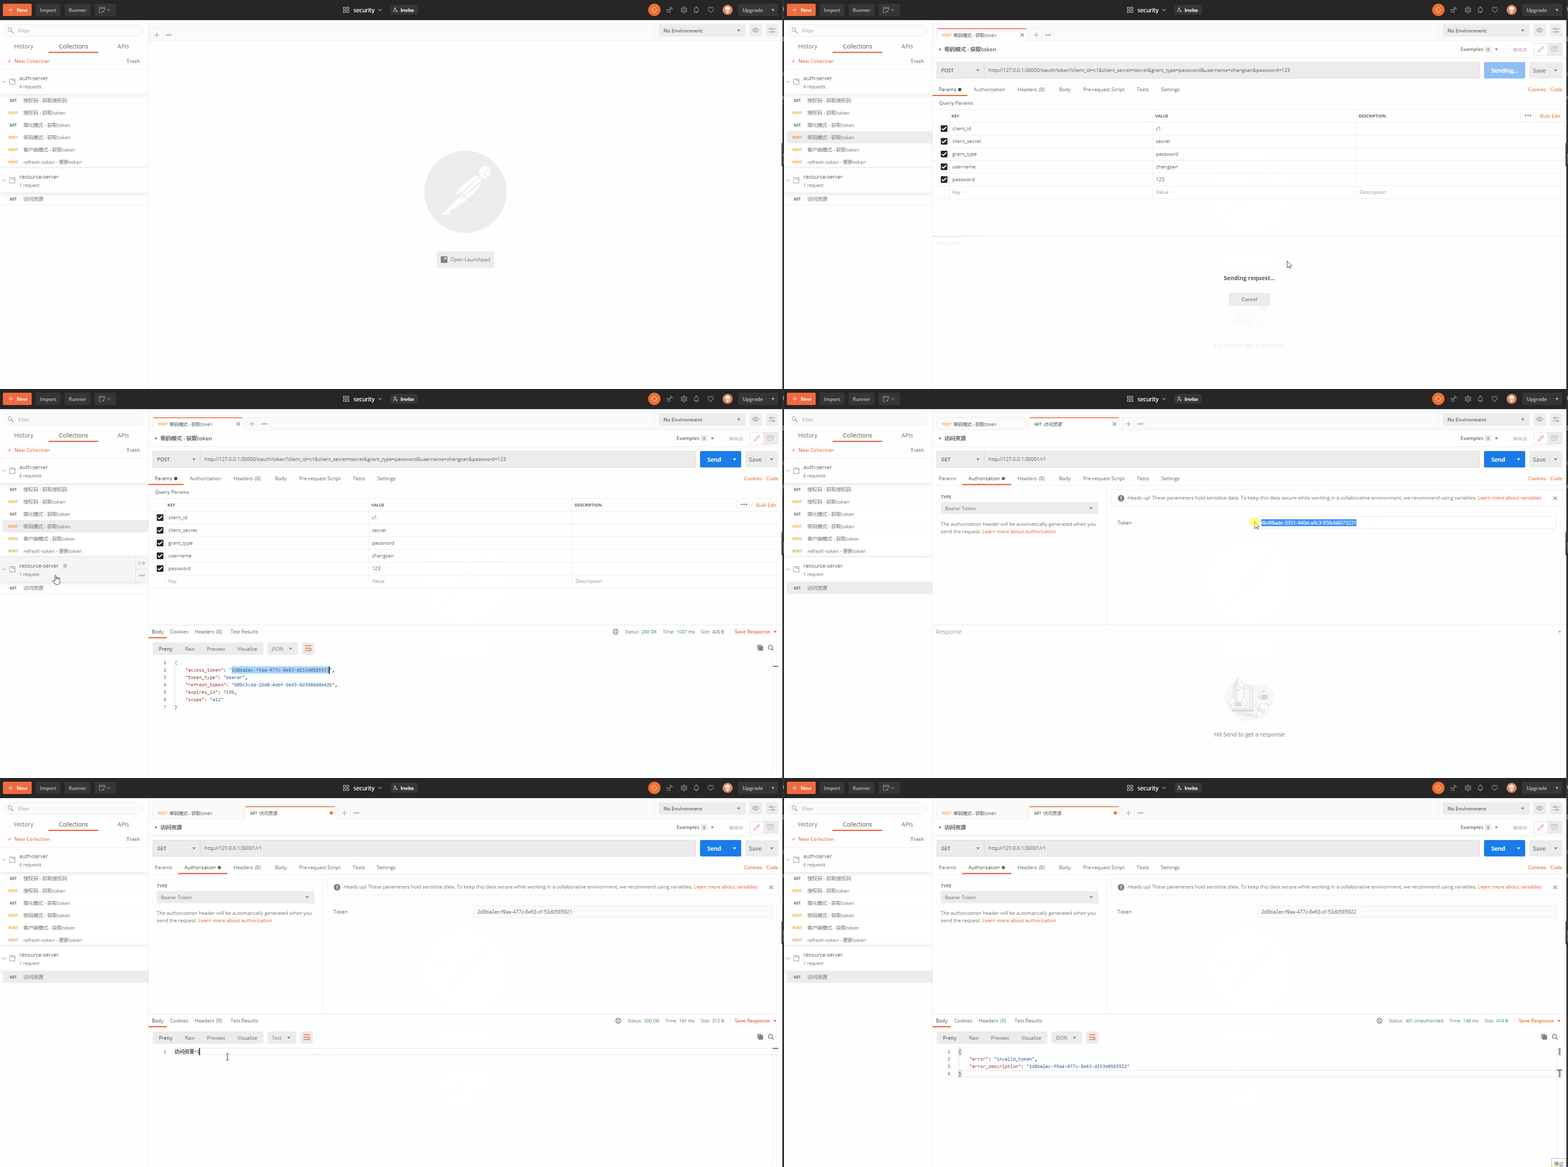
下面演示使用postman基于密码模式获取token并请求资源服务的过程:

6.源代码
源代码地址:https://gitee.com/kdyzm/spring-security-oauth-study/tree/v3.0.0
我的博客地址:https://blog.kdyzm.cn/