自动化交互expect
一,介绍
每次服务器控制链接都需要输入密码,很麻烦,每次交互大大延长了时间
因此就有了免交互及自动化交互存在expect
二,安装
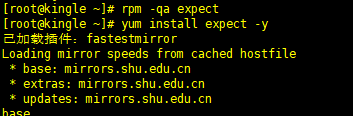
yum install expect -y
查看是否安装成功
rpm -qa expect
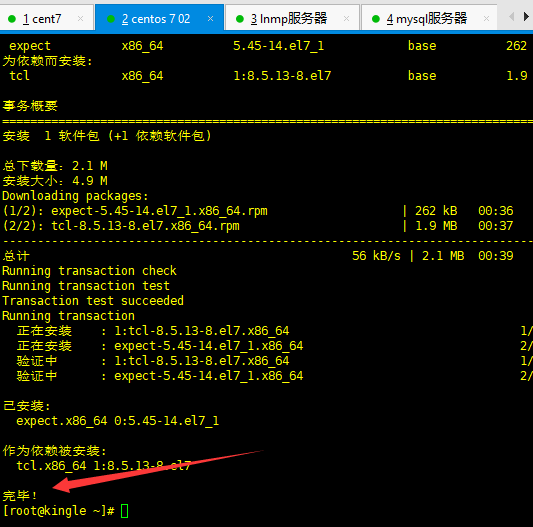

安装算是完成了
三,ssh链接交互
主机:三台 ---->一台主控制服务器
10.0.0.203 ----mysql服务器
10.0.0.204 -----web服务器
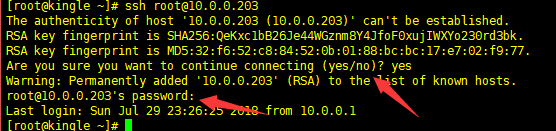
手动链接服务器的话需要实现两次交互操作
我们现在用expect交互
编写kingle.exp文件
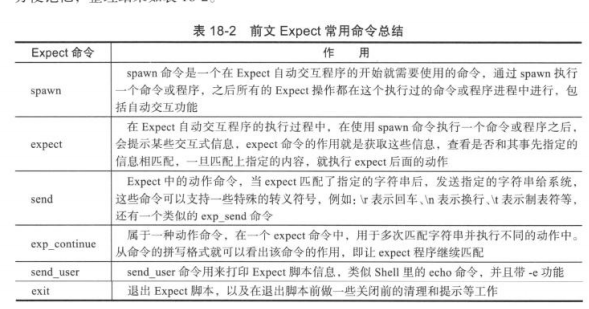
 1 #!/uer/bin/expect
 2 #解析开头
 3 spawn ssh root@10.0.0.203 uptime
 4 #执行ssh命令
 5 expect "*password"
 6 #获取字符串
 7 send "123456
"
 8 #获取到子浮川的时候自动发送密码,
换行
 9 expect eof
10 #结束
运行expect脚本
# expect kingle.exp
少了一次密码交互这样
四,实战分析
实战一 ,交互式执行命令
expect脚本
 1 #########################################################################
 2 #    File Name: command.exp
 3 #    Author: kingle
 4 #    Mail: kingle122@vip.qq.com
 5 #    Created Time: 2018年08月03日 星期五 16时21分13秒
 6 #########################################################################
 7 #!/usr/bin/expect
 8 if { $argc !=2 } {  #判断传入值个数是不是两个
 9     puts "usage: expect $argv0 ip command"  #报错信息
10     exit #退出
11 }
12 set ip [ lindex $argv 0 ] # 接受ip信息复制给ip
13 set cmd [ lindex $argv 1 ] # 接收命令赋值给cmd
14 set password "123456"  #设置密码
15 spawn ssh root@$ip $cmd  #客户端执行的命令
16 expect {  #配置交互模块
17     "yes/no" {send "yes
;exp_continue"}  #收到yes/no就发送yes交互,并持续接受
18     "*password" {send "$password
"}  #收到密码则发送密码
19 }
20 expect eof  #结束
执行结果如下

传入IP的值 和传入 需要执行的命令
使用shell进行多台内网交互
 1 #########################################################################
 2 #    File Name: command.sh
 3 #    Author: kingle
 4 #    Mail: kingle122@vip.qq.com
 5 #    Created Time: 2018年08月03日 星期五 16时44分04秒
 6 #########################################################################
 7 #!/bin/bash
 8 if [ $# -ne 1 ]
 9 #是否传入值
10 then
11     echo $"USAGE:$0 cmd"
12     #输出需要传入命令操作
13         exit 1
14 fi
15 cmd=$1
16 #传值
17 for n in 203 204
18 #for 循环调用
19 do
20     expect command.exp 10.0.0.$n "$cmd"
21 #expect 调用脚本 并且给予值
22 done
执行脚本
sh commaod.sh
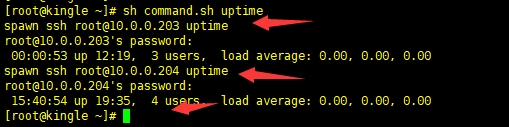
成功 显示两台服务器的负载信息
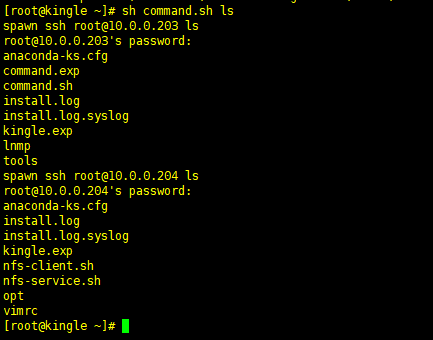
我们在看一下他的其他信息
实战二,批量发送文件
expect脚本:
#########################################################################
#    File Name: fileup.exp
#    Author: kingle
#    Mail: kingle122@vip.qq.com
#    Created Time: 2018年08月03日 星期五 16时44分04秒
########################################################################
#!/usr/bin/expect
if { $argc != 3 } {
    puts "usage: expect $argv0 file host dir"
    exit
}
set file [lindex $argv 0]
#获取数据并传值
set host [lindex $argv 1]
set dir [lindex $argv 2]
set password "123456"
spawn scp -P22 -rp $file root@$host:$dir
#执行命令
expect {
    "yes/no" {send "yes
" ;exp_continue}
    "*password" {send "$password
"}
}
expect eof
我们发送文件看看
expect fileup.exp /etc/hosts 10.0.0.203 /home

显示成功了,,好了我们要集群网络发送了编写脚本
 1 #########################################################################
 2 #    File Name: fileup.sh
 3 #    Author: kingle
 4 #    Mail: kingle122@vip.qq.com
 5 #    Created Time: 2018年08月03日 星期五 16时16分12秒
 6 #########################################################################
 7 #!/bin/bash
 8 if [ $# -ne 2 ]
 9     then
10         echo $"USAGE:$0 file dir"
11         exit 1
12 fi
13 file=$1
14 dir=$2
15 for n in 203 204
16 do
17     expect fileup.exp $file 10.0.0.$n $dir
18 done
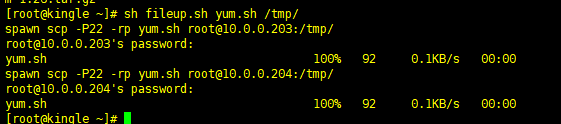
使用脚本执行命令
sh fileup.sh fileup.sh /tmp

我看一下是否成功了呢
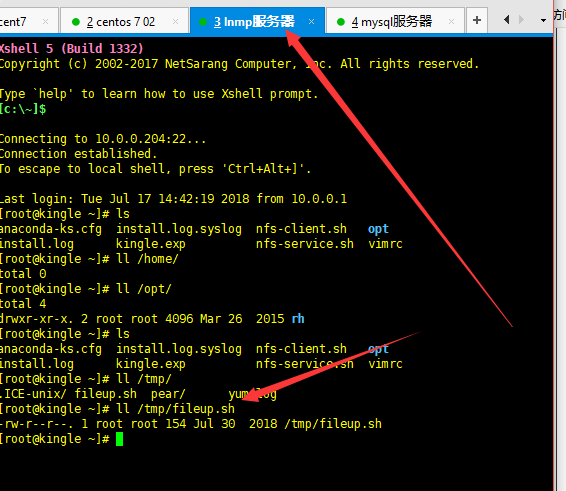

可以看到成功额,不过我的服务器名字一样不好看呢
这样就成功了
我们结合上面的两个来实战一下全网络安装系统
我们编写个安装脚本
全集群下载源码包
wget -P /root/opt http://www.linuxvirtualserver.org/software/kernel-2.6/ipvsadm-1.26.tar.gz


把这个文件发放到整个局域网
查看下局域网是否存在

然后通过第一个脚本进行执行命令

注意执行命令用source

我们查看一下
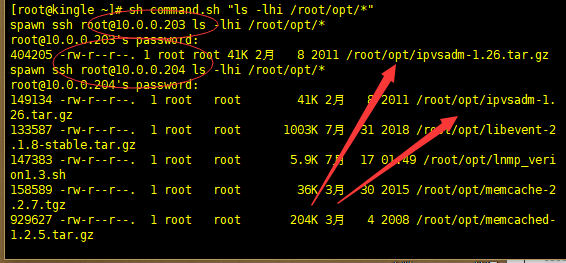
已经下好了
实战三,ssh面登入交互部署
ssh-keygen -t dsa -P '' -f ~/.ssh/id_dsa &>/dev/null

生成本地密钥
全局下发公钥
 1 #########################################################################
 2 #    File Name: ssh.exp
 3 #    Author: kingle
 4 #    Mail: kingle122@vip.qq.com
 5 #    Created Time: 2018年08月03日 星期五 16时16分12秒
 6 #########################################################################
 7 #!/usr/bin/expect
 8 if { $argc != 2 } {
 9     send_user "usage: expect.exp file host
"
10     exit
11 }
12 set file [lindex $argv 0]
13 set host [lindex $argv 1]
14 set password "123456"
15 spawn ssh-copy-id  root@$host
16 expect {
17     "yes/no"    {send "yes
";exp_continue}
18     "*password" {send "$password
"}
19 }
20 expect eof
ssh脚本全局下发
 1 #########################################################################
 2 #    File Name: ssh.sh
 3 #    Author: kingle
 4 #    Mail: kingle122@vip.qq.com
 5 #    Created Time: 2018年08月04日 星期六 17时11分23秒
 6 #########################################################################
 7 #!/bin/bash
 8 for n in 203 204
 9 do
10     expect ssh.exp ~/.ssh/id_dsa.pub 10.0.0.$n
11 done
执行脚本
就完成了
现在我们看下
配置脚本
uptime.sh
ssh 10.0.0.203 uptime
ssh 10.0.0.204 uptime
不用密码就能交互了