背景:在一个angularJS的项目中,需要添加点击某个按钮之后调用手机的照相机,扫描二维码输出所扫描二维码的结果,利用这个结果来处理其他的事情。
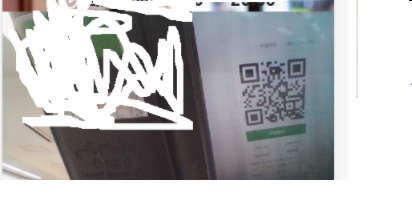
效果如下

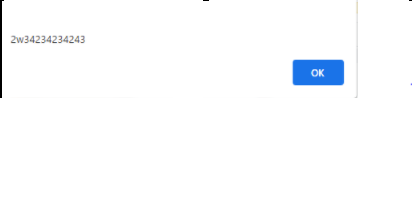
扫描玩二维码把结果alert出来如下图
扫描二维码
1.在本地需要安装下面的包文件
在现有的angularJS项目中,执行下面的命令
npm install
npm i @zxing/browser@latest --save
npm i @zxing/library@latest --save
npm i @zxing/ngx-scanner@latest --save
2.在module 文件中引入下面的代码
// some.module.ts
import { NgModule } from '@angular/core';

// your very important imports here

// the scanner!
import { ZXingScannerModule } from '@zxing/ngx-scanner';

// your other nice stuff

@NgModule({
  imports: [
    // ...
    // gets the scanner ready!
    ZXingScannerModule,
    // ...
  ]
})
export class SomeModule {}
3.html上面添加下面的代码
【scannerEnabled】指的是是否启动照相机,true的场合启动,false的场合不启动
<zxing-scanner [enable]="scannerEnabled" (scanSuccess)="onCodeResult($event)" [formats]="['QR_CODE', 'EAN_13', 'CODE_128', 'DATA_MATRIX']">
            </zxing-scanner>
备注:zxing标签的所有属性,根据自己的需求来定
中文的
英文

<zxing-scanner [enable]="scannerEnabled" [(device)]="desiredDevice" [torch]="torch" (torchCompatible)="onTorchCompatible($event)" (camerasFound)="camerasFoundHandler($event)" ( cameraNotFound)="camerasNotFoundHandler($event)" (scanSuccess)="scanSuccessHandler($event)" (scanError)="scanErrorHandler($event)" (scanFailure)="scanFailureHandler($event)" (scanComplete)="scanCompleteHandler( $事件)”
4.在component.ts文件中写入下面的代码
    onCodeResult(resultString: string) {
        this.qrResultString = resultString;
        alert(resultString);
    }
备注:根据自己的需求来定
 clearResult(): void {
    this.qrResultString = null;
  }

  onCamerasFound(devices: MediaDeviceInfo[]): void {
    this.availableDevices = devices;
    this.hasDevices = Boolean(devices && devices.length);
  }

  onCodeResult(resultString: string) {
    this.qrResultString = resultString;
  }

  onDeviceSelectChange(selected: string) {
    const selectedStr = selected || '';
    if (this.deviceSelected === selectedStr) { return; }
    this.deviceSelected = selectedStr;
    const device = this.availableDevices.find(x => x.deviceId === selected);
    this.deviceCurrent = device || undefined;
  }

  onDeviceChange(device: MediaDeviceInfo) {
    const selectedStr = device?.deviceId || '';
    if (this.deviceSelected === selectedStr) { return; }
    this.deviceSelected = selectedStr;
    this.deviceCurrent = device || undefined;
  }

  openFormatsDialog() {
    const data = {
      formatsEnabled: this.formatsEnabled,
    };

    this._dialog
      .open(FormatsDialogComponent, { data })
      .afterClosed()
      .subscribe(x => {
        if (x) {
          this.formatsEnabled = x;
        }
      });
  }

  onHasPermission(has: boolean) {
    this.hasPermission = has;
  }

  openInfoDialog() {
    const data = {
      hasDevices: this.hasDevices,
      hasPermission: this.hasPermission,
    };

    this._dialog.open(AppInfoDialogComponent, { data });
  }

  onTorchCompatible(isCompatible: boolean): void {
    this.torchAvailable$.next(isCompatible || false);
  }

  toggleTorch(): void {
    this.torchEnabled = !this.torchEnabled;
  }

  toggleTryHarder(): void {
    this.tryHarder = !this.tryHarder;
  }
之后运行angularJS项目,测试是没问题的。
相关资料
https://github.com/zxing-js/ngx-scanner/wiki/Getting-Started
https://www.npmjs.com/package/@zxing/ngx-scanner
https://www.npmjs.com/package/angular-weblineindia-qrcode-scanner
演示地址
https://zxing-ngx-scanner.stackblitz.io/