参考文章
安装golang
#下载golang 1.18 版本
wget https://golang.google.cn/dl/go1.18.3.linux-amd64.tar.gz
#解压golang至指定目录
tar -C /usr/local/ -zxvf ./go1.18.3.linux-amd64.tar.gz
#创建gopath目录
mkdir /home/gopath
#添加环境变量,编辑/etc/profile 文件,在文件末尾添加以下配置
export GOROOT=/usr/local/go
export GOPATH=/home/gopath
export PATH=$PATH:$GOROOT/bin:$GOPATH/bin
#加载/etc/profile文件
source /etc/profile
#配置go proxy代理
go env -w GOPROXY="https://goproxy.io,direct"
#验证golang是否安装完成
go version
部署cri-dockerd
#下载cri-dockerd源码
git clone https://github.com/Mirantis/cri-dockerd.git
#进入cri-dockerd目录
cd cri-dockerd/
#执行 依赖包下载和命令构建
go get && go build
go: downloading k8s.io/component-base v0.20.4
go: downloading k8s.io/apiserver v0.20.4
go: downloading github.com/sirupsen/logrus v1.8.1
go: downloading github.com/spf13/cobra v1.1.1
go: downloading github.com/spf13/pflag v1.0.5
go: downloading k8s.io/cri-api v0.20.4
go: downloading github.com/coreos/go-systemd v0.0.0-20190321100706-95778dfbb74e
go: downloading github.com/coreos/go-systemd/v22 v22.1.0
go: downloading github.com/pkg/errors v0.9.1
..........
go: downloading go.etcd.io/etcd v0.5.0-alpha.5
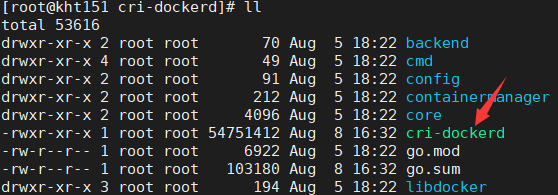
#构建完成后生成cri-dockerd命令
接下来执行cri-dockerd命令的安装及环境配置命令
install -o root -g root -m 0755 cri-dockerd /usr/bin/cri-dockerd
cp -a packaging/systemd/* /etc/systemd/system
systemctl daemon-reload
systemctl enable cri-docker.service
systemctl enable --now cri-docker.socket
集群初始化
#安装指定版本kubeadm
yum install --setopt=obsoletes=0 kubeadm-1.23.9-0 kubelet-1.23.9-0 kubectl-1.23.9-0 -y
#也可执行 yum list kubeadm kubelet kubectl --showduplicates | sort -r 按照输出的列表项安装特定版本.
#拉取k8s指定版本的镜像
kubeadm config images pull --cri-socket unix:///var/run/cri-dockerd.sock --image-repository registry.aliyuncs.com/google_containers
[root@kht151 run]# kubeadm config images pull --cri-socket unix:///var/run/cri-dockerd.sock --image-repository registry.aliyuncs.com/google_containers
[config/images] Pulled registry.aliyuncs.com/google_containers/kube-apiserver:v1.24.3
[config/images] Pulled registry.aliyuncs.com/google_containers/kube-controller-manager:v1.24.3
[config/images] Pulled registry.aliyuncs.com/google_containers/kube-scheduler:v1.24.3
[config/images] Pulled registry.aliyuncs.com/google_containers/kube-proxy:v1.24.3
[config/images] Pulled registry.aliyuncs.com/google_containers/pause:3.7
[config/images] Pulled registry.aliyuncs.com/google_containers/etcd:3.5.3-0
[config/images] Pulled registry.aliyuncs.com/google_containers/coredns:v1.8.6
#kubernetes实际使用pause3.6
docker pull registry.cn-hangzhou.aliyuncs.com/google_containers/pause:3.6
docker tag registry.cn-hangzhou.aliyuncs.com/google_containers/pause:3.6 k8s.gcr.io/pause:3.6
docker rmi registry.cn-hangzhou.aliyuncs.com/google_containers/pause:3.6
#查看状态
systemctl status kubelet
#查看kubelet实时日志
journalctl -xefu kubelet
#master节点执行如下命令安装k8s
kubeadm init \
--kubernetes-version=v1.24.3 \
--pod-network-cidr=10.244.0.0/16 \
--service-cidr=10.96.0.0/12 \
--apiserver-advertise-address=192.168.2.151 \
--cri-socket unix:///var/run/cri-dockerd.sock \
--image-repository registry.aliyuncs.com/google_containers
##集群重置
kubeadm reset --cri-socket unix:///var/run/cri-dockerd.sock
#分节点执行时
kubeadm join 192.168.2.151:6443 --token prrwid.7j4qv12b2vllv9px \
--discovery-token-ca-cert-hash sha256:9b4892840fc6f8897a61d0018fbec03e0343098b863b5f0b214d67869357f98e \
--cri-socket unix:///var/run/cri-dockerd.sock
成功
[root@kht151 images]# kubeadm init --kubernetes-version=v1.24.3 --pod-network-cidr=10.244.0.0/16 --service-cidr=10.96.0.0/12 --apiserver-advertise-address=192.168.2.151 --cri-socket unix:///var/run/cri-dockerd.sock
[init] Using Kubernetes version: v1.24.3
[preflight] Running pre-flight checks
[preflight] Pulling images required for setting up a Kubernetes cluster
[preflight] This might take a minute or two, depending on the speed of your internet connection
[preflight] You can also perform this action in beforehand using 'kubeadm config images pull'
[certs] Using certificateDir folder "/etc/kubernetes/pki"
[certs] Generating "ca" certificate and key
[certs] Generating "apiserver" certificate and key
[certs] apiserver serving cert is signed for DNS names [kht151 kubernetes kubernetes.default kubernetes.default.svc kubernetes.default.svc.cluster.local] and IPs [10.96.0.1 192.168.2.151]
[certs] Generating "apiserver-kubelet-client" certificate and key
[certs] Generating "front-proxy-ca" certificate and key
[certs] Generating "front-proxy-client" certificate and key
[certs] Generating "etcd/ca" certificate and key
[certs] Generating "etcd/server" certificate and key
[certs] etcd/server serving cert is signed for DNS names [kht151 localhost] and IPs [192.168.2.151 127.0.0.1 ::1]
[certs] Generating "etcd/peer" certificate and key
[certs] etcd/peer serving cert is signed for DNS names [kht151 localhost] and IPs [192.168.2.151 127.0.0.1 ::1]
[certs] Generating "etcd/healthcheck-client" certificate and key
[certs] Generating "apiserver-etcd-client" certificate and key
[certs] Generating "sa" key and public key
[kubeconfig] Using kubeconfig folder "/etc/kubernetes"
[kubeconfig] Writing "admin.conf" kubeconfig file
[kubeconfig] Writing "kubelet.conf" kubeconfig file
[kubeconfig] Writing "controller-manager.conf" kubeconfig file
[kubeconfig] Writing "scheduler.conf" kubeconfig file
[kubelet-start] Writing kubelet environment file with flags to file "/var/lib/kubelet/kubeadm-flags.env"
[kubelet-start] Writing kubelet configuration to file "/var/lib/kubelet/config.yaml"
[kubelet-start] Starting the kubelet
[control-plane] Using manifest folder "/etc/kubernetes/manifests"
[control-plane] Creating static Pod manifest for "kube-apiserver"
[control-plane] Creating static Pod manifest for "kube-controller-manager"
[control-plane] Creating static Pod manifest for "kube-scheduler"
[etcd] Creating static Pod manifest for local etcd in "/etc/kubernetes/manifests"
[wait-control-plane] Waiting for the kubelet to boot up the control plane as static Pods from directory "/etc/kubernetes/manifests". This can take up to 4m0s
[apiclient] All control plane components are healthy after 6.002666 seconds
[upload-config] Storing the configuration used in ConfigMap "kubeadm-config" in the "kube-system" Namespace
[kubelet] Creating a ConfigMap "kubelet-config" in namespace kube-system with the configuration for the kubelets in the cluster
[upload-certs] Skipping phase. Please see --upload-certs
[mark-control-plane] Marking the node kht151 as control-plane by adding the labels: [node-role.kubernetes.io/control-plane node.kubernetes.io/exclude-from-external-load-balancers]
[mark-control-plane] Marking the node kht151 as control-plane by adding the taints [node-role.kubernetes.io/master:NoSchedule node-role.kubernetes.io/control-plane:NoSchedule]
[bootstrap-token] Using token: cqbezw.0sk30tigwl2w60dp
[bootstrap-token] Configuring bootstrap tokens, cluster-info ConfigMap, RBAC Roles
[bootstrap-token] Configured RBAC rules to allow Node Bootstrap tokens to get nodes
[bootstrap-token] Configured RBAC rules to allow Node Bootstrap tokens to post CSRs in order for nodes to get long term certificate credentials
[bootstrap-token] Configured RBAC rules to allow the csrapprover controller automatically approve CSRs from a Node Bootstrap Token
[bootstrap-token] Configured RBAC rules to allow certificate rotation for all node client certificates in the cluster
[bootstrap-token] Creating the "cluster-info" ConfigMap in the "kube-public" namespace
[kubelet-finalize] Updating "/etc/kubernetes/kubelet.conf" to point to a rotatable kubelet client certificate and key
[addons] Applied essential addon: CoreDNS
[addons] Applied essential addon: kube-proxy

Your Kubernetes control-plane has initialized successfully!

To start using your cluster, you need to run the following as a regular user:

  mkdir -p $HOME/.kube
  sudo cp -i /etc/kubernetes/admin.conf $HOME/.kube/config
  sudo chown $(id -u):$(id -g) $HOME/.kube/config

Alternatively, if you are the root user, you can run:

  export KUBECONFIG=/etc/kubernetes/admin.conf

You should now deploy a pod network to the cluster.
Run "kubectl apply -f [podnetwork].yaml" with one of the options listed at:
  https://kubernetes.io/docs/concepts/cluster-administration/addons/

Then you can join any number of worker nodes by running the following on each as root:

kubeadm join 192.168.2.151:6443 --token cqbezw.0sk30tigwl2w60dp \
        --discovery-token-ca-cert-hash sha256:5f7a22abec64268c7abbbb25dc48e79678e6b799fc27b0a37cb9944f510ca80f
镜像打包命令
[root@kht151 k8simages]# docker save -o kube-apiserver.tar k8s.gcr.io/kube-apiserver:v1.24.3
[root@kht151 k8simages]# docker save -o kube-proxy.tar k8s.gcr.io/kube-proxy:v1.24.3
[root@kht151 k8simages]# docker save -o kube-scheduler.tar  k8s.gcr.io/kube-scheduler:v1.24.3
[root@kht151 k8simages]# docker save -o kube-controller-manager.tar  k8s.gcr.io/kube-controller-manager:v1.24.3
[root@kht151 k8simages]# docker save -o etcd.tar  k8s.gcr.io/etcd:3.5.3-0
[root@kht151 k8simages]# docker save -o pause3.7.tar  k8s.gcr.io/pause:3.7
[root@kht151 k8simages]# docker save -o pause3.6.tar  k8s.gcr.io/pause:3.6
[root@kht151 k8simages]# docker save -o coredns.tar k8s.gcr.io/coredns/coredns:v1.8.6
镜像解压
docker load -i coredns.tar
docker load -i etcd.tar
docker load -i kube-apiserver.tar
docker load -i kube-controller-manager.tar
docker load -i kube-proxy.tar
docker load -i kube-scheduler.tar
docker load -i pause3.6.tar
docker load -i pause3.7.tar