本文首发于个人博客https://kezunlin.me/post/23014ca5/,欢迎阅读最新内容!
anaconda tutorial on ubuntu 16.04
Guide
versions:
- ubuntu 16.04
- conda 4.6.14
- python 3.7.3 (default)
- python 3.5.6 (env)
Install Conda
download Anaconda3-2019.03-Linux-x86_64.sh from here
bash ./Anaconda3-2019.03-Linux-x86_64.sh
output
[/home/kezunlin/anaconda3] >>>
PREFIX=/home/kezunlin/anaconda3
installing: python-3.7.3-h0371630_0 ...
Python 3.7.3
...
installing: scikit-image-0.14.2-py37he6710b0_0 ...
installing: scikit-learn-0.20.3-py37hd81dba3_0 ...
installing: astropy-3.1.2-py37h7b6447c_0 ...
installing: statsmodels-0.9.0-py37h035aef0_0 ...
installing: seaborn-0.9.0-py37_0 ...
installing: anaconda-2019.03-py37_0 ...
installation finished.
Do you wish the installer to initialize Anaconda3
by running conda init? [yes|no]

If you'd prefer that conda's base environment not be activated on startup,
   set the auto_activate_base parameter to false:

conda config --set auto_activate_base false

Thank you for installing Anaconda3!
conda config --set auto_activate_base false
check version
conda --version
conda 4.6.11

conda update conda

conda --version
conda 4.6.14
Managing Environments
create new env
When you begin using conda, you already have a default environment named base. You don't want to put programs into your base environment, though. Create separate environments to keep your programs isolated from each other.
(base) kezunlin@ke:~$ conda --version
conda 4.6.14

(base) kezunlin@ke:~$ conda create --name snowflakes biopython
(base) kezunlin@ke:~$ conda activate snowflakes
(snowflakes) kezunlin@ke:~$
(snowflakes) kezunlin@ke:~$ conda deactivate
(base) kezunlin@ke:~$
conda activateonly works on conda 4.6 and later versions.
list envs
conda info --envs
# conda environments:
#
base                  *  /home/kezunlin/anaconda3
snowflakes               /home/kezunlin/anaconda3/envs/snowflakes
~/.conda/environments.txt
/home/kezunlin/anaconda3
/home/kezunlin/anaconda3/envs/snowflakes
/home/kezunlin/anaconda3/envs/py35
Managing Python
When you create a new environment, conda installs the same Python version you used when you downloaded and installed Anaconda. If you want to use a different version of Python, for example Python 3.5, simply create a new environment and specify the version of Python that you want.
conda create --name snakes python=3.5
conda activate py35

conda info --envs
# conda environments:
#
base                     /home/kezunlin/anaconda3
py35                  *  /home/kezunlin/anaconda3/envs/py35
snowflakes               /home/kezunlin/anaconda3/envs/snowflakes

(base) kezunlin@ke:~$ python --version
Python 3.7.3
(base) kezunlin@ke:~$ conda activate py35
(py35) kezunlin@ke:~$ python --version
Python 3.5.6 :: Anaconda, Inc.
Managing packages
list packages
(base) kezunlin@ke:~$ conda activate py35
(py35) kezunlin@ke:~$
(py35) kezunlin@ke:~$ conda list
# packages in environment at /home/kezunlin/anaconda3/envs/py35:
#
# Name                    Version                   Build  Channel
ca-certificates           2019.1.23                     0
certifi                   2018.8.24                py35_1
libedit                   3.1.20181209         hc058e9b_0
search
conda search beautifulsoup4

...
beautifulsoup4                 4.6.3          py27_0  pkgs/main
beautifulsoup4                 4.6.3          py35_0  pkgs/main
beautifulsoup4                 4.6.3          py36_0  pkgs/main
beautifulsoup4                 4.6.3          py37_0  pkgs/main
beautifulsoup4                 4.7.1          py27_1  pkgs/main
beautifulsoup4                 4.7.1          py36_1  pkgs/main
beautifulsoup4                 4.7.1          py37_1  pkgs/main
install
conda install beautifulsoup4
conda config
conda config --set show_channel_urls yes
conda config --show
Tools
Jupyter notebook
install jupyter
conda create -n py35 python=3.5
conda activate py35
conda install jupyter
install kernel
python -m ipykernel install --user --name=py35
Installed kernelspec py35 in /home/kezunlin/.local/share/jupyter/kernels/py35
jupyterdepends onnotebookandipykernel
also see tensorflow jupyter notebook kenel
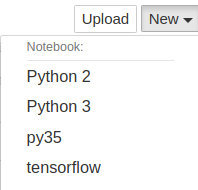
run jupyter
jupyter notebook
now we can see py35 kernel appears.
tensorflow-gpu/keras
conda activate py35
conda install tensorflow-gpu keras
test
 >>>import tensorflow as tf
 >>>import keras as K
 Using TensorFlow backend.
.keras/keras.json
{
    "epsilon": 1e-07,
    "floatx": "float32",
    "image_data_format": "channels_last",
    "backend": "tensorflow"
}
pytorch
see pytorch tutorial on ubuntu 16.04
Reference
History
- 20190524: created.
Copyright
- Post author: kezunlin
- Post link: https://kezunlin.me/post/23014ca5/
- Copyright Notice: All articles in this blog are licensed under CC BY-NC-SA 3.0 unless stating additionally.