Sublime Text is a most popular, lightweight and smart cross-platform text and source code editor with a Python API, that available for Linux, Windows and Mac OS X. It is really an awesome application for programming and offers a wide range of file types to manage has it supports syntax highlighting for C, C++, C#, CSS, HTML, Java, JavaScript, PHP, Groovy, LaTeX and the list goes on. The user interface is much similar to most famous editor called “vim“.
By default there is no official repository available for Sublime Text 2 and there is no any magical way to install using “yum” or “apt-get” command as you use these command frequently to install packages on your Linux systems.
But due to high volume of users requests, the WebUpd8team created a up-to-date PPA forSublime Text 2 for Ubuntu users. So, here in this article we will show you two methods to install Sublime Text.
At the time of writing this article, Sublime Text 3 beta is available to registered Sublime Text users only at a license costs USD $70. However, now it’s available to all users.
The first method is using source tarball on RHEL, CentOS, Fedora, Debian, Ubuntu andLinux Mint.
The Second method is using PPA on Debian, Ubuntu and Linux Mint.
Method 1: Installing from Source Tarball
The latest stable version can be downloaded from Sublime Text website or you can use the following “wget” command to download the tar-file that suits you better and extract it as shown below.
On 32-Bit Systems
# cd ~
# wget http://c758482.r82.cf2.rackcdn.com/Sublime Text 2.0.2.tar.bz2
# tar vxjf Sublime Text 2.0.2.tar.bz2
On 64-Bit Systems
# cd ~
# wget http://c758482.r82.cf2.rackcdn.com/Sublime Text 2.0.2 x64.tar.bz2
# tar vxjf Sublime Text 2.0.2 x64.tar.bz2
Once unpacked, you will get a directory called “Sublime Text 2″, inside this directory you will see a list files that required by Sublime Text to run. For security reason, we move this folder under “/opt” location.
# sudo mv Sublime Text 2 /opt/
Next create a symbolic link to call “Sublime Text” from the command line as “sublime”. To do, create a symbolic link under “/usr/bin” as shown below.
# sudo ln -s /opt/Sublime Text 2/sublime_text /usr/bin/sublime
For Ubuntu Unity Lancher
If you are using Unity and want to add “Sublime Text” to the Unity launcher. Create a “sublime.desktop” file under “/usr/share/applications”.
# sudo sublime /usr/share/applications/sublime.desktop
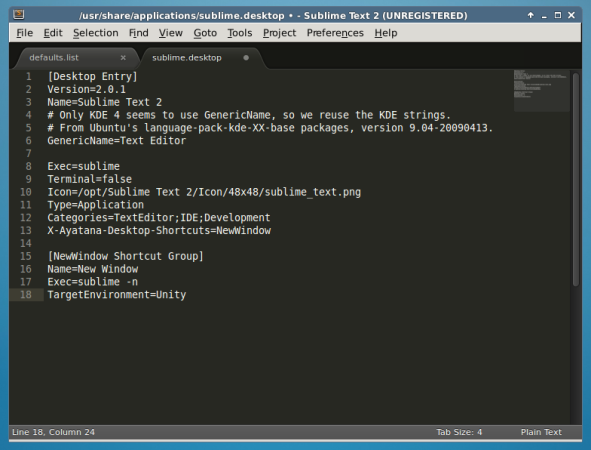
Then Copy and Paste the following content into it. Save and close.
[Desktop Entry]
Version=2.0.1
Name=Sublime Text 2
# Only KDE 4 seems to use GenericName, so we reuse the KDE strings.
# From Ubuntu's language-pack-kde-XX-base packages, version 9.04-20090413.
GenericName=Text Editor
Exec=sublime
Terminal=false
Icon=/opt/Sublime Text 2/Icon/48x48/sublime_text.png
Type=Application
Categories=TextEditor;IDE;Development
X-Ayatana-Desktop-Shortcuts=NewWindow
[NewWindow Shortcut Group]
Name=New Window
Exec=sublime -n
TargetEnvironment=Unity
Install Sublime Text in Ubuntu
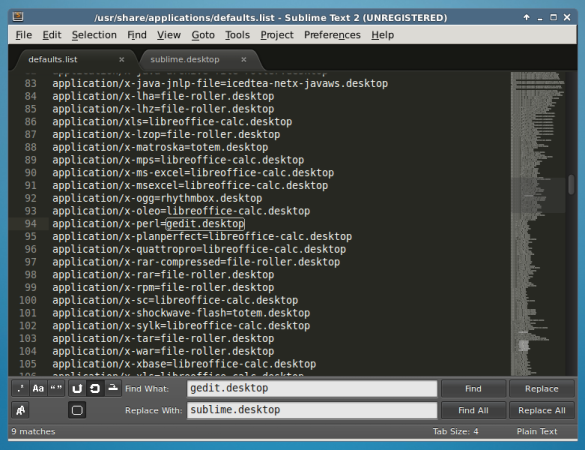
If you would like to open all your text files with “Sublime Text“. Open a “defaults.list” file and replace all occurrences of “gedit.desktop” with “sublime.desktop” as shown.
# sudo sublime /usr/share/applications/defaults.list
Method 2: Installing Sublime Text Using PPA
Add WebUpd8team PPA to your Synaptic Manager to install Sublime Text using following steps.
# sudo add-apt-repository ppa:webupd8team/sublime-text-2
# sudo apt-get update
# sudo apt-get install sublime-text
NOTE: As I said the Sublime Text 3 Beta is released, if you would like to install Sublime Text 3, use this following command.
# sudo apt-get install sublime-text-installer
Start Sublime Text
To Launch Sublime Text from command line, call the “sublime” as shown.
# sublime
Install Sublime Text in Debian
That’s It! If you are using any other editor, please do tell us via comment section.