总的来说:三种高亮显示
一、plain highlight(默认)
二、posting highlight(性能)
对磁盘的消耗更少
将文本切割为句子,并且对句子进行高亮,效果更好
性能比plain highlight高,因为不需要重新对高亮文本进行分词
三、fast vector highlight(文件)
对大文件而言(大于1M),性能更高
代码时间
默认创建索引时添加分词

PUT /blog_website
{
  "mappings": {
    "blogs": {
      "properties": {
        "title": {
          "type": "text",
          "analyzer": "ik_max_word"
        },
        "content": {
          "type": "text",
          "analyzer": "ik_max_word"
        }
      }
    }
  }
}
查询
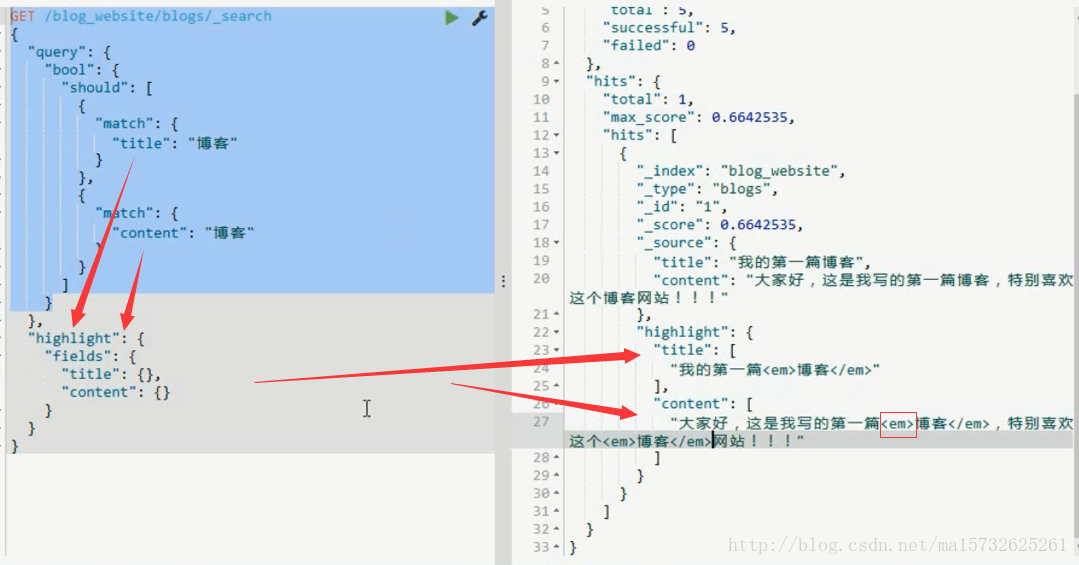
如果包含了那个搜索词的话,就会在那个field的文本中,对搜索词进行红色的高亮显示
posting highlight
创建索引时在要搜索的字段添加”index_options”: “offsets”
PUT /blog_website
{
  "mappings": {
    "blogs": {
      "properties": {
        "title": {
          "type": "text",
          "analyzer": "ik_max_word"
        },
        "content": {
          "type": "text",
          "analyzer": "ik_max_word",
          "index_options": "offsets"
        }
      }
    }
  }
}
fast vector highlight
建索引时term vector设置在mapping中
PUT /blog_website
{
  "mappings": {
    "blogs": {
      "properties": {
        "title": {
          "type": "text",
          "analyzer": "ik_max_word"
        },
        "content": {
          "type": "text",
          "analyzer": "ik_max_word",
          "term_vector" : "with_positions_offsets"
        }
      }
    }
  }
}
自定义:
强制使用某种高亮:指定type
GET /blog_website/blogs/_search
{
  "query": {
    "match": {
      "content": "博客"
    }
  },
  "highlight": {
    "fields": {
      "content": {
        "type": "plain"//强制使用某种highlighter
      }
    }
  }
}
设置高亮标签,取代<em>
 "pre_tags": ["<tag1>"],
  "post_tags": ["</tag2>"],
如下:
GET /blog_website/blogs/_search
{
  "query": {
    "match": {
      "content": "博客"
    }
  },
  "highlight": {
    "pre_tags": ["<tag1>"],
    "post_tags": ["</tag2>"],
    "fields": {
      "content": {
        "type": "plain"
      }
    }
  }
}
设置文本片段:长度、个数
GET /_search
{
    "query" : {
        "match": { "user": "kimchy" }
    },
    "highlight" : {
        "fields" : {
            "content" : {"fragment_size" : 150, "number_of_fragments" : 3, "no_match_size": 150 }
        }
    }
}

fragment_size: 将要显示的文本拆成*长的一段来进行显示
    (设置要显示出来的文本片段的长度,默认是100)

number_of_fragments:可能高亮的文本片段有多个片段,指定显示几个片段
————————————————
版权声明:本文为CSDN博主「星小丫头辰」的原创文章,遵循 CC 4.0 BY-SA 版权协议,转载请附上原文出处链接及本声明。
原文链接:https://blog.csdn.net/ma15732625261/article/details/79722791