1.3用户登录
用户登录成功后跳转到商品显示页面
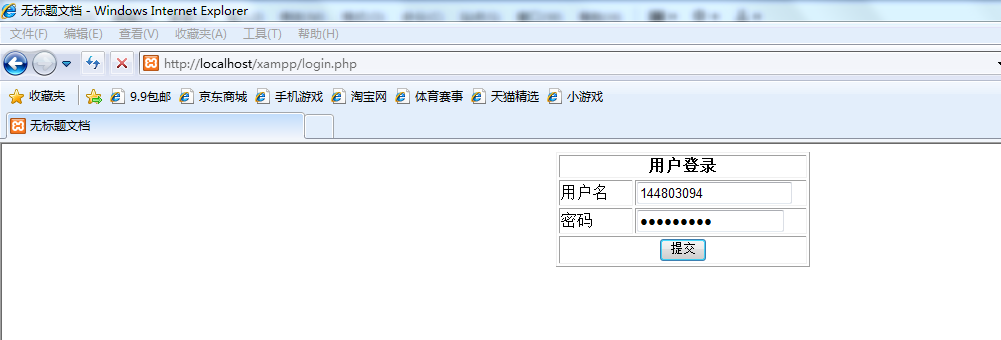
1.3.1设计界面
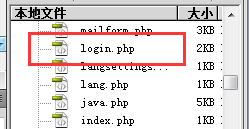
1、新建一个login.php页面,用来做用户的登录

2、登录业务原理
通过输入的用户名和密码查询对应的记录,表示登陆成功,否则登录失败
SQL语句如下:
$sql = "select * from users where username = '$username' and password='$password'";
3、业务逻辑的实现


源代码为:
<!DOCTYPE html PUBLIC "-//W3C//DTD XHTML 1.0 Transitional//EN" "http://www.w3.org/TR/xhtml1/DTD/xhtml1-transitional.dtd">
<html xmlns="http://www.w3.org/1999/xhtml">
<head>
<meta http-equiv="Content-Type" content="text/html; charset=utf-8" />
<title>无标题文档</title>
<link rel="stylesheet" type="text/css" href="styles/common.css"/>
</head>

<body>
<?php

if
(isset($_POST['button'])){
    $username=$_POST['username'];//得到用户输入的用户名
    $password=$_POST['password'];//密码
     mysql_connect('127.0.0.1:3306','root','')or die(mysql_error());//连接数据库
    mysql_select_db('mvc_study');//选择数据库
    mysql_query('set names utf8');

    $sql = "select * from users
     where username = '$username' and password='$password'";
     $rs=mysql_query($sql);
     if(mysql_num_rows($rs)==1){//如果数据库的行数为1则成功否则失败
        echo '登陆成功';
        }else{
            echo '登录失败';
             }
    }
?>
<form id="form1" name="form1" method="post" action="">
  <table width="254" border="1" align="center">
    <tr>
      <th colspan="2" scope="col">用户登录</th>
    </tr>
    <tr>
      <td width="70">用户名</td>
      <td width="168"><label for="username"></label>
      <input type="text" name="username" id="username" /></td>
    </tr>
    <tr>
      <td>密码</td>
      <td><input type="password" name="password" id="password" /></td>
    </tr>
    <tr>
      <td colspan="2" align="center"><label for="password">
        <input type="submit" name="button" id="button" value="提交" />
      </label></td>
    </tr>
  </table>
</form>
</body>
</html>
1.4 管理员之管理页面
为了便于管理,在站点下新建一个文件夹(admin),用来存放管理员的管理页面。
在admin文件夹中,新建一个admin.php页面,用来做管理员的管理页面。
在页面中导入外部样式
页面效果和前台显示页面效果(showgoods.php)是一样的,多了三个链接,“添加商品”,“修改”,“删除”

具体代码参见admin下的admin.php
<!DOCTYPE html PUBLIC "-//W3C//DTD XHTML 1.0 Transitional//EN" "http://www.w3.org/TR/xhtml1/DTD/xhtml1-transitional.dtd">
<html xmlns="http://www.w3.org/1999/xhtml">
<head>
<meta http-equiv="Content-Type" content="text/html; charset=utf-8" />
<title>无标题文档</title>
<link rel="stylesheet" type="text/css" href="../styles/common.css"/>
<style type="text/css">
table{
    width:980px;
    }
</style>
</head>

<body>
<?php
//连接数据库
mysql_connect('localhost','root','') or die (mysql_error());
mysql_select_db('data');
mysql_query('set names utf8');
$rs = mysql_query('select * from products');
?>
<a>添加商品</a>
<table width="980">
<tr>
    <th>编号</th> <th>商品名称</th><th>规格</th><th>库存量</th> <th>图片</th> <th>网址</th><th>修改</th><th>删除</th>
<?php
while($rows = mysql_fetch_assoc($rs)){
    echo '<tr>';
    echo  '<td>'.$rows['proID'].'</td>';
    echo  '<td>'.$rows['proname'].'</td>';
    echo  '<td>'.$rows['proguige'].'</td>';
    echo  '<td>'.$rows['promount'].'</td>';
    echo  '<td>'.$rows['proimages'].'</td>';
    echo  '<td>'.$rows['proweb'].'</td>';
    echo  '<td><input type = "button" value="修改"</td>' ;
    echo  '<td><input type = "button" value="删除"</td>' ;
    echo '</tr>';
    }
?>
</tr>
</body>
</html>
common.css代码为:
@charset "utf-8";
table,th,td{
    border:#000 solid 1px;
    }
    table{
        margin:auto;
        font-size:14px;
        }
tr{
    height:35px;
    }