导入数据并设定随机数种子
import torch
import torch.nn as nn
import numpy as np
import random
import pandas as pd
import matplotlib.pyplot as plt
from d2l import torch as d2l
import torch.nn.functional as F
import math

def setup_seed(seed):
     torch.manual_seed(seed)
     torch.cuda.manual_seed_all(seed)
     np.random.seed(seed)
     random.seed(seed)
     torch.backends.cudnn.deterministic = True
# 设置随机数种子
setup_seed(916)

data_iter, vocab = d2l.load_data_time_machine(64, 35)
indim = 28
hidim = 512
outdim = 28
epochs = 500
batch_size = 64
随机数种子设置是一个好习惯,因为我的生日就在916,所以设置916作为以后我训练的随机数种子。
搭建RNN模型
class RNN(nn.Module):
    def __init__(self, indim, hidim, outdim):
        super(RNN, self).__init__()
        self.rnn = nn.RNN(len(vocab), hidim)
        self.linear = nn.Linear(hidim, len(vocab))

    def get_begin_state(self, batch_size, hidim):
        self.begin_state = torch.zeros((1, batch_size, hidim), dtype=torch.float32)
        self.begin_state =self.begin_state.cuda()

    def forward(self, input, state):
        input = input.type(torch.float32)
        input = input.cuda()
        self.rnn.cuda()
        self.linear.cuda()
        # 这里的输入input 是(时间步,batchsize,feature维度)
        y, state = self.rnn(input, state) # state 是起始的state
        output = self.linear(y.reshape(-1, y.shape[-1]))
        return output, state
rnn 的输入input 的shape是时间步,batchsize,特征维度)
torch 中的 rnn 是不会直接就输出 label 预测的,rnn输出的y只是一连串隐变量,并且shape为(时间步, batch_size,hiddim),state 的shape是(层数, batch_size, hiddim)。
这里有点绕,并且要reshape,所以应当格外小心。
训练
def train():
animator = d2l.Animator(xlabel='epoch',ylabel='perplexity', xlim = [10, epochs],
legend=['train'])
for epoch in range(epochs):
metrics = d2l.Accumulator(2)
for x, y in data_iter:
x = x.T
y = y.T
y = y.reshape(-1).type(torch.int64) # 时间步 * batch_size
y = y.cuda()
x = F.one_hot(x, len(vocab))
y_hat,_ = rnn(x, rnn.get_begin_state(batch_size, hidim))
l = loss(y_hat, y)
optimizer.zero_grad()
l.backward()
nn.utils.clip_grad.clip_grad_norm_(rnn.parameters(), 1)
optimizer.step()
metrics.add(l.item() * len(y), len(y))
perplexity = math.exp(metrics[0]/metrics[1])
if epoch % 50 == 0:
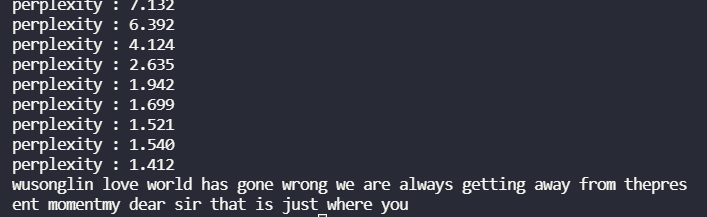
print("perplexity : %.3f"% perplexity)
#animator.add(epoch+1, perplexity)
#plt.show()
print("perplexity : %.3f"% perplexity)
注意这里的真实值 y我做了一个转置并 reshape,这是因为我的预测值输出的(时间步*batchsize, 特征维度),而真实值y导入时的shape是(batch_size ,时间步)因为y是索引,没有特征维度这个说法,将其reshape(-1)是因为label要用在交叉熵计算上,而交叉熵输入label只接受一个一维向量。
这里也是很绕,需要格外小心并且注意。
预测
def predict():
    prefix = 'time machine ' #长度为13
    state = rnn.get_begin_state(1, hidim)
    outputs = [vocab[prefix[0]]]
    get_input = lambda: torch.tensor([outputs[-1]]).reshape((1,1))
    for y in prefix[1:]:
        _, state = rnn(F.one_hot(get_input(),len(vocab)), state)# warm 操作,想用prefix做得到一个state,这里拆开了一个词一个词计算,其实吧,直接导入,相当于,13个时间步,一个batchsize,最后得到的输出还是
        outputs.append(vocab[y])
    for _ in range(100):
        y, state = rnn(F.one_hot(get_input(),len(vocab)), state)#用上一个预测值去得到下一个预测值
        outputs.append(int(y.argmax(dim=1).reshape(1)))

    print(''.join([vocab.idx_to_token[i] for i in outputs]))
这里需要注意的是,预测输入的词实际上是上一步预测得到的词,所以在这里要一步一步的进行预测。
在刚开始,我是直接手撸一个RNN,各种权重参数自己设定 ,发现结果并不好,困惑度一直维持在6左右,而用torch提供的RNN困惑度可以降到1.4。看了torch的rnn实现源码后发现可能是没有加tanh激活函数的原因,或者是初始化方式有关。可以看到torch对于rnn所有的权重参数常用相同的初始化方式。
def reset_parameters(self) -> None:
  stdv = 1.0 / math.sqrt(self.hidden_size)
  for weight in self.parameters():
      init.uniform_(weight, -stdv, stdv)
自己手写了一个RNN:
class RNN(nn.Module):
    def __init__(self, indim, hidim, outdim):
        super(RNN, self).__init__()
        self.hidim = hidim
        self.W_hh = nn.Parameter(torch.FloatTensor(hidim, hidim))
        self.W_hx = nn.Parameter(torch.FloatTensor(indim, hidim))
        self.W_hy = nn.Parameter(torch.FloatTensor(hidim, outdim))
        self.b_h  = nn.Parameter(torch.FloatTensor(hidim))
        self.b_y = nn.Parameter(torch.FloatTensor(outdim))
        self.reset()

    def reset(self):
        stdv = 1.0 / math.sqrt(self.hidim)
        for param in self.parameters():
            nn.init.uniform_(param, -stdv, stdv)

    def get_begin_state(self, batch_size, hidim):
        self.begin_state = torch.zeros((batch_size, hidim), dtype=torch.float32)
        return self.begin_state

    def forward(self, input, state):
        input = input.type(torch.float32)
        input = input.cuda()
        h = state
        h = h.cuda()
        Y = []
        for x in input: # 每个时间步
            h = F.tanh(x @ self.W_hx + h @ self.W_hh + self.b_h)
            y = h @ self.W_hy + self.b_y
            Y.append(y)

        return torch.concat(Y, dim=0), h
最终,我的复杂度完美达到了用torch 提供的rnn实现的效果。问题就出在初始化和激活函数上面。