For those that want to dive right in, I have put up a tutorial and some sample manifests on github. Check it out at https://github.com/IanLewis/kubernetes-bluegreen-deployment-tutorial
Kubernetes has a really awesome built-in feature called Deployments. Deployments come with the ability to do rolling updates of containers when you update your application to a new version. Rolling updates are a great way to update applications because your app uses about the same amount of resources during an update as it does when not updating, all with minimal impact to performance and availability.
However, there are many legacy applications out there that don't work well with rolling updates. Some applications simply need to deploy a new version and cut over to it right away. For this, we need to perform a blue/green deployment. With blue/green deployments a new copy of the application (green) is deployed alongside the existing version (blue). Then the ingress/router to the app is updated to switch to the new version (green). You then need to wait for the old (blue) version to finish the requests sent to it, but for the most part traffic to the app changes to the new version all at once.
Kubernetes doesn't have support for blue/green deployments built in. Currently the best way to do it is create a new deployment and then update the service for the application to point to the new deployment. Let's look at what that means.
The Blue Deployment
A Kubernetes deployment specifies a group of instances of an application. Behind the scenes it creates a replicaset which is responsible for keeping the specified number of instances up and running.
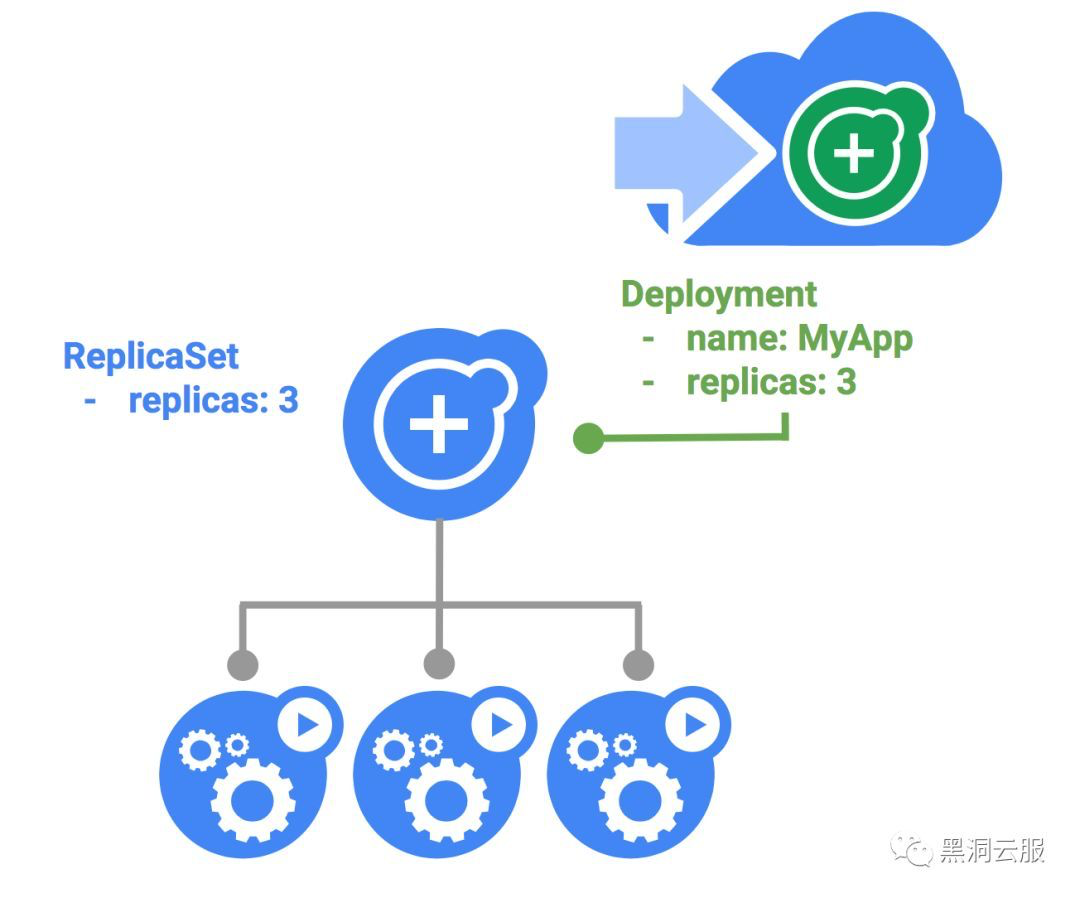
We can create our "blue" deployment by saving the following yaml to a file blue.yaml
apiVersion: extensions/v1beta1
kind: Deployment
metadata:
  name: nginx-1.10
spec:
  replicas: 3
  template:
    metadata:
      labels:
        name: nginx
        version: "1.10"
    spec:
      containers:
        - name: nginx
          image: nginx:1.10
          ports:
            - name: http
              containerPort: 80
You can then create the deployment using the kubectl command.
$ kubectl apply -f blue.yaml
Once we have a deployment we can provide a way to access the instances of the deployment by creating a Service. Services are decoupled from deployments so that means that you don't explicitly point a service at a deployment. What you do instead is specify a label selector which is used to list the pods that make up the service. When using deployments, this is typically set up so that it matches the pods for a deployment.
In this case we have two labels, name=nginx and version=1.10. We will set these as the label selector for the service below. Save this to service.yaml
apiVersion: v1
kind: Service
metadata:
  name: nginx
  labels:
    name: nginx
spec:
  ports:
    - name: http
      port: 80
      targetPort: 80
  selector:
    name: nginx
    version: "1.10"
  type: LoadBalancer
Creating the service will create a load balancer that is accessible outside the cluster.
$ kubectl apply -f service.yaml
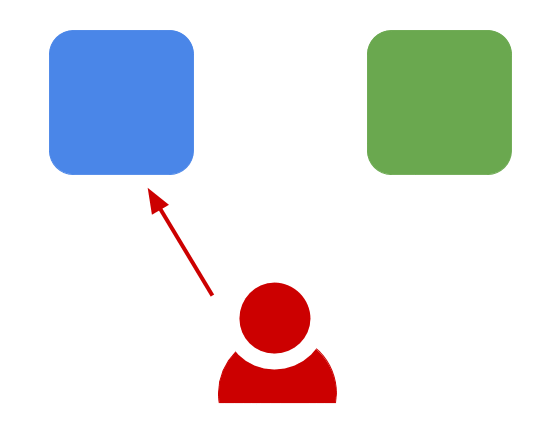
Now we have something that looks like this.

You can test that the service is accessible and get the version.
$ EXTERNAL_IP=$(kubectl get svc nginx -o jsonpath="{.status.loadBalancer.ingress[*].ip}")
$ curl -s http://$EXTERNAL_IP/version | grep nginx
Creating Green Deployment
For the "green" deployment we will deploy a new deployment in parallel wit the "blue" deployment. If the following is in green.yaml ...
apiVersion: extensions/v1beta1
kind: Deployment
metadata:
  name: nginx-1.11
spec:
  replicas: 3
  template:
    metadata:
      labels:
        name: nginx
        version: "1.11"
    spec:
      containers:
        - name: nginx
          image: nginx:1.11
          ports:
            - name: http
              containerPort: 80
... I can create the new deployment like so.
$ kubectl apply -f green.yaml
Now I have two deployments but the service is still pointing to the "blue" one.

Updating the App
To cut over to the "green" deployment we will update the selector for the service. Edit the service.yaml and change the selector version to "1.11". That will make it so that it matches the pods on the "green" deployment.
apiVersion: v1
kind: Service
metadata:
  name: nginx
  labels:
    name: nginx
spec:
  ports:
    - name: http
      port: 80
      targetPort: 80
  selector:
    name: nginx
    version: "1.11"
  type: LoadBalancer
This apply will update the existing nginx service in place.
$ kubectl apply -f service.yaml
Now we have something that looks like this.

Updating the selector for the service is applied immediately and so you should see that the new version of nginx is serving traffic.
$ EXTERNAL_IP=$(kubectl get svc nginx -o jsonpath="{.status.loadBalancer.ingress[*].ip}")
$ curl -s http://$EXTERNAL_IP/version | grep nginx
Automating
You can automate your blue/green deployment a bit with some scripting. The following script takes the name of the service, the version you want to deploy, and the path to the green deployment's yaml file and runs through a full blue/green deployment using kubectl to output raw JSON from the API and parsing it with jq. It waits for the green deployment to become ready by inspecting the status.conditions on the deployment object before updating the service definition.
The script makes some assumptions for simplicity's sake, such as expecting the deployment's name to be of the form - and that there are name and version labels that are used for the selector. kubectl is super flexible you can imagine writing something like this for your own needs.
#!/bin/bash

# bg-deploy.sh <servicename> <version> <green-deployment.yaml>
# Deployment name should be <service>-<version>

DEPLOYMENTNAME=$1-$2
SERVICE=$1
VERSION=$2
DEPLOYMENTFILE=$3

kubectl apply -f $DEPLOYMENTFILE

# Wait until the Deployment is ready by checking the MinimumReplicasAvailable condition.
READY=$(kubectl get deploy $DEPLOYMENTNAME -o json | jq '.status.conditions[] | select(.reason == "MinimumReplicasAvailable") | .status' | tr -d '"')
while [[ "$READY" != "True" ]]; do
    READY=$(kubectl get deploy $DEPLOYMENTNAME -o json | jq '.status.conditions[] | select(.reason == "MinimumReplicasAvailable") | .status' | tr -d '"')
    sleep 5
done

# Update the service selector with the new version
kubectl patch svc $SERVICE -p "{"spec":{"selector": {"name": "${SERVICE}", "version": "${VERSION}"}}}"

echo "Done."
From: https://www.ianlewis.org/en/bluegreen-deployments-kubernetes