一:原理
1.
首先Spring Boot项目中都会如下启动类:
@SpringBootApplication
public class Application {
    public static void main(String[] args) {
        SpringApplication.run(Application.class, args);
    }
}
其中,@SpringBootApplication中有三个重要的注解合一。
@Target(ElementType.TYPE)
@Retention(RetentionPolicy.RUNTIME)
@Documented
@Inherited
@SpringBootConfiguration
@EnableAutoConfiguration
@ComponentScan(excludeFilters = { @Filter(type = FilterType.CUSTOM, classes = TypeExcludeFilter.class),
        @Filter(type = FilterType.CUSTOM, classes = AutoConfigurationExcludeFilter.class) })
public @interface SpringBootApplication {
所以,来说说@EnableAutoConfiguration的作用。
1 @Target(ElementType.TYPE)
2 @Retention(RetentionPolicy.RUNTIME)
3 @Documented
4 @Import(EnableConfigurationPropertiesImportSelector.class)
5 public @interface EnableConfigurationProperties {
2.作用
借助AutoConfigurationImportSelector,@EnableAutoConfiguration可以帮助SpringBoot应用将所有符合条件的@Configuration配置都加载到当前SpringBoot创建并使用的IoC容器。
借助于Spring框架原有的一个工具类:SpringFactoriesLoader的支持,@EnableAutoConfiguration可以智能的自动配置功效才得以大功告成!
3.进一步说明如何加载
在AutoConfigurationImportSelector类中可以看到通过 SpringFactoriesLoader.loadFactoryNames()把 spring-boot-autoconfigure.jar/META-INF/spring.factories中每一个xxxAutoConfiguration文件都加载到容器中。
spring.factories文件里每一个xxxAutoConfiguration文件一般都会有下面的条件注解:
@ConditionalOnClass : classpath中存在该类时起效
@ConditionalOnMissingClass : classpath中不存在该类时起效
@ConditionalOnBean : DI容器中存在该类型Bean时起效
@ConditionalOnMissingBean : DI容器中不存在该类型Bean时起效
@ConditionalOnSingleCandidate : DI容器中该类型Bean只有一个或@Primary的只有一个时起效
@ConditionalOnExpression : SpEL表达式结果为true时
@ConditionalOnProperty : 参数设置或者值一致时起效
@ConditionalOnResource : 指定的文件存在时起效
@ConditionalOnJndi : 指定的JNDI存在时起效
@ConditionalOnJava : 指定的Java版本存在时起效
@ConditionalOnWebApplication : Web应用环境下起效
@ConditionalOnNotWebApplication : 非Web应用环境下起效
二:示例
1.结构
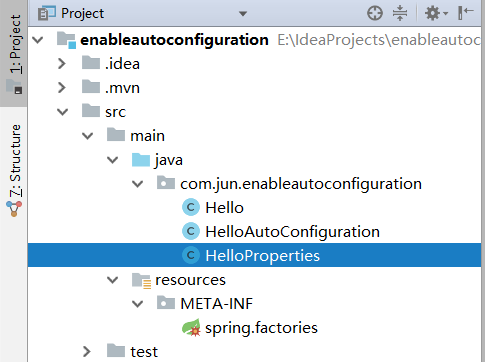
2.说明
在加载的时候,会通过一些注解进行匹配,然后都通过了,@EnableConfiguration才可以加载。
同时,可以不写@SpringBootApplication注解了。
3.说明项目
一共两个。
第一个是加载合适的bean
第二个是使用。
三:项目一
1.pom文件
<?xml version="1.0" encoding="UTF-8"?>
<project xmlns="http://maven.apache.org/POM/4.0.0" xmlns:xsi="http://www.w3.org/2001/XMLSchema-instance"
    xsi:schemaLocation="http://maven.apache.org/POM/4.0.0 https://maven.apache.org/xsd/maven-4.0.0.xsd">
    <modelVersion>4.0.0</modelVersion>
    <parent>
        <groupId>org.springframework.boot</groupId>
        <artifactId>spring-boot-starter-parent</artifactId>
        <version>2.1.7.RELEASE</version>
        <relativePath/> <!-- lookup parent from repository -->
    </parent>
    <groupId>com.jun</groupId>
    <artifactId>enableautoconfiguration</artifactId>
    <version>0.0.1-SNAPSHOT</version>
    <name>enableautoconfiguration</name>
    <description>Demo project for Spring Boot</description>

    <properties>
        <java.version>1.8</java.version>
    </properties>

    <dependencies>
        <dependency>
            <groupId>org.springframework.boot</groupId>
            <artifactId>spring-boot-starter</artifactId>
        </dependency>

        <dependency>
            <groupId>org.springframework.boot</groupId>
            <artifactId>spring-boot-starter-test</artifactId>
            <scope>test</scope>
        </dependency>

        <dependency>
            <groupId>org.springframework.boot</groupId>
            <artifactId>spring-boot-autoconfigure</artifactId>
            <version>2.0.4.RELEASE</version>
        </dependency>
        <dependency>
            <groupId>org.springframework.boot</groupId>
            <artifactId>spring-boot-configuration-processor</artifactId>
            <version>2.0.4.RELEASE</version>
            <optional>true</optional>
        </dependency>
        <dependency>
            <groupId>org.springframework.boot</groupId>
            <artifactId>spring-boot-starter-web</artifactId>
        </dependency>
    </dependencies>


</project>
2.hello
<?xml version="1.0" encoding="UTF-8"?>
<project xmlns="http://maven.apache.org/POM/4.0.0" xmlns:xsi="http://www.w3.org/2001/XMLSchema-instance"
    xsi:schemaLocation="http://maven.apache.org/POM/4.0.0 https://maven.apache.org/xsd/maven-4.0.0.xsd">
    <modelVersion>4.0.0</modelVersion>
    <parent>
        <groupId>org.springframework.boot</groupId>
        <artifactId>spring-boot-starter-parent</artifactId>
        <version>2.1.7.RELEASE</version>
        <relativePath/> <!-- lookup parent from repository -->
    </parent>
    <groupId>com.jun</groupId>
    <artifactId>enableautoconfiguration</artifactId>
    <version>0.0.1-SNAPSHOT</version>
    <name>enableautoconfiguration</name>
    <description>Demo project for Spring Boot</description>

    <properties>
        <java.version>1.8</java.version>
    </properties>

    <dependencies>
        <dependency>
            <groupId>org.springframework.boot</groupId>
            <artifactId>spring-boot-starter</artifactId>
        </dependency>

        <dependency>
            <groupId>org.springframework.boot</groupId>
            <artifactId>spring-boot-starter-test</artifactId>
            <scope>test</scope>
        </dependency>

        <dependency>
            <groupId>org.springframework.boot</groupId>
            <artifactId>spring-boot-autoconfigure</artifactId>
            <version>2.0.4.RELEASE</version>
        </dependency>
        <dependency>
            <groupId>org.springframework.boot</groupId>
            <artifactId>spring-boot-configuration-processor</artifactId>
            <version>2.0.4.RELEASE</version>
            <optional>true</optional>
        </dependency>
        <dependency>
            <groupId>org.springframework.boot</groupId>
            <artifactId>spring-boot-starter-web</artifactId>
        </dependency>
    </dependencies>


</project>
3.helloproperties
package com.jun.enableautoconfiguration;

import org.springframework.boot.context.properties.ConfigurationProperties;

@ConfigurationProperties(prefix = "hello") //获取属性值
public class HelloProperties {
    private static final String MSG = "world";

    private String msg = MSG ;

    public String getMsg() {
        return msg;
    }

    public void setMsg(String msg) {
        this.msg = msg;
    }
}
4.helloautoconfiguration
 1 package com.jun.enableautoconfiguration;
 2
 3 import org.springframework.beans.factory.annotation.Autowired;
 4 import org.springframework.boot.autoconfigure.condition.ConditionalOnClass;
 5 import org.springframework.boot.autoconfigure.condition.ConditionalOnMissingBean;
 6 import org.springframework.boot.autoconfigure.condition.ConditionalOnProperty;
 7 import org.springframework.boot.context.properties.EnableConfigurationProperties;
 8 import org.springframework.context.annotation.Bean;
 9 import org.springframework.context.annotation.Configuration;
10
11 @Configuration        //为带有@ConfigurationProperties注解的Bean提供有效的支持。
12                       // 这个注解可以提供一种方便的方式来将带有@ConfigurationProperties注解的类注入为Spring容器的Bean。
13 @EnableConfigurationProperties(HelloProperties.class)       //开启属性注入,通过@autowired注入
14 @ConditionalOnClass(Hello.class)           //判断这个类是否在classpath中存在,如果存在,才会实例化一个Bean
15 @ConditionalOnProperty(prefix="hello", value="enabled", matchIfMissing = true)
16 public class HelloAutoConfiguration {
17
18     @Autowired
19     private HelloProperties helloProperties;
20
21     @Bean
22     @ConditionalOnMissingBean(Hello.class)//容器中如果没有Hello这个类,那么自动配置这个Hello
23     public Hello hello() {
24         Hello hello = new Hello();
25         hello.setMsg(helloProperties.getMsg());
26         return hello;
27     }
28
29 }
5.spring.factories
org.springframework.boot.autoconfigure.EnableAutoConfiguration=com.jun.enableautoconfiguration.HelloAutoConfiguration
四:使用项目
1.application.properties
#可以不配置
hello.enabled=true

hello.msg=uuibiu

#以debug模式运行
debug=true
2.WenApplication
 1 package com.jun.web;
 2
 3 import com.jun.enableautoconfiguration.Hello;
 4 import org.slf4j.Logger;
 5 import org.slf4j.LoggerFactory;
 6 import org.springframework.beans.factory.annotation.Autowired;
 7 import org.springframework.boot.SpringApplication;
 8 import org.springframework.boot.autoconfigure.EnableAutoConfiguration;
 9 import org.springframework.boot.autoconfigure.SpringBootApplication;
10 import org.springframework.context.ConfigurableApplicationContext;
11 import org.springframework.core.env.ConfigurableEnvironment;
12 import org.springframework.web.bind.annotation.RequestMapping;
13 import org.springframework.web.bind.annotation.RestController;
14
15 @SpringBootApplication
16 @EnableAutoConfiguration
17 @RestController
18 public class WebApplication {
19     private static final Logger logger = LoggerFactory.getLogger(WebApplication.class);
20
21     @Autowired
22     private Hello hello;
23
24     @RequestMapping("/")
25     public String index() {
26         return hello.sayHello();
27     }
28
29     public static void main(String[] args) {
30         ConfigurableApplicationContext context = SpringApplication.run(WebApplication.class, args);
31         ConfigurableEnvironment environment = context.getEnvironment();
32         logger.info("hello.msg:{}",environment.getProperty("hello.msg"));
33
34     }
35
36 }