背景:
由于工作的原因要处理和打印一些pdf文档,目前的实现方式是FOP,园子里有这方面的介绍:Pdf 解决方案——fop。但项目中打印的pdf文档较大,每次用户打印文档都要run很长一段时间,因此老大希望将FOP转换为iTextSharp来处理。iText是java中处理pdf文档很出名的一个开源类库,其NET版本的是iTextSharp,大家可以从这里下载源代码和dll文件,具体使用的时候引用dll即可。
iText是开源的类库,文档可以参考其首页推荐的书:iText In Action 2nd。这书是iText的创建人Bruno写的,但里面的实例都是java写的。不过国外还是有人写了iTextSharp相关的一些文档,博客园的能人很多,Careyson同学就翻译了这一系列:使用iTextSharp在Asp.Net中操作PDF系列文章 目录。
资源下载:
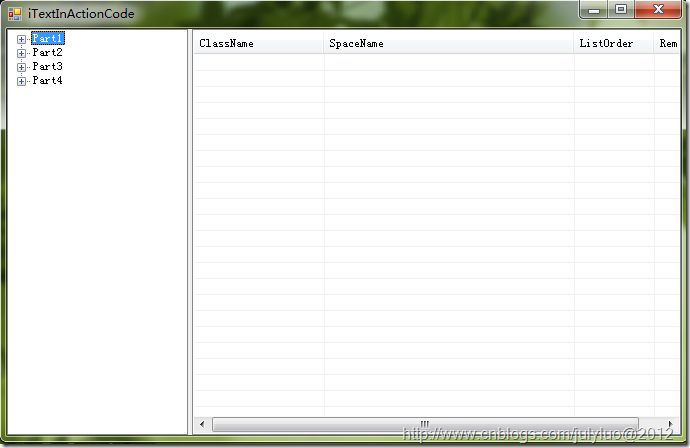
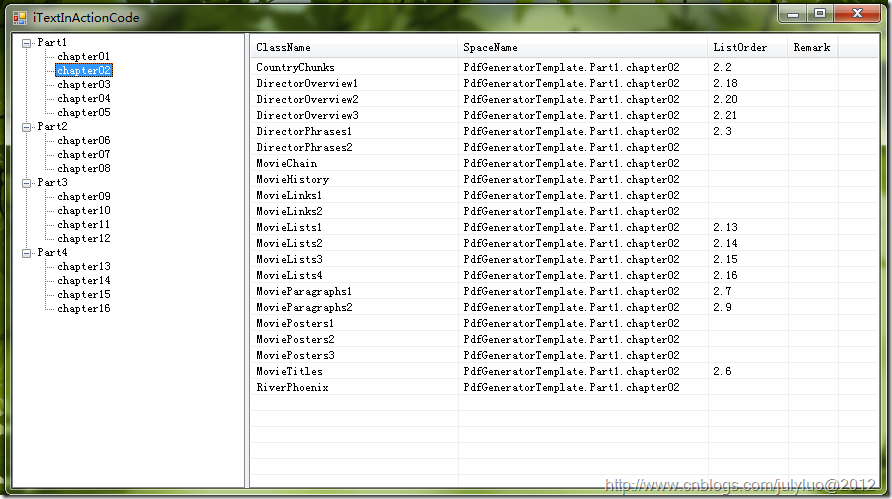
当然了最好的资料还是上面提到的书::iText In Action 2nd,书可以在这里下载。这本书我断断续续的看了大部分,也将看过的大部分java代码转换为C#版本,于是希望写一些博客记录一下。书中自带的代码都是命令行模式,为了方便我写成了一个winform应用程序,以下为代码的运行界面:
写的winform没什么技术含量,大家双击右侧ListView中某个Item就会打开对应的pdf文档。本机开发环境为win7 64bit,VS2010,NET 4.0,代码大家可以点击这里下载:chapter01 。
代码的solution如下图:

整个工程就只有两个类库和一个winform,但引用了三个第三方的类库,这些dll已经放到代码中的Resource文件夹下。如上图所示:我为每一节都创建了一个文件夹,大家目前下载的只有chapter01目录下有类文件,后续我也只需放出对应章节的类文件即可,大家也只要放入到对应的文件夹然后将其加入到工程中即可。
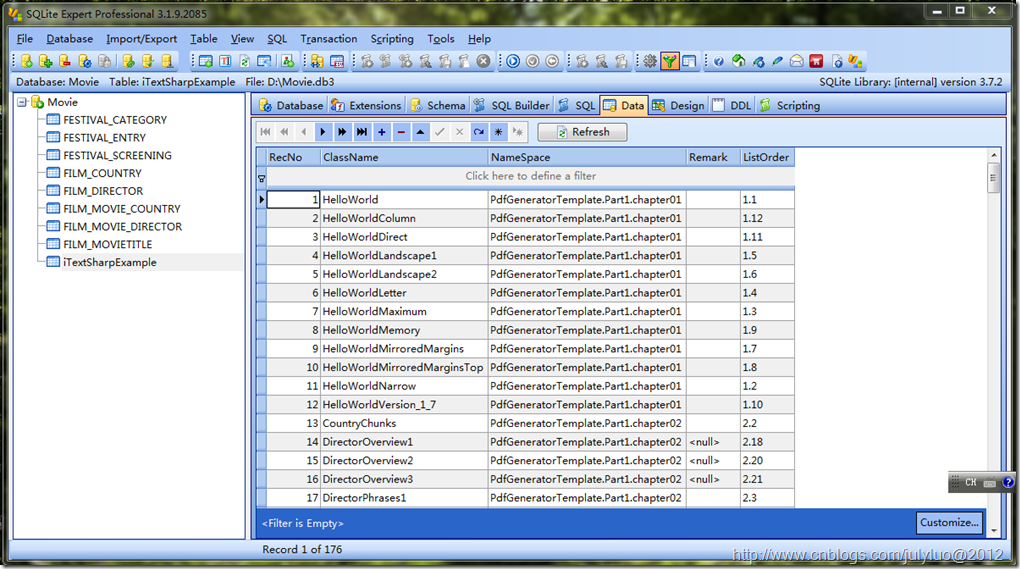
大家要注意的是System.Data.SQLite.dll在win 32bit和win 64bit有不同的版本,如果是32位的机子,大家去 官方网站 找到对应的下载。由于用到了SqLite来存储数据,Resource文件夹下面还有一个Movie.db3文件,我本机用的是SQLite Expert Professional来查看和编辑里面的数据,下载 点击这里。
以下为其运行界面:
其中以FILM和FESTIVAL开头的表是iText In Action书中demo要用到的一些数据,最后一个表iTextSharpExample我存储的是winform中listview对应的item数据。 iText in Action书中有用到一些resource文件(比如说图片和xml文件),所以代码中也需引用resource文件,大家先下载 Source文件,解压之后可以在SourceCodeiText\itext-book\book\resources文件夹中找到资源文件,然后修改下winform的app.config文件使其引用正确的目录。
最后在app.config文件中还需配置下SQLiteConnStr节点,对应的value就是上面提到的Movie.db3文件,要注意的是最好配置绝对路径。以下为我本机的app.config文件内容:
  <appSettings>
    <add key="SQLiteConnStr" value="data source=D:\Movie.db3"/>
    <add key="ResourceFont" value="D:\MyFolder\SourceCodeiText\itext-book\book\resources\fonts\"/>
    <add key="ResourcePosters" value="D:\MyFolder\SourceCodeiText\itext-book\book\resources\posters\{0}.jpg"/>
    <add key="ResourceCalendar" value="D:\MyFolder\SourceCodeiText\itext-book\book\resources\calendar\{0}.jpg"/>
    <add key="ResourceImage" value="D:\MyFolder\SourceCodeiText\itext-book\book\resources\img\"/>
    <add key="ResourcePdfs" value="D:\MyFolder\SourceCodeiText\itext-book\book\resources\pdfs\"/>
    <add key="ResourceTxt" value="D:\MyFolder\SourceCodeiText\itext-book\book\resources\txt\"/>
    <add key="ResourceJS" value="D:\MyFolder\SourceCodeiText\itext-book\book\resources\js\"/>
    <add key="ResourceXml" value="D:\MyFolder\SourceCodeiText\itext-book\book\resources\xml\"/>
  </appSettings>
Creating a PDF document in five steps with iText
好了,说来很多,我们现在就直奔主题。这一节的标题就是五步创建pdf文档,典型的代码如下:
HelloWorld.cs
// step 1
Document document = new Document();
using (document)
{
 // step 2
PdfWriter.GetInstance(document, new FileStream(fileName, FileMode.Create));
// step 3
document.Open();
// step 4
document.Add(new Paragraph("Hello World"));
//step 5
document.Close();
}
- 第一步:创建Document类的实例
- 第二步:获取一个PdfWriter的实例
- 第三步:打开文档
- 第四步:添加内容
- 第五步:关闭文档
以上五步还是比较容易看懂的,下面就对具体的每一步进行介绍:
Step1:创建Document的实例
Document类我们可以理解为一个容器,因此可以往里面添加一些高层次(high-level)的类。高层次的意思是高度抽象了,里面没有涉及到pdf语法等相关等操作,和我们平常创建的类类似。高层次的类一般有:Chunk、Pharse、Paragraph等,这一节中我们只使用Paragraph类。那我们先看下Document类的三个构造器:
public Document();
public Document(Rectangle pageSize);
public Document(Rectangle pageSize, float marginLeft, float marginRight, float marginTop, float marginBottom);
从形参最长的构造器中可以得知Document要有页面大小(PageSize)和页边距,因此我们也可以使用以下代码:
HelloWorldNarrow.cs
Rectangle pagesize = new Rectangle(216f, 720f);
Document document = new Document(pagesize, 36f, 72f, 108f, 180f);
上面的代码好懂,要注意的是度量单位,在pdf中度量单位是用户单位(user unit)。换算的公式是 1英寸=25.4mm=72 user units≈72pt(磅)。老外的计量单位一般都是英寸,大家仔细看上面的代码,里面的数字都是36的倍数,也就是0.5英寸。但在iText中,默认的度量单位是pt不是user uint。因为pt和user unit基本上是相等的,而且pt也是比较常用的度量单位。不过我们也可以修改他们之间的对应关系,代码如下:
HelloWorldMaximum.cs
// step 1
// maximum page size
Document document = new Document(new Rectangle(14400, 14400));
using (document)
{
// step 2
PdfWriter writer = PdfWriter.GetInstance(document, new FileStream(fileName, FileMode.Create));
// changes the user unit
writer.Userunit = 75000f;
// step 3
document.Open();
// step 4
document.Add(new Paragraph("Hello World"));
}
通过以上代码生成的pdf文档其页面大小是15000000(200*75000)英寸*15000000英寸,因为1user unit对应了75000pt。
一般来讲,我们生成pdf文档是都会选用一些标准页面大小。为了方便生成标准页面大小,iText中提供一个PageSize类,其中包含了大量标准页面大小,有B0到B10,A0到A10还有美国的标准页面:LETTER,LEGAL等。因此我们也可以按照以下代码设置页面大小:
Document document = new Document(PageSize.LETTER);
在上面创建的页面大小中,都是长度小余高度的。但也可以创建长度大于高度的文档,以下为代码:
HelloWorldLandscape1.cs
// step 1
Document document = new Document(PageSize.LETTER.Rotate());
或者
HelloWorldLandscape2.cs
Document document = new Document(new Rectangle(792, 612));
通过以上两张方法生成的pdf文档打开看的话是没有什么区别。只是在pdf文档内部,第一种的页面大小是长度小余高度,但有一个90度的页面旋转,而第二种的页面大小是长度大于高度没有页面的旋转。这些都是一些细微的差别,在操作和处理已经存在的文档时我们就需要考虑这些细节。
在Document类中还有SetPageSize()方法和SetMargins()方法,我们可以在创建文档过程中的任意时刻调用这些方法,但这些方法不会影响当前页面的设置,只会影响到下一页。
这里要注意的是如果调用的Document的无参构造器创建的页面大小就是A4,页边距全是36pt。但我们还是建议显示的设置页面大小和页边距。
页边距在文档双面打印的时候要注意一些细节:如果文档要装订成册,那么我们就会希望在装订的一边设置大一点的页边距,比如说平常的书左边装订,那么第一页的左边距要大一点,而第二页的右边距要和第一页的左边距一样。总而言之页边距要对称。这些在iText中可以这样设置:
HelloWorldMirroredMargins.cs
PdfWriter writer = PdfWriter.GetInstance(document, new FileStream(fileName, FileMode.Create));
document.SetPageSize(PageSize.A5);
document.SetMargins(36, 72, 108, 180);
document.SetMarginMirroring(true);
这样设置页面的左边距和右边距就对称了,但还有一些书是在页面的上部或者下部装订,因此就需要页面的上边距和下边距对称,代码如下:
HelloWorldMirroredMarginsTop.cs
document.SetMarginMirroringTopBottom(true);
Step2:获取一个PdfWriter的实例
上面介绍Document类时说过其可以理解为一个容器,我们为其添加一些high-level的对象。但具体负责写入pdf文档的是PdfWriter类,一般都是通过一下代码获取PdfWriter实例:
PdfWriter.GetInstance(document, new FileStream(fileName, FileMode.Create));
以上的代码有两个作用
- 将Document类的实例和PdfWriter实例关联起来,这样PdfWriter就会监听Docuemnt,并将加入到Document类中的high-level对象转换为相应的pdf语句。
- 告诉PdfWriter实例要将转换好的pdf语句写入到那个输出流。
这里的代码设置的都是文件流FileStream,但也可以设置为其它的Stream:
HelloWorldMemory.cs
 public override void CreateFile(string fileName)
{
// step 1
Document document = new Document();
MemoryStream ms = new MemoryStream();
using (document)
{
// step 2
// we'll create the file in memory
PdfWriter.GetInstance(document, ms);
// step 3
document.Open();
// step 4
document.Add(new Paragraph("Hello World"));
}
// let's write the file in memory to a file anyway
FileStream fs = new FileStream(fileName, FileMode.Create);
using (fs)
{
BinaryWriter w = new BinaryWriter(fs);
using (w)
{
w.Write(ms.ToArray());
}
}
}
Step3:打开文档
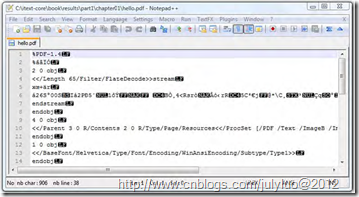
当文档被打开时,进行了大量的初始化的设置,其中包括将pdf文件头信息写入到输出流中。下图就是你创建的第一个pdf文件:hello.pdf用记事本打开的样子:
第一行看起来应该是这样:
%PDF-1.4
%âãÏÓ
以上就是pdf文档的header,Pdf文档是由header,body,cross-reference table和footer组成,更加详细的信息可以参考书的chapter13。大家从上也猜到pdf的版本是1.4,现在大部分的pdf文档基本上都是1.4版本,其它的版本可以这样设置:
HelloWorldVersion_1_7.cs
// Creating a PDF 1.7 document
PdfWriter writer = PdfWriter.GetInstance(document, new FileStream(fileName, FileMode.Create));
writer.PdfVersion = PdfWriter.VERSION_1_7;
Step4:添加内容
以上啰啰嗦嗦的将了很多,其实我们要关注的主要就是添加内容。
添加内容也有两个方法
- 往Document类中添加high-level的对象
- 直接用PdfWriter实例添加比较low-level的数据。
以下代码就是一个看起来有点复杂,但可以给大家一个关于iText内部PDF创建进程的大概印象。
HelloWorldDirect.cs
PdfWriter writer = PdfWriter.GetInstance(document, new FileStream(fileName, FileMode.Create));
// step 3
document.Open();
// step 4
PdfContentByte canvas = writer.DirectContent;
writer.CompressionLevel = 0;
canvas.SaveState(); //q
canvas.BeginText(); //BT
canvas.MoveText(36, 788); //36 788 Td
canvas.SetFontAndSize(BaseFont.CreateFont(), 12); //F1 12 Tf
canvas.ShowText("Hello world"); //(Hello world)Tj
canvas.EndText(); // ET
canvas.RestoreState();//Q
和以前代码不同的是:我们将生成的PdfWriter实例保存到局部变量writer中。因为后续要通过此writer来获取canvas画线画图。代码中通过设置CompressionLevel属性为0可以避免对输出流的压缩,我们也可以通过记事本来查看pdf的语法语句。以上canvas的每个方法后面的注释对应具体的pdf语法,大家用记事本打开就可以看到。但代码看起来就比较复杂,而且只是简单的一个hello world,如果要写更多的内容,那代码可能就更加难懂。
因此iText提供了一些便利的方法来调用:
HelloWorldColumn.cs
PdfWriter writer = PdfWriter.GetInstance(document, new FileStream(OnePdfFile, FileMode.Create));
// step 3
document.Open();
// step 4
// we set the compression to 0 so that we can read the PDF syntax
writer.CompressionLevel = 0;
// writes something to the direct content using a convenience method
Phrase hello = new Phrase("Hello World");
PdfContentByte canvas = writer.DirectContent;
ColumnText.ShowTextAligned(canvas, Element.ALIGN_LEFT, hello, 36, 788, 0);
这样代码看起来就比较亲民一些,而且用Adobe Reader打开以上的两份Pdf文档,看起来是一样的。如果用记事本打开,里面会有一些细微的差别。这里按照作者的说法就是PDF内置的特点,而且如果你用相同的一份代码生成两份pdf文档,也会有一些差别。
Step5:关闭文档
关闭的时候iText会在pdf文档中写入EOF(End of File)标记,在iTextSharp中,Document实现了IDisposable接口,因此就用了using语句。要注意的是在关闭Document的时候,设置的输出流也会被自动关闭,但有时候我们希望输出流不被自动关闭。
HelloZip.cs
// creating a zip file with different PDF documents
ZipOutputStream zip = new ZipOutputStream(new FileStream(fileName, FileMode.Create));
for (int i = 0; i < 4; i++)
{
 ZipEntry entry = new ZipEntry("hello_" + i + ".pdf");
zip.PutNextEntry(entry);
// step 1
Document document= new Document();
// step 2
PdfWriter writer = PdfWriter.GetInstance(document, zip);
writer.CloseStream = false;
// step 3
document.Open();
// step 4
document.Add(new Paragraph("Hello " + i));
// step 5
document.Close();
zip.CloseEntry();
}
zip.Close();
以上代码会产生一个压缩包,包中包含了4个pdf文件,因为设置的是ZipOutpuStream,我们不希望在中间生成pdf文档时输出流被自动关闭,这里只要设置PdfWriter的ClosedStream属性为true即可。
总结
通过五步我们学会了创建pdf文档,每一步也都有了基本的了解。但我们最需要关注的就是第四步:添加内容。其它的步骤大家有个概念并知道一些配置就可以了。在后续的章节中,我们会为pdf文档添加一些有实际意义的内容,大家也会关注一些常用high-level对象的操作。
同步
此文章已同步到目录索引:iText in Action 2nd 读书笔记。


