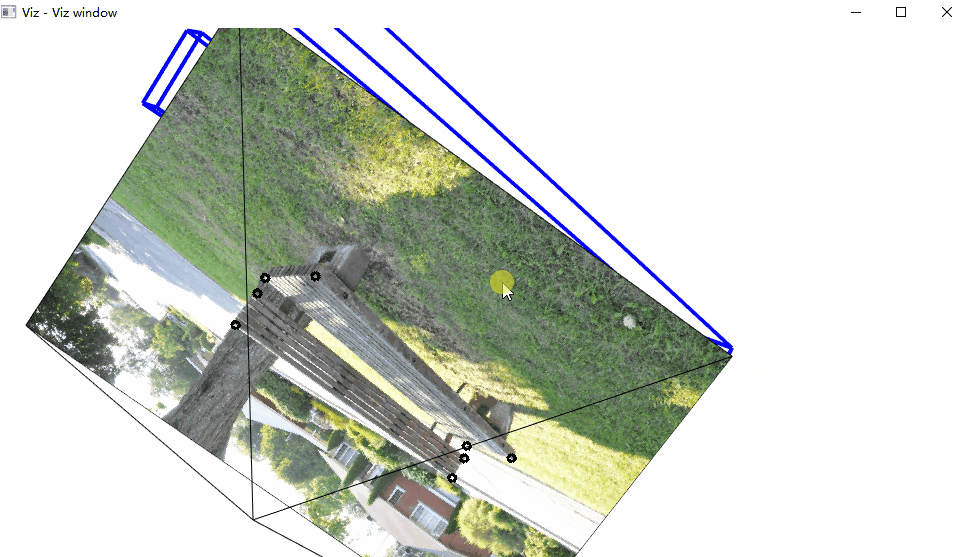
在这个动画中,注意图片后面的那个黑线,对应的是相机的位置。
/*------------------------------------------------------------------------------------------*
This file contains material supporting chapter 11 of the book:
OpenCV3 Computer Vision Application Programming Cookbook
Third Edition
by Robert Laganiere, Packt Publishing, 2016.
This program is free software; permission is hereby granted to use, copy, modify,
and distribute this source code, or portions thereof, for any purpose, without fee,
subject to the restriction that the copyright notice may not be removed
or altered from any source or altered source distribution.
The software is released on an as-is basis and without any warranties of any kind.
In particular, the software is not guaranteed to be fault-tolerant or free from failure.
The author disclaims all warranties with regard to this software, any use,
and any consequent failure, is purely the responsibility of the user.
Copyright (C) 2016 Robert Laganiere, www.laganiere.name
*------------------------------------------------------------------------------------------*/
#include "stdafx.h"
#include <opencv2/core.hpp>
#include <opencv2/highgui.hpp>
#include <opencv2/imgproc.hpp>
#include <opencv2/viz.hpp>
#include <opencv2/calib3d.hpp>
#include <iostream>
int main()
{
// Read the camera calibration parameters
cv::Mat cameraMatrix;
cv::Mat cameraDistCoeffs;
cv::FileStorage fs("calib.xml", cv::FileStorage::READ);
fs["Intrinsic"] >> cameraMatrix;
fs["Distortion"] >> cameraDistCoeffs;
std::cout << " Camera intrinsic: " << cameraMatrix.rows << "x" << cameraMatrix.cols << std::endl;
std::cout << cameraMatrix.at<double>(0, 0) << " " << cameraMatrix.at<double>(0, 1) << " " << cameraMatrix.at<double>(0, 2) << std::endl;
std::cout << cameraMatrix.at<double>(1, 0) << " " << cameraMatrix.at<double>(1, 1) << " " << cameraMatrix.at<double>(1, 2) << std::endl;
std::cout << cameraMatrix.at<double>(2, 0) << " " << cameraMatrix.at<double>(2, 1) << " " << cameraMatrix.at<double>(2, 2) << std::endl << std::endl;
cv::Matx33d cMatrix(cameraMatrix);
// Input image points
std::vector<cv::Point2f> imagePoints;
imagePoints.push_back(cv::Point2f(136, 113));
imagePoints.push_back(cv::Point2f(379, 114));
imagePoints.push_back(cv::Point2f(379, 150));
imagePoints.push_back(cv::Point2f(138, 135));
imagePoints.push_back(cv::Point2f(143, 146));
imagePoints.push_back(cv::Point2f(381, 166));
imagePoints.push_back(cv::Point2f(345, 194));
imagePoints.push_back(cv::Point2f(103, 161));
// Input object points
std::vector<cv::Point3f> objectPoints;
objectPoints.push_back(cv::Point3f(0, 45, 0));
objectPoints.push_back(cv::Point3f(242.5, 45, 0));
objectPoints.push_back(cv::Point3f(242.5, 21, 0));
objectPoints.push_back(cv::Point3f(0, 21, 0));
objectPoints.push_back(cv::Point3f(0, 9, -9));
objectPoints.push_back(cv::Point3f(242.5, 9, -9));
objectPoints.push_back(cv::Point3f(242.5, 9, 44.5));
objectPoints.push_back(cv::Point3f(0, 9, 44.5));
// Read image
cv::Mat image = cv::imread("e:/template/bench2.jpg");
// Draw image points
for (int i = 0; i < 8; i++) {
cv::circle(image, imagePoints[i], 3, cv::Scalar(0, 0, 0),2);
}
cv::imshow("An image of a bench", image);
// Create a viz window
cv::viz::Viz3d visualizer("Viz window");
visualizer.setBackgroundColor(cv::viz::Color::white());
/// Construct the scene
// Create a virtual camera
cv::viz::WCameraPosition cam(cMatrix, // matrix of intrinsics
image, // image displayed on the plane
30.0, // scale factor
cv::viz::Color::black());
// Create a virtual bench from cuboids
cv::viz::WCube plane1(cv::Point3f(0.0, 45.0, 0.0),
cv::Point3f(242.5, 21.0, -9.0),
true, // show wire frame
cv::viz::Color::blue());
plane1.setRenderingProperty(cv::viz::LINE_WIDTH, 4.0);
cv::viz::WCube plane2(cv::Point3f(0.0, 9.0, -9.0),
cv::Point3f(242.5, 0.0, 44.5),
true, // show wire frame
cv::viz::Color::blue());
plane2.setRenderingProperty(cv::viz::LINE_WIDTH, 4.0);
// Add the virtual objects to the environment
visualizer.showWidget("top", plane1);
visualizer.showWidget("bottom", plane2);
visualizer.showWidget("Camera", cam);
// Get the camera pose from 3D/2D points
cv::Mat rvec, tvec;
cv::solvePnP(objectPoints, imagePoints, // corresponding 3D/2D pts
cameraMatrix, cameraDistCoeffs, // calibration
rvec, tvec); // output pose
std::cout << " rvec: " << rvec.rows << "x" << rvec.cols << std::endl;
std::cout << " tvec: " << tvec.rows << "x" << tvec.cols << std::endl;
cv::Mat rotation;
// convert vector-3 rotation
// to a 3x3 rotation matrix
cv::Rodrigues(rvec, rotation);
// Move the bench
cv::Affine3d pose(rotation, tvec);
visualizer.setWidgetPose("top", pose);
visualizer.setWidgetPose("bottom", pose);
// visualization loop
while(cv::waitKey(100)==-1 && !visualizer.wasStopped())
{
visualizer.spinOnce(1, // pause 1ms
true); // redraw
}
return 0;
}
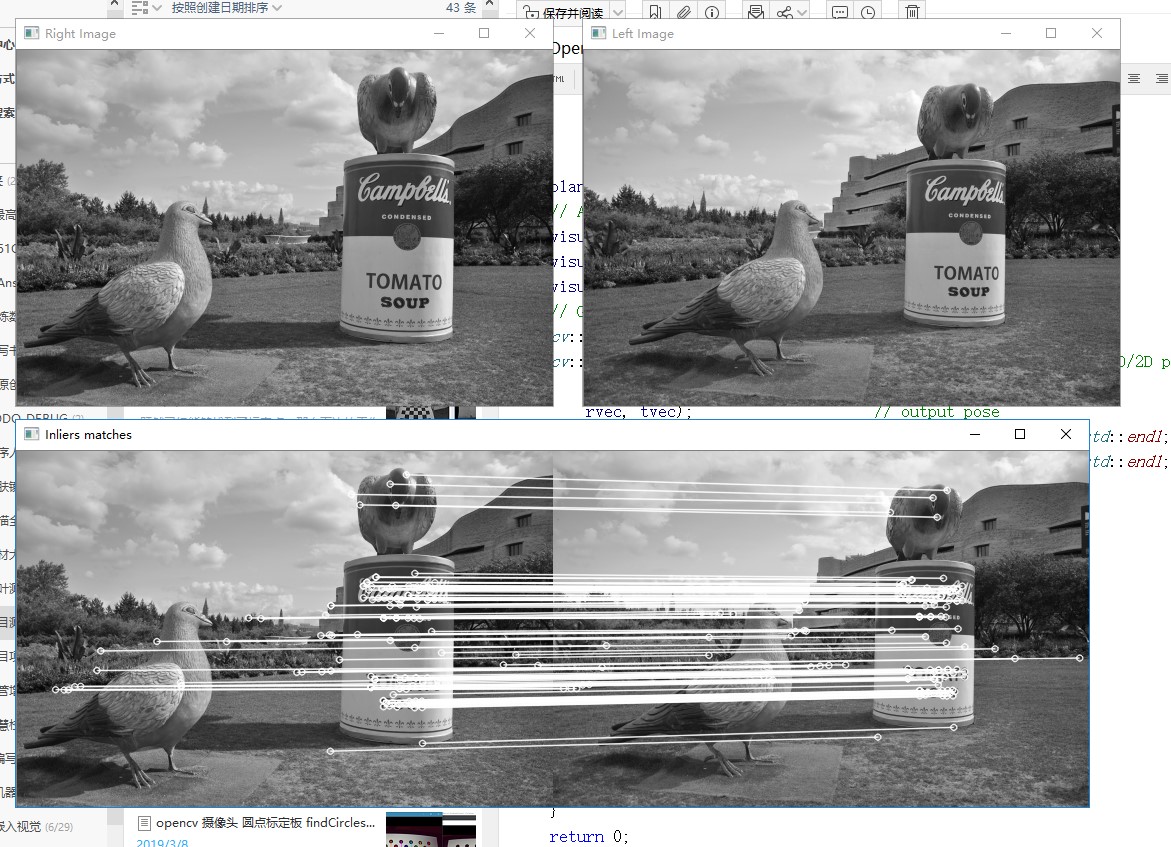
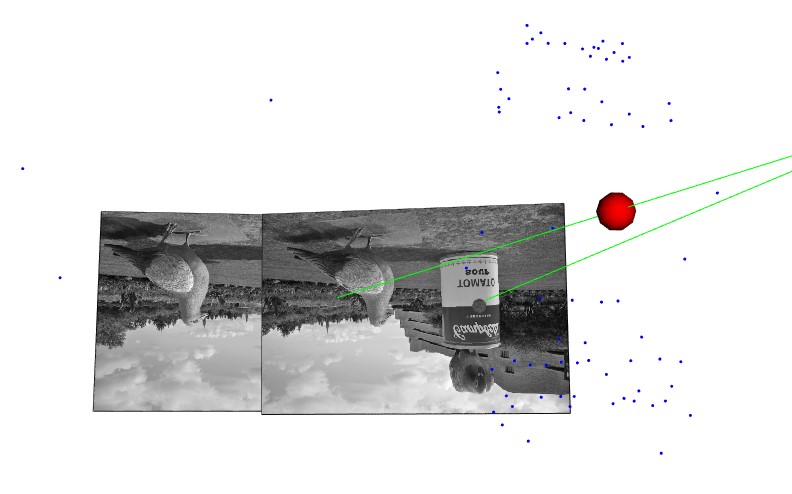
三维重建这块,我也运行成功书本的例子: