AndroidStudio项目打包成jar
前言:在eclipse中我们知道如何将一个项目导出为jar包,现在普遍AndroidStuido开发,这里一步一步详加介绍AS项目打包成jar,jar和arr的使用
在这里先补充一下我在编译时遇到的问题:
① Android 打包jarUnable to start the daemon process.
解决办法:(这个问题百度有答案,这里直接写出来,免得大家再找)
②报错:Unsupported major.minor version 52.0 (jar包对不同JDK版本的兼容性问题:
③ 在下面的步骤配置中,build/intermediates/bundles/release/路径下没有release文件夹。
解决办法:

接下来按照下面的步骤就可以编译成功了。
一.作用:为了供其它项目使用,将项目打包成jar
二.步骤(AndroidStudio):
1.像平常一个样新建一个项目(步骤省略)
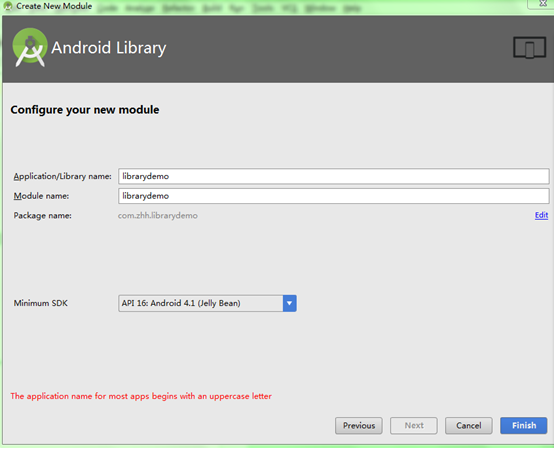
2.(在步骤1的基础上)点击File-->New-->New Module—>选择Android Library-->点击Next(如下图:)

定义好Library的工程名:librarydemo(如下图:)
创建完成:
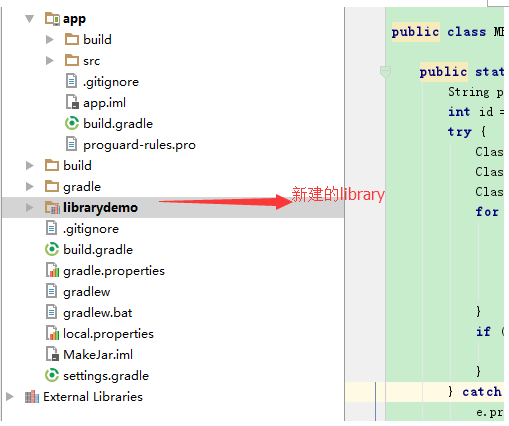
(步骤1建的)项目中会自动引入该Model (app下的build.gradle):(这个可以手动配置,在open moudle 配置依赖也可以)

3.生成jar:
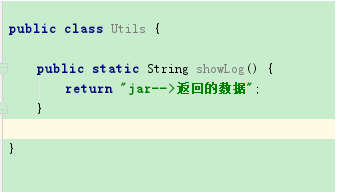
创建之前我先在librarydemo工程中建一个测试类,方便测试调用:
在librarydemo工程下的build.gradle中加上:
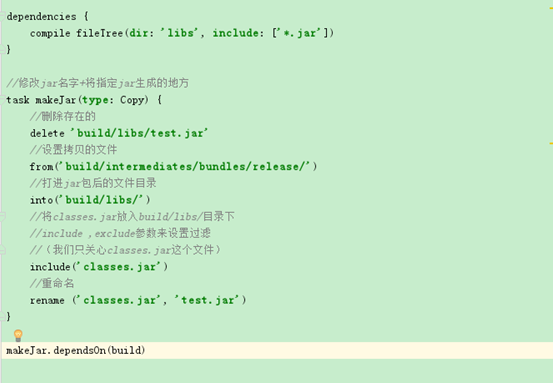
做如下操作:
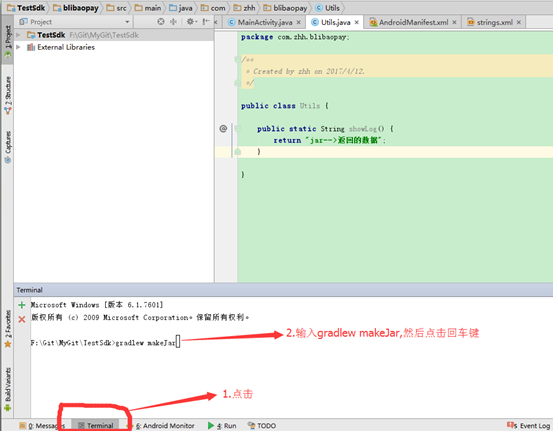
(注:你的as从来没有生成过jar,那么第一次就会很慢,会去下载一些文件)
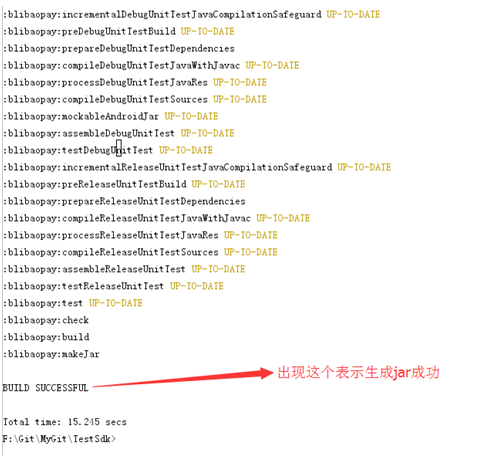
查看jar是否成功生成:

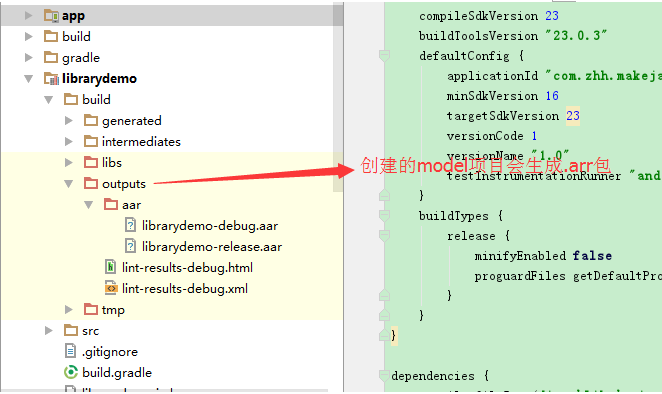
三、使用jar和arr:
在AndroidStudio中,创建的Model项目下:
二者区别:
jar: 只包含了class文件与清单文件 ,不包含资源文件,如图片等所有res中的文件。
aar: 包含jar包和资源文件,如图片等所有res中的文件。
个人觉得还是用as提供的aar包比较好,编译完就生成了aar了,不用担心资源问题,
1. aar使用:
导入aar(jar一样):
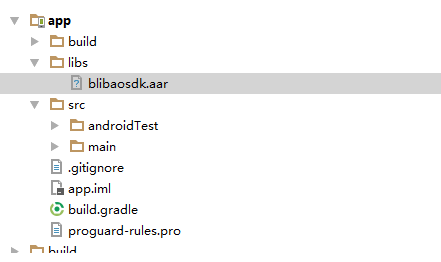
在app下的build.gradle中添加如下:
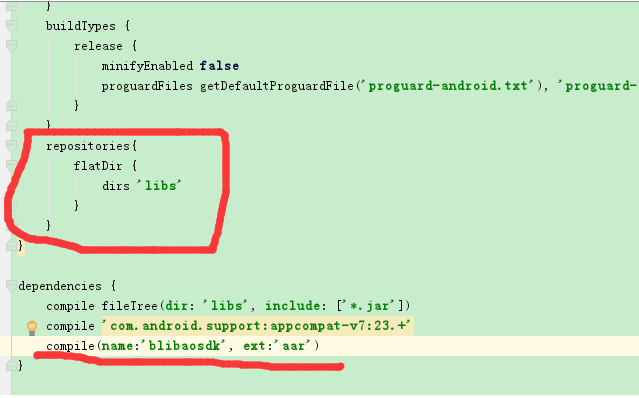
Sync Now一下,看
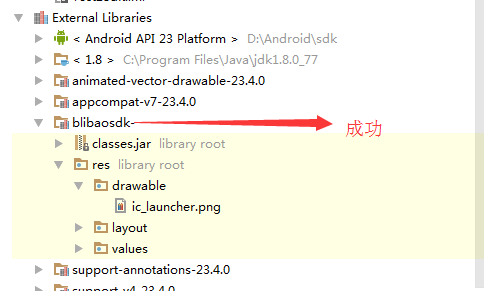
有资源文件和布局文件
2. jar导入:
导入jar(同arr一样)-->选中jar-->右键-->点击Add As Library-->点击Ok
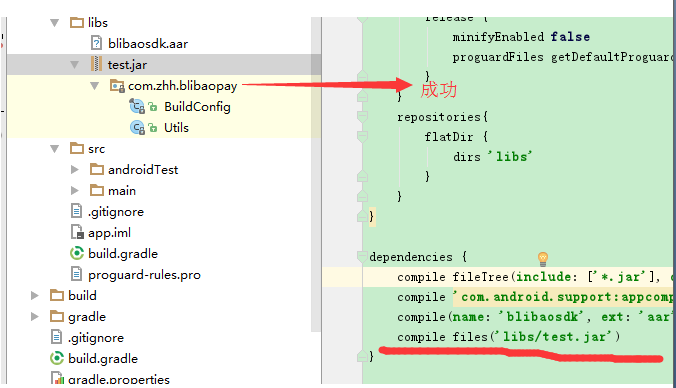
无资源文件
有人会想怎么把资源(图片,布局,string等)打进jar包呢?
例如:jar中有一个activity用到了布局文件和图片资源,那么怎么办呢?
解决如下:由于打包出来的jar只有源代码的.class 文件,不包含资源文件,我们就把jar包中用到的资源放到你使用
该jar的工程里面。然后通过反射即可,这里给出反射类:

public class MResource {</span><span style="color:rgb(0,0,255);line-height:1.5;">public</span> <span style="color:rgb(0,0,255);line-height:1.5;">static</span> <span style="color:rgb(0,0,255);line-height:1.5;">int</span><span style="line-height:1.5;"> getIdByName(Context context, String className, String resName) { String packageName </span>=<span style="line-height:1.5;"> context.getPackageName(); </span><span style="color:rgb(0,0,255);line-height:1.5;">int</span> id = 0<span style="line-height:1.5;">; </span><span style="color:rgb(0,0,255);line-height:1.5;">try</span><span style="line-height:1.5;"> { Class r </span>= Class.forName(packageName + ".R"<span style="line-height:1.5;">); Class[] classes </span>=<span style="line-height:1.5;"> r.getClasses(); Class desireClass </span>= <span style="color:rgb(0,0,255);line-height:1.5;">null</span><span style="line-height:1.5;">; </span><span style="color:rgb(0,0,255);line-height:1.5;">for</span><span style="line-height:1.5;"> (Class cls : classes) { </span><span style="color:rgb(0,0,255);line-height:1.5;">if</span> (cls.getName().split("\$")[1<span style="line-height:1.5;">].equals(className)) { desireClass </span>=<span style="line-height:1.5;"> cls; </span><span style="color:rgb(0,0,255);line-height:1.5;">break</span><span style="line-height:1.5;">; } } </span><span style="color:rgb(0,0,255);line-height:1.5;">if</span> (desireClass != <span style="color:rgb(0,0,255);line-height:1.5;">null</span><span style="line-height:1.5;">) { id </span>=<span style="line-height:1.5;"> desireClass.getField(resName).getInt(desireClass); } } </span><span style="color:rgb(0,0,255);line-height:1.5;">catch</span><span style="line-height:1.5;"> (Exception e) { e.printStackTrace(); } </span><span style="color:rgb(0,0,255);line-height:1.5;">return</span><span style="line-height:1.5;"> id; }}
这里演示项目中打开jar中的activity的实例
这里给出jar中activity的代码:
public class JarActivity extends AppCompatActivity {@Override </span><span style="color:rgb(0,0,255);line-height:1.5;">protected</span> <span style="color:rgb(0,0,255);line-height:1.5;">void</span><span style="line-height:1.5;"> onCreate(@Nullable Bundle savedInstanceState) { </span><span style="color:rgb(0,0,255);line-height:1.5;">super</span><span style="line-height:1.5;">.onCreate(savedInstanceState); setContentView(MResource.getIdByName(</span><span style="color:rgb(0,0,255);line-height:1.5;">this</span>, "layout", "jar_layout"<span style="line-height:1.5;">)); ImageView mPlayerLogo </span>= (ImageView) <span style="color:rgb(0,0,255);line-height:1.5;">this</span>.findViewById(MResource.getIdByName(<span style="color:rgb(0,0,255);line-height:1.5;">this</span><span style="line-height:1.5;">, </span>"id", "logo"<span style="line-height:1.5;">)); mPlayerLogo.setImageResource(MResource.getIdByName(</span><span style="color:rgb(0,0,255);line-height:1.5;">this</span>, "drawable", "ic_launcher"<span style="line-height:1.5;">)); }}
这里:利用反射根据资源名字获取资源ID加载布局+设置图片
在项目中打开jar的JarActivity的实现代码如下:
注:由于jar没有布局文件和资源文件,所以需要把布局(jar_layout)copy到项目中,aar则不需要
public class MainActivity extends AppCompatActivity {@Override </span><span style="color:rgb(0,0,255);line-height:1.5;">protected</span> <span style="color:rgb(0,0,255);line-height:1.5;">void</span><span style="line-height:1.5;"> onCreate(Bundle savedInstanceState) { </span><span style="color:rgb(0,0,255);line-height:1.5;">super</span><span style="line-height:1.5;">.onCreate(savedInstanceState); setContentView(R.layout.activity_main); findViewById(R.id.btn_jar).setOnClickListener(</span><span style="color:rgb(0,0,255);line-height:1.5;">new</span><span style="line-height:1.5;"> View.OnClickListener() { @Override </span><span style="color:rgb(0,0,255);line-height:1.5;">public</span> <span style="color:rgb(0,0,255);line-height:1.5;">void</span><span style="line-height:1.5;"> onClick(View v) { Intent intent </span>= <span style="color:rgb(0,0,255);line-height:1.5;">new</span><span style="line-height:1.5;"> Intent(); intent.setClassName(getApplication(), </span>"com.zhh.librarydemo.JarActivity"<span style="line-height:1.5;">); startActivity(intent); } }); }}
jar_layout布局:
<?xml version="1.0" encoding="utf-8"?>
<LinearLayout xmlns:android="http://schemas.android.com/apk/res/android"
android:layout_width="match_parent"
android:layout_height="match_parent"
android:orientation="vertical"><<span style="line-height:1.5;">ImageView android:id</span>="@+id/logo"<span style="line-height:1.5;"> android:layout_width</span>="wrap_content"<span style="line-height:1.5;"> android:layout_height</span>="wrap_content" /></LinearLayout>
在清单文件中注册:
<activity android:name="com.zhh.librarydemo.JarActivity"/>